ISCHIA / ISOLA VERDE
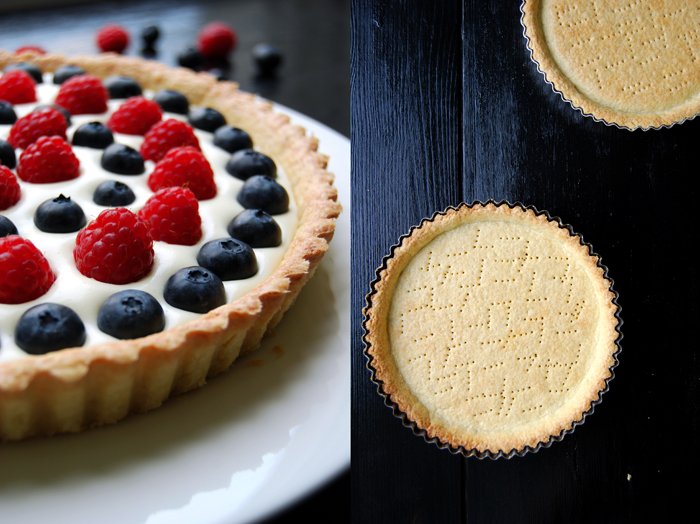
A Perfect Raspberry and Blueberry Tart with Bavarian Cream

More than twenty years ago I spent a beautiful two weeks in the South of France together with my uncle's family. We stayed in a pink house in the hills of Grasse surrounded by a blossoming garden full of roses, jasmine and lavender. My room faced this fragrant oasis, a French picture book scene in white, blue, red and pink. I used to sit on my bed with the windows wide open, watching the curtains fly in the warm wind, mesmerized by the scent that caught all my senses. Grasse has been known as the "world's perfume capital" since the end of the 18th century. Thanks to its warm climate it is ideal for flower farming, this is where the best parfumeurs get trained to distinguish between thousands of scents. Although I didn't go there with any professional intentions I'm sure my sense of smell wasn't the same after this holiday!
This leads me to another sense, the sense of taste! My family is very passionate about food and so are my aunt and uncle. We went to amazing restaurants and kept the cooking in the house quite simple but nonetheless delicious. Salads, fruit, pasta but also quail and fish were on our table. One afternoon, we invited some friends to come over for tea and the lady who took care of the house offered to bake a fruit tart. Her creation was one of the prettiest I've ever seen and definitely one of the best I have ever eaten. It was very simple, a perfect short crust base topped with circles of four or five different berries, all sweet and ripened under the French sun. We all loved it!
I'm a big fan of these summer tarts, buttery short crust and fruit is just my kind of combination. This is a cake you can enjoy in the hottest temperatures when heavy cream cakes are already out of the question.
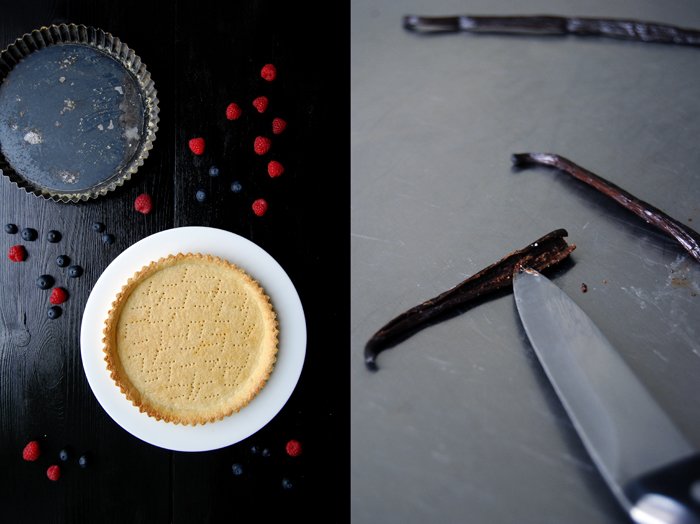
This holiday will always remind me of this wonderful cake and the memories of the smell and the hills of Grasse will always inspire me to bake a tart. Today I gave it a raspberry and blueberry layer on top of a delicious Bavarian cream, fluffy, light and full of vanilla. The pastry is crisp and light but strong enough to carry the cream without getting soggy. This is a perfect tart to me - so good that I always bake two of them straight away!

Raspberry and Blueberry Tart with Bavarian Cream
For 2 tarts in 22cm / 9" tart pans you need
blueberries 200g / 7 ounceras
pberries 100g / 3.5 ounces
For the short crust base
plain flour 400g / 14 ounces (I use white spelt flour type 630 but you can use any other plain flour)
granulated sugar 100g / 3.5 ounces
salt 1/4 teaspoon
butter 200g / 7 ounces
organic egg yolks 3
water 3 tablespoons
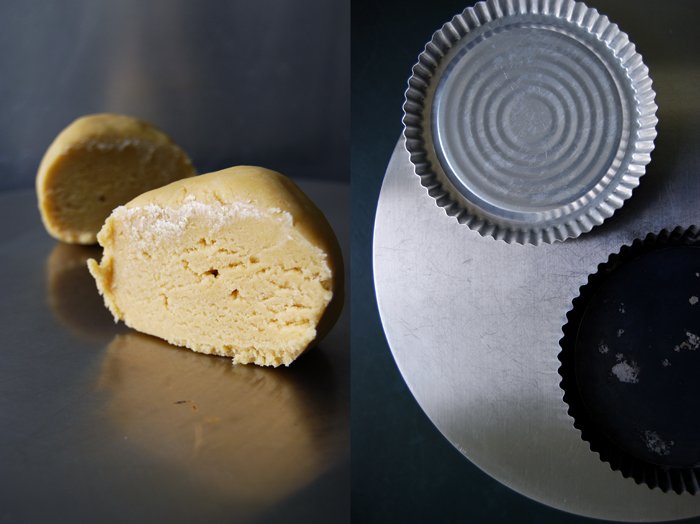
Combine the flour with the sugar and salt. Cut the butter with a knife into the flour until there are just little pieces of butter left. Continue with your fingers and work the butter into the flour until combined (there shouldn’t be any lumps of butter left). Add the egg and water and continue mixing with the hooks of your mixer until you have a crumbly mixture. Form 2 discs, wrap in cling film and put in the freezer for 15 minutes.
Set the oven to 200°C / 390°F top/ bottom heat.
Roll out the dough between cling film and line your tart pans with the flat pastry. Prick it with a fork and blind-bake in the hot oven for 20 minutes or until golden. Let the tarts cool completely before you take them out of their pans.
For the Bavarian cream
organic egg 1
organic egg yolks 2
sugar 80g / 3 ounces
a pinch of salt
milk 250ml / 8.5 ounces
vanilla bean, slit slightly, 1/2
gelatin sheets 2
heavy cream, whipped, 230g / 8 ounces
Soak the gelatin sheets in cold water for a few minutes.
Whisk the egg, egg yolks, sugar and salt till thick and fluffy.
In a sauce pan, bring the milk together with the vanilla bean to the boil. Take the vanilla bean out, scrape the seeds out of the bean into the milk. Whisk the egg mixture into the hot milk and put the pan back on a medium heat, stirring constantly. When the cream is thick enough to coat the back of a spoon (it will take around 5 minutes depending on the temperature) take it off the heat.
Squeeze the soaked galatin sheets into the egg mixture and crumble the sheets in. Whisk well, fill in a bowl and let it cool for a few minutes before you put it in the fridge to bring it to room temperature.
Gently fold in the whipped cream and cool in the fridge for 2 hours until the cream is set.
The fruit tart
Divide the Bavarian cream between the 2 tarts and spread evenly. Garnish with the fruits and serve immediately or keep in the fridge.
The crust is best when it's fresh but we still enjoyed a couple pieces after the tart had been in the fridge.


Tomato and Buffalo Mozzarella Quiche
7 months and 210 recipes ago I started eat in my kitchen, it was last November when this adventure began and I had no idea what to expect. I just knew that I wanted to write a post about our food every day, to share my recipes and my love for cooking and baking and that's what I've done till today and what I will continue in the future. When I saw the amount of recipes gathered on the blog, I realized how much has happened since that grey day in November. So much that my webpage can't even keep up with it, the Recipe page seems to have reached its capacity limit (which I'm working on fixing at the moment!). For now you might not find all the older recipes in the recipe index.
It's been an overwhelming time, I have received so many emails, so much support and interest in my culinary activities. I want to thank you for that, it's an amazing experience and a wonderful chance to meet food lovers all over the world who want to join me in my kitchen! I'm very happy about every single comment I get from you, every email and photo I receive about my recipes that you've cooked or baked in your kitchen!
I've been asked quite often if my cooking has changed in the past few months through the blog. Not really, I've always loved creating delicious food with my pots and pans, quite excessively to be honest, but luckily we have many friends who help out whenever I miscalculate how much 2 people can eat! It doesn't matter how many cakes I bake there are always enough hungry people around me!
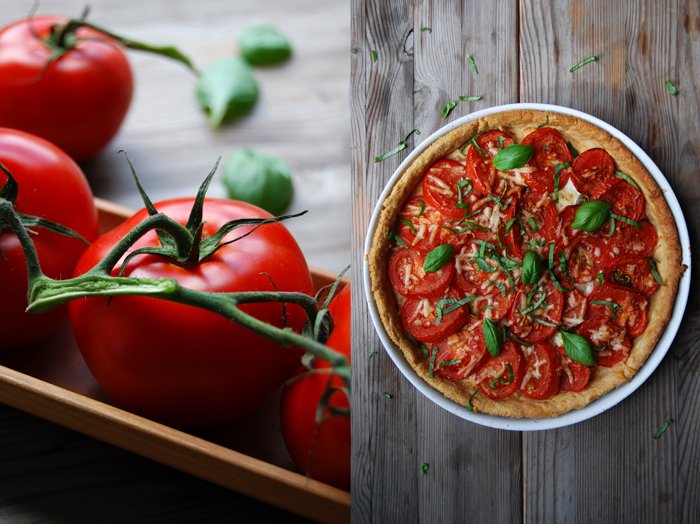
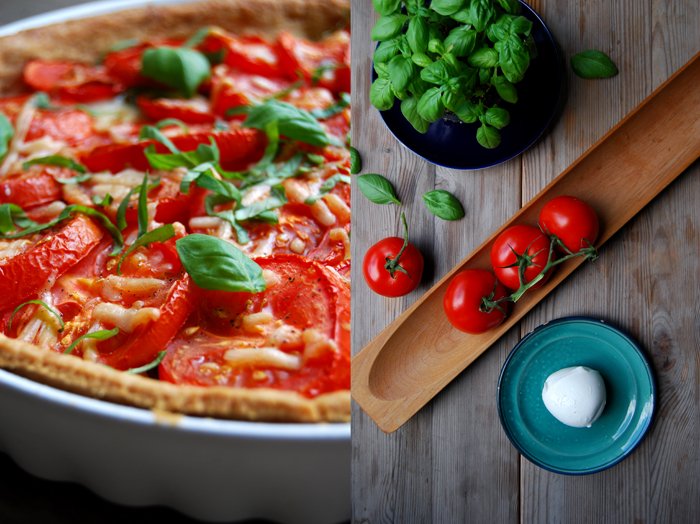
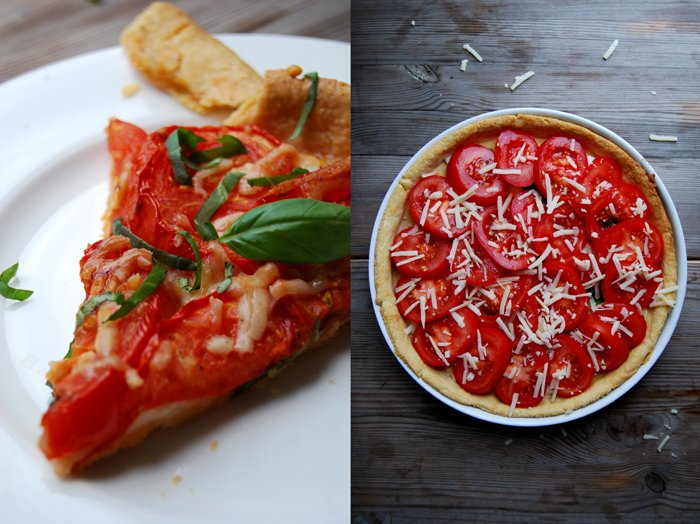
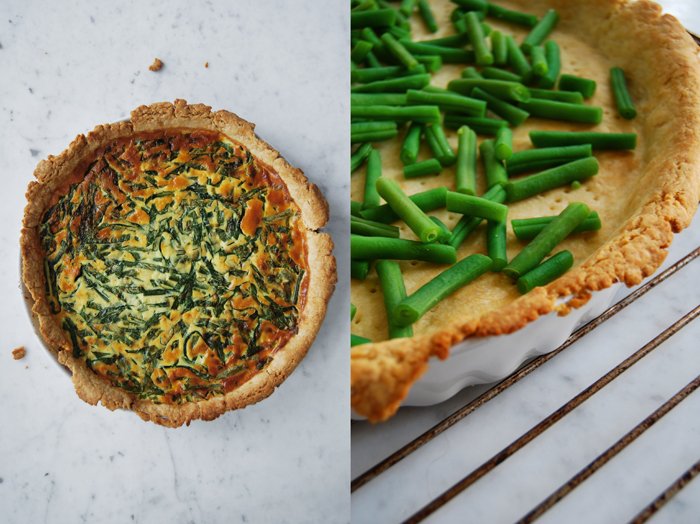
There's no better way to celebrate than with one of my favourite recipes, my beloved quiche! It made its first appearance with leek and tomato, followed by a fennel tart and my bean and ramp quiche. Today's tart is a delicious tomato, Buffalo mozzarella and basil quiche, the pastry buttery and crisp (as always) but with a little change, I added some olive oil to the dough. The topping is a celebration of Italian summer flavours, sweet tomatoes, creamy Buffalo mozzarella and fresh green basil leaves. It reminds me a bit of pizza, just more fine and buttery!

Tomato and Buffalo Mozzarella Quiche
For one quiche you need a round (27cm / 10.5″) or oval baking dish or tart pan.
For the short crust base
flour 250g / 8.5 ounces (I use white spelt flour type 630 but you can use any other plain flour)
butter, cold 125g / 4.5 ounces
olive oil 1 tablespoon plus more for brushing the pastry
organic egg 1
salt 1 teaspoon
Combine the flour with the salt. Cut the butter with a knife into the flour until there are just little pieces of butter left. Continue with your fingers and work the butter into the flour until combined (there shouldn’t be any lumps of butter left). Add the egg and olive oil and continue mixing with the hooks of your mixer until you have a crumbly mixture. Form a disc, wrap in cling film and put in the freezer for 15 minutes.
The topping
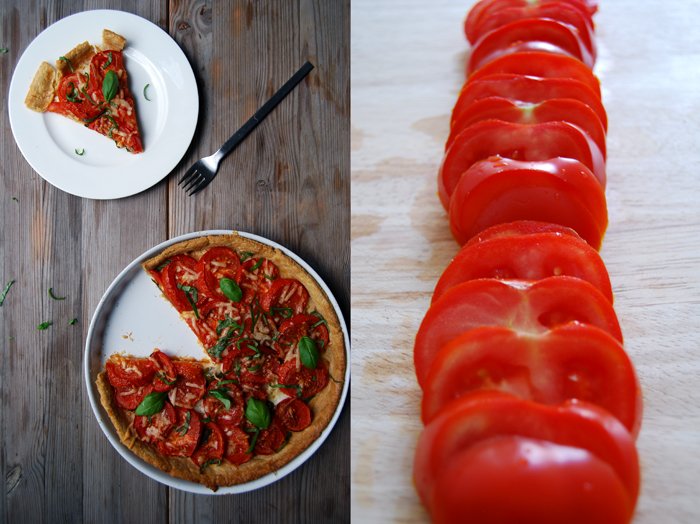
medium tomatoes, sliced, 4
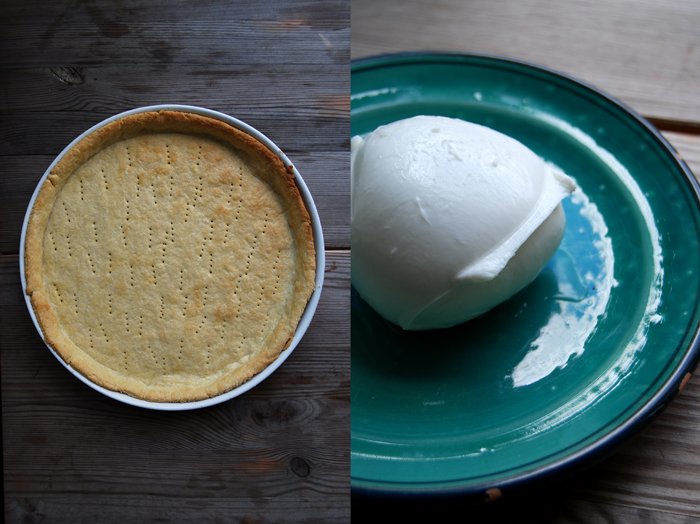
Buffalo mozzarella, drained and very thinly sliced, 125g / 4.5 ounces
Parmesan, grated 30g / 1 ounce
fresh basil leaves 14 plus 8 leaves (chopped) for topping when the quiche is done
salt and pepper
The quiche
Set the oven to 210°C / 410°F top/ bottom heat.
Roll out the dough between cling film and line your baking dish with the flat pastry. Prick it with a fork and blind-bake in the hot oven for 10 minutes. Take it out of the oven and set the temperature down to 180°C / 355°F.
Brush the pastry with a thin layer of olive oil, spread the mozzarella and basil on top and cover with the tomatoes. Sprinkle with the parmesan, season with salt and pepper and bake for about 25 minutes or until the tomatoes are soft. Let it cool for 10 minutes and sprinkle with the fresh basil.

Affogato - Vanilla Ice Cream in Espresso and a creamy Fruit Tart

We live quite a Roman lifestyle when the family meets at my mother's house. It's all about food, nice wine and at breakfast time we already start to talk about our plans for dinner. We all love to eat and to cook, so when we meet that's what it's about, enjoying life!
Caught in this enthusiasm for culinary pleasures it sometimes happens that we end up with two sweet breaks, three actually but I will leave out the Oeufs à la neige or île flottante which we had after dinner, a beautiful dessert of floating meringue on a warm vanilla sauce. It was amazing but I was too relaxed to get up and get the camera.
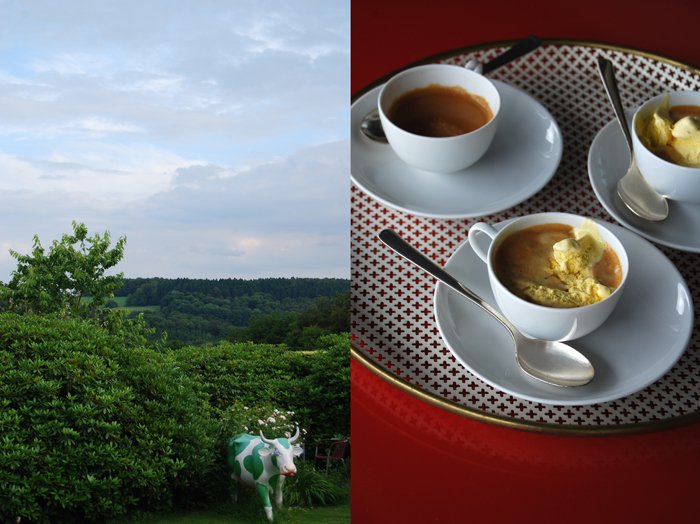
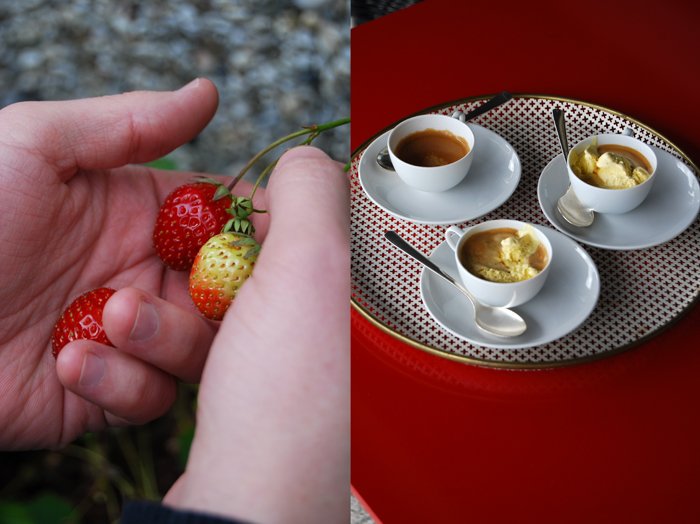
In the early afternoon we started with a sweet kick, a genius idea, we just dropped a spoonful of vanilla ice cream into our little cups filled with strong espresso, a wonderful Affogato. This was better than any iced coffee I ever had before, it's great! It was a warm day, we had spent lots of time in my mother's garden, she cleaned up her flower beds and then we went for a long walk in the forest. We walked over soft hills and green fields and after all that activity and a heavy dose of fresh air (which is always a shock on our lungs used to the city air) the vanilla ice cream in espresso was the right thing to put us back on our feet. I'm sure I will make this again for a dinner party!
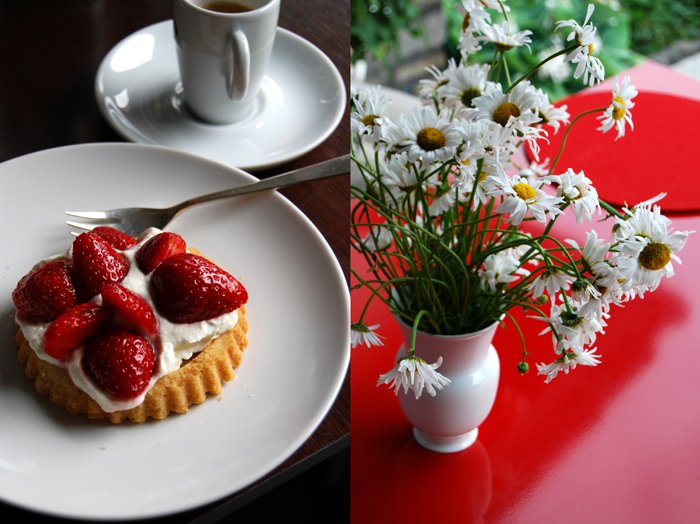
The next spontaneous break involved fresh strawberries and short crust tarts which my mother had bought from her bakery. They were buttery and crumbly, we dolloped some vanilla whipped cream on top and my mother garnished them artfully with halves of strawberries - another break, another espresso and more happy faces!
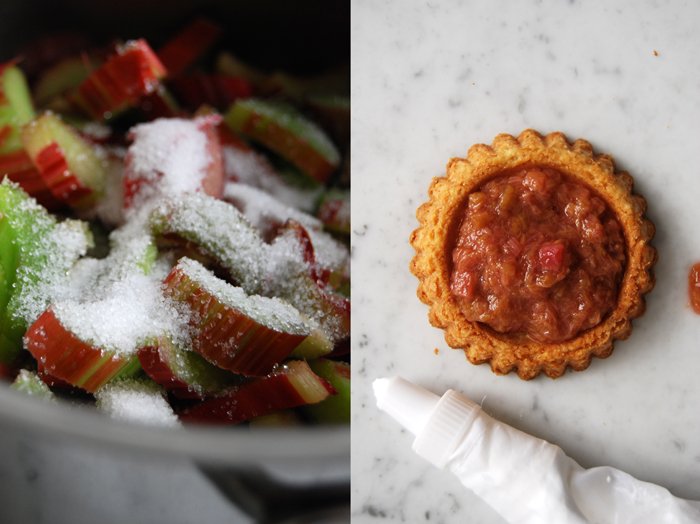
You can use store bought tartlets or the ones I baked for my rhubarb meringue. If you prefer different fruit toppings, you could also top a few with blueberries or raspberries. Unfortunately, the gooseberries in my mother's garden weren't ripe enough yet, they would have turned it into my favourite fruit tart!

Strawberry Cream Tartlets
You will need round 10cm / 4″ tartlet pans.
For 10 tartlets you need
plain flour 250g / 9 ounces
sugar 80g / 3 ounces
a pinch of salt
a pinch of vanilla
butter, cold, 160g / 5.5 ounces
organic egg yolks 2
For the topping
strawberries, cut in half, 40
heavy cream 300g / 10.5 ounces
a pinch of vanilla
granulated sugar 1 1/2 tablespoons
Combine the flour with the salt, vanilla and sugar. Cut the butter with a knife into the flour until there are just little pieces of butter left. Continue with your fingers and work the butter into the flour until combined (there shouldn’t be any lumps of butter left). Add the egg yolks and continue mixing with the hooks of your mixer until you have a crumbly mixture. Form a thick disc, wrap in cling film and put in the freezer for 10 minutes.
Set your oven to 200°C / 390°F top / bottom heat. Butter the tartlet pans and dust with flour.
Roll out the dough about 3mm thick between cling film and cut out 10 12cm / 5″ circles. Line your tartlet pans with the pastry and prick with a fork. Blind-bake in the hot oven for 9 minutes or until golden. Take them out, let them cool for a couple minutes before you flip them over and let the tartlets cool off completely.
Whip the heavy cream with a pinch of fresh vanilla and 1 1/2 tablespoons of sugar (or more if you prefer it sweeter) till thick. Dollop a spoonful on each tartlet and top with 8 strawberry halves. Our strawberries were sweet enough but you could also dust them with icing sugar if you prefer it sweeter.


Chunky Chocolate Fruit Loaf with Dates and Prunes
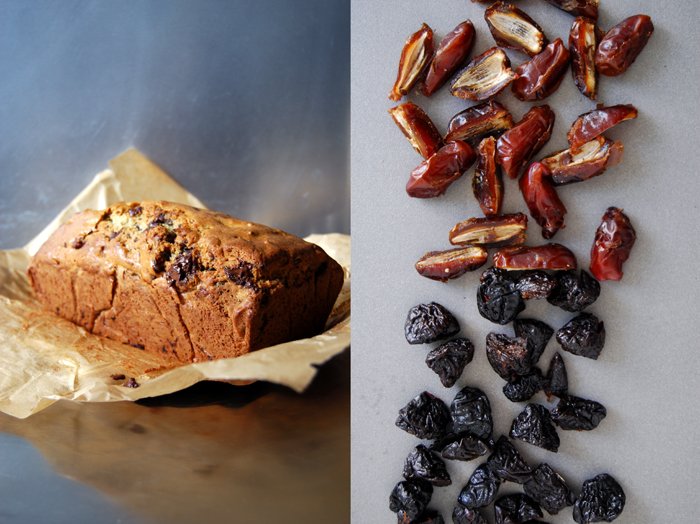
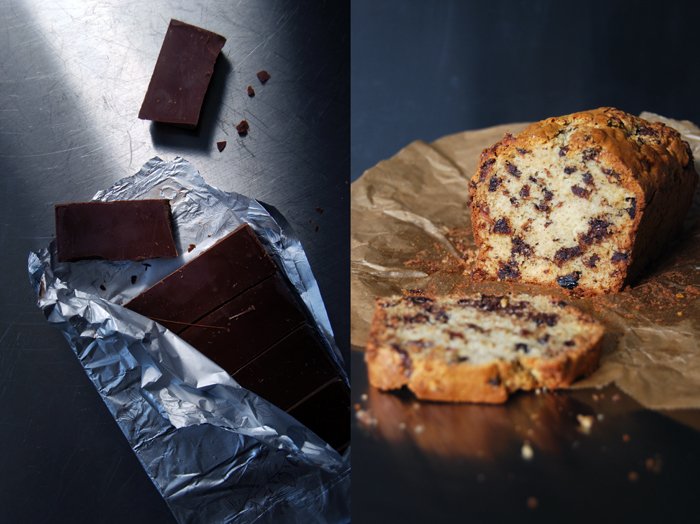
Raisins, prunes, dates, there are always lots of open bags in my kitchen shelves. Sometimes it's just too much! When there's no corner left which isn't occupied by dried fruits I know it's time for a recipe to empty them at one go and a fruit loaf is one of them. My fruity mixtures change depending on my shelf finds, I've often stocked up on figs, apricots or cranberries a bit too excessivly during the winter months as well, they can all go into the cake to add their concentrated fruity sweetness. It works for morning loaf cakes as much as for muffins, it makes them rich and won't leave you hungry! I'm particularly fond of this in combination with bittersweet chocolate, big chunks that melt into the dough and merge with the fruit, delicious!
This time I had dates, prunes and a dark Belgian chocolate which ended up in the lumpy dough, roughly chopped and sticky. It made the loaf dense and moist and so pleasantly sweet that it felt like a sweet bread rather than a cake. You can replace the dried fruit with any other you find in your shelves and add some nuts or white chocolate. I often bake it on Sundays when I feel the urge to bake all of a sudden, I can be sure that I will find something in my shelves worth turning into a fruit loaf.
Chocolate Fruit Loaf with Dates and Prunes
For a 24 x 10cm / 10 x 4" loaf pan you need
plain flour 340g / 12 ounces
granulated sugar 100g / 3.5 ounces
baking powder 2 teaspoons
baking soda 1 teaspoon
salt 1/4 teaspoon
butter, melted, 120g /4.5 ounces
milk 220ml /7.5 ounces
organic eggs 2
bittersweet chocolate, roughly chopped, 120g / 4.5 ounces
dates, roughly chopped, 100g / 3.5 ounces
prunes, roughly chopped, 100g / 3.5 ounces
Set the oven to 190°C / 375°F (fan-assisted oven). Line a loaf pan with parchment paper.
Combine the dry ingredients. Whisk the butter, milk and eggs and mix in the dry mixture with a wooden spoon. Don't over mix, the dough should be lumpy. Gently stir in the dried fruit and chocolate and scrape into the pan. Bake for 30 minutes, turn the oven down to 175°C / 350°F and bake for another 15 minutes or until golden. Check with a skewer, it should come out clean. Let the loaf cool in the pan for a few minutes before you take it out.


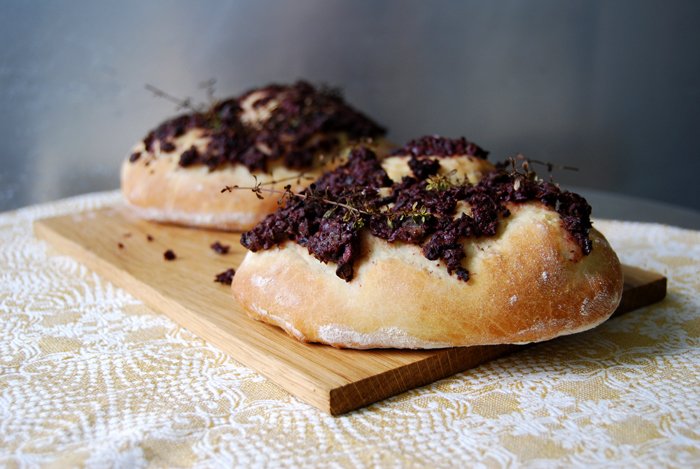
Sicilian Sfincione with Tapenade
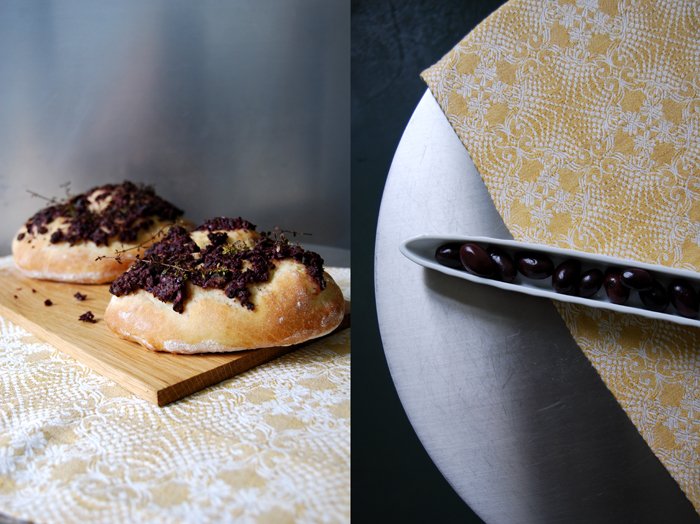
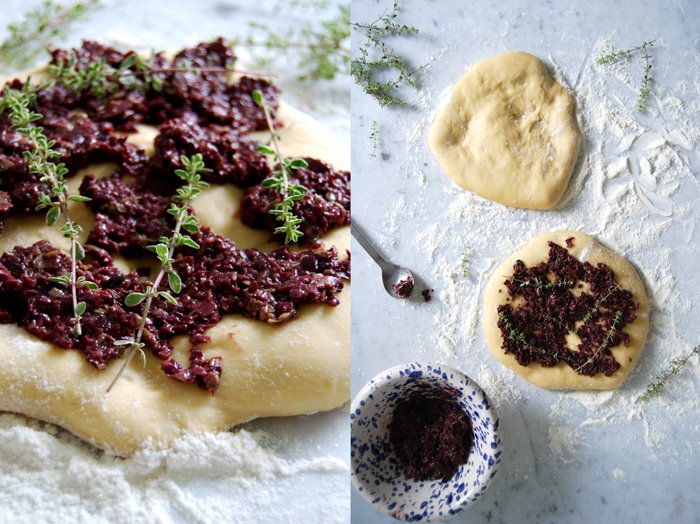
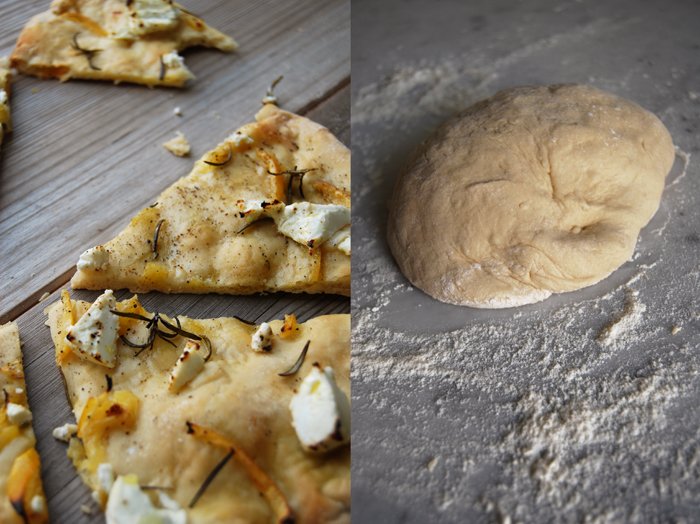
Forget thin and crisp, this pizza is thick and juicy! The Sicilian Sfincione is more like a focaccia, the dough is made with eggs and milk which gives it a bit of a sweet bread feeling. Its origin dates back to the late Baroque when the aristocratic Sicilian families liked to employ French chefs, the "Monzu" coming from the French Monsieur, some of them became famous Sicilian chefs. Here's the beauty of culinary exchange between two cultures, they influence each other, they don't confine each other but merge and evolve! If only cultural exchange was always so easy and well received!
In the beginning of the 18th century, these chefs started to influence Sicilian cuisine and left quite a few marks in the kitchen, also in the making of pizza. Eggs and milk, sometimes even butter, found their way into this famous dish and created completely different textures and tastes, like the popular Sfincione.
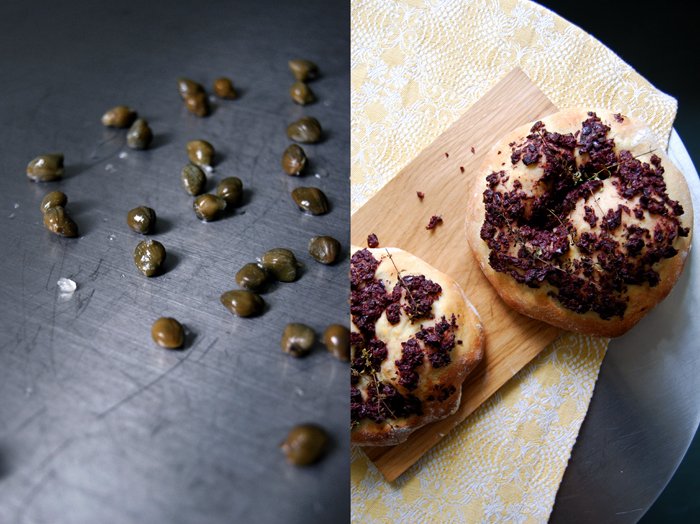
As there is already a French touch involved I thought I might as well continue working with it in the topping. I went for a rich Provençal tapenade made of lots of black olives, capers, anchovies, olive oil, brandy and lemon juice topped with thyme sprigs. It was great! This pizza is perfect for a picnic, as a starter or with a salad on the side. I love pizza, so much that I bake it every Sunday and this Sicilian variation is definitely a summer favourite!
Sfincione with Tapenade
For 4 Sfincione (15cm / 6") you need
For the dough
plain flour 500g / 1 pound
dry yeast 1 package (for 500g / 1 pound of flour)
salt 1/2 teaspoon
organic egg 1milk, lukewarm, 250ml / 8.5 ounces
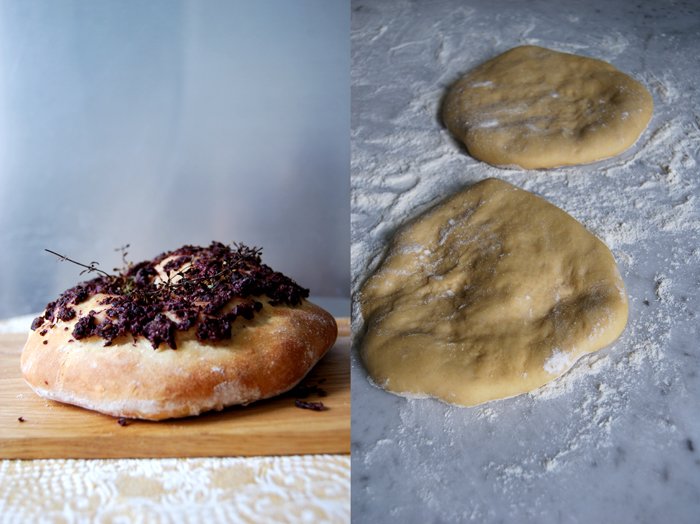
Combine the flour with the yeast and salt, add the lukewarm milk and egg and mix with your dough hooks for a few minutes. Continue kneading and punching with your hands until you have an elastic dough ball and put it back in the bowl. Cover with a tea towel and let it rise in a 35°C / 95°F warm ( top / bottom heat, no fan!) oven for 45 minutes.
Divide the dough into 4, stretch into thick 15cm / 6" disks on a floured surface and cover with a kitchen towel. Let them rise while you continue the preparation for the tapenade.
For the tapenade
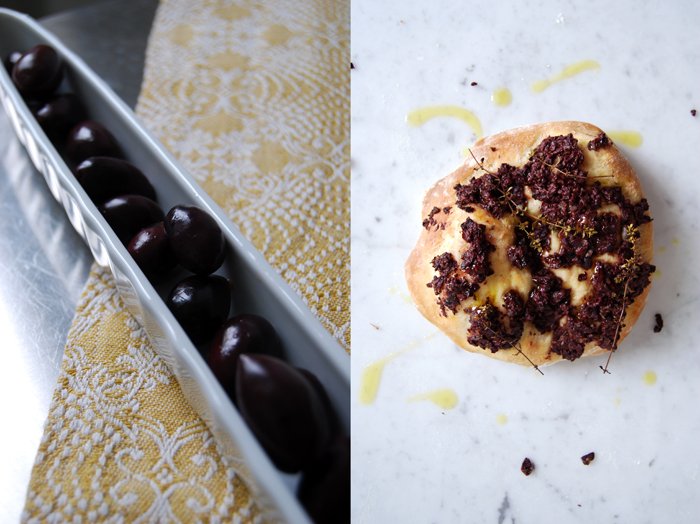
black olives 200g / 7 ounces
capers 40
anchovy, rinsed and dried, 2 fillets
olive oil 2 tablespoons plus more for sprinkling
brandy (or cognac) 2 tablespoons
freshly squeezed lemon juice 2 tablespoons
mustard 1 teaspoon
pepper
thyme 16 small sprigs for topping
Mix the ingredients for the tapenade in a blender and season with pepper to taste.
The Sfincione
Set the oven to 250°C / 480°F, my oven has a special pizza setting but you can use top / bottom heat as well. Line a baking sheet with parchment paper.
Spread a quarter of the tapenade on each pizza, put 4 thyme sprigs on top of each and bake for 6 minutes or until golden brown. Sprinkle with olive oil immediately and serve warm or cold.

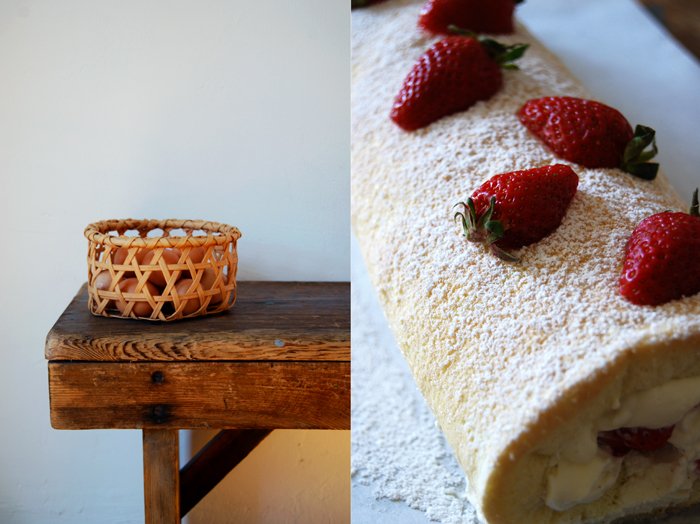
Strawberry Cream Roll for Tea Time in June
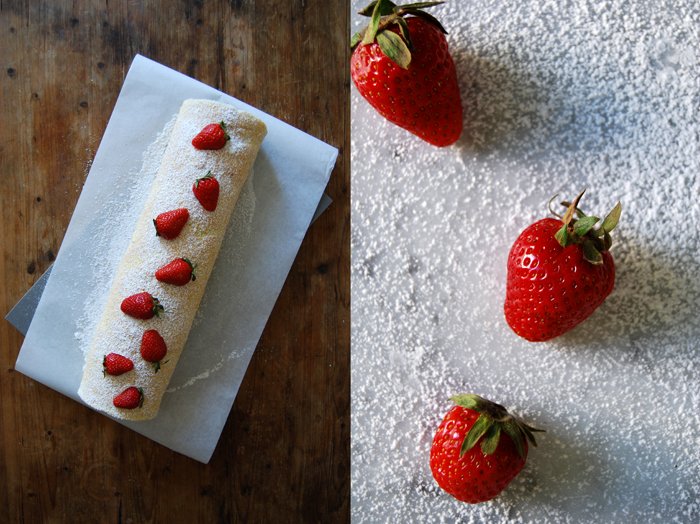
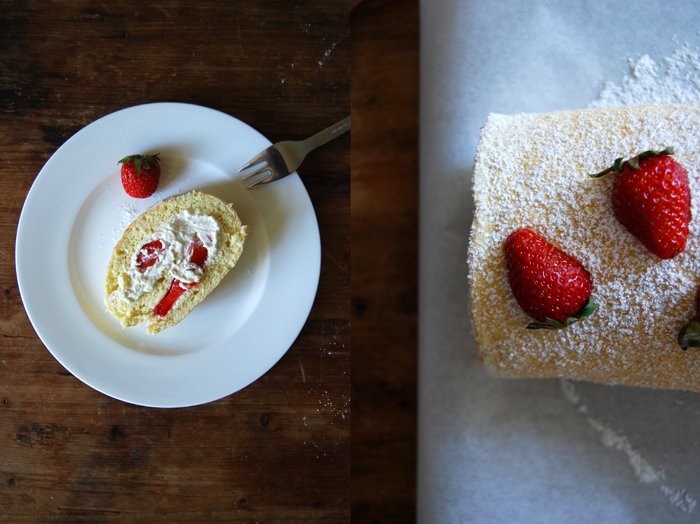
This is the ultimate strawberry dessert to me, the lightest sponge roll you can imagine filled with vanilla whipped cream and lots of sweet red berries. This cake just makes me happy, and lots of my friends too! There are many cakes, pies, creams, meringues, puddings or trifles which can be tastefully refined with strawberries but nothing beats my fruity summer roll. There is only one variation on this roll which is as good but it demands a bit more work and time, and that's to replace the whipped cream with a Bavarian vanilla cream. It has the same effect on me, I just can stop eating it!
For now it's whipped cream which makes this dessert a very quick one. The sponge dough only needs 6 minutes in the oven and it can even be prepared a day before. Then you just need to whip the cream, cut the berries and roll everything up in a big, beautiful roll. I love to eat it at tea time on a Sunday, preferably on a sunny day in my mother's garden in the countryside. Sitting in the shade under one of her big trees, a plate of this creamy cake in my hands is one of the best treats in June I can imagine. I'm lucky, I will be there next week and I'm sure I'll bake it again!
Strawberry Cream Roll
For one big roll made of 38 x 30cm / 15 x 12" sponge you need
organic eggs 6
granulated sugar 100g/ 3.5 ounces plus more for the whipped cream and sprinkling (around 4 tablespoons)
a pinch of salt
plain flour, sieved, 100g / 3.5 ounces
cornstarch 40g / 1.5 ounces
strawberries, rinsed and cut into slices, 370g / 13 ounces (keep 4 berries cut in half as decoration)
heavy cream 300g / 10.5 ounces
a pinch of fresh vanilla
icing sugar to dust the roll
Set the oven to 220°C (top / bottom heat) and line a baking sheet (around 38 x 30cm / 15 x 12") with parchment paper.
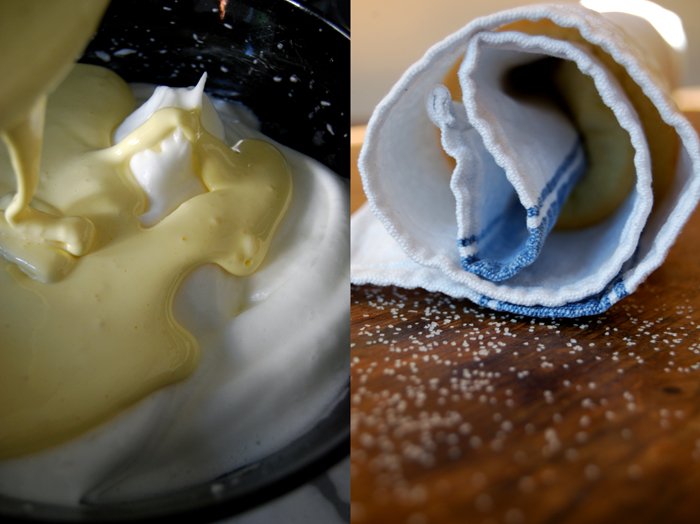
Whisk the the egg whites with a pinch of salt for 10 seconds, add 40g of the sugar and continue beating till stiff. Mix the egg yolks with a pinch of vanilla and 60g of the sugar for a few minutes till thick and creamy. Fold the egg whites with a wooden spoon into the egg yolks. Combine the flour and cornstarch and fold gently into the egg mixture. Spread the dough on the baking sheet and bake in the middle of the oven for 6 minutes until spongy.
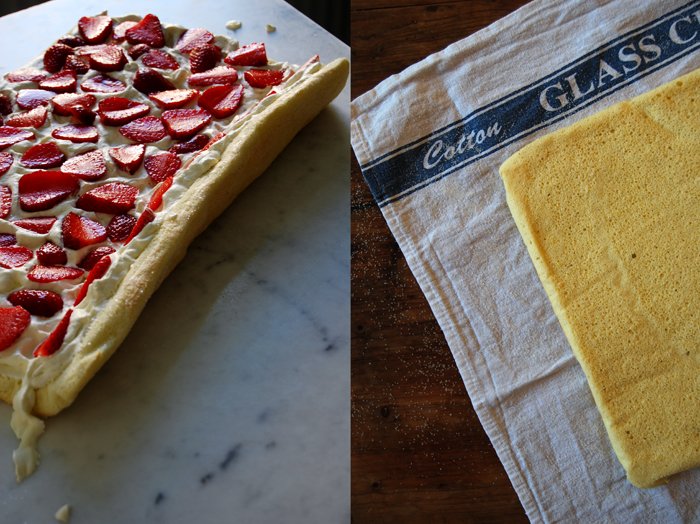
Sprinkle a kitchen towel with sugar (around 2 tablespoons) and flip the hot sponge onto the towel. Roll it up carefully as you can see in the picture below and let it cool.
Whip the heavy cream with a pinch of fresh vanilla and 1 1/2 tablespoons of sugar (or more if you prefer it sweeter) till thick.
Unwind the sponge roll carefully and lay it flat onto a working surface. Spread the whipped cream on the cake, cover with slices of strawberries and roll it up again, slowly and gently, not to squeeze the cream out from the sides. Dust with icing sugar and decorate with the strawberries cut in half. Serve immediately or keep in the fridge for a few hours before serving.


Saffron Bread
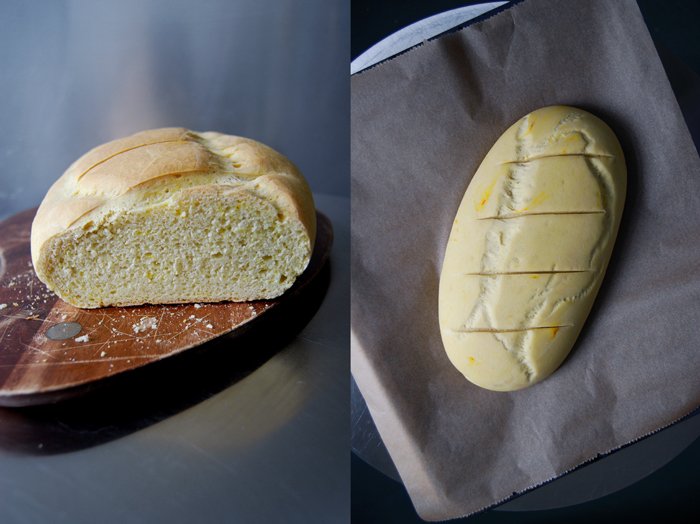
Here's the saffron bread I promised!
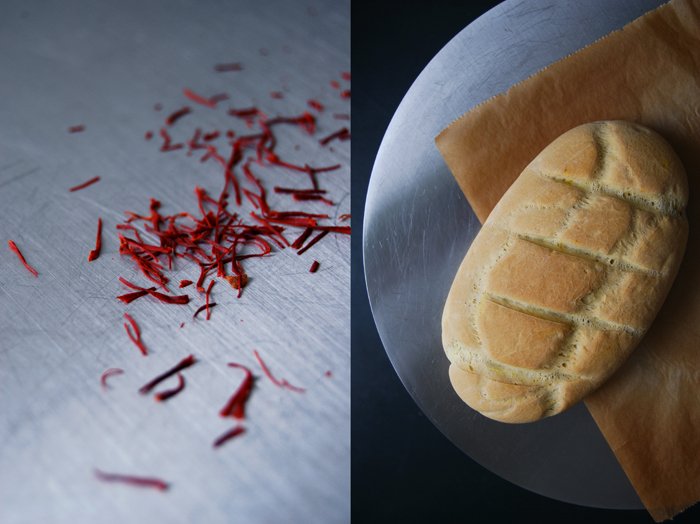
Let's start with the texture, it's juicy but light, a quality I love of all of my bread recipes, be it my Zucchini Bread, the Olive Loaf or my Potato Bread, but this one has a special aroma. It's made with one of the most precious and expensive spices, dried saffron threads. Only a very small part of the saffron crocus' flower is used for the production of this red spice, the three crimson stigmas growing at the end of the carpel. Lots of flowers, 150 - 200, are necessary to produce 1 gram of this treasure! Luckily, its aroma is so intense that a tiny amount is enough to refine other ingredients with its flavour.
For my bread made of a bit more than a pound of flour I used a pinch of saffron threads (around 1/5 teaspoon) to spread their unique taste. At first I was a bit worried that it wouldn't be strong enough for yesterday's sandwich, the Greek feta dip mixed with harissa and cayenne pepper had quite an impact of different flavours. To my surprise, the hot spiciness and the saffron complemented each other perfectly! It was a Greek reunion as antique mythology tells that the Greek God Zeus used to sleep on a bed covered in saffron.
Saffron Bread
For 1 big loaf of bread you need
plain flour 550g / 19 ounces
yeast 1 package (for 500g / 1 pound of flour)
salt 1 1/2 teaspoons
water, lukewarm, 230ml / 8 ounces
olive oil 4 tablespoons
a pinch of saffron threads (around 1/5 teaspoon)
Mix the saffron with 3 teaspoons of the water.
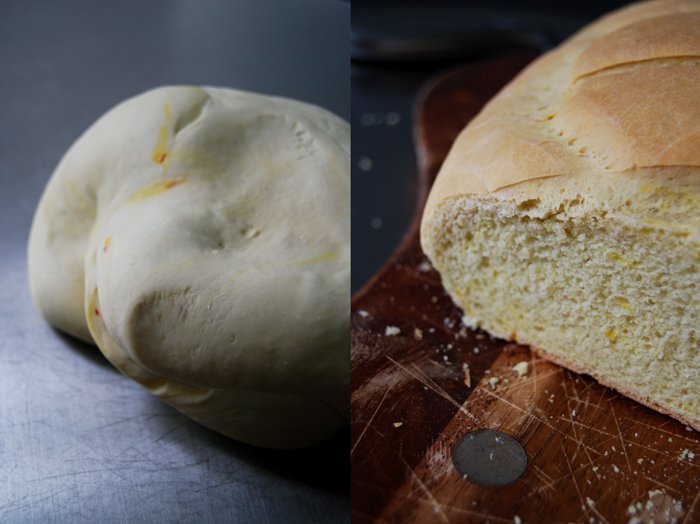
In a large bowl, combine the dry ingredients, add the olive oil, saffron liquid and the rest of the water and mix with your dough hooks for 5 minutes until well combined. Continue kneading with your hands for around 5 minutes until you have an elastic dough ball. Put the dough back into the bowl and cover with a tea towel. Let the dough rise in a 35°C / 95°F warm ( top / bottom heat, no fan!) oven for 60 minutes.
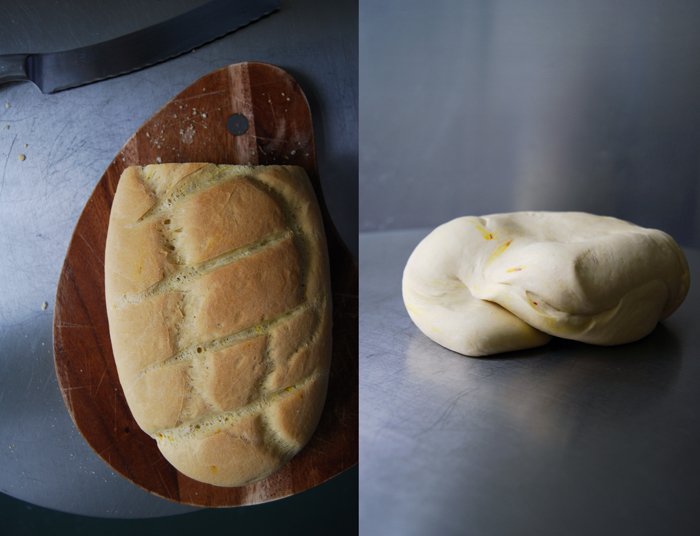
Take the dough out, punch it down and knead for 1 minute. Form 1 long loaf and put on a baking sheet lined with parchment paper. Cover with a tea towel and let it rise for 25 minutes in a warm place.
Set the oven to 225°C / 440°F.
Cut 4 diagonal slashes into the bread and bake for 20 minutes or until cooked through. If you’re not sure if it’s done turn the bread around and knock on its underside, it should sound hollow. Let it cool for a couple minutes on a wire rack covered with a tea towel to soften the crust a bit.


An Upside Down Cake with Rhubarb, Cinnamon and Strawberries

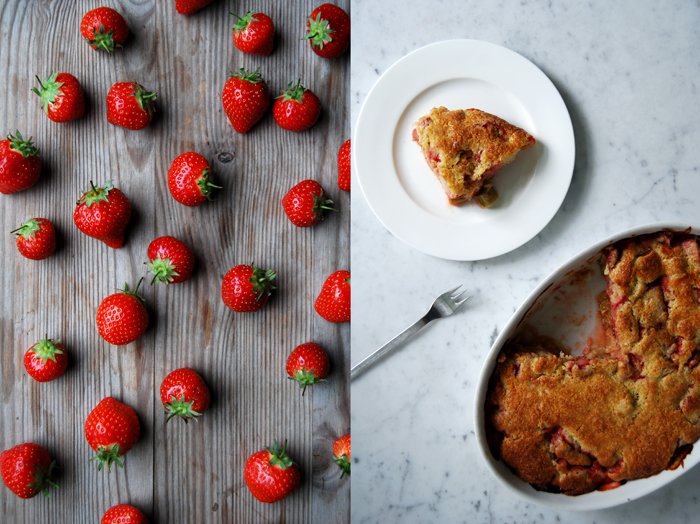
An upside down cake is the easiest and most convenient way to put juicy fruits into a quick cake. They just sit on the bottom, soften slowly in their juices and spread their aroma into the dough baking on top. The pastry can grow spongy with a thin crisp layer and the fruits turn into a thick compote. Juiciness where juiciness belongs! Technically the cake should be flipped upside down when it's done, I just skipped this part. I liked the rustic look of its golden top, like a pie that you scoop out of the pan with a spoon, and to be honest, the bottom doesn't look as pretty!
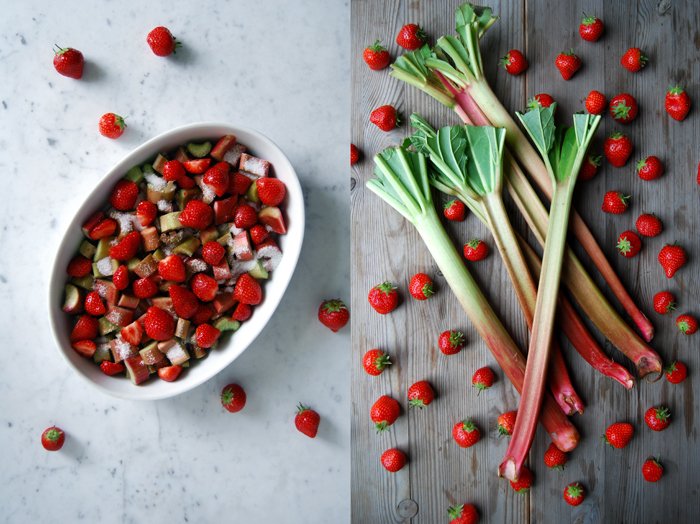
In the past few weeks I've been using lots of rhubarb in my recipes, I love its fresh, sour taste but its season is quickly coming to an end. No reason to be sad as I'm slowly changing over to what nature offers next, like strawberries! Much sweeter, yet no less versatile in the kitchen. My upside down cake combines the qualities of both fruits, sweet and and sour with a pinch of cinnamon. Not to forget the pastry, it is so good that the cake only lasted a few hours! While I was taking the photos my kitchen was filled with the sweet smell of cinnamon, fruit and fresh pastry, I could barely stop myself from taking the first bite!

Rhubarb and Strawberry Upside Down Cake
For an oval baking dish (around 25cm / 10") you need
plain flour 210g / 7.5 ounces
granulated sugar 150g / 5.5 ounces plus 6 tablespoons for the fruit
baking powder 1 1/2 teaspoons
a pinch of salt
butter, melted, 60g / 2 ounces
organic eggs 2
milk 100ml / 3.5 ounces
a pinch of fresh vanilla
rhubarb, sliced thickly, 650g / 1.5 pounds
strawberries, cut in half, 200g / 7 ounces
ground cinnamon 1 teaspoon
Set the oven to 190°C / 375°F.
Spread the fruits in a baking dish and sprinkle with 6 tablespoons of sugar mixed with a teaspoon of cinnamon.
Combine the flour, sugar, baking powder and salt. In another bowl, mix the butter, eggs, milk and vanilla with a mixer and fold into the dry mixture, stir with a wooden spoon until you have a lumpy dough. Don't over mix! With a big spoon dollop the dough on top of the fruits and spread gently until roughly covered. Bake in the oven for 45 minutes or until golden brown. Check with a skewer, it should come out clean.

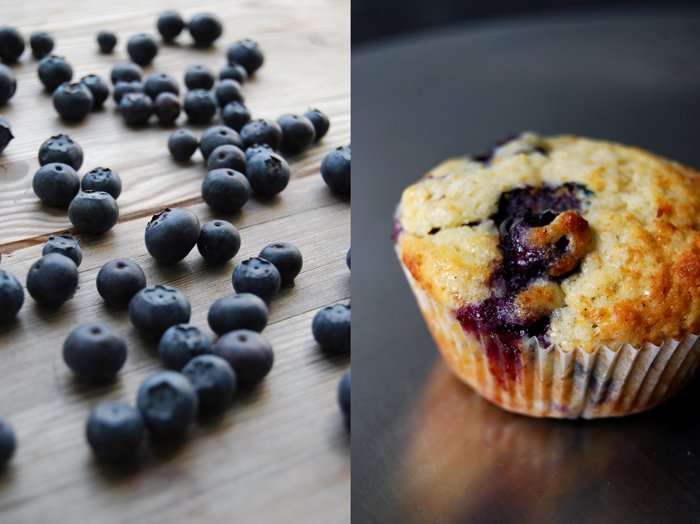
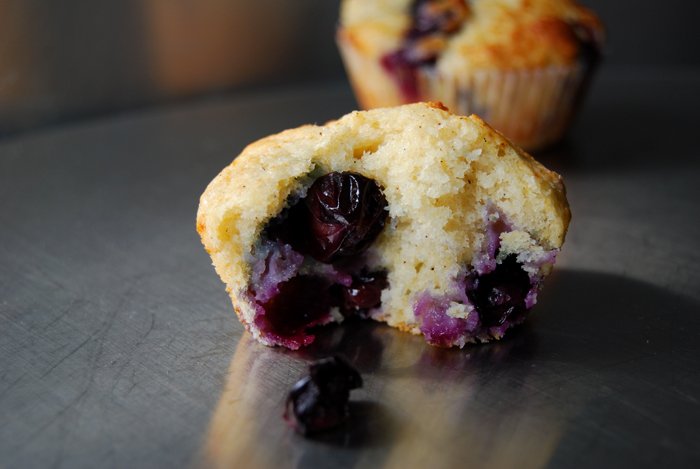
Fruity Blueberry Muffins
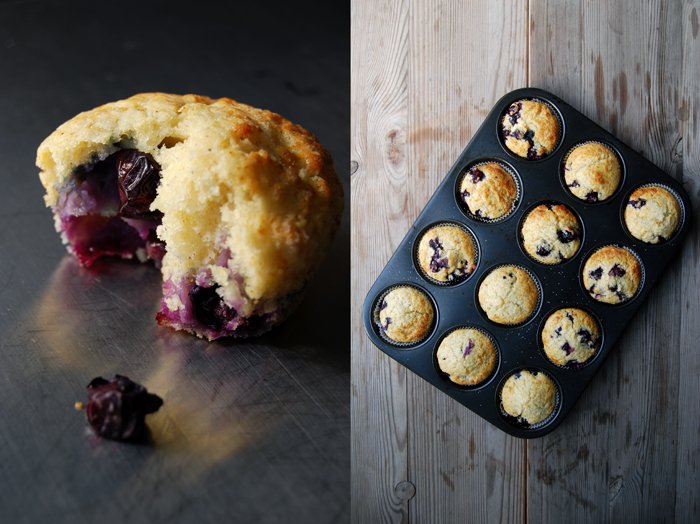
Muffins! Spongy, sugar coated and full of big, juicy blueberries that pop open in your mouth when you take the first bite, that's the perfect muffin to me! After my wintery blood orange marmalade muffin and my drunken Irish Coffee Muffin, the time was ripe for a fresh and fruity weekend muffin. I make the dough with buttermilk which gives them a light and fluffy texture, it's so light that you can empty half a tray without noticing!
You could also replace the blueberries with raspberries or strawberries which are at the peak of their season here at the moment. Peaches are nice too although I think it's still a bit early for them. I've spotted them at the markets already, from Italy mainly, but they don't look ripe and juicy yet, more pale and hard as a rock. I'd rather wait another month or two for a satisfying peach experience.
Frozen fruits work as well but keep in mind that they will soak the dough a bit more as they are a bit soggy when they have been defrosted. The muffins may need a little longer in the oven and won't give you the full berry aroma, so if possible, throw in the fresh ones!
Blueberry Muffins
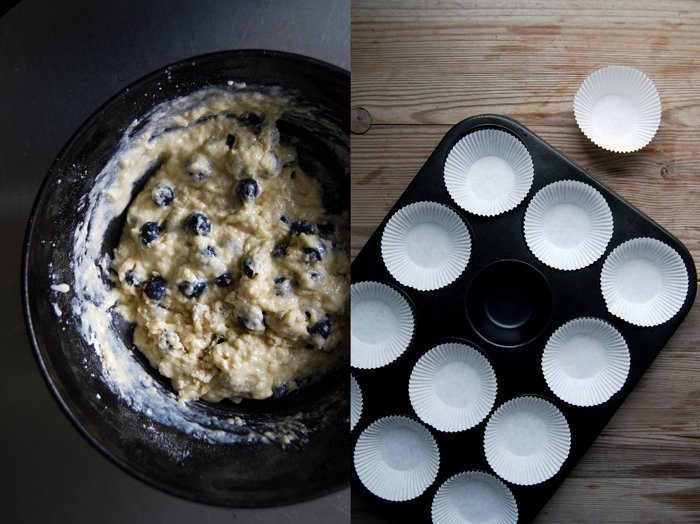
You need a muffin tray with 12 molds and paper baking cups.
plain flour 200g / 7 ounces
granulated sugar 70g / 2.5 ounces plus 1 teaspoon for the topping
baking powder 2 1/2 teaspoons
baking soda 1/2 teaspoon
a pinch of salt
buttermilk 190ml / 6.5 ounces
butter, melted, 90g / 3 ounces
organic egg 1
a pinch of fresh vanilla
blueberries 180g / 6.5 ounces
Set your oven to 200°C / 390°F.
Combine the dry ingredients in a large bowl (except the vanilla). Whisk the melted butter, buttermilk, vanilla and egg in another bowl. Pour the liquid mixture into the dry mixture, stir with a wooden spoon until you have a lumpy dough and gently fold in the blueberries. The more you mix it the more it will lose its light texture so don’t mix it too long.
Fill the muffin tray, sprinkle some sugar on top and bake for 14 minutes or until golden.


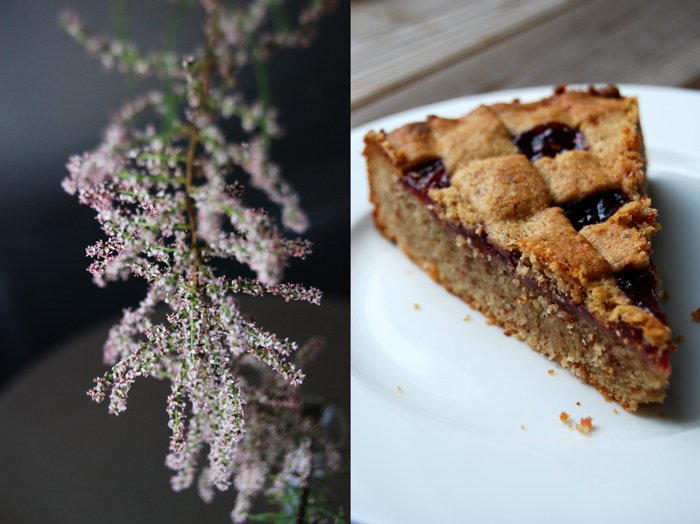
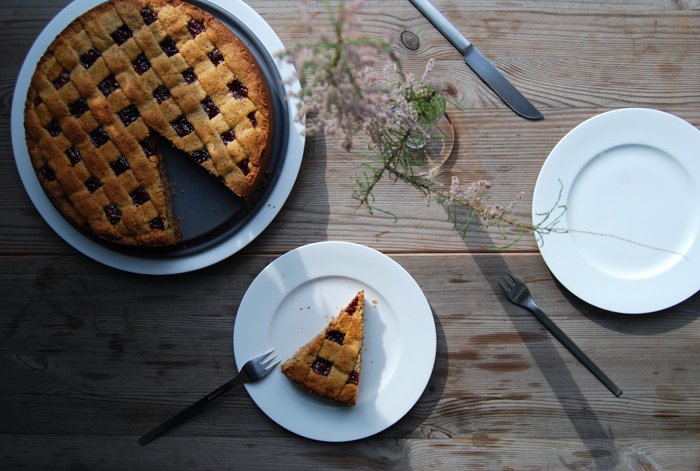
Linzer Torte, a family recipe

Although Linzer Torte has a Christmassy image, nothing I'm too fond of in May, there is a reason why I put this cake in my oven at this time of the year. It was my uncle's birthday a few days ago and he is the biggest fan of this traditional cake I know, he keeps his mother's fabulous recipe for this famous Austrian cake like a big treasure. I'm lucky, he shared it with me which made me feel very honoured but we had a deal, I would bake it for his special day in May.
To me, Linzer Torte is not particularly wintery, it's made of two layers of buttery short pastry sandwiched with raspberry jam. It feels a bit like a dense fruit pie, maybe not as juicy as the layer of jam is quite thin and not a proper filling. It gives the pastry's flavours more space and makes it a bit softer. That's why the cake is best when it sits for a few days, a week is even better. The jam soaks the crumbly base and spreads its fruity aroma.
I recently found out that the recipe for this cake which is named after the city of Linz is supposed to be the oldest known cake recipe in the world, dated 1653. Discovered in the archives of the Admont Abbey, it was found in Countess Anna Margarita Sagramosa's cookbook, a lady who liked to develop, collect and record good recipes as much as I do!

Linzer Torte
For a 25cm / 10" springform pan you need
plain flour 300g / 10.5 ounces
almonds (or hazelnuts), ground 300g / 10.5 ounces
cocoa powder 1 teaspoon
a pinch of salt
a pinch of cloves, ground
a pinch of ground cinnamon
butter, at room temperature, 300g / 10.5 ounces
granulated sugar 250g / 9 ounces
organic egg 1
Kirschwasser (cherry schnaps) 2 tablespoons
raspberry jam, whisked, 6 tablespoons
Set the oven to 170°C / 340°F (fan-assisted oven) and butter the springform pan.
Combine the dry ingredients (except the sugar). Beat the butter with the sugar till fluffy. Add the egg and the Kirschwasser and continue mixing adding the dry mixture.
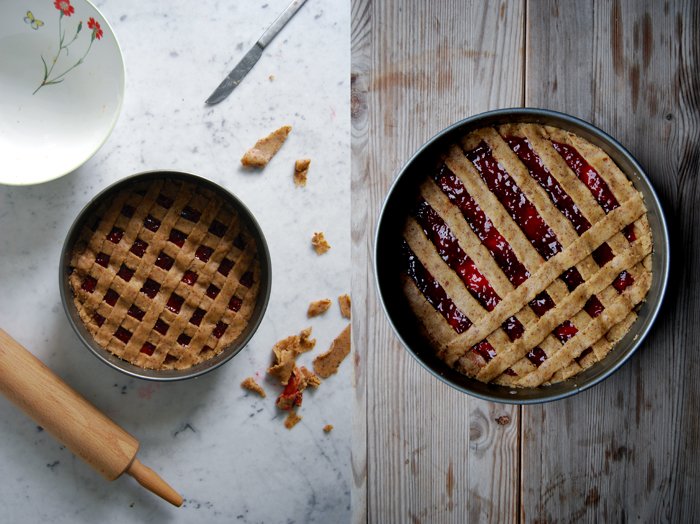
Take 1/5 of the dough and set aside for the decoration and place the rest in the pan, pushing it down evenly. Spread with the jam.
For the decoration, you could put the dough in the freezer for 10 minutes which makes it easier to handle. I left it soft, it worked but it was a bit more fiddly. Roll out the dough between cling film (around 28 x 25 cm / 11 x 10") and cut into 1.5 cm / 1/2" strips. Arrange the stripes in a lattice top (you can make a woven pattern, but I didn't have the patience, I just put them on top of each other).
Bake in the oven for 35 minutes and keep in an airtight container for at least 1 day (3 days to a week would be better) before you serve the cake.

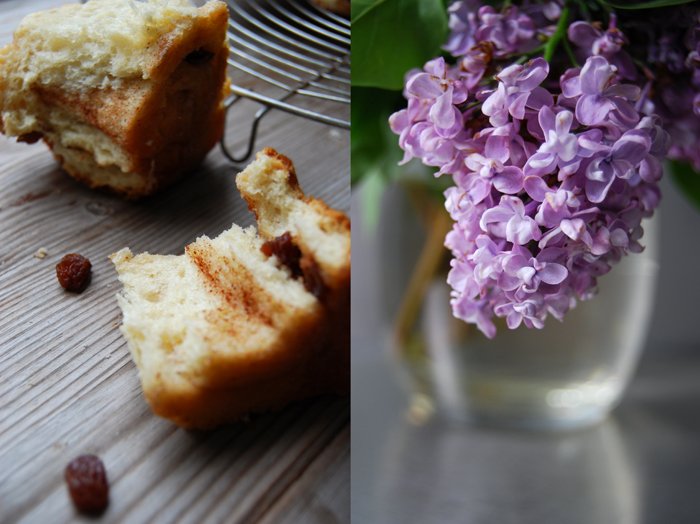
Sticky German Cinnamon Schnecken with Raisins and Maple Syrup

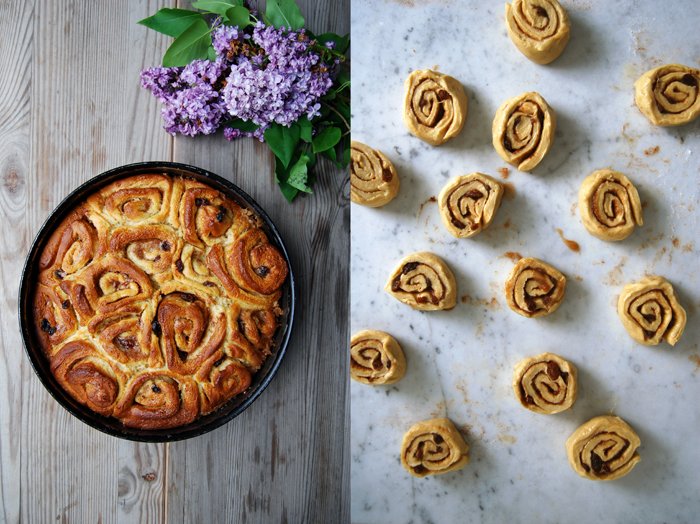
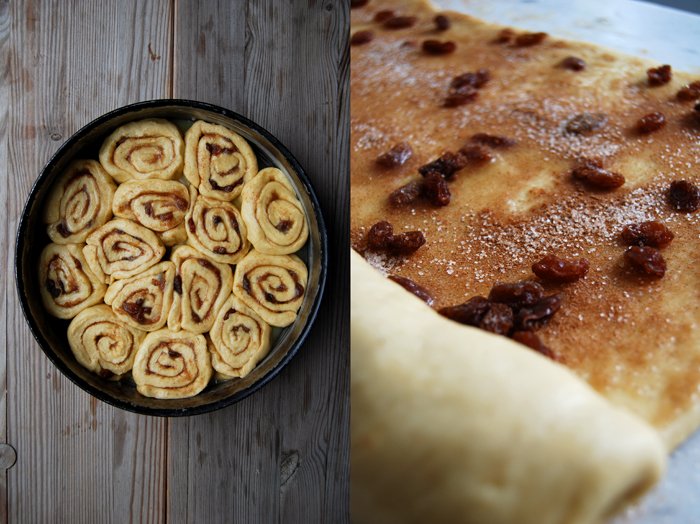
Sunday morning, the cosy smell of espresso bubbling in my espresso maker and fresh, warm buns on the table, there's no better weekend treat! This week, my breakfast buns are German schnecken, sticky pastry snails, filled with cinnamon and raisins, sweet, juicy and buttery. The top is crisp but when you pull the buns apart you can feel their soft inside, it's puffy, infused with cinnamon, slightly soaked with a thick syrup made of butter, sugar and a splash of maple syrup. They taste divine, I love them!
I had planned to bake cardamom buns for days but a package of raisins changed my mind in the last second and brought the cinnamon in. I like this combination so much that I forget about other spices sometimes, but next time it'll be cardamom again!
Cinnamon Schnecken
For 14 Schnecken you need
plain flour 600g / 21 ounces
granulated sugar 75g / 3 ounces
dry yeast 1 package (for 500g / 1 pound of flour)
salt 1 teaspoon
ground cinnamon 1 leveled teaspoon
butter, melted, 100g / 3.5 ounces
milk, lukewarm, 225ml / 7.5 ounces
organic eggs 2
For the syrup
water 50ml / 2 ounces
granulated sugar 120g / 4.5 ounces
maple syrup 1 tablespoon
butter 50g / 2 ounces
For the filling
raisins 60g / 2 ounces
granulated sugar 30g / 1 ounce
ground cinnamon 1 tablespoon
Combine the dry ingredients. Mix the hot melted butter with the cold milk and the 2 eggs, this way the liquid mixture will have the right lukewarm temperature (check with a finger). Mix the dry and the liquid mixture with your dough hooks for 5 minutes until well combined. Continue kneading with your hands for around 5 minutes until you have an elastic dough ball. Put the dough back into the bowl and cover with a tea towel. Let the dough rise in a 35°C / 95°F warm oven for 70 minutes. Make sure that your oven is set to top/ bottom heat and not to fan.
Bring all the ingredients for the syrup to a boil and cook on a medium heat for 3 minutes. Mix the raisins, sugar and cinnamon for the filling.
Take the dough out, punch it down and knead for 1 minute. Roll it out on a working surface (roughly 36 x 32cm / 14 x 12.5"), spread with the syrup and sprinkle with the sugared raisins. Roll it up tightly, cut into 14 schnecken and put into a buttered springform pan (around 26cm /10″), arrange them in a circle. Cover with a tea towel and let them rise for 20 minutes in a warm place.
Set your oven to 175°C / 350°F (fan-assisted oven).
Bake for 30 minutes or until golden brown. Let them cool for a few minutes before you take them out of the pan.


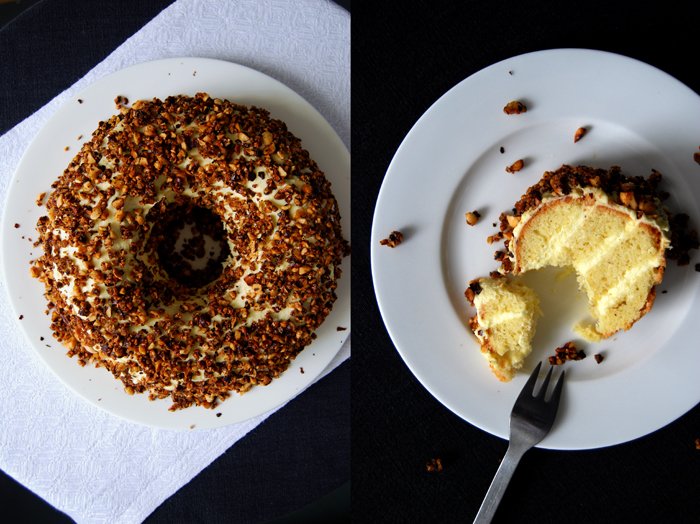
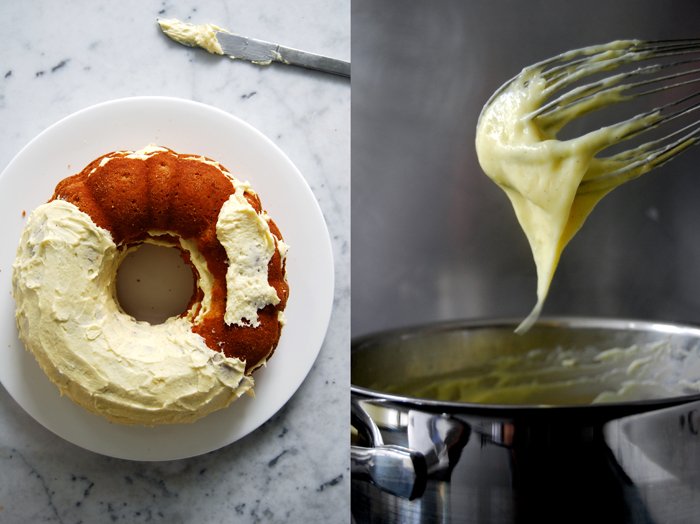
Frankfurter Kranz, a German Buttercream Cake with caramelized Hazelnuts

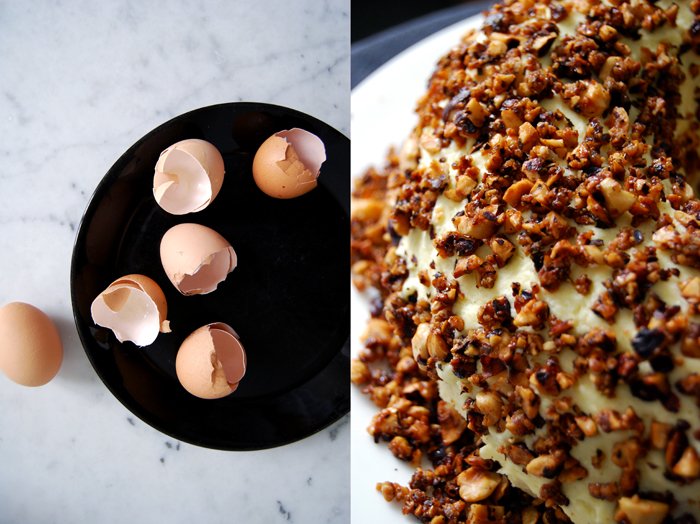
The Frankfurt Crown Cake, also known as Frankfurter Kranz is the queen of German buttercream cakes and my grandmother was a master at baking it. There was no special occasion, no family Sunday lunch without this opulent cake on the table. If you're on a diet you should avoid it because as all buttercream cakes, it needs lots of eggs, sugar and butter to transform into a delicious layered sponge cake filled and covered with German vanilla buttercream and sprinkled with caramelised hazelnuts. My Granny's lunches used to start with a green salad with a sugared cream dressing followed by the best beef rouladen (beef olive) filled with prosciutto, gherkin and mustard. While everyone else was worried about how one would manage to eat her traditional Frankfurt Crown Cake so soon at tea time, I was already excited and looking forward to eating my beloved buttercream cake.
The outside of the spongy cake, made with lots of vanilla and eggs, soaks a bit of the cream, which is made of vanilla pudding mixed with butter, that's why the cake is best after 2 days. The aromas have to spread, the vanilla and also the buttery caramelized hazelnuts infuse the cake. It's best to keep it in the fridge but it should always be eaten at room temperature. I didn't manage to wait for a couple days, the cake looked so good, I had to eat it as soon as I sprinkled the last hazelnuts on top. It was great but when I ate a piece on the 3rd day, I was reminded why it's good to be patient. The cake was amazing, it had developed its full deep taste and I understood why this cake was my Granny's famous signature cake.
Sometimes life is just about enjoying a piece of cake, no matter how much butter or eggs were needed to make it. Mother's and grandmother's know that!
Happy Mother's Day!

Frankfurt Crown Cake, Frankfurter Kranz
For a 23cm / 9″ bundt pan you need
For the sponge cake
butter, at room temperature, 200g / 7 ounces
granulated sugar 225g / 8 ounces
a pinch of fresh vanilla
organic eggs 6
plain flour, sieved, 200g / 7 ounces
cornstarch, 100g / 3.5 ounces
baking powder 3 teaspoons
a pinch of salt
dry breadcrumbs to sprinkle the bundt pan
Set the oven to 180°C / 355°F top/ bottom heat. Butter a bundt pan and sprinkle with bread crumbs.
Beat the butter, sugar and vanilla till fluffy, add the eggs, one at a time and continue beating for a few minutes till thick, creamy and light yellow. Combine the dry ingredients and fold gently into the butter egg mixture with a wooden spoon (in batches, combine well in between). Scrape the dough into the bundt pan and bake for 45 minutes or until golden. Check with a skewer, it should come out clean. Let the cake cool for 2-3 minutes before you turn it over onto a wire rack to cool completely. When the cake has cooled off completely, slice it 3 times into 4 layers.
For the buttercream
All ingredients for the buttercream must be at the same temperature (room temperature) to combine well!
butter 250g / 9 ounces
organic egg yolks 4
cornstarch 60g / 2 ounces
granulated sugar 120g / 4.5 ounces
milk 500ml / 17 ounces
a pinch of salt
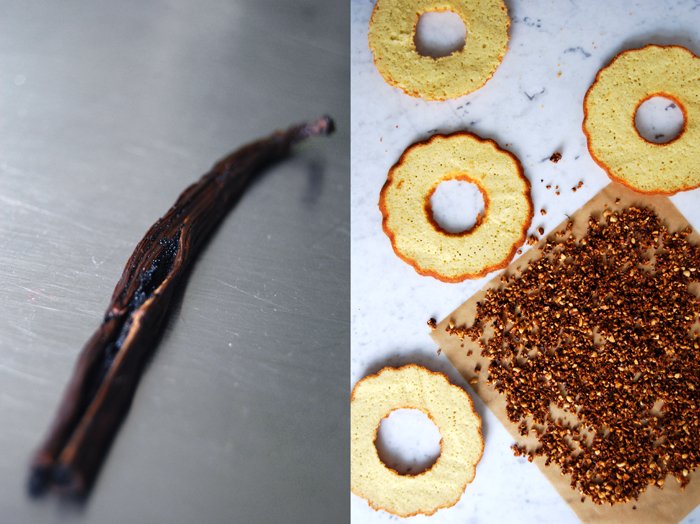
vanilla bean, slit slightly, 1
Beat the butter for 10 minutes till white and fluffy.
Whisk the egg yolks with the cornstarch, sugar, salt and 50ml / 2 ounces of the milk till well combined.
In a sauce pan, bring the remaining milk together with the vanilla bean to a boil. Take the vanilla bean out, scrape the seeds out of the bean into the milk. Add the egg mixture to the hot milk, whisking well. Take the sauce pan off the heat after 1 minute and continue whisking for 2 minutes till stiff. Fill into a bowl and cover the pudding's surface with cling film.
When the vanilla pudding has cooled off completely, press it through a sieve and mix in batches with the beaten butter, first with a spoon and then with your mixer for a few seconds till nice and creamy.
For the caramelized hazelnuts
hazelnuts, finely chopped, 200g / 7 ounces
granulated sugar 100g / 3.5 ounces
butter 35g / 1.5 ounces
In a large heavy pan, heat up the hazelnuts, sugar and butter on high-medium temperature and roast for around 5 minutes till golden brown and caramelized, stirring constantly. Take off the heat and spread on parchment paper.
Assembling the Frankfurter Kranz
Leave around 1/3 of the buttercream to cover the Frankfurter Kranz and spread the remaining cream on the 3 layers of cake. Start with the bottom one, spread with cream, cover with the next layer of cake and continue with the other layers. When the cake is assembled, spread the remaining cream gently all over the cake and sprinkle with the caramelized nuts on all sides, inside and out.
You can eat the cake right away or be patient and keep it in the fridge for 1-2 days before you serve it.

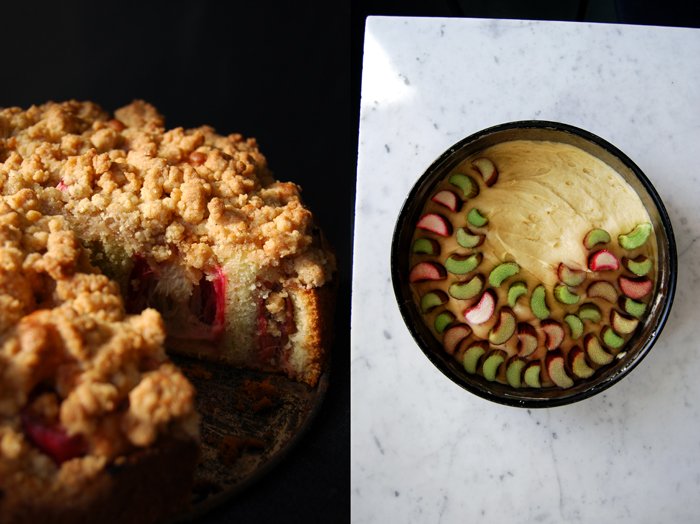
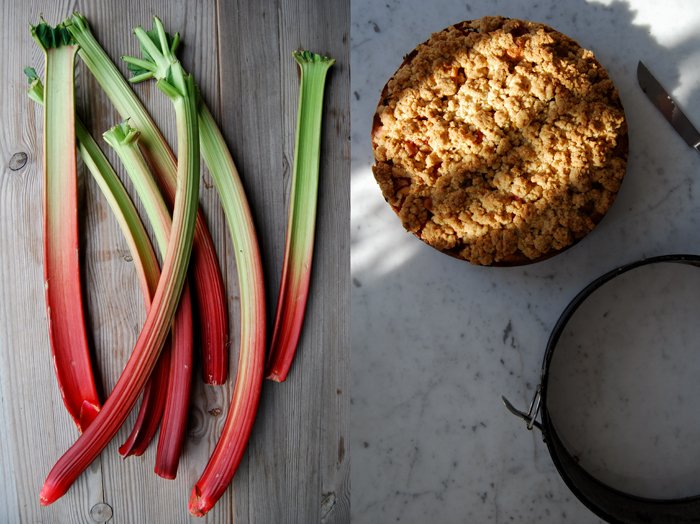
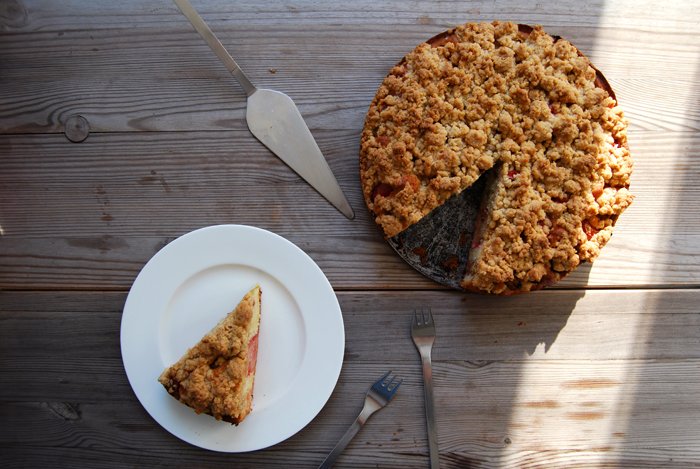
Rhubarb Crumble Cake, truly addictive!
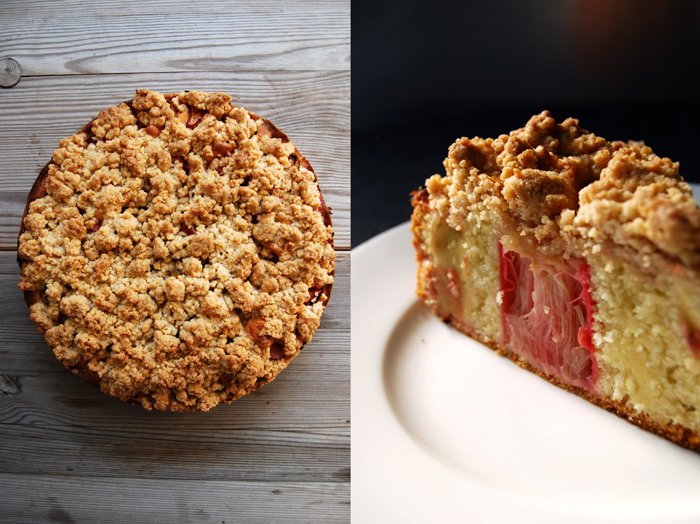
There are two of my recipes, classics, that I can't live without. I constantly adapt and change them according to the seasons and there isn't a month without them. I'm talking about my beloved quiche and my crumble cake, filled with seasonal fruit and topped with the most amazing crumbles, buttery and crunchy! In winter I filled it with apples, now it's time for rhubarb and there will be more to follow. I have no preference, I love all of them!
For this cake, I like to choose fruit with a strong texture, the dough rises around these moist pockets and stays juicy without becoming soggy. I use lots of cinnamon for the crumbles, one of my favourite spices for baking which refines the fruit's flavours perfectly. The rhubarb brings in a bit more sourness than the apples, it fits to the fresh feeling of this season. In the post about my apple crumble I've praised the cake's light and spongy base, the perfect composition of soft, juicy and crunchy and its dessert and teatime qualities. Now it's time to bake rhubarb crumble, but be prepared, this cake is truly addictive!
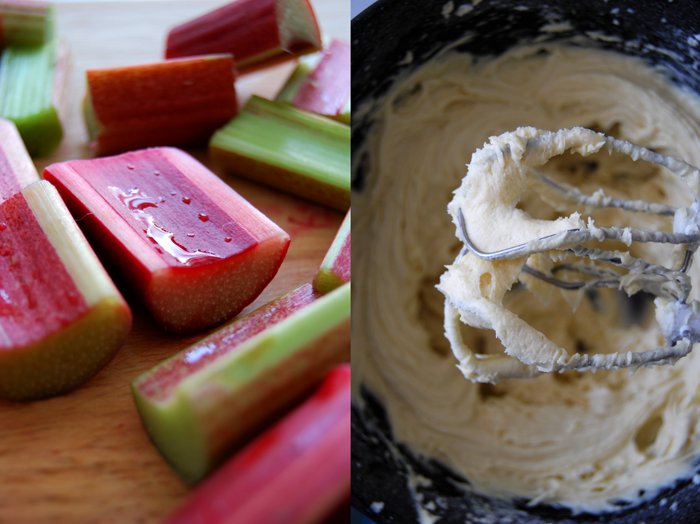
Rhubarb Crumble Cake
Prepare the dough for the base first, the rhubarb afterwards and the crumbles at the end.
For a 26cm /10″ springform pan you need
For the cake
butter 125g / 4.5 ounces
granulated sugar 125g / 4.5 ounces
a pinch of fresh vanilla
organic eggs 3
plain flour 250g / 9 ounces
baking powder 2 teaspoons
a pinch of salt
rhubarb, cut into 4cm / 1.5" pieces, 800g / 28 ounces
For the crumbles
plain flour 200g / 7 ounces (you might need some more if the crumbles are too sticky)
granulated sugar 125g / 4.5 ounces
a pinch of fresh vanilla
ground cinnamon 2 teaspoons
butter, melted, 125g / 4.5 ounces (plus more if the crumbles are too fine)
Set the oven to 180°C / 355°F.
For the cake base, beat the butter, sugar and vanilla till fluffy. Add the eggs, one at a time and continue mixing for a few minutes. Add the flour mixed with the baking powder and salt and continue mixing until well combined. Scrape the dough into a buttered springform pan and arrange the rhubarb vertically in circles pushing it into the dough.
The crumbles need good preparation as you have to make sure that the mixture is neither too moist nor too dry. Have some extra flour and melted butter close at hand so that you can add some immediately if necessary:
Combine the dry ingredients in a bowl. Pour the melted butter on top and mix quickly with the hooks of your mixer, stop as soon as it crumbles. If the crumbles are too moist and sticky add a bit more flour (1-2 tablespoons). If they are too fine and don’t form bigger crumbles add more melted butter. Spread quickly on top of the rhubarb. If you have bigger lumps of crumbles you may have to separate and spread them.
Bake in the oven for 55 minutes or until golden. Check with a skewer, it should come out clean, and let it cool.
You can serve the cake with sweet whipped cream or vanilla or cinnamon ice cream.


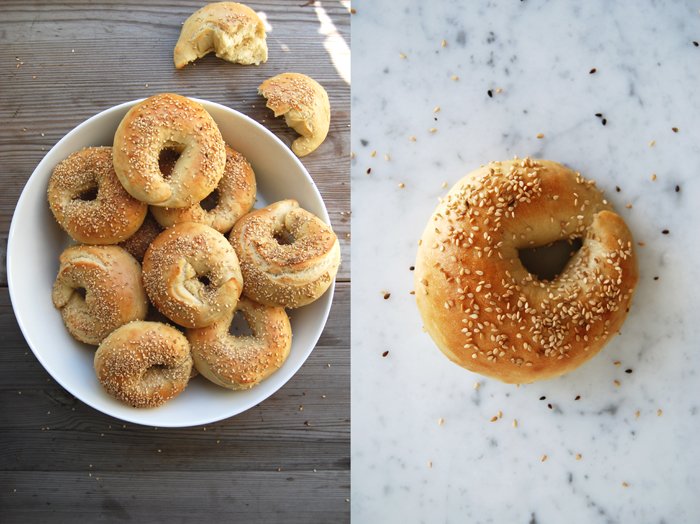
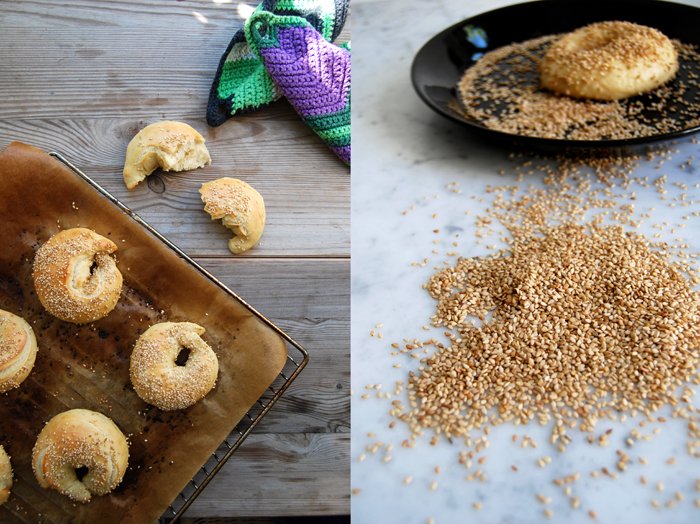
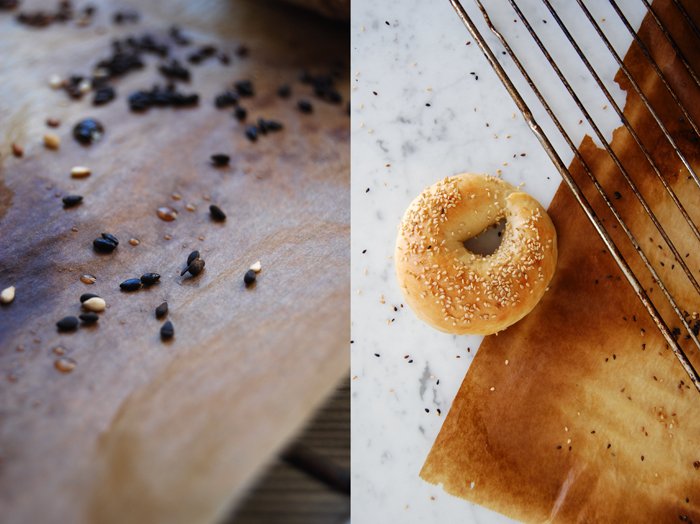
Sesame Seed Weekend Bagels

My Sandwich Wednesdays became a tradition shortly after I started eat in my kitchen more than 5 months ago. Usually I choose the bread according to the toppings when I share one of my sandwich recipes but sometimes it's the other way around. The first sandwich post on the 4th December started with a homemade bagel, a defrosted one as I like to bake them in big batches and fill my freezer with them. It's so convenient to have them on hand, I just have to warm them up in the hot oven for a few minutes. The crust becomes a little bit more crunchy but the inside stays soft and as soon as I cut the warm bagels in half the sweet smell of homemade bread fills the air in my kitchen. That's what happened on a cold day in early December, when I smelt the bagel I felt like butter fried leek, sweet tomatoes, hot red chili peppers and smooth cream cheese, the first eat in my kitchen sandwich was born!
Here's the recipe I promised to share! One batch gives me 12 well sized bagels. Most of the time I use organic white spelt flour (type 630) which I prefer to use for my baking in general, for sweet and savory. It's similar to wheat, the results don't differ in taste or texture but it's better for the body as it has much higher nutrition values. My extensive baking demands lots of flour therefore I prefer to go for good ingredients. Another nice side effect is that ever since I changed over to spelt flour a few years ago I lost 2 pounds! When I run out of spelt, I still use wheat without changing the recipes, also for the bagels and they look, feel and taste the same, delicious!
Sesame Seed Bagels
For 12 bagels you need
plain flour, wheat or white spelt type 630, 700g / 1.5 pounds
dry yeast 1 package (for 500g / 1 pound of flour)
water, lukewarm, 380ml / 13 ounces
granulated sugar 2 tablespoons
salt 1 1/2 scant tablespoons
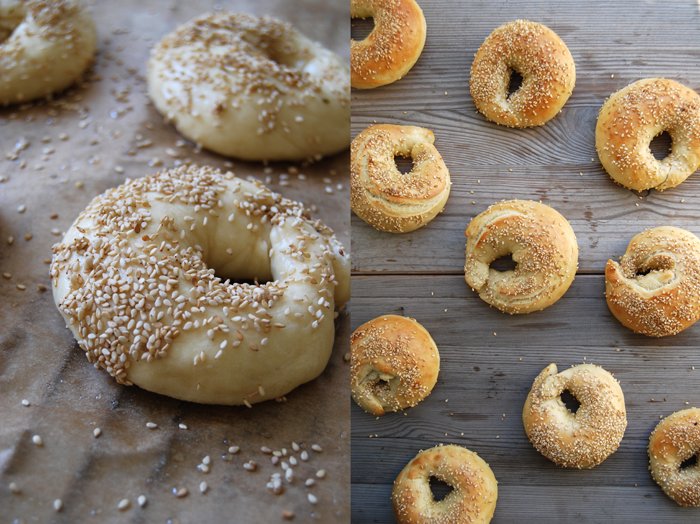
sesame seeds, for sprinkling
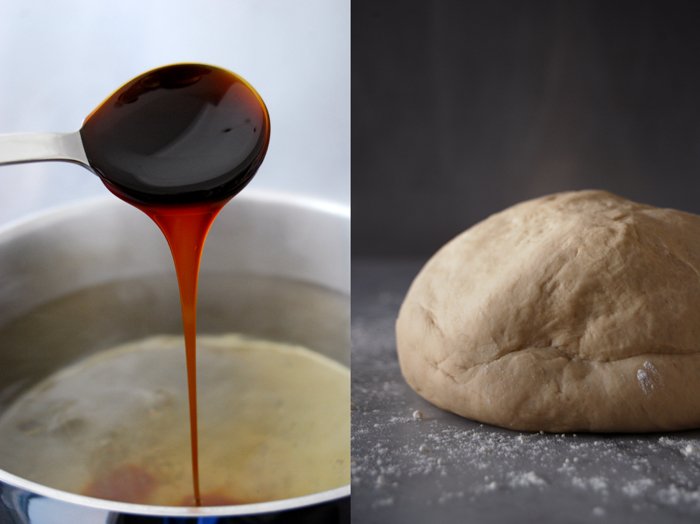
sugar cane syrup or molasses 1 heaping tablespoon, for poaching the bagels
In a large bowl, combine the flour with the yeast, sugar and salt, add the lukewarm water (you might not need all of it). Mix with your dough hooks for a few minutes. The dough shouldn’t be moist and sticky at all, more on the dry side. Continue kneading and punching with your hands until you have an elastic and soft dough ball. Grease the bowl lightly with vegetable oil and put the dough back in. Cover with a tea towel and let it rise in the warm oven (35°C / 95°F) for 60 minutes. This works really well but make sure that your oven is set to top/ bottom heat and not to fan.
Take the dough out, punch it down and knead for 1 minute. Divide the dough in half and each portion in 6 for 12 bagels. Roll each piece into a round ball between your hands and shape into a thick rope. Connect the ends to a ring, sealing and pinching well. Place on two baking sheets lined with parchment paper and greased with vegetable oil, cover with a tea towel and let the bagels rise for 30 minutes in a warm place.
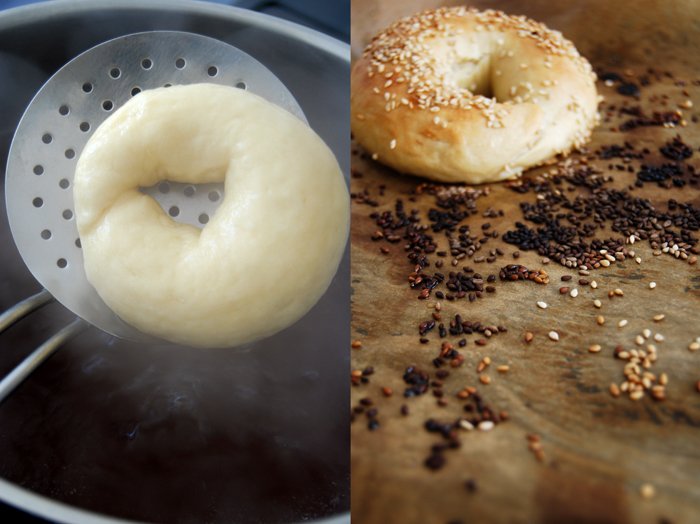
Set your oven to 260°C / 500°F top/ bottom heat. Fill a large pot with water and bring to a boil.
Add the syrup to the boiling water and poach the bagels for around 30 seconds on each side turning them with a spatula or a slotted ladle. I boil 3 bagels at a time, they should swim freely. Put them back on the baking sheets, sprinkle generously with sesame seeds and bake for 8 minutes until golden brown.


Pizza Bianca with Moroccan Lemons, Chèvre and Rosemary
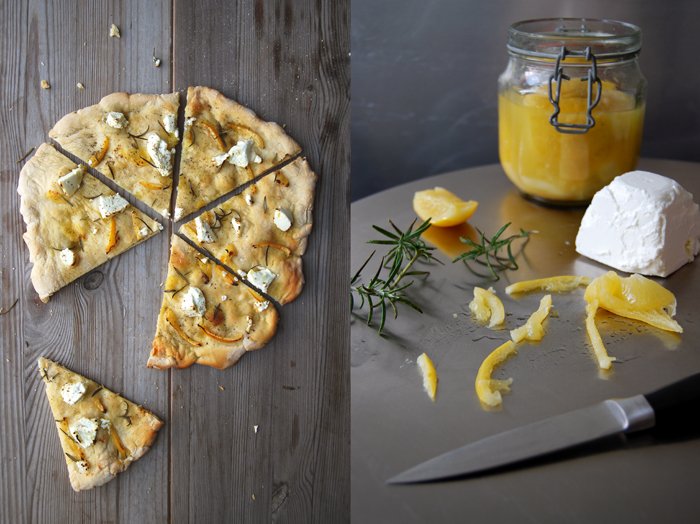
When I wrote about my Moroccan Preserved Lemons about a month ago, Kelly from My Soulfull Home got in touch. I met Kelly through a blog tour in February which she had organised. She asked me to join the tour together with 15 other bloggers, it was carnival and I shared my family's Berliner experience. A few weeks ago she told me about a delicious pizza bianca with lemons and rosemary which one of her friend's makes and she told me that I should give it a try as soon as my lemons were ready. Here they are, sour, soft and juicy!
When I had the first piece of my own preserved lemons in my mouth, I felt a bit excited! My aunt was with me in my kitchen, she was the one who inspired me to preserve lemons in the first place. The first bite was intense, a bit salty as I forgot to rinse the slice of lemon, too much excitement! When I let some water rinse off a bit of the saltiness (for 2-3 seconds), they were perfect! The preserving liquid, concentrated juices of all the lemons, tastes as good and is great for strong sauces and stews.
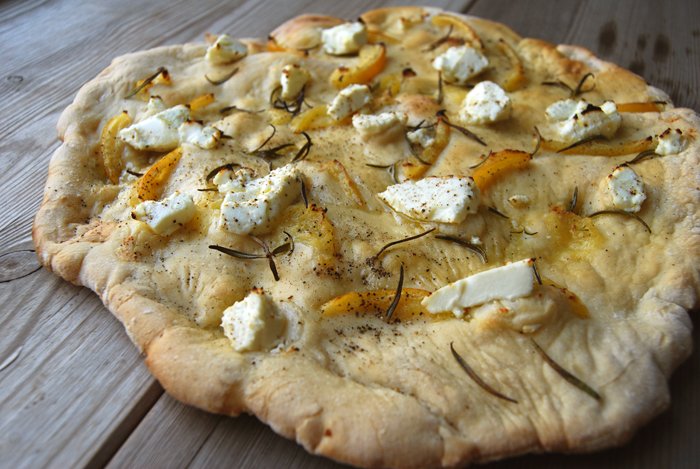
For my pizza bianca, I decided to add some chèvre to mix its smooth milkiness with the lemon's sourness and the woody rosemary. Ricotta would have worked too, but I wanted the strong aroma of this soft goat cheese. I sprinkled some olive oil on top which gave it a bit of a focaccia feeling, some sea salt and pepper and enjoyed this absolutely delicious summery snack. Thank you Kelly!
If you like pizza as much as I do, you can also try my Aubergine and Pecorino Pizza or my Spinach and Ricotta Pizza.
Pizza Bianca with Moroccan Lemons, Chevre and Rosemary
I always start to prepare the dough 2 hours before I bake it to give it enough time to rise. I bake my pizza on a hot baking sheet which has a similar effect to a pizza stone.
For 1 large pizza (size of 1 baking sheet) you need
For the topping
chèvre or ricotta, 200g / 7 ounces
preserved lemon, rinsed and thinly sliced, 1(you could also use lemon zest)
fresh rosemary, the needles of 5 sprigs
olive oil 4-6 tablespoons
salt and black pepper
For the dough
plain flour 350g / 12.5 ounces plus more for mixing
dry yeast 1 package (for 500g / 1 pound of flour)
water, lukewarm, 190ml
olive oil 3 tablespoons
salt 1 teaspoon
Combine the flour with the yeast and salt, add the lukewarm water (you might not need all of it) and olive oil. Mix with your dough hooks for a few minutes. The dough shouldn’t be moist and sticky at all, more on the dry side. Continue kneading and punching with your hands until you have an elastic dough ball, not too hard, not sticky. Put the dough back in the bowl, cover with a tea towel and let it rise in the warm oven (35°C / 95°F) for 40 minutes. This works really well but make sure that your oven is set to top/ bottom heat and not to fan.
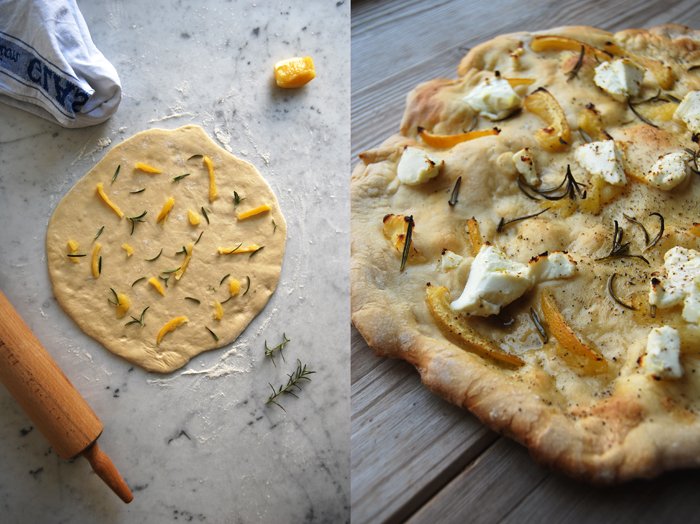
When the dough is well risen, roll it out on a very well floured working surface (this is very important or you'll have problems taking it off again). It should be a bit smaller than the size of your baking sheet. Cover with a tea towel and let it rise for another 10-15 minutes.
The pizza
Set your oven to 260°C / 500°F. My oven has a special pizza setting but you can use top / bottom heat as well. Put the baking sheet on the bottom of your oven to heat it (for around 10 minutes).
Take the hot baking sheet out of the oven, turn it around and place it carefully on two stable wooden boards or mats as it will be very hot. Place your risen dough carefully but quickly (best done by two people) on the baking sheet, push it gently into place if necessary. Sprinkle with the slices of lemon, rosemary and olive oil and dollop the chèvre with a tea spoon on top.
Put the baking sheet back into the oven, on the bottom again, and bake for a few minutes until the pizza is golden, season with salt and pepper.


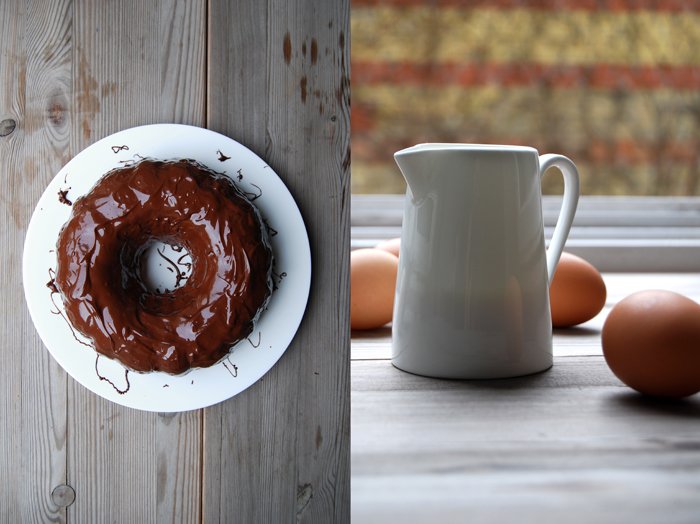
My favourite Chocolate Marble Cake
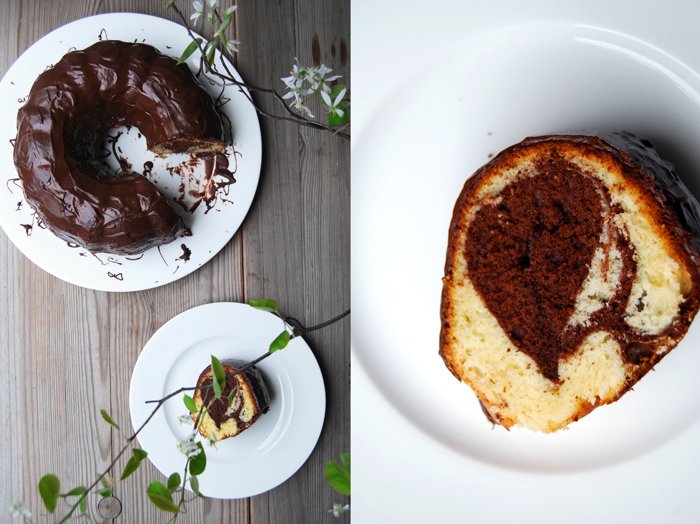
My favourite marble cake needs 6 eggs to turn into a bundt cake so fluffy and juicy, light and enjoyable that I just can't stop eating it. Most of the time I just sprinkle it with icing sugar but some days ask for more. When I'm in a chocolaty mood I cover it in a crunchy layer of bittersweet chocolate.
This cake is so simple but whenever I hold a slice of it in my hand and take the first bite I ask myself why I don't bake it more often. It's a typical childhood cake, a birthday party classic which had to be on every coffee table. It's also the cake my mother used to bake for my own special day. In the morning, I used to find it on my birthday table together with all my presents and it always had my name and age written on it, with colourful smarties pushed into the glossy chocolate. Two year's ago I baked it for the first time for our godchild's first birthday, with smarties of course to continue the tradition.

Chocolate Marble Cake
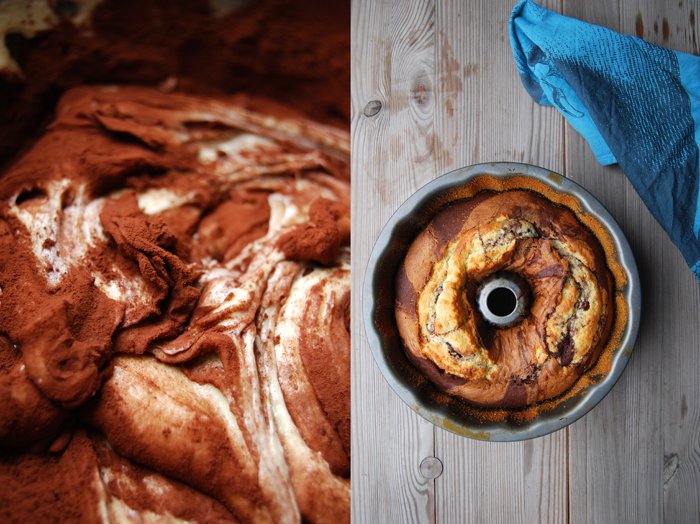
For a 23cm / 9″ bundt pan you need
butter 200g / 7 ounces plus 1 tablespoon for the chocolate glaze
granulated sugar 250g / 9 ounces
a pinch of fresh vanilla
organic eggs, divided, 6
a pinch of salt
milk 100ml
plain flour, sieved, 300g / 10.5 ounces
baking powder 3 teaspoons
cocoa powder 30g /1 ounce
bittersweet chocolate 200g / 7 ounces, for the topping
dry breadcrumbs to sprinkle the pan
Set the oven to 180°C / 355°F (fan-assisted oven). Butter a bundt pan and sprinkle with bread crumbs.
Whisk the egg whites with the salt and 1 tablespoon of the sugar till stiff.
Combine the flour and baking powder in another bowl.
In a large bowl, mix the butter, sugar and vanilla till fluffy. Add the egg yolks and continue mixing till thick, creamy and light yellow. Add the milk and mix until well. Fold the egg whites and the flour with a wooden spoon gently into the butter and egg mixture, alternating, 1/3 at a time, combining well in between.
Scrape half of the dough into the bundt pan and stir the cocoa powder into the remaining batter. Dollop the dark batter on top of the light one and swirl with a small fork through the 2 batters, carefully, from top to bottom pulling slowly all the way around the pan. Don't over mix the different batters to keep the marble pattern.
Bake for 40 minutes or until golden and spongy. Check with a skewer, it should come out clean. Let the cake cool for 2-3 minutes before you turn it around onto a wire rack to cool completely.
Melt the chocolate and mix in 1 tablespoon of butter, let it cool for 2 minutes before you drizzle it over the cake. Spread it or leave it sprinkly, as you like.

Traditional Maltese Easter Figolli

There are three cultures which have a big influence on my life, the German which I grew up with and the Maltese and the American through my boyfriend and his family. Our life is a daily mix of different traditions, habits, mentalities and languages, this is a gift to me but it also brings a lot of potential to create friction. The German and the Maltese background especially couldn't be more different. My Northern European mind, focussing on logic and order, black and white thinking, clashes sometimes (often) with the Mediterranean mentality, its relaxed trust in life, its chilled out pace, its emotional and sometimes dramatic approach to conflicts of any kind. It can be frustrating, for both sides, but it has made our lives so much richer! It's a challenge, testing out how much one is willing to accept that we are all different. I want to stay open for this experience which involves so much love from and for so many people and on top it is so much fun and entertainment and there's plenty of that! When I'm together with my Maltese family, after all theses years we're still confronted with cultural misunderstandings that bring us to tears as we have to laugh so hard. When my German seriousness clashes with Mediterranean humour, the potential for comic situations is practically never ending!
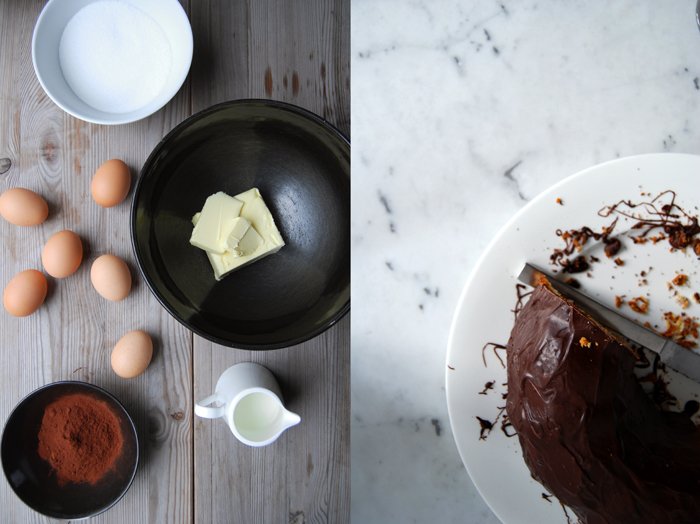
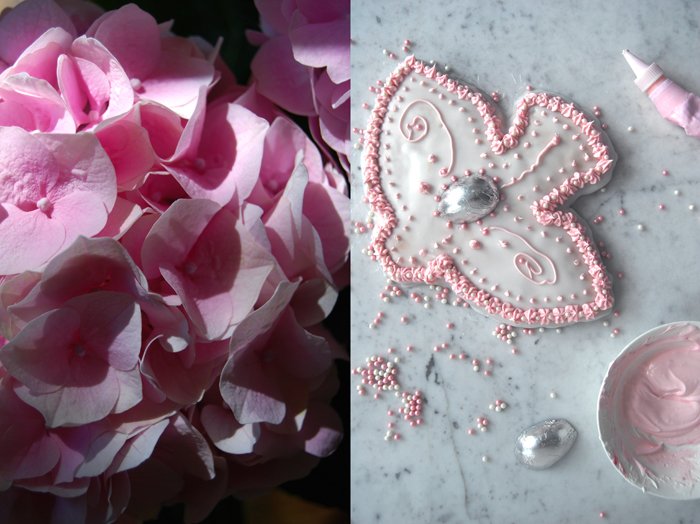
The cakes and pictures in my posts from yesterday and today couldn't reflect the two cultures and differences in a better way. Yesterday's eggnog sponge cake with whipped cream, its clean and minimal look, the concentrated focus on the pure taste of German eggnog meets today's Maltese figolla which is opulent and dramatic, lusciously and colourfully decorated. It's stuffed with various exotic flavours like orange, cinnamon and almonds. Two cultures packed in two cakes!

Figolli is the plural for figolla coming from the Latin word figura, it's a famous traditional treat eaten on Easter Sunday in Malta. To me, it's a bit like a big cookieish cake although every Maltese would disagree with that. Originally it was made in the shape of a woman, a man, a fish or a basket, ancient symbols of fertility like the chocolate egg which is always placed on top of each figolla. Without the egg (which is actually cut in half) it's not an original figolla! Times changed and more shapes became popular such as lambs, hearts, stars and a few other Easter related figures. I was given a fish and a bird by my mother in law and to be honest I was happy about her choice as the dough extends quite a bit while it's baking. I have my doubts that, if she had given me a lamb, there would have been any association left with this animal.
The decoration of a figolla is very important and involves lots of colourful sugar coating and icing. The pastry itself is made of a short crust like dough, sandwiched and filled with almond paste. There are lots of different recipes, my Maltese family gave me about six to prepare me for this experience. I was very thankful for this support but in the end I took a bit of each and added and changed after my own taste. The almond paste for example had to be exchanged with a hazelnut paste with a hint of almonds enhanced with orange zest and cinnamon. When it came to decorating the figolla I was happy to have my assisting sister in law Julia at my side to give me stylistic instructions. That's what she does when she makes figolli in Malta together with one of her aunts.
When I wrote about my rhubarb meringue tartlets last week I had mentioned that I'm not the best decorator when it comes to pastry. After we managed to put around 1kg (2 pounds) of icing sugar in both the lemony sugar glaze and in the royal icing which is made with egg whites and used for the icing decoration, we were equipped with two thick pastes and food colouring, we were ready to start! I was prepared that decorating a figolla would be very difficult, maybe stressful but I was mistaken. It was fun and I can admit that we were quite impressed with the results. I was an inexperienced German beginner after all but thanks to our North-South European cooperation we were rewarded with two beautiful and delicious figolli!
I wish you a Happy Easter!
Traditional Maltese Figolli
You need figolli cutters with a high rim.
For two big figolli (around 30cm x 20cm / 12" x 8") you need
For the dough
plain flour 400g / 14 ounces
granulated sugar 200g / 7 ounces
a pinch of salt
zest of 1 lemon
a pinch of fresh vanilla
butter 200g / 7 ounces
organic eggs 2
Combine the flour with the sugar, lemon zest, vanilla and salt. Cut the butter with a knife into the flour until there are just little pieces of butter left. Continue with your fingers and work the butter into the flour until combined (there shouldn’t be any lumps of butter left). Add the eggs and continue mixing with the hooks of your mixer until combined, the dough will be a bit sticky and soft. Form a flat ball, wrap in cling film and put in the fridge for at least 1 hour.
For the hazelnut/ almond paste
hazelnuts, ground 90g / 3 ounces
almonds, ground 60g / 2 ounces (you can also use just 150g of almonds or just hazelnuts if you prefer)
granulated sugar 100g / 3.5 ounces
ground cinnamon 1/2 teaspoon
zest of 1 orange
juice of 1/2 orange
organic egg whites 2
Combine the dry ingredients and add the orange juice. In a separate bowl, mix the egg whites until stiff, add the hazelnut-almond mixture and mix to a thick paste.
For the figolli
Set the oven to 180°C/ 355°F (fan-assisted oven) and line 2 baking sheets with parchment paper.
Divide the dough into 4 pieces, roll each one out between cling film (about 3/4 cm / 1/3" thick) and cut out 2 equal figures for each figolla. Place one pastry figure on the baking sheet (this works best when you put the parchment paper on top of a rolled out figure, flip it and put it back on the baking sheet). Spread half the hazelnut paste on top and cover gently with the corresponding figure. Continue with the second figolla and bake for 25 minutes in the oven or until golden brown. Let them cool completely.
For the decoration
For the sugar glaze
icing sugar, sieved, around 400g / 14 ounces
lemon juice 2 tablespoons
water 3 tablespoons, you might need less
food colouring
Mix the icing sugar with the lemon juice and add the water, one tablespoon at a time until you have a thick and slightly runny paste (you may not need all of the water), if it's too liquid it won't stay on the figolla. Add food colouring after your own taste.
For the royal icing
organic egg whites 3
icing sugar, sieved about 600 g / 21 ounces
food colouring
Lightly whisk the egg whites, add the icing sugar a little at a time and continue beating. Stop adding more sugar when you have a very thick and stiff paste. To check the texture, fill a piping bag and press out a little drop, if it stays in shape, the icing is done. Add food colouring after your own taste.
Spread the sugar glaze on top of the figolla and let it dry for a couple minutes. When the glaze is hard, fill a piping bag and decorate with the royal icing. By experience I can say, be brave and it will look much better!


Eggnog Sponge Cake with Whipped Cream

Eggnog has a bit of an old fashioned reputation but let someone try a sip, even rather doubtful gourmets, and you will see a hint of appreciation on their faces.
It used to be a popular drink in bars, both of my grandmothers used to love it and even made their own in their kitchens. This was once a true party classic, in the 1950s and 60s! Today, people pour it over their ice cream or cake like my mother who always keeps a little bottle of it in her fridge for this reason. Some make it at home for Christmas but it feels like it lost its popularity. I find this unfortunate, I have quite a soft spot for it - eggnog is creamy, smooth, sweet and eggy. I like to drink it sometimes, as a digestif, preferably out of tiny old fashioned glasses with a short stem - 50s style to make the experience complete.
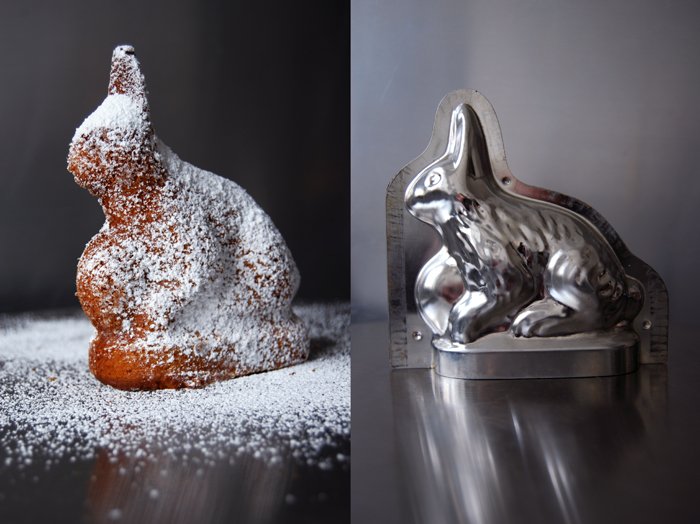
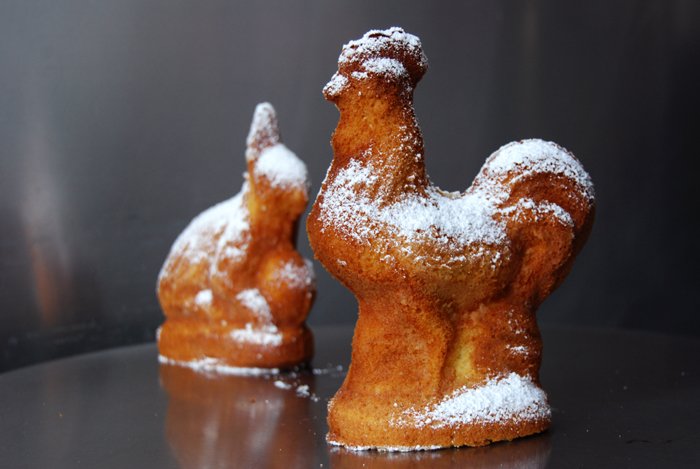
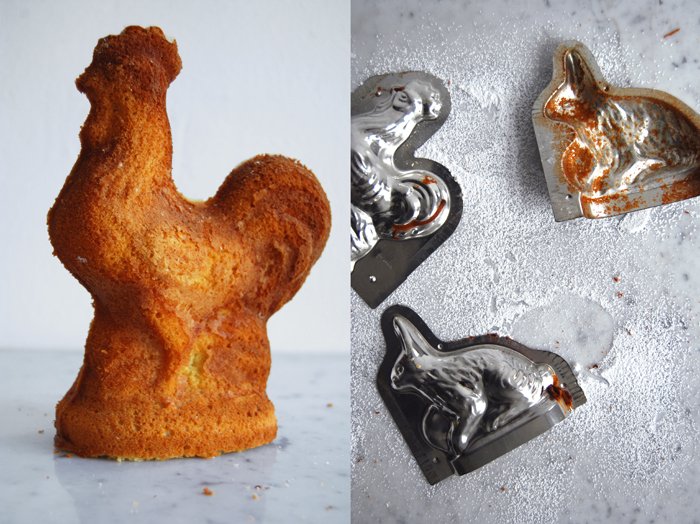
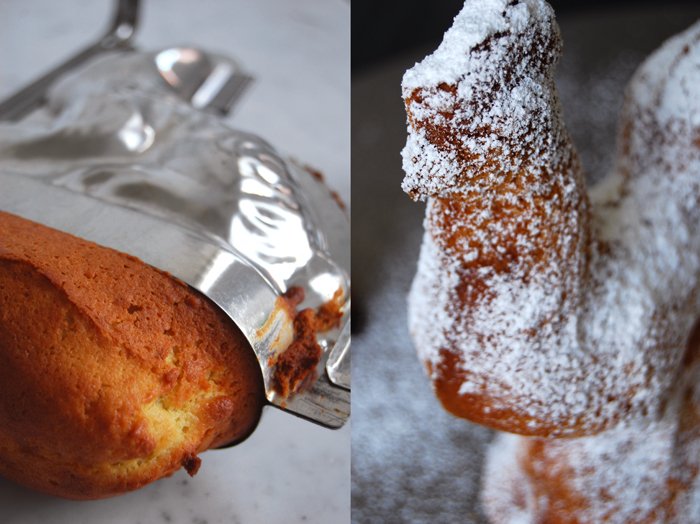
I believe that something that was so passionately enjoyed a few decades ago - and that tastes so good - is reason enough to be included in my today’s kitchen activities. I'm up for an easy Easter cake, a spongy cake made with lots of eggnog. A few days ago my aunt Ursula gave me two 3d-cake pans and wrote down one of her recipes for a juicy cake laced with the yellow liqueur that her own mother used to like so much. I doubled the recipe and baked it in lovely rabbit and chicken molds (but you can use a 20cm / 8″ cake pan).
I prepared some whipped cream with even more eggnog while the cakes were in the oven and noticed at one point that the cakes started to overflow. Luckily, my miscalculation didn't do the final cake any harm. It rose and dropped off the molds like a volcano and continued to bake on the tray but turned out as spongy and juicy as the cake in the molds.
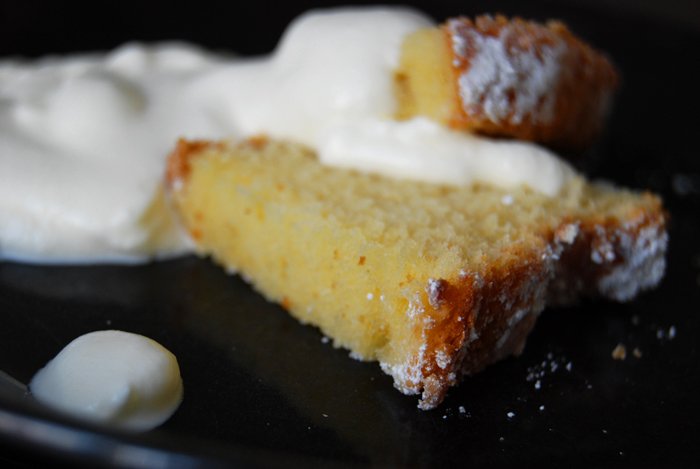
This is a quick cake. After only 30 minutes in the oven, I was rewarded with a delicious eggnog-y teatime treat, best dipped into eggnog whipped cream and enjoyed with an extra shot of this special liqueur from the past, in an old fashioned glass of course. Cheers to our grandmothers!
Eggnog Sponge Cake with Whipped Cream
For a 20cm / 8″ cake pan you need
organic eggs 4
granulated sugar 140g / 3/4 cup
a pinch of fresh vanilla (scraped out of a vanilla pod)
vegetable oil (I use sunflower oil) 140ml / 2/3 cup
eggnog 140ml / 2/3 cup plus one shot for the whipped cream
plain flour 220g / 1 2/3 cups
baking powder 2 teaspoons
a pinch of salt
heavy cream 200ml / 3/4 cup plus 1 tablespoon
Set the oven to 170°C / 340°F (preferably convection setting) and butter the cake pan.
Beat the eggs together with the sugar and vanilla until fluffy. Slowly, add the oil and and eggnog and continue mixing. Combine the flour, salt and baking powder and mix quickly into the liquid mixture. Scrape the batter into the prepared pan and bake for 40 minutes or until golden brown. Check with a skewer, it should come out clean. In the 2 figure molds, the cake needed just 30 minutes. Let the cake cool for 5 minutes.
Whip the cream, stir in a shot of eggnog and serve with the cake.


Bean and Ramp Quiche

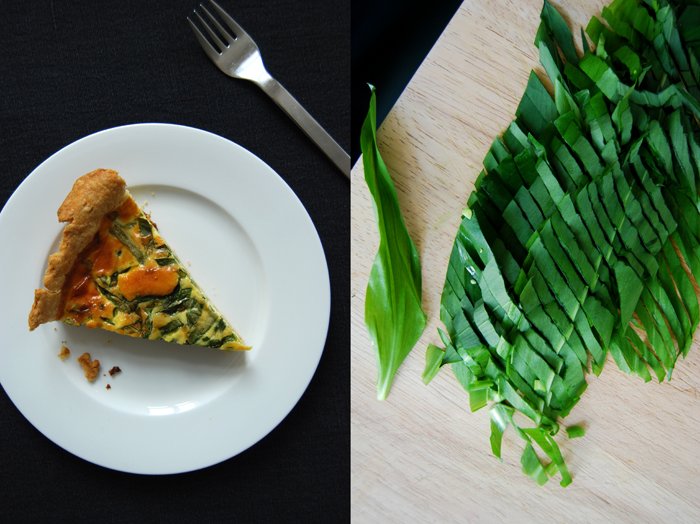
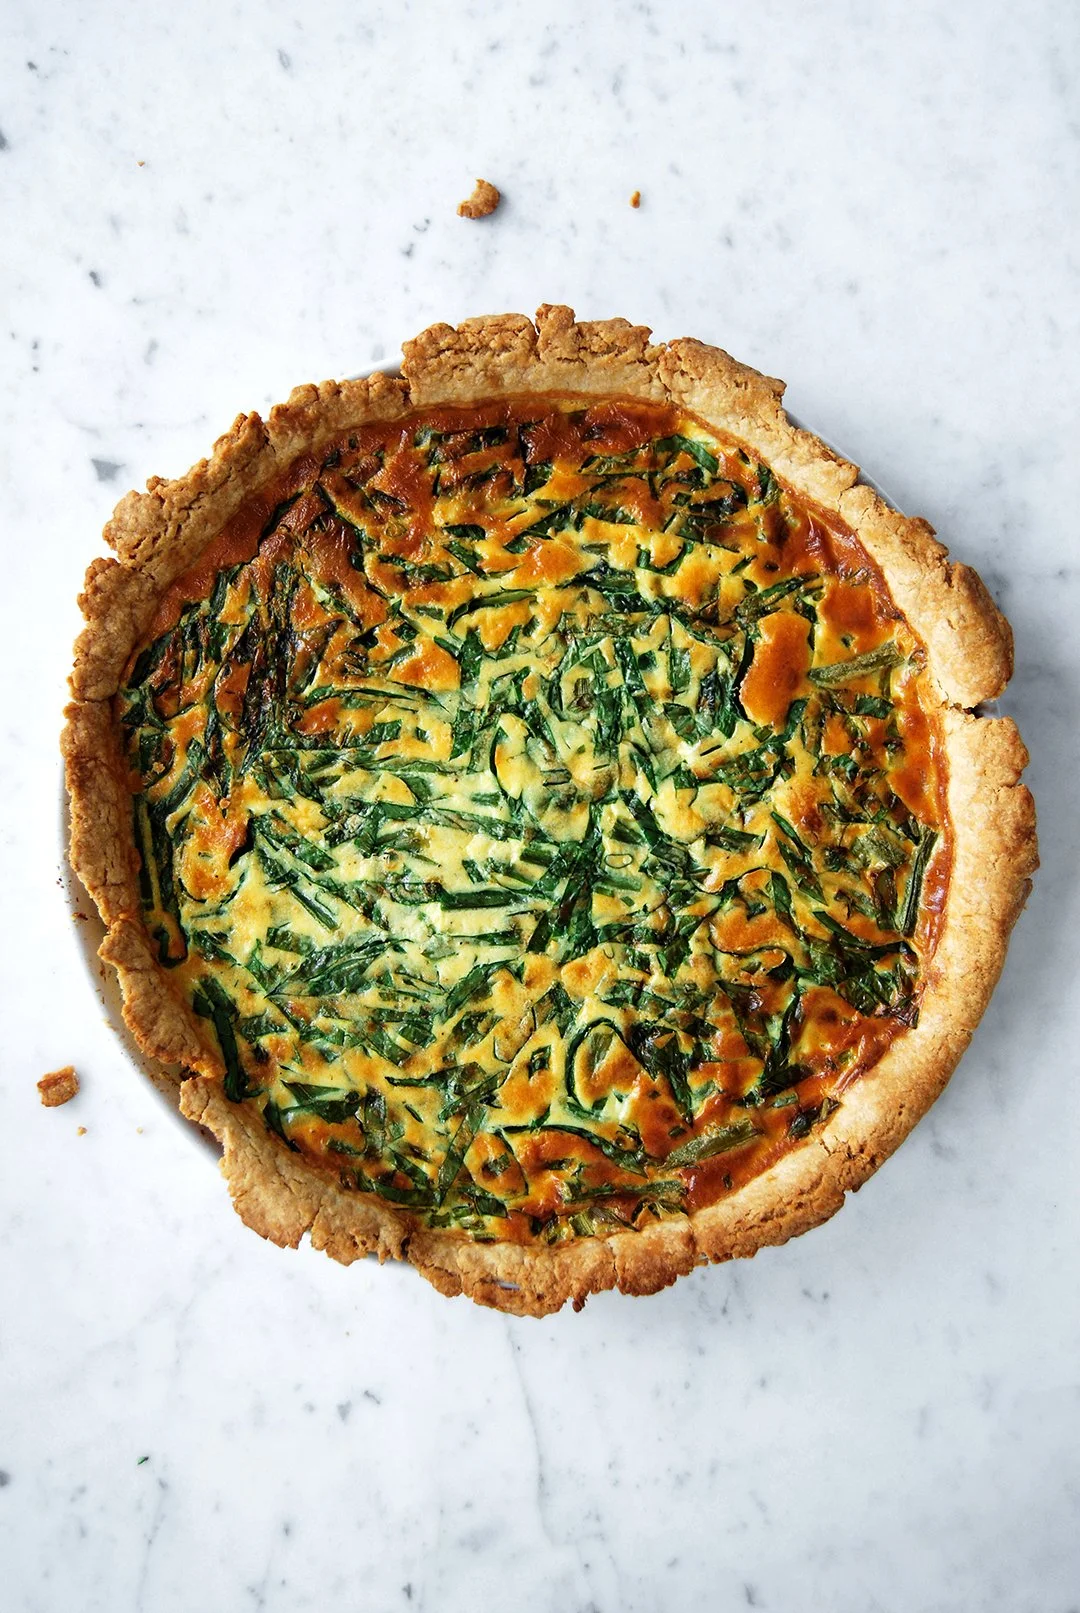
Quiche is one of those dishes which makes me feel good, always, no matter what my day has been like. As soon as I see a quiche in my oven and smell its buttery aroma spread through the kitchen I have to smile. Maybe it's the butter, or the eggs or the fact that I can look forward to another tart on my plate! That's why I've already written about a couple of my quiche recipes, my classic quiche with leek, tomatoes and thyme, an Italian-style tart with fennel and parmesan and here is another one, packed with greens. I fill this savory tart with beans, ramp (wild garlic) and spring onions and it has a deliciously light spring feeling!
I've praised its short crust at length which is so crisp and buttery, to me it's just perfect. My quiches always have a thin layer of an eggy and creamy mixture to keep it light and to leave space for the vegetable filling. Some recipes focus on the creamy filling which can make a quiche too rich and heavy, at least for my taste. I want to be able to eat a piece of quiche with my fingers, a tart for a picnic!

Bean and Ramp Quiche
For one quiche you need a round (27cm / 10.5″) or oval baking dish or tart pan.
For the short crust base
flour 250g / 8.5 ounces (I use spelt flour type 630 but you can use any other plain flour)
butter, cold 125g / 4.5 ounces
organic egg 1
salt 1 teaspoon
Combine the flour with the salt. Cut the butter with a knife into the flour until there are just little pieces of butter left. Continue with your fingers and work the butter into the flour until combined (there shouldn’t be any lumps of butter left). Add the egg and continue mixing with the hooks of your mixer until you have a crumbly mixture. Form a disc, wrap in cling film and put in the freezer for 10 minutes.
For the filling
green beans 200g / 7 ounces
ramp (wild garlic), just the leaves, cut into slices, 30g / 1 ounce
spring onion, cut into slices, 1/2
organic eggs 3
heavy cream 125 ml
crème fraiche or sour cream 125ml
salt 1 teaspoon
ground black pepper
nutmeg, freshly grated, a generous amount
The quiche
Set the oven to 210°C / 410°F top/ bottom heat.
Blanche the beans in plenty of salted water for a couple minutes until al dente.
Mix the eggs with the heavy cream, crème fraiche, salt, pepper and nutmeg.
Roll out the dough between cling film and line your baking dish with the flat pastry. Prick it with a fork and blind-bake in the hot oven for 10 minutes. Take your baking dish out of the oven and set the temperature down to 180°C / 355°F.
Spread the beans, ramp and spring onions on top of the pre-baked pastry base and pour the liquid mixture over it. Put the quiche on a baking sheet in the oven and bake for about 45 minutes or until golden, the top should be firm. Let it cool for 10 minutes.


Rhubarb Meringue Tartlets
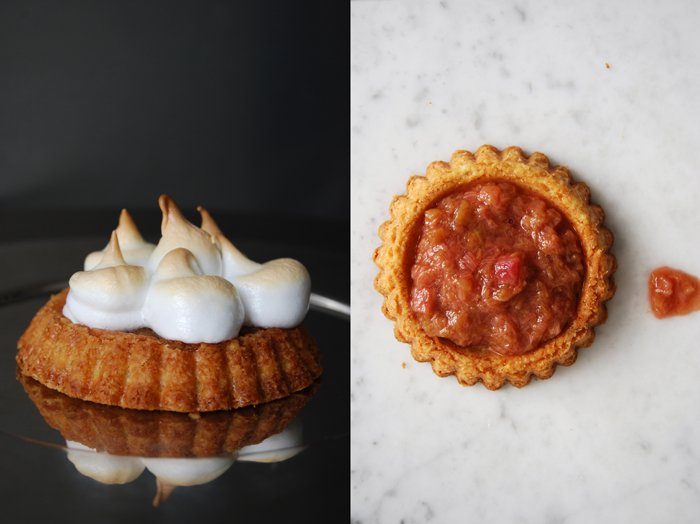
My long loved rhubarb crumble cake has been my favourite rhubarb cake so far, but these little meringue tartlets caused a change on my list. I can't say that I prefer them over my buttery cinnamon crumble (I made the apple version a couple months ago, the recipe is here) but they are definitely just as good!
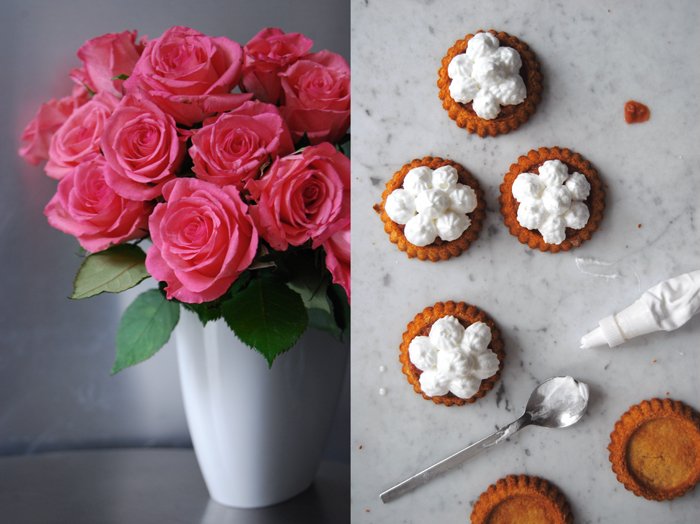
Until I started taking the ingredients out, I wasn't even sure about the recipe. I wanted a crumbly short crust, strong enough to carry the juicy rhubarb compote and not as flaky as the one I make for my Tarte Tatin. I thought I would give it a try but expected that I would have to refine the recipe over the next few weeks before I would be rewarded with a satisfying result. I was wrong! The pastry was exactly what I wanted, buttery, crumbly with a strong structure, neither too fragile nor to compact. When the tartlets had cooled off, I topped them with a tablespoon of my thick rhubarb compote and some fluffy meringue. As I'm not very good at decorating cakes, I tried to keep them simple. Usually I try to avoid piping bags as they make me nervous but here I made an exception, I wanted them pretty! The result was worth it, a bit sweet, a bit sour, buttery but still light, and all of this in a cute little rhubarb meringue tartlet!
Rhubarb Meringue Tartlets
When the tartlets are finished and baked with the meringue, you should serve them within the next 15 minutes as that's when they are at their best (I had one the next day and it was still delicious but a bit softer). If you want to prepare them for guests, you can bake the tartlets and cook the compote beforehand (both should be cold either way). Then you just need to beat the egg whites, assemble the tartlets and bake them for 3 minutes in the oven.
You will need round 10cm / 4" tartlet pans.
For 10 tartlets you need
For the short crust
plain flour 250g / 9 ounces
granulated sugar 80g / 3 ounces
a pinch of salt
a pinch of vanilla
butter, cold, 160g / 5.5 ounces
organic egg yolks 2
Combine the flour with the salt, vanilla and sugar. Cut the butter with a knife into the flour until there are just little pieces of butter left. Continue with your fingers and work the butter into the flour until combined (there shouldn’t be any lumps of butter left). Add the egg yolks and continue mixing with the hooks of your mixer until you have a crumbly mixture. Form a thick disc, wrap in cling film and put in the freezer for 10 minutes.
Set your oven to 200°C / 390°F top / bottom heat. Butter the tartlet pans and dust with flour.
Roll out the dough about 3mm thick between cling film and cut out 10 12cm / 5" circles. Line your tartlet pans with the pastry and prick with a fork. Blind-bake in the hot oven for 9 minutes or until golden. Take them out, let them cool for a couple minutes before you flip them over and let the tartlets cool off completely.
For the compote
rhubarb, sliced thinly, 400g / 14 ounces
granulated sugar 3 tablespoons
ground cinnamon 1/4 teaspoon
water 2 tablespoons
In a sauce pan, heat all the ingredients for the compote on medium temperature, keep the lid closed. Cook for 10 minutes or until the rhubarb has become a thick compote and let it cool completely.
For the meringue
organic egg whites 4
granulated sugar 120g / 4.5 ounces
a pinch of salt
Set the oven to 220°C / 430°F top / bottom heat.
Beat the egg whites with the salt for 10 - 20 seconds until they start to stiffen. Add the sugar gradually and continue beating until stiff and glossy.
Put a tablespoon of the rhubarb compote on top of the tartlet, spread evenly. Fill the meringue mixture in a piping bag and decorate generously. Bake them on a baking sheet for 2-3 minutes until the tops of the meringue become golden. Let them cool for 1 minute, put them on plates with a spatula and serve immediately.