ISCHIA / ISOLA VERDE
Buttery Blue Cheese Crackers

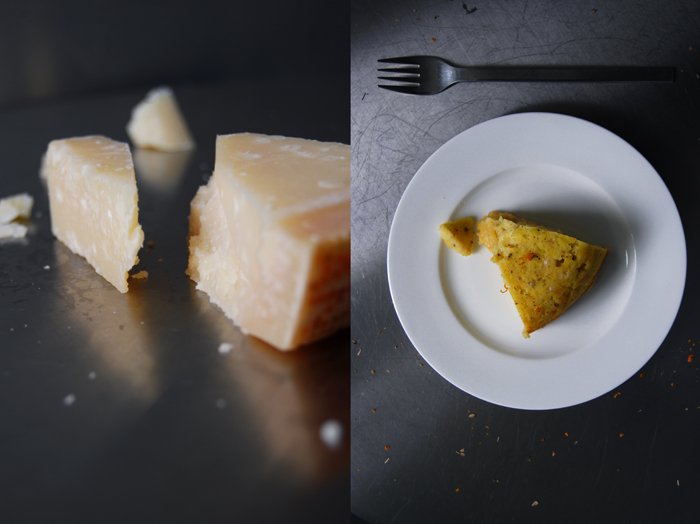
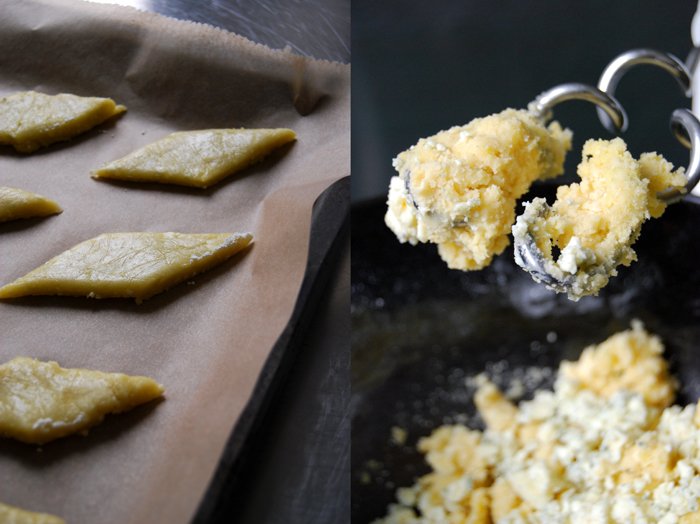
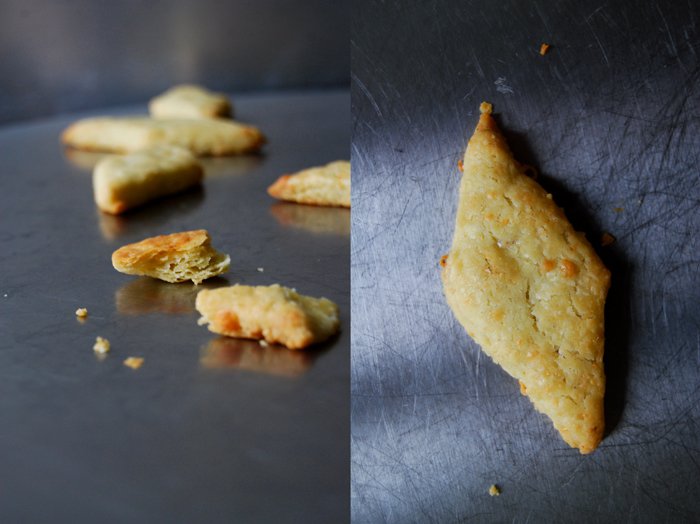
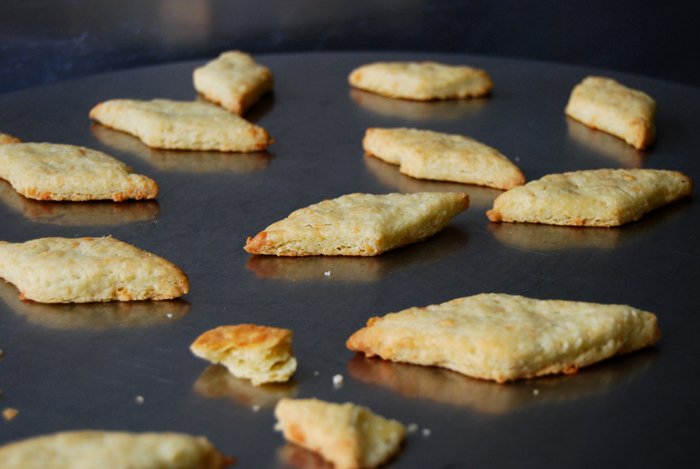
Buttery, flaky little bites of blue cheese! These crackers are the perfect savory snack, too good actually and a bit addictive but that's often the case when butter and cheese are combined in a recipe. I just made a few more than 20 crackers, that was a mistake that I regret, I should have doubled the amount!
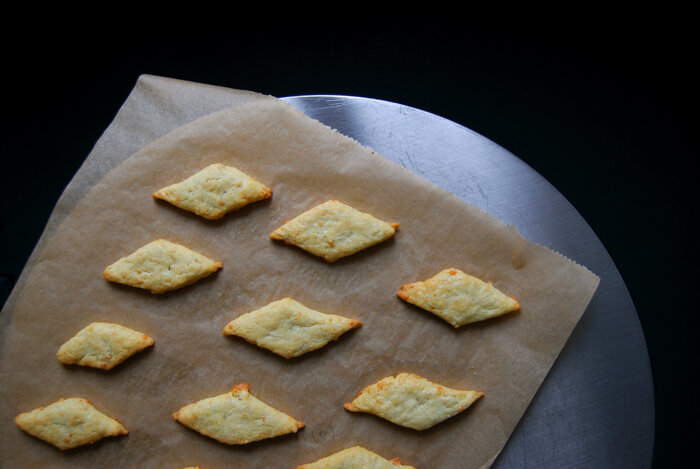
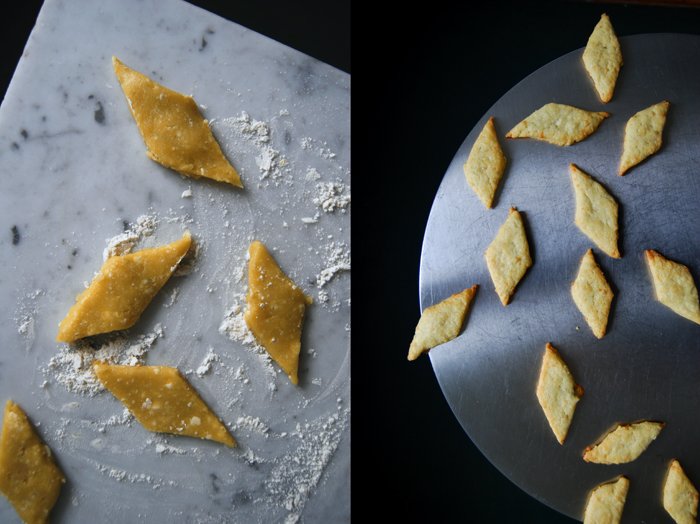
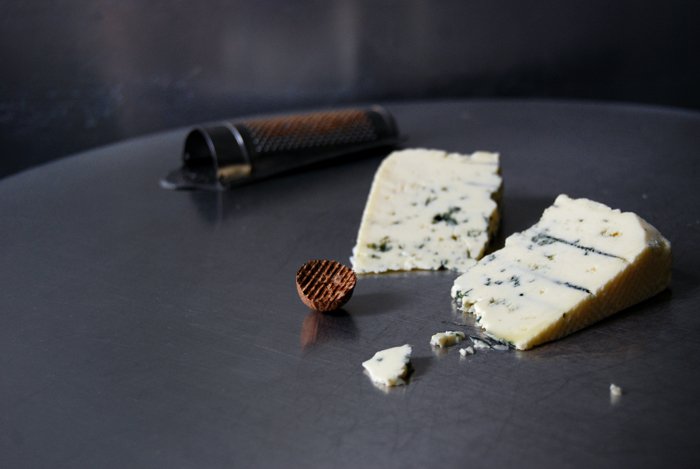
For the right cracker texture, you need a crumbly blue cheese, mine was a Bavarian strong in taste and not creamy, more on the dry side. Stilton would be perfect as well, or Roquefort, but I wouldn't use Gorgonzola. The dough is made like a simple short crust refined with nutmeg and cheese mixed in at the end. I kept it in the freezer for 15 minutes to make it workable and less sticky. It's a little fiddly but if you roll out the dough between cling film and always use a floured knife you will have the diamond shaped crackers ready on your tray in less than half an hour.

Blue Cheese Crackers
For 22 crackers you need
plain flour 150g / 5.5 ounces
salt 1/4 teaspoon
a pinch of freshly grated nutmeg
cold butter 120g / 4.5 ounces
organic egg yolk 1
crumbly blue cheese (like Stilton), crumbled, 100g / 3.5 ounces
Set the oven to 200°C / 390°F (fan assisted oven). Line a baking sheet with parchment paper.
Combine the dry ingredients. Cut the butter with a knife into the flour mixture until there are just little pieces of butter left. Continue with your fingers and rub the butter into the flour until combined. Add the egg yolk and mix with the hooks of your mixer for 1-2 minutes. Add the cheese and continue mixing until you have a crumbly mixture. Form a thick disc, wrap in cling film and put in the freezer for 15 minutes.
Roll out the dough between cling film (about 1/2cm / 1/4" thick). With a floured knife, cut square or diamond shaped crackers, about 4 x 4cm / 1 1/2 x 1 1/2". Lift the dough gently with a knife (always dip it in flour when it becomes too sticky) and put the crackers on the baking sheet. Bake for 11 minutes or until golden and cooked through.

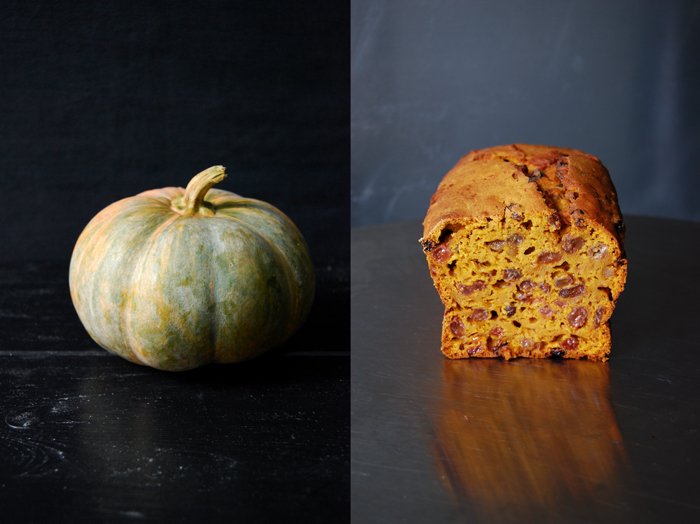
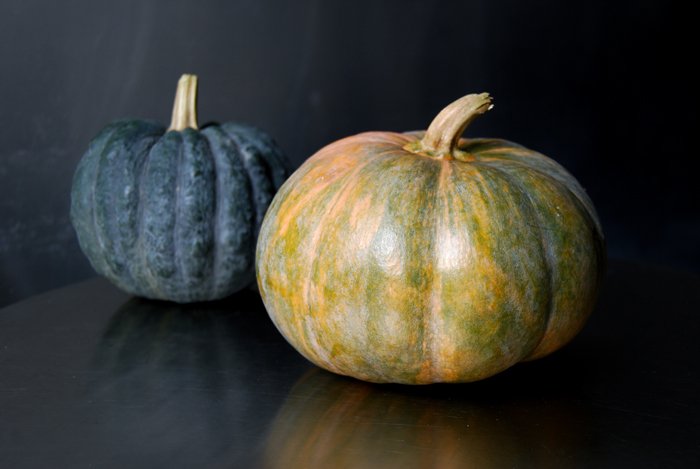
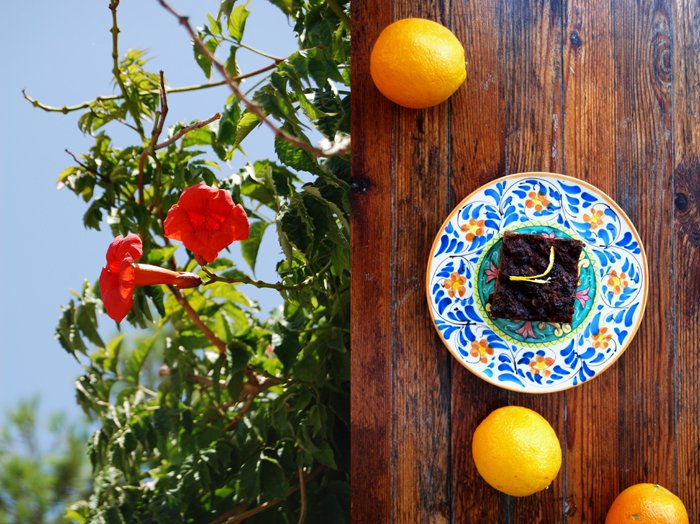
Pumpkin and Ginger Brack - an Irish Tea Cake
When we moved to England a few years ago to live in Whitby in North Yorkshire, it didn't take me too long to fall in love with the locals, the food, the little harbour and its long pier right next to the endless beach. It's a dreamy village, cut off the world - I have a weak spot for these places! I felt great from day one and when I discovered the famous local bakery (it must have been the day after my arrival) with its beautiful name, Botham's written in big letters over the shop on Skinner street I found my second home! You can send me to any village or town in the world and I will find the best bakery or confectionery within 10 minutes, I find my way intuitively and it has never let me down. Through the eyes of a bakery you learn so much about a place and its people. The bread, cookies and cakes, the local delicacies, the whole presentation but also the service tells you many secrets and gives you an insight into a new world. That's one of the many reasons why it's so important to keep up this tradition and support those small local businesses!
At Botham's, I discovered thin Shah tea biscuits, eccles cakes, English muffins, Sally Lunn loaves, millionaire's shortbread, flapjacks, Maids of Honour and fruit breads. I tried so many different kinds of loaves of this famous English tea time cake, that I lost track at one point. I love the simplicity of this sweet and cakey bread paired with the richness of dried fruits soaked in tea mixed with ginger, spices, citrus zest or nuts. Botham's Stem Ginger Brack was my favourite, an Irish fruit cake made without any fat but with lots of raisins, sultanas, stem ginger and orange zest. It's so juicy and it tastes divine with butter spread on top (the fat had to come in at one point!).
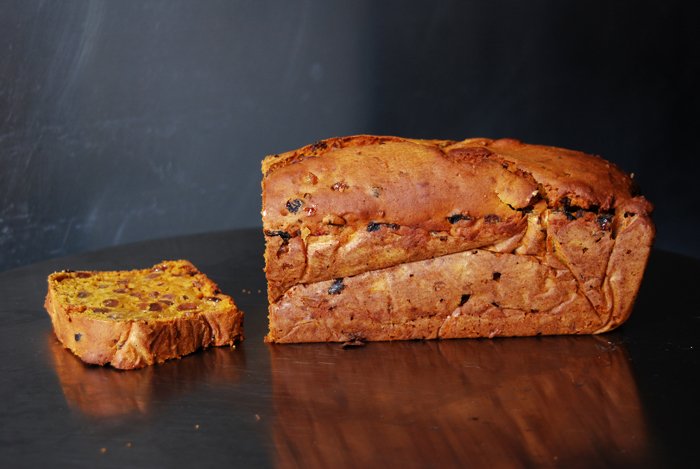
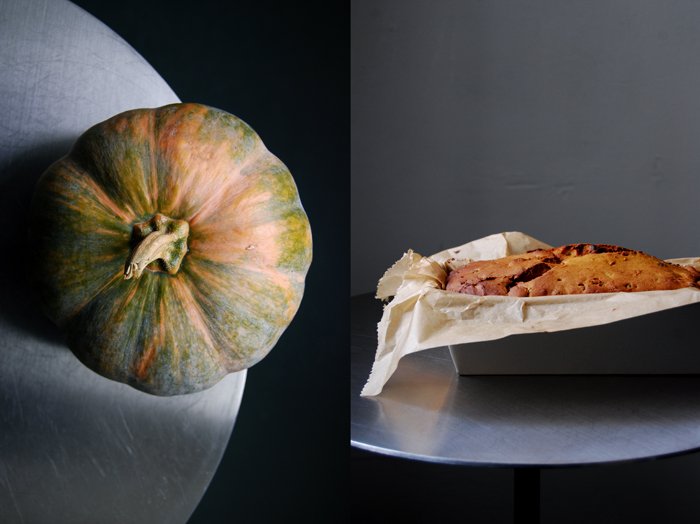
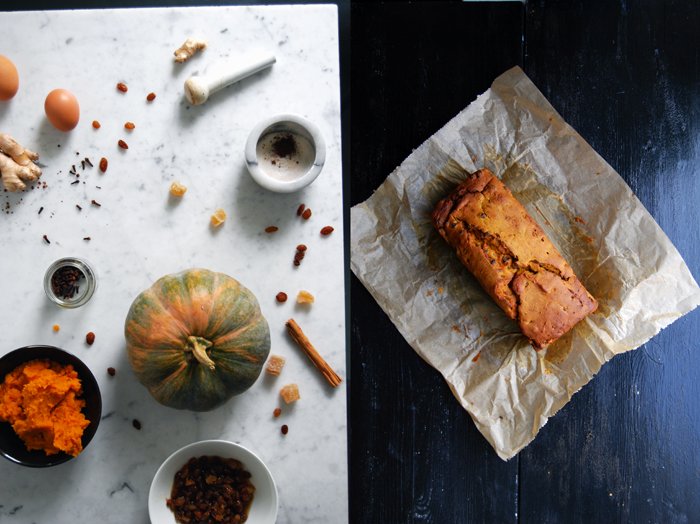
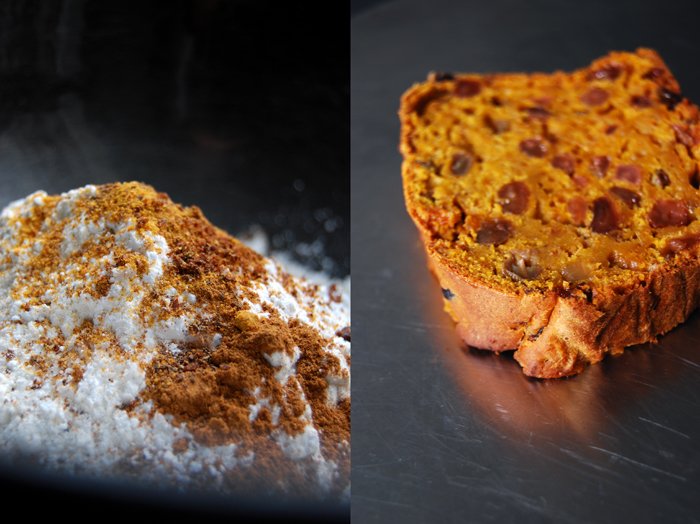
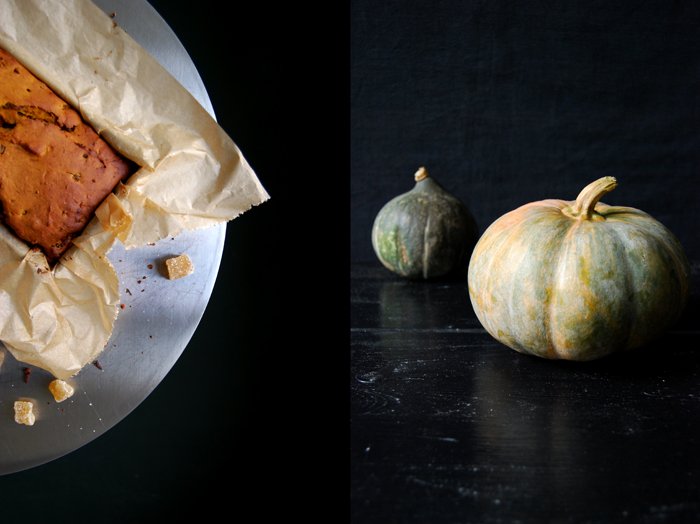
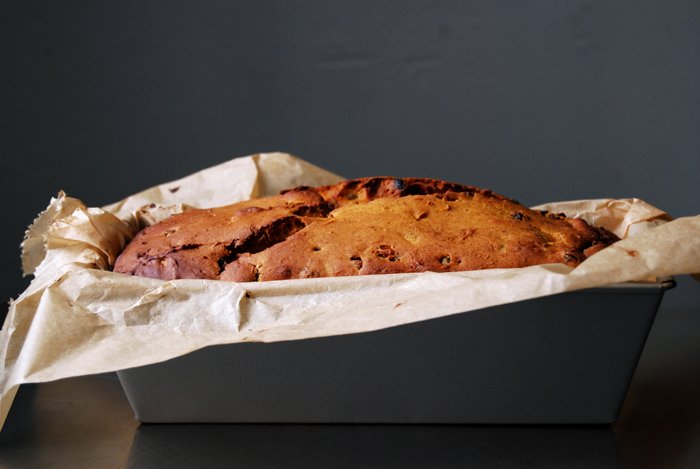
Years later, back in my own kitchen, I started to bake my own bracks. The first loaf was inspired by the one I got to love in Whitby but then I got a bit more experimental. Here's one made with puréed pumpkin in addition to the tea soaked raisins, grated fresh ginger and stem ginger. I also added a nice spice composition of cinnamon, nutmeg, allspice and cloves. The result is aromatic and moist, but still structured. The pumpkin makes the loaf more juicy and smooth than the one I bake without the puréed vegetable. It would be a perfect Halloween cake although it's still a month ahead. In Ireland, bracks are traditionally made for this festive season, but at Botham's (and in my oven) you can find them all year round!
This recipe has been featured on Food52 Halfway To Dinner!
Pumpkin and Ginger Brack
You need to prepare 2 steps in advance for this cake:
1. If you don't buy canned pumpkin purée, the pumpkin has to cook in the oven for 30 minutes before you can turn it into a purée.
2. The dried fruits have to soak in tea overnight.
For a 24.5 x 10cm / 10 x 4″ loaf pan you need
pumpkin purée 400g / 14 ounces or pumpkin (squash), without the fibres and seeds, cut into cubes, 500g / 17.5 ounces (Hokkaido with skin or peeled butternut or Musquée de Provence pumpkin)
strong black English tea 150ml / 5 ounces
raisins and/ or sultanas 250g / 9 ounces
stem ginger, finely chopped, 60g / 2 ounces
fresh ginger, grated, a 3.5cm / 1.5" piece
Demerara sugar 140g / 5 ounces
organic eggs, beaten, 2
plain flour 220g / 8 ounces
baking powder 2 teaspoons
a pinch of salt
ground cinnamon 1 teaspoon
ground nutmeg or mace 1/4 teaspoon
ground allspice 1/8 teaspoon
ground cloves 1/8 teaspoon
For the pumpkin purée
Set the oven to 200°C / 390°F (fan assisted oven).
Put the pumpkin into a baking dish. Cover the bottom of the dish with about 100ml / 3.5 ounces of water. Wet a piece of parchment paper under water, scrunch it a little and cover the pumpkin in the baking dish, tucking the sides in. Cook for 30 minutes in the oven or until the pumpkin is soft. Purée the pumpkin in a blender or with a stick mixer and set aside (you could keep it in the fridge for a day).
For the brack
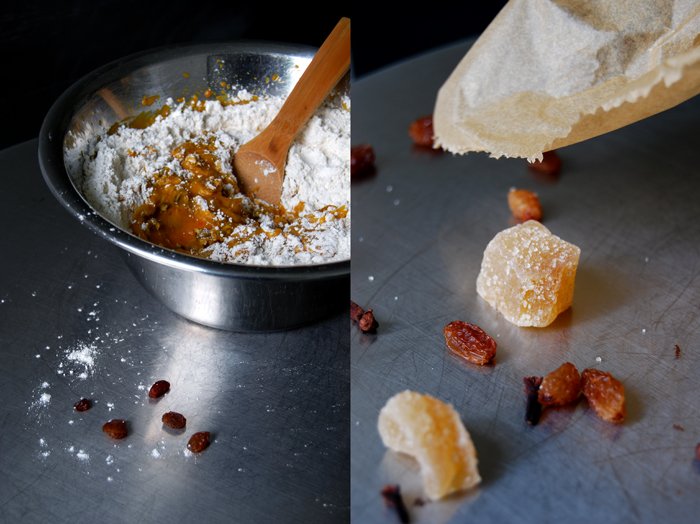
In a large bowl, mix the tea, raisins, stem ginger, grated ginger and sugar and soak overnight.
Set the oven to 175°C / 350°F (fan assisted oven).
Combine the flour, baking powder, salt and dry spices.
Mix the eggs into the raisin tea mixture with an electric mixer, add 400g (14 ounces) of pumpkin purée and mix until well combined. With a wooden spoon, stir in the flour spice mixture until combined and fill into the loaf pan lined with parchment paper. Bake the brack for 50 minutes, turn the temperature down to 160°C / 320°F and bake for another 30-35 minutes or until the cake is golden brown on top. Check with a skewer, it won't come out clean, there will be a few moist pieces but there shouldn't be any liquid dough left on it. Take the cake out of the pan after 10 minutes and let it cool for at least 10 minutes before you cut off your first slice. The cake is best after 1-3 days, wrapped in parchment paper after it cools down completely. The outside will be soft by then.

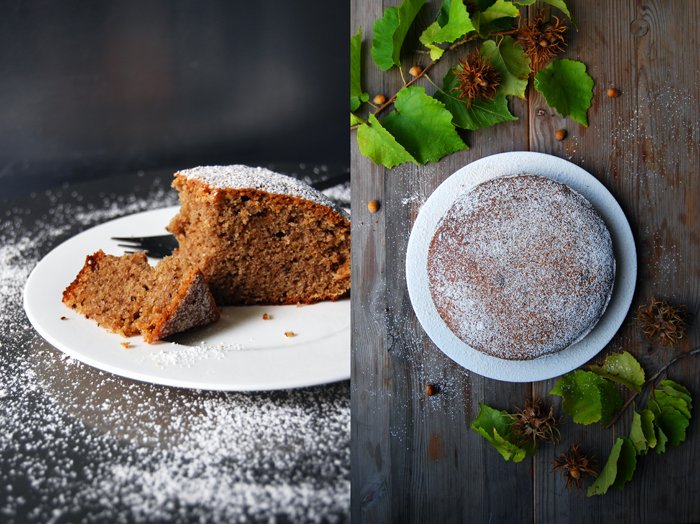
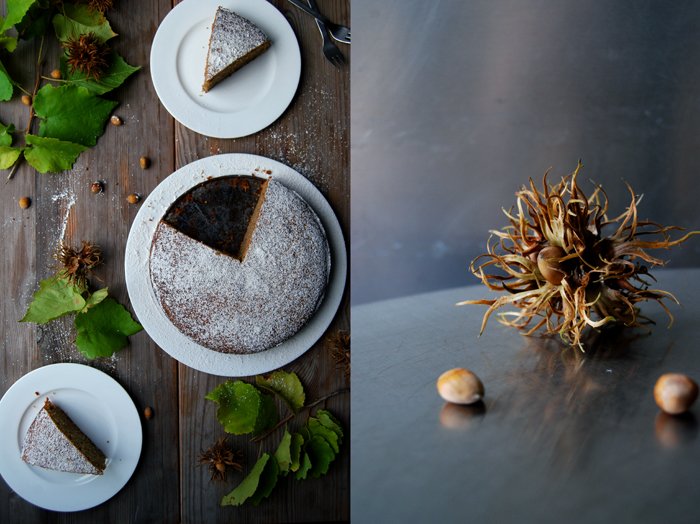
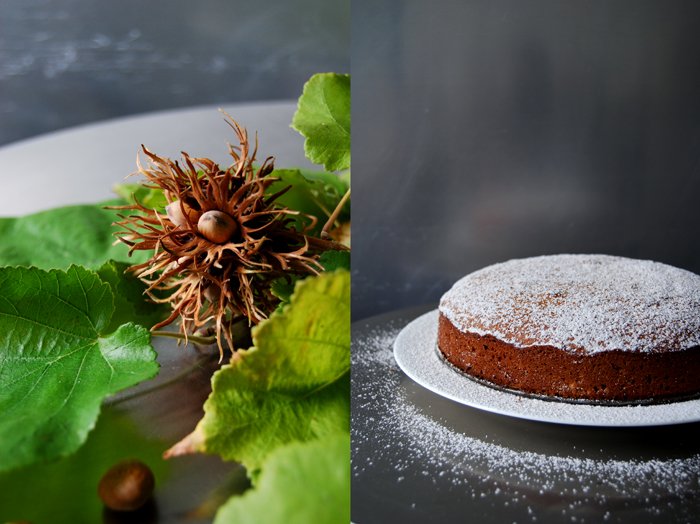
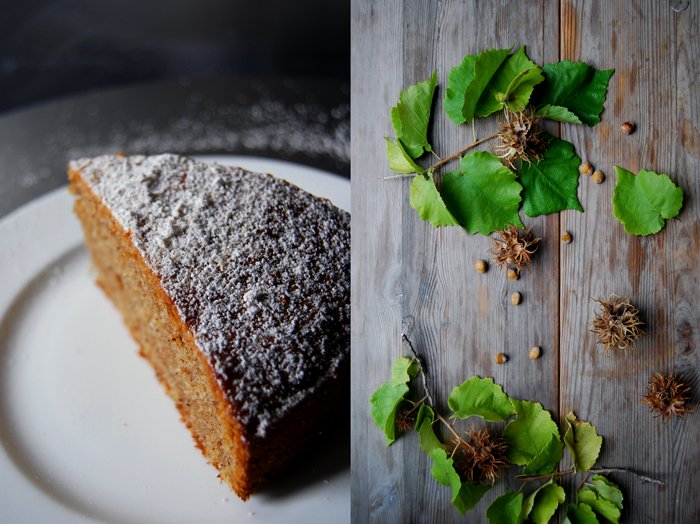
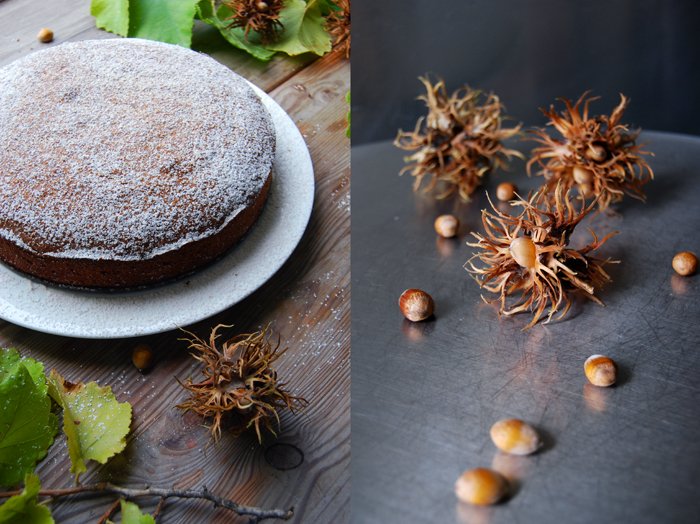
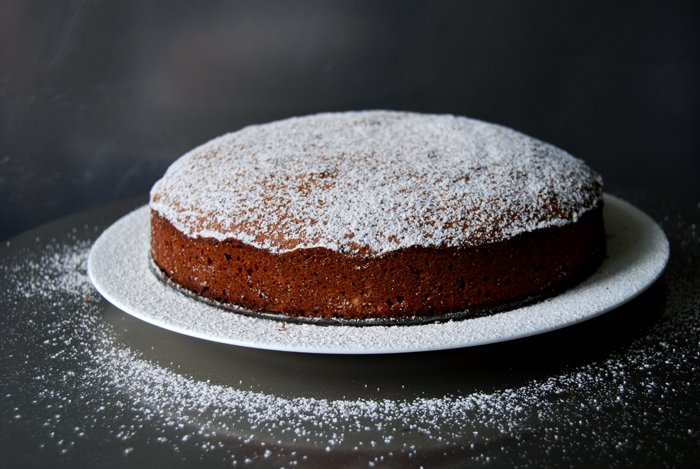
Hazelnut and Buckwheat Cake with Cinnamon Icing Sugar
Family guests from LA! Our American grandfather Jim and his wife Gina came to visit us and - as always when guests stay with us - we let the feast begin from day one! When they arrived at noon, we sat down at our long wooden table and we only got up in the early evening, after hours of savoring. I carried one dish after the other to the table, so much so, that at one point my boyfriend stated I must have mistaken his grandparents for goats! There was so much to talk about, so many memories and stories to share, so much to show after years of not seeing each other, that a good amount of nice food seemed like the perfect company for a day like that. Also, it was a very successful way to fight their jet lag. 9 hours of time difference and my food kept them awake till 9!
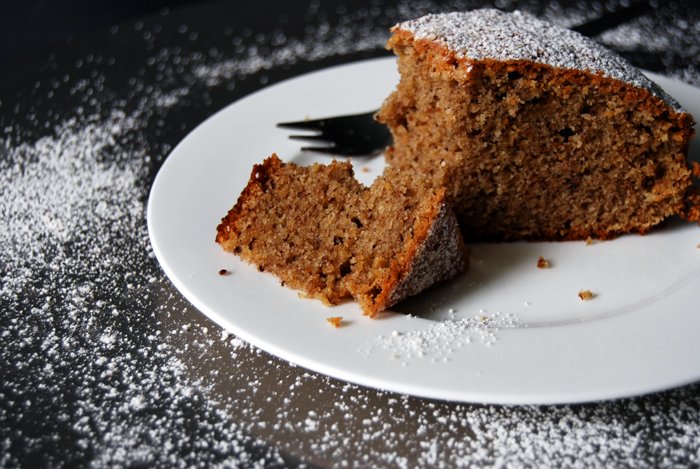
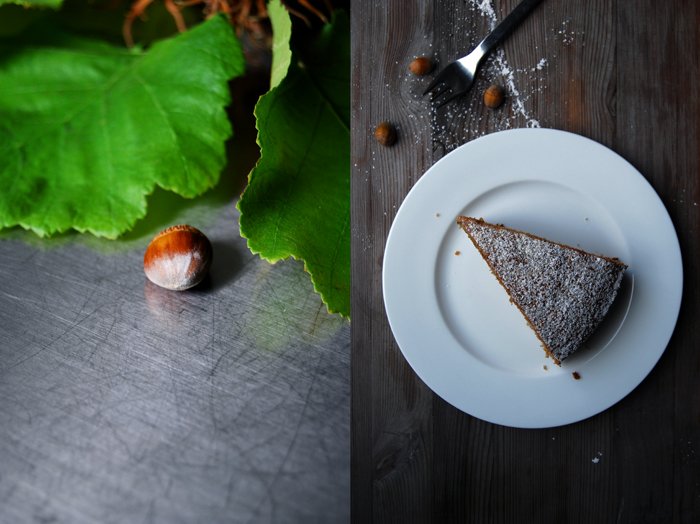
One of my personal table highlights of that first day was my hazelnut and buckwheat cake. I love to welcome friends and family with a cake on the table. The sweet smell of freshly baked food in the house wakes you up even after the longest flight and makes you feel home right away! I had been in the mood for a cake like that for days, simple and spongy with the deep flavour of hazelnuts and I got what I asked for. I made the dough with ground nuts and buckwheat which adds a nuttiness to it that I wouldn't have achieved with wheat or spelt flour. It's a very popular combination in the Tyrolean mountains which always start to have a growing influence on my cooking and baking as soon as the temperatures drop. So it's a mountain cake, honest and rich in taste, refined with lots of cinnamon mixed in and sprinkled on top with some icing sugar.
I wanted to put even more food on the table, but at one point, they all stopped me. My plan was to finish the day off with my famous Swabian Cheese Spaetzle, hearty cheese and onions with homemade southern noodles, but they didn't let me go back to my kitchen! I saved it for another night and dinner and they loved it, like the Blue Cheese Crackers, Beluga Lentils with Pear, Tyrolean Plum Dumplings, Sicilian Chard, Radicchio Crespelle and all the other goodies I will write about in the coming days!
Hazelnut and Buckwheat Cake
For one 26cm / 10" springform pan or two 18cm / 7" pans you need
ground hazelnuts 225g / 8 ounces
buckwheat flour 225g / 8 ounces
granulated sugar 200g / 7 ounces
ground cinnamon 1 teaspoon plus more for dusting
baking powder 4 1/2 teaspoons
a pinch of salt
butter, at room temperature, 250g / 9 ounces
organic eggs 6
icing sugar for dusting
Set the oven to 180°C / 350°F (fan assisted oven).
Combine the dry ingredients.
Beat the egg whites and salt until stiff.
Beat the butter and sugar until fluffy. Add the egg yolks, one at a time and continue mixing for a few minutes until the mixture is thick and creamy.
Gently fold the dry mixture and the egg whites with a wooden spoon into the butter and sugar mixture, alternating, 1/3 at a time, combining well in between.
Bake for 35 minutes (or a bit shorter if you use smaller pans) or until golden brown on top. Check with a skewer, it should come out clean. Let it cool for a few minutes.
Combine 2-3 tablespoons of icing sugar with 1/4 teaspoon of cinnamon and sprinkle over the cake.

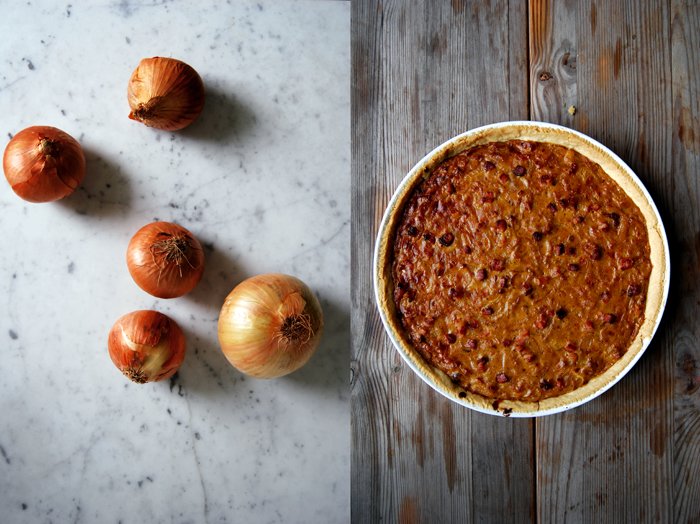
Zwiebelkuchen, the perfect Onion and Bacon Pie for September

Zwiebelkuchen, young wines and the warming sun of late September! I used to live quite close to the French border, not too far away from the Alsace region. On Sundays, in late September and October, when the leaves start changing colour and the grapes are ripe and plump, I loved visiting the winegrowers in the vineyards on both sides of the border. They were busy bringing their harvest in and producing the first young wines, like the Alsatian Nouveau Vin (like Neier Siasser) or the Federweisser in the Pfalz area in south-west Germany. Many villages celebrate the harvest season with a traditional wine feast, with lots of wine and Zwiebelkuchen, a hearty pie with a sweet and juicy onion filling on top of a flaky buttery short crust. It's divine, the ultimate autumn food!
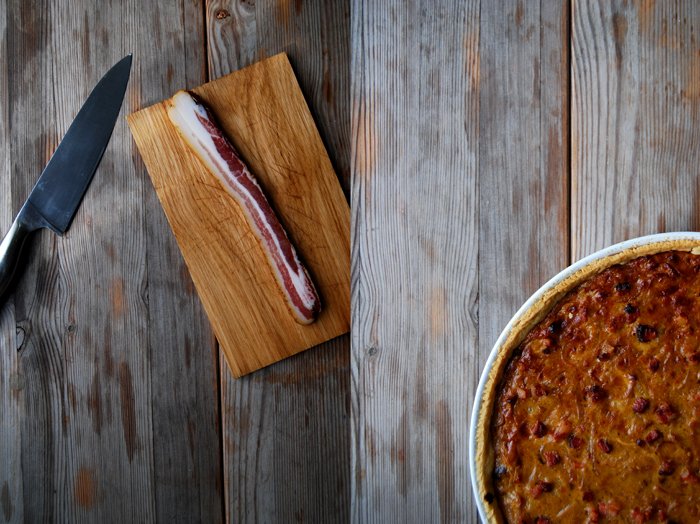
Sometimes, Zwiebelkuchen is made with bacon which adds a nice smoky flavour to it and a bit of saltiness to balance out the sweetness of the onions. However, one thing used to bother me with many pies I ate in those days, soft uncooked bacon. To me, bacon should be crisp and crunchy, I can't stand chewing on soft pieces of fat. When the bacon is mixed with the onion and eggs for the filling, there's no chance to get the right result, it will stay rubbery and soggy. The solution is very simple, just put the bacon on top of the filling while it's in the oven and let it release its juices and flavours. This way you get the best crunchy bacon bits you can imagine!
Zwiebelkuchen
For one pie you need a round (27cm / 10.5″) baking dish or tart pan.
For the short crust base
plain flour 200g / 7 ounces (I use spelt flour type 630 but you can use any other plain flour)
salt 1/4 teaspoon
butter, cold, 100g / 3.5 ounces
water, cold, 2 tablespoons
Combine the flour with the salt. Cut the butter with a knife into the flour until there are just little pieces of butter left. Continue with your fingers and rub the butter into the flour until combined. Add the water and continue mixing with the hooks of your mixer until you have a crumbly mixture. Form a disc, wrap in cling film and put in the freezer for 10 minutes.
For the filling
onions, cut in half and thinly sliced, 650g / 1.5 pounds
heavy cream 200ml / 7 ounces
milk 150ml / 5 ounces
organic eggs, mixed with a fork, 3
bacon, cut into little cubes, 40g / 1.5 ounces
butter 1 tablespoon
olive oil
nutmeg, freshly grated, to taste
salt and pepper
plain flour 1 heaping tablespoon
In a large heavy pan, heat the olive oil and butter and cook the onions on medium heat for about 15 minutes until golden brown and soft, stirring them once in while. Season with salt, pepper and nutmeg to taste, add the flour and brown on high temperature for 1-2 minutes, stirring constantly. Add the milk mixed with cream, bring to the boil and cook for 3 minutes on medium-high temperature, continue stirring. Take off the heat, season to taste and mix in the eggs.
Set the oven to 200°C / 390°F top/ bottom heat.
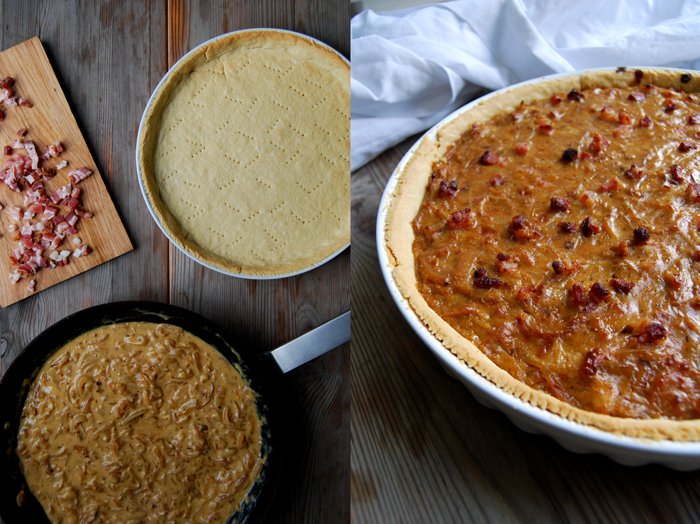
Roll out the dough between cling film and line your baking dish with the flat pastry. Prick with a fork and blind bake for 5 minutes.
Put the onion filling on top of the blind baked pastry, sprinkle with the bacon and bake for 10 minutes. Turn down the heat to 175°C / 350°C and bake for another 30 minutes or until the pie is golden brown on top and set.
Let the pie cool for a few minutes and serve warm or cold, preferably with Nouveau Vin!


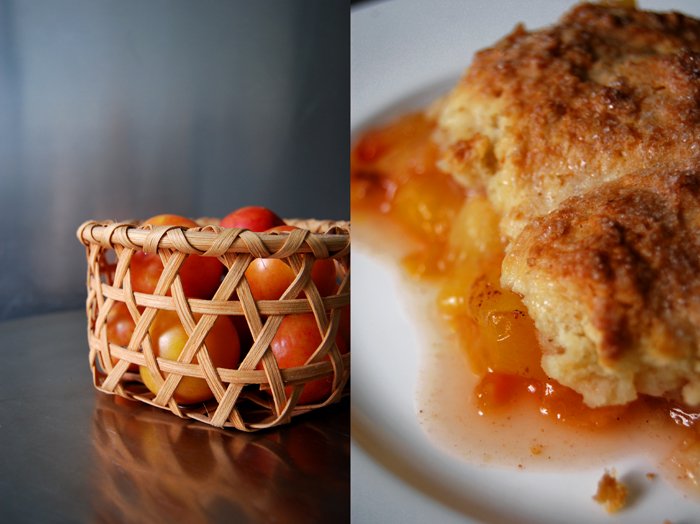
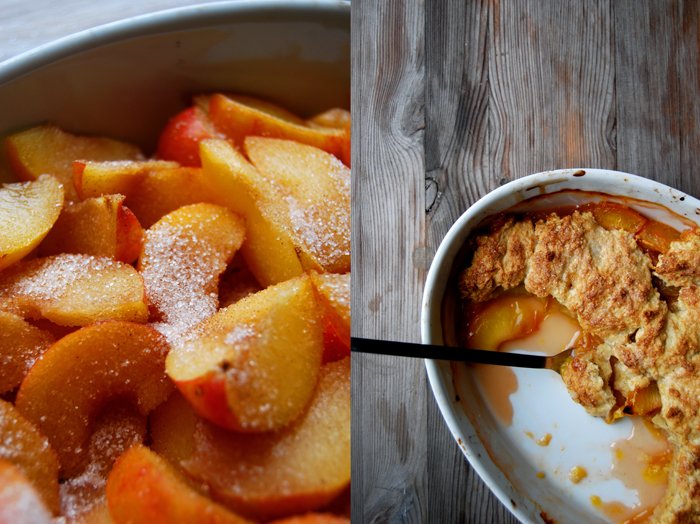
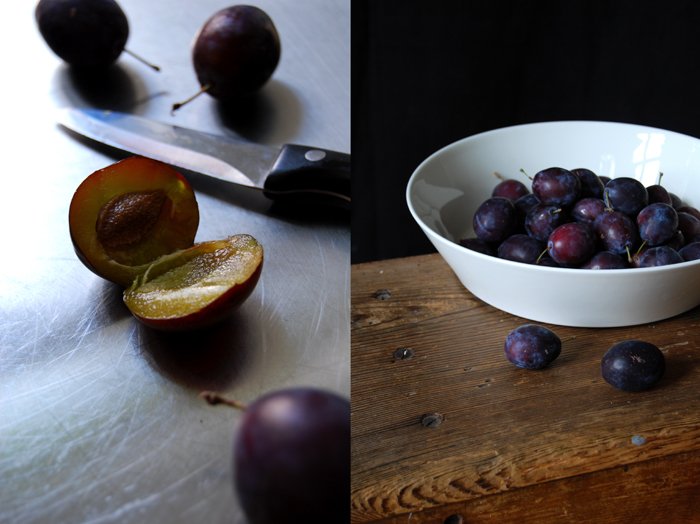
Yellow Plum Cobbler

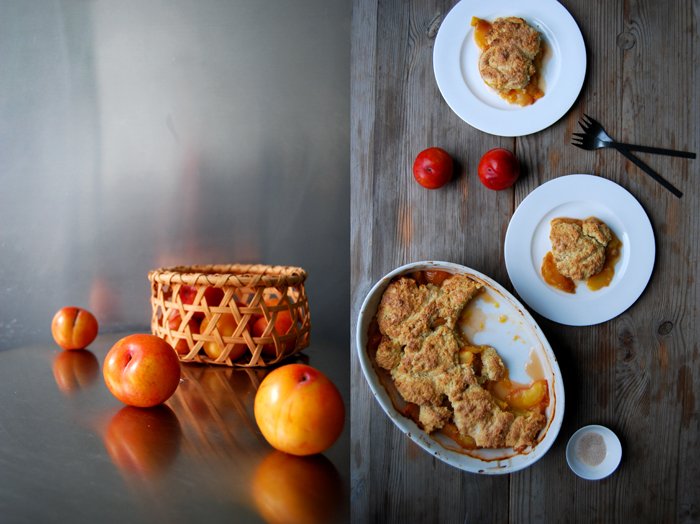
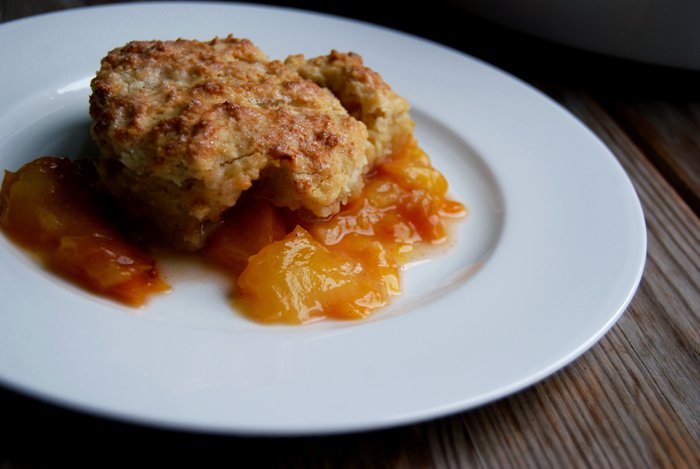
A fruity cobbler is one of the quickest, most comfortable and delicious morning sweets you can put on your breakfast table, with short preparation (unlike my Friday's brioche) and a satisfying result! The pastry is a smooth scone dough with sour cream, thrown together in just a few minutes. It turns into a light golden crust lying on top of the fruity filling like fluffy clouds.
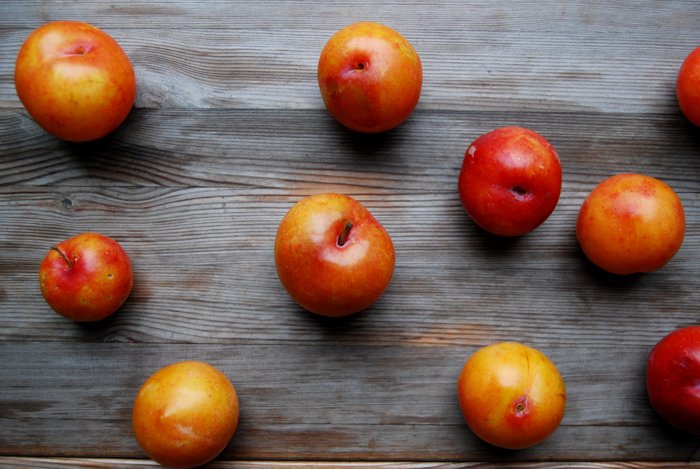
Plums are my favourite addition to this dish and yellow plums are my latest discovery for desserts. It's not only the warm glowing colour that's so striking, it's their honey sweet taste. Uncooked, they aren't too far away from blue plums, just a bit sweeter, but when they are cooked, seasoned with a little cinnamon, they develop a very deep flowery taste, almost like rosewater. Their fragrant sweetness made me choose them for this easy pie. My cobbler is made with just a little sugar, you could also use the pastry for a savory pie, but when the yellow fruit kicks in, the sweet richness takes over. Warm and fragrant, I couldn't stop shoveling one portion after the other onto my plate!

Yellow Plum Cobbler
You could replace the yellow plums with red plums and add a few drops of rosewater.
For 4 people you need
yellow plums, sliced, 600g / 1.5 pounds
granulated sugar 4 tablespoons
ground cinnamon 1/2 teaspoon
For the pastry
plain flour 200g / 7 ounces
granulated sugar 2 tablespoons plus 1 tablespoon for the topping
ground cinnamon 1/4 teaspoon
baking powder 1 1/2 teaspoons
a pinch of salt
butter, cold, 100g / 3.5 ounces
sour cream 160ml / 5.5 ounces
Set the oven to 190°C / 375°F (fan assisted oven).
Spread the plums in a baking dish and coat with the sugar mixed with cinnamon.
For the pastry, combine the dry ingredients. Cut the butter with a knife into the flour until there are just crumbly pieces left. Continue with your fingers, rub the buttery pieces into the flour until combined. Mix in the sour cream with a spoon until combined. Break the soft dough into pieces, gently flatten them and put them on top of the plums, they should be almost covered. Sprinkle with a tablespoon of sugar and some more cinnamon if you like and bake in the oven for 35 minutes or until golden brown on top. Serve warm.


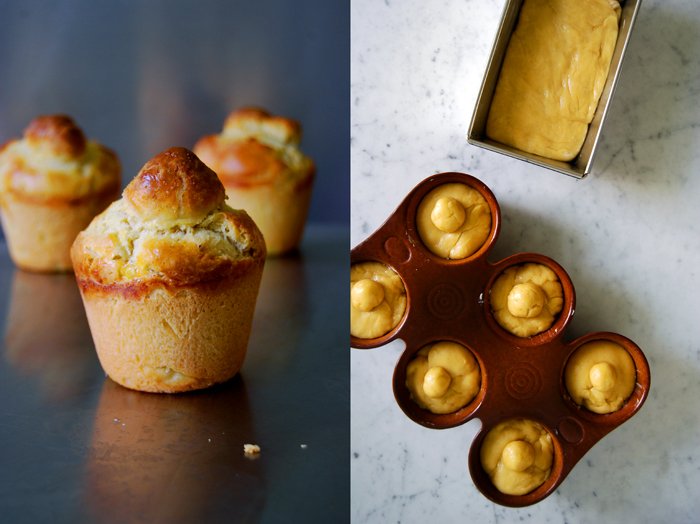
Weekend Brioche
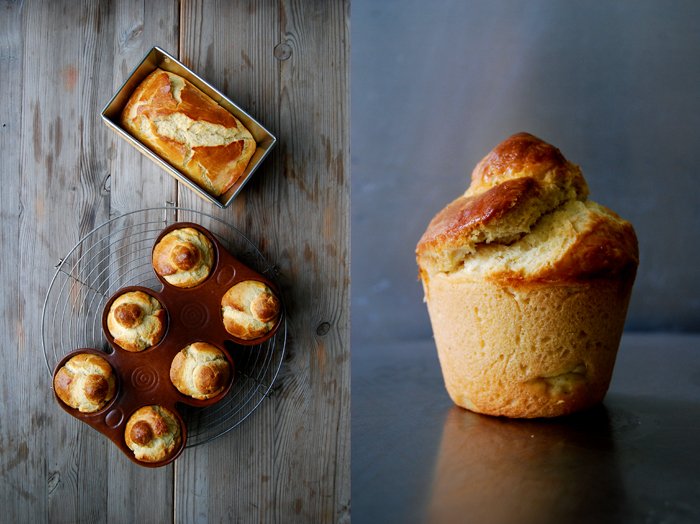
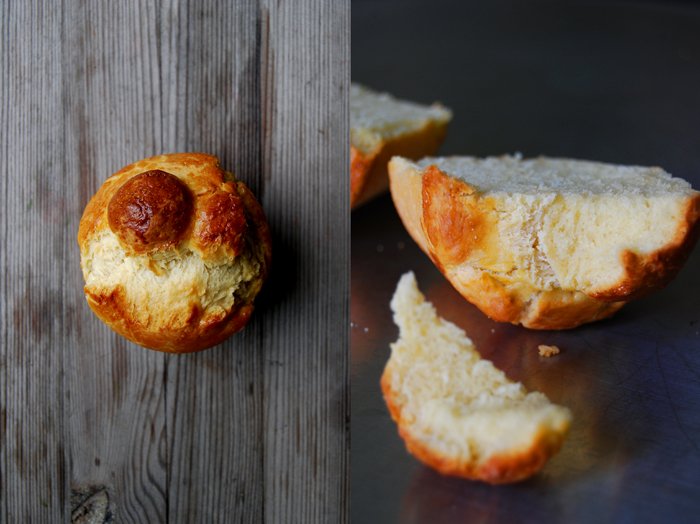
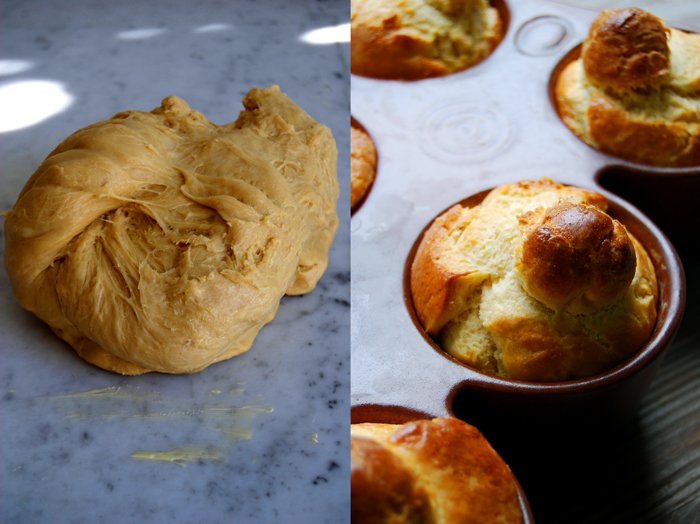
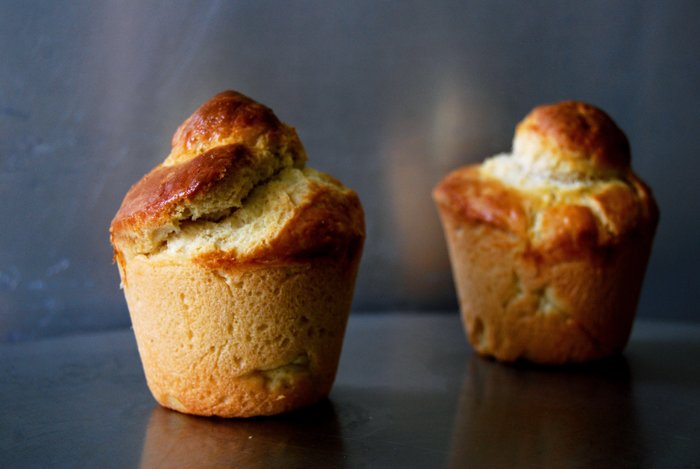
Lots of butter and many eggs - that’s the secret to a great brioche! I enjoy this rich, sweet, fluffy bread when it’s still warm, right out of the oven, and the next day, toasted for breakfast or lunch. So, when I bake brioche, I bake a big batch of it.
The dough has to rise three times, but that shouldn't put you off. If you time it well and let it rise overnight the second time, you can be rewarded with the best French breakfast treat ever - apart from croissants maybe but their preparation put me off! I never managed to move myself to give them a try but one day their time will come even in my kitchen. Back to the brioche, this recipe makes a wonderful buttery bread, rich but tender. I like to tear it into pieces and spread even more butter on top and some of my homemade strawberry or Tyrolean plum jam, a hot latte macchiato on the side and I'm happy!
I always bake one loaf and a few little round brioches. The bread stays fresh for days wrapped in parchment paper and it's great for teatime, sliced, toasted and - again - with some butter melted on top. It also makes a delicious dessert, in a trifle or bread pudding, or thick fresh slices topped with warm berry compote and some whipped cream!
Brioche
For 2 loaves you need
butter, at room temperature, 250g / 1 cup
whole milk, lukewarm, 60ml / 1/4 cup
plain flour 700g / 5 1/3 cups
granulated sugar 60g / 2 ounces
fast-acting yeast 1 (7-g / 1/4-ounce) envelope
salt 1 1/2 teaspoons
large eggs, whisked with a fork, 5, plus 1 beaten egg mixed with a pinch of salt for the glaze
Melt 50 g / 3 tablespoons of the butter, let it cool then mix with the milk.
In the bowl of a stand mixer, fitted with the dough hook attachment, combine the flour, sugar, yeast and salt. Add the lukewarm milk-butter mixture and the 5 eggs and mix with the hook for about 5 minutes or until well combined. Add the remaining butter cut into 5 portions, 1 portion at a time, mixing well before adding the next portion to the dough; keep mixing for about 10 minutes or until you have a smooth and shiny ball, soft and sticky.
Cover the bowl with a kitchen towel and let rise in a warm place for about 1 to 1 1/2 hours or until doubled in size.
Take the dough out of the bowl, knead for 30 seconds then form into a smooth ball. Return the dough to the bowl, cover with plastic wrap and keep in the fridge overnight.
The next morning, take the dough out of the fridge and let it sit for 10 minutes. Knead the dough with your hands for 1 minute then divide it into 2 portions (or more depending on the loaf or cake pans you use to bake the brioche). Butter the baking tins generously then push the dough into the tins; the tins should be filled about 1/2 to 2/3, not more. If you bake a round brioche you can shape little (or big) balls and place them on top: form a little hole with your finger in the middle of the dough and gently push the ball in to prevent it from falling off. Cover the baking tins with a kitchen towel and let the brioche rise in a warm place for about 1 hour and 15 minutes.
Preheat the oven to 175°C / 350°F (conventional setting).
Brush the top of the brioche with the egg wash then bake the brioche for 35 minutes or until golden brown on top and baked through, depending on the tins' shape and size the baking time can be shorter or longer. If you’re not sure if the brioche is done turn the brioche around and knock on its underside, it should sound hollow; or prick with a skewer, it should come out clean. Enjoy warm!


Blackberry and Apple Pie
Glorious weather, food and friends, it was a perfect weekend! Last week, an old friend of mine from my days at university came to visit us and I was so excited as we hadn't seen each other in years! She moved to LA a long time ago where I've only visited her once but a year ago she decided to head over to Costa Rica together with her family, so we're even further apart from each other now. When she finally stood at the door with her two children, I couldn't believe it! It was such a strange feeling to meet the little ones who I only knew from pictures and skype, but they felt so familiar. This is such a weird thing about the internet, you can be so far away and still feel so close!
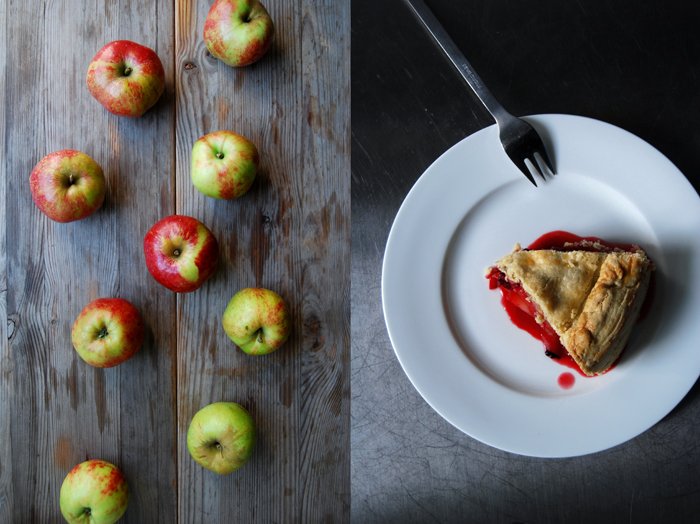
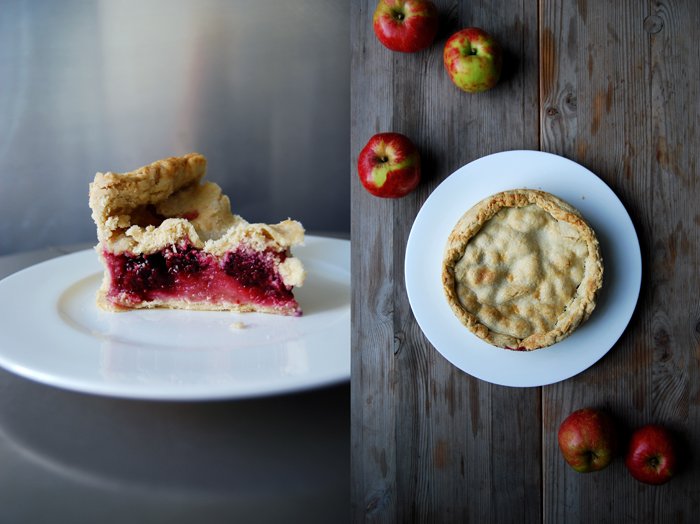
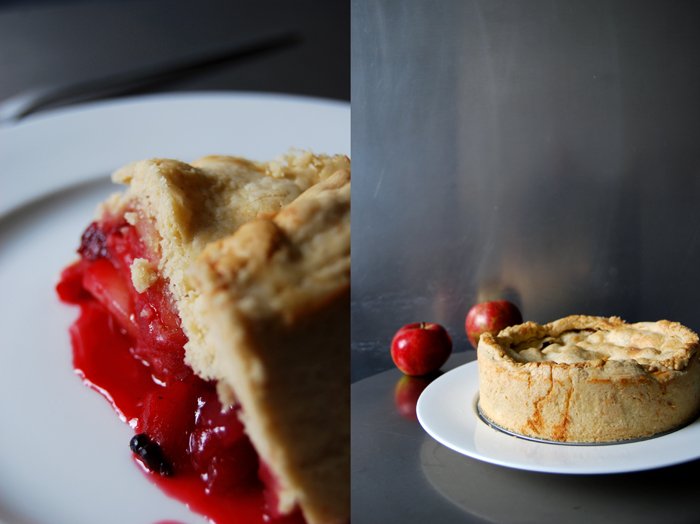
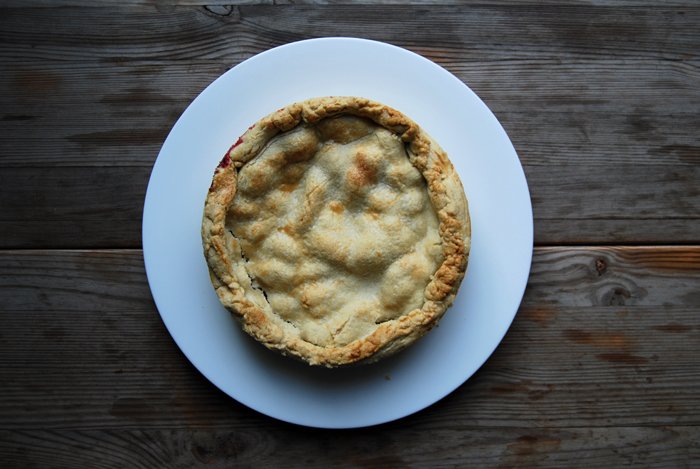
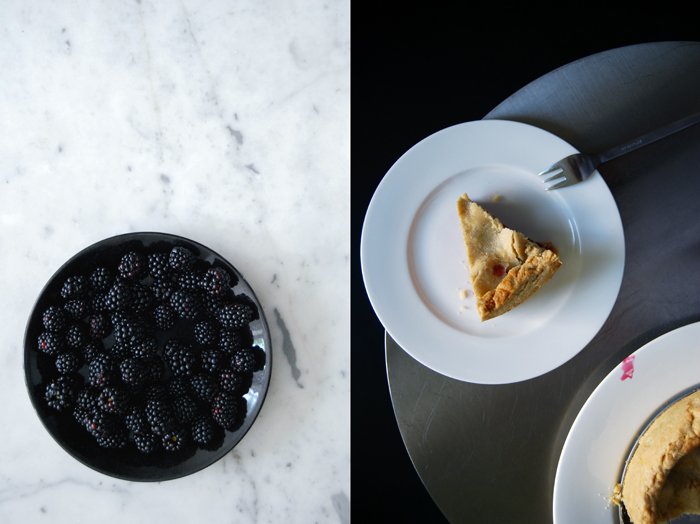
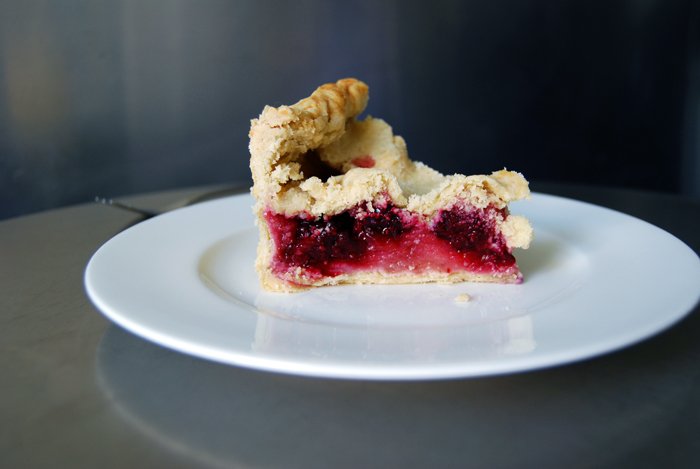
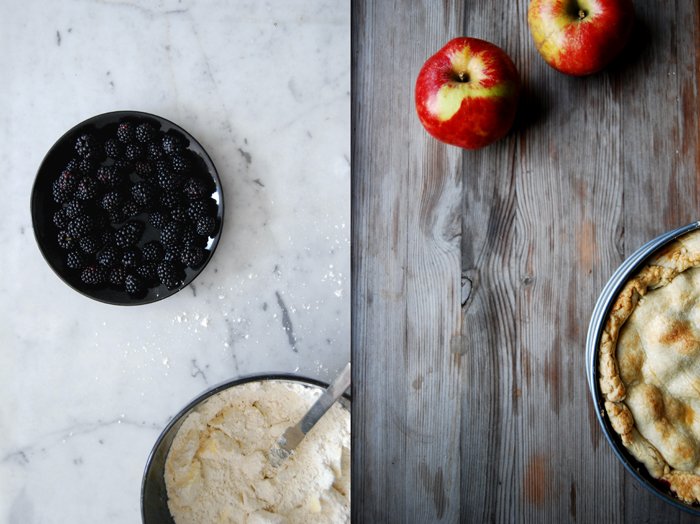
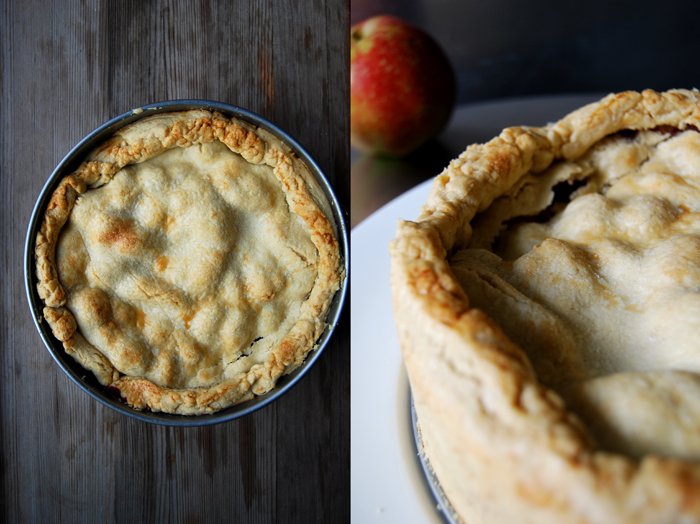
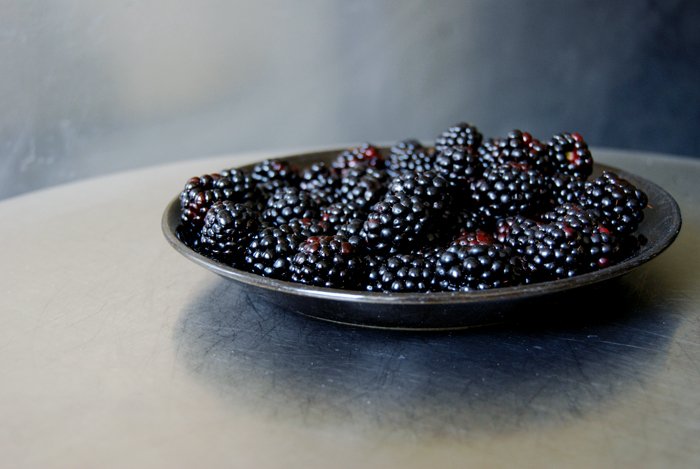
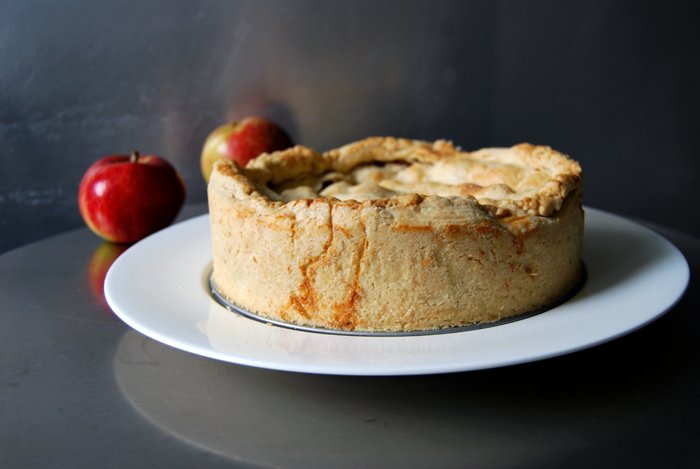
Before the young family arrived I decided to bake, not only a cake but a pie, the ultimate sweet comfort food. I needed to calm down and nothing beats a pie in a situation like that! The result was a thin layer of buttery short crust wrapped around a juicy filling of apples and blackberries. I've made many apple pies in my life but this was the first time that I tried this English classic with the dark berries. They add a sweet juiciness and melt together with the apples to a very unique composition. It reminds me a bit of plums or pears but it's still different, they create a new taste which is hard to describe.
The fruity filling was so full of red juices that I was a bit worried about the pastry. For no reason, the short crust didn't soak it all up or get too soggy, it was still crunchy. It was all good, even more so, it was delicious! Just the first piece which I cut off impatiently when the pie was still hot was a bit soft, it's best to let it sit for a while which is almost impossible as it smells too good!

Apple and Blackberry Pie
For a 20cm / 8" springform pan you need
For the filling
sour baking apples (such as Boskoop), peeled, cored, quartered and thinly sliced, 600g / 21 ounces
blackberries, 200g / 7 ounces
granulated sugar 5 tablespoons
ground cinnamon 1 teaspoon
plain flour 2 tablespoons
For the pastry
plain flour 260g / 9 ounces
granulated sugar 1 teaspoon
a pinch of salt
ground cinnamon 1/4 teaspoon
butter, cold, 70g / 2.5 ounces
vegetable shortening, cold, 70g / 2.5 ounces
cold water 1 tablespoon
For the glaze
milk 3 tablespoons
granulated sugar 1 heaping teaspoon
For the pastry, combine the dry ingredients. Cut the butter and vegetable shortening with a knife into the flour until there are just little, crumbly pieces left. Continue with your fingers and quickly work the buttery pieces into the flour until combined. Add the water, continue mixing with the hooks of your mixer until you have a crumbly mixture. Form 2 discs, dividing them roughly 2:1, wrap in cling film and put in the freezer for 10 minutes.
Set the oven to 200°C / 390°F (top / bottom heat).
Take the dough out of the freezer, put the smaller disc in the fridge and roll out the bigger one. Roll out a circle big enough to line the bottom and the sides of the springform pan, overlapping the rim about 1 cm / 1/2 ". Put the pan with the pastry in the fridge.
For the filling, combine the sugar and cinnamon and mix with the apples. Take out the pan with the pastry and fill with 1/3 of the apples, sprinkle with 1 tablespoon of flour and add half of the berries. Add another layer of apples, 1 tablespoon of flour and the remaining berries and apples on top. Roll out the remaining disc, a bit bigger than the springform pan and lay on top of the apples. Gently push the sides onto the bottom layer of pastry, sealing it by rolling it inwards. Brush the top with milk and sprinkle with sugar.
Bake the pie for 15 minutes, turn down the heat to 175°C / 350°F and bake for another 40 minutes or until the pie is golden on top. Take it out and let it sit for 10 minutes.

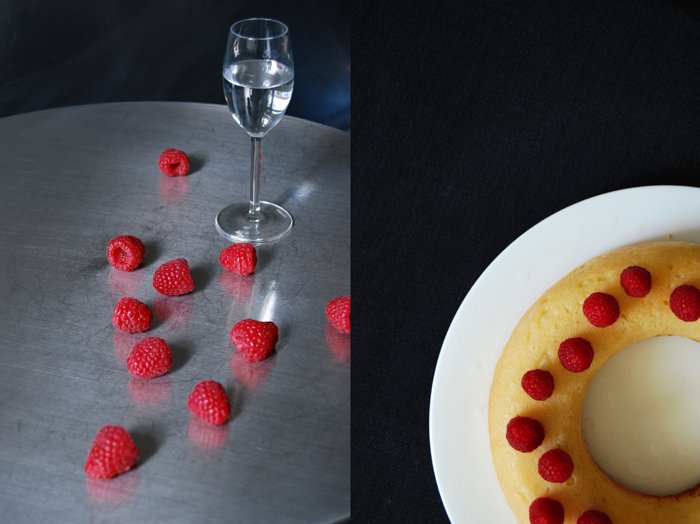
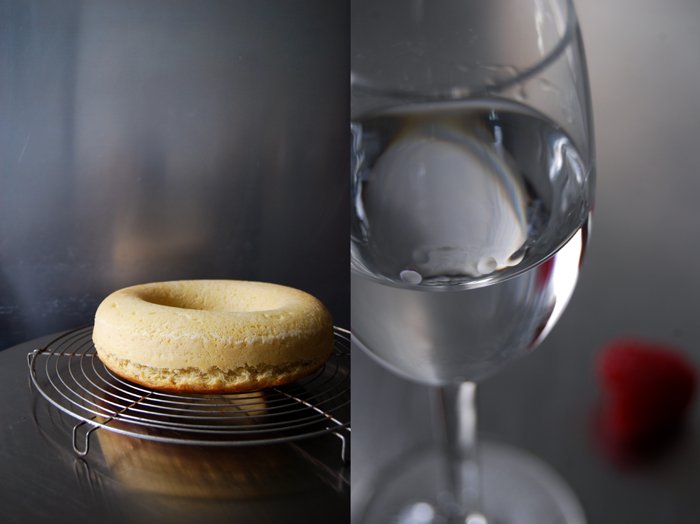
Raspberry Savarin or a giant Rum Baba
Giorgio's Cafe is a busy bistro in Malta on the Sliema promenade where I love to go for a morning espresso. It's right opposite Valletta and you can see the capital's majestic bastions right across Marsamxett Harbour. Just sitting there, enjoying my breakfast and watching people passing by is one of my favourite Saturday morning activities when I'm on the island. On that day of the week, lots of Maltese ladies meet at Giorgio's amongst a few business men for a little break and a snack in between their weekend shopping. Everybody is dressed up, the mood is chatty and you can see the season's latest sunglasses collections presented at every table. It's a wonderful Mediterranean scene, la dolce vita!
It wouldn't be one of my most beloved cafes on the island if there wasn't a culinary treat involved. In this case, it's Rum Baba, a little yeast cake soaked in syrupy liqueur topped with fresh fruits! It's sticky and sweet. The cake is so saturated in syrup that it feels like a soaking wet sponge when you cut off a piece. I've been wanting to make a lighter version of this sweet dish for years, in a bigger pan and with less syrup, in essence, a Savarin which is like a giant Rum Baba. The only difference between the two cakes is the size and the amount of syrup, apart from that, both use the same rich yeast dough which is similar to a brioche. Another recipe that I will share with you in the next few weeks!
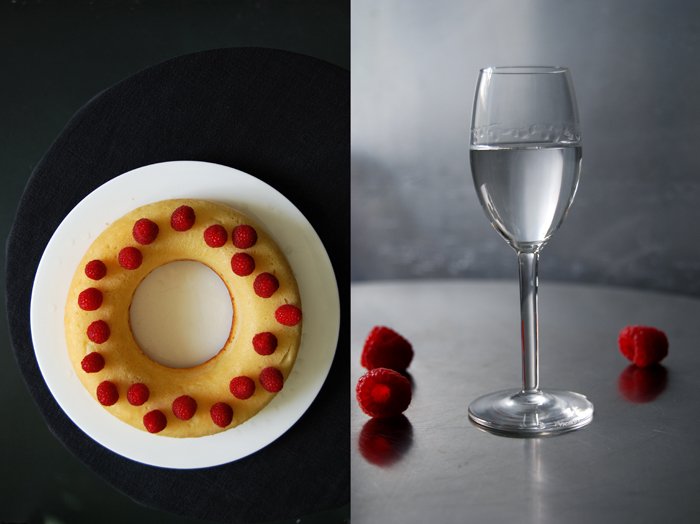
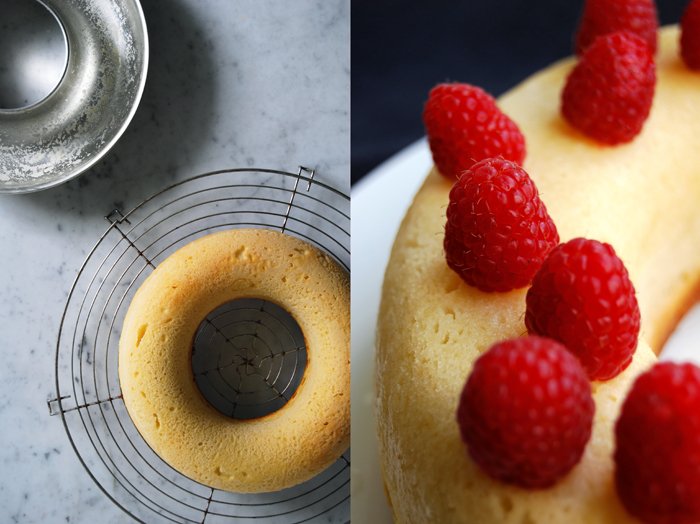
I prefer to use less syrup as it's so sweet that it can easily become too dominant in this composition and you wouldn't be able to taste the cake anymore. To accompany my fruits, slightly tart, delicate raspberries, I used a liqueur also made of the red berries, a German Waldhimbeer Geist which is a traditional spirit made of wild raspberries. I cooked the liqueur with Riesling wine, sugar, lemon juice and water for a few minutes to turn it into an aromatic syrup. It wasn't just sweet, it was rich in flavours! Some Savarin and Rum Baba recipes add whipped cream, which is nice too but it takes away a bit of the fresh touch that the fruity cake has without it. For me, it depends on my mood and the weather, the colder it gets the more I like rich cakes. If it's a warm day I like my tea time treat light and fruity!

Raspberry Savarin Cake
For a 1 litre / 2 pint Savarin or Bundt pan you need
For the topping
raspberries 125g / 4.5 ounces
For the cake
plain flour 210g / 7.5 ounces
dry yeast 2 teaspoons
granulated sugar 30g / 1 ounce
a pinch of vanilla
a pinch of salt
milk, lukewarm, 80ml / 3 ounces
butter, melted, 80g / 3 ounces
organic eggs 2
In a large bowl, combine the flour, yeast, vanilla, salt and sugar. Whisk the milk, melted butter and eggs, the temperature should be lukewarm! Add the liquid mixture to the dry ingredients and mix with your dough hooks for a few minutes until well combined, on high speed for the last minute. The dough will be thick but runny. Cover with a tea towel and let the dough rise in a 35°C / 95°F warm ( top / bottom heat, no fan!) oven for 45 minutes.
Butter the cake pan, dust with flour and fill the dough (best with 2 tablespoons) into the pan. Even out the top, cover with a tea towel and let it rise for 20 minutes in a warm place.
Set the oven to 200°C / 390°F (top/ bottom heat).
Bake the cake for 20 minutes or until golden on top. Check with a skewer, it should come out clean. Let the cake cool for a few minutes and take it out of the pan.
For the syrup
white wine (preferably Riesling) 100ml / 3.5 ounces
fruity schnaps (preferably raspberry) 60ml / 2 ounces
freshly squeezed lemon juice 30ml / 1 ounce
water 60ml / 2 ounces
granulated sugar 100g / 3.5 ounces
In a sauce pan, mix the ingredients for the syrup, bring to the boil and cook down for 2 minutes.
The Savarin
Pour the warm syrup into a pot or dish just big enough for the cake to fit in. Put the warm cake into the pot with the syrup (the soft, top side of the cake first). Gently turn the pot around a little to help the cake soak the syrup. After the syrup is completely soaked (after around 15-20 minutes), put a big plate on top of the pot and turn it around, carefully but quickly! Top with the fruits and serve with or without whipped cream, as you prefer.


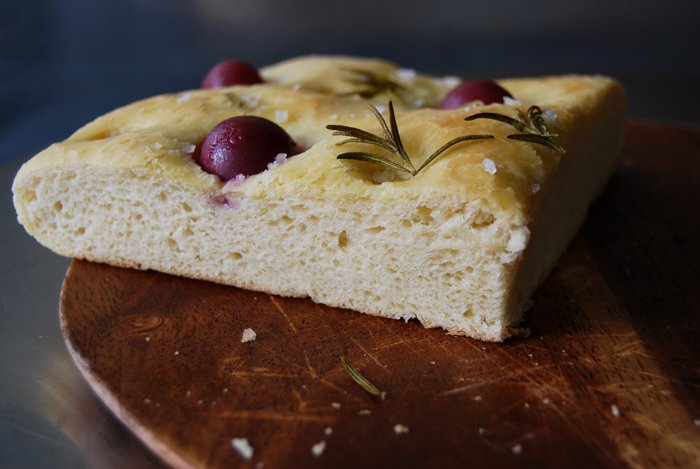
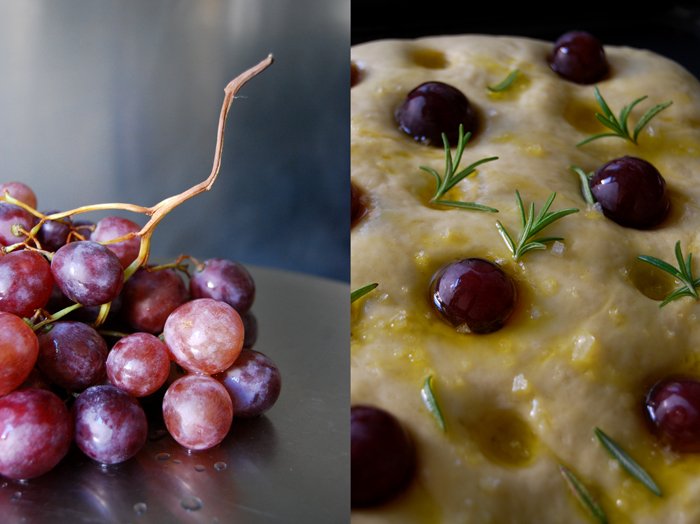
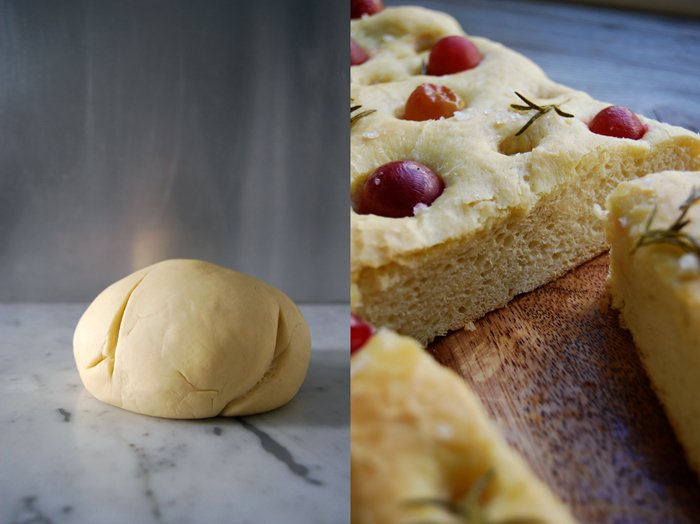
Focaccia with Grapes, Rosemary and Gozitan Sea Salt

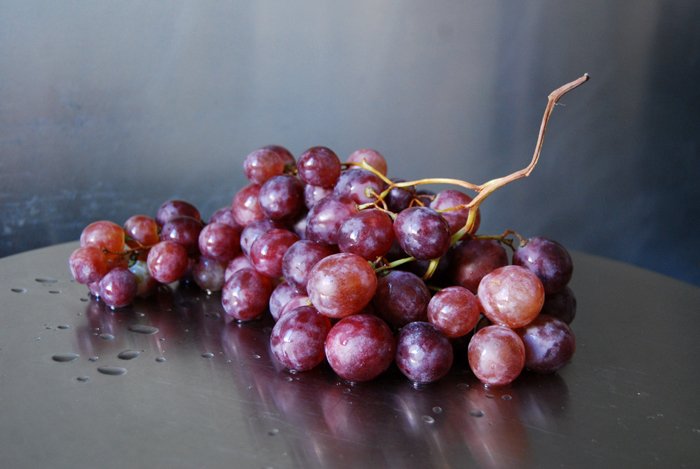
This is the best focaccia I ever made! One reason might be the excessive use of very good olive oil. Sometimes there's just no way around, if you spare on oil you spare on taste and texture, it's just that simple. The second reason is the unbelievably delicious combination of baked ripe dark grapes and rosemary! The fruits add a soft sweetness and juiciness to the bread which is better than any other flavouring I ever tasted in combination with this Italian classic.
So, the air in my kitchen was filled with the addictive smell of freshly baked bread mixed with the woody aroma of rosemary. I sat in front of the oven like a hungry cat and I couldn't wait for the focaccia to be done, it was so tempting! I took the photos as quickly as possible as the aromas teased my nose even more after I cut the first piece off the thick and flat loaf. Then, finally, when I took the first bite, I just enjoyed the spongy softness, the oily crust which was almost flaky, the grapes which released their juices and this heavenly taste topped with roast rosemary sprigs and my Gozitan salt from the Cini family!
More focaccia inspiration:
Focaccia with Grapes, Rosemary and Gozitan Sea Salt
For a 25 x 32cm / 10 x 12.5" focaccia you need
plain flour 500g / 17 1/2 ounces
dry yeast 1 sachet (7g / 1/4 ounce)
salt 1 teaspoon
granulated sugar 1 heaped teaspoon
water, lukewarm, 260ml / 9 ounces
olive oil 110ml / 3 3/4 ounces (60ml / 2 ounces for the dough and 50ml / 1 3/4 ounces for the topping)
red grapes around 25
fresh rosemary needles, a small handful
flaky sea salt for the topping
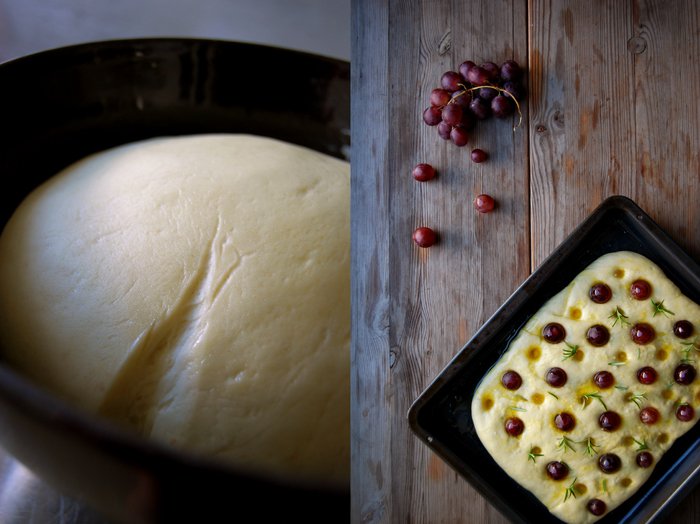
In a large bowl, combine the flour, yeast, salt and sugar. Add the water and 60ml / 2 ounces of olive oil and mix with your dough hooks for 5 minutes until well combined. Continue kneading with your hands for around 5 minutes until you have an elastic dough ball. Put the dough back into the bowl and cover with a tea towel. Let the dough rise in a 35°C / 95°F warm ( top / bottom heat, no fan!) oven for 40 minutes.
Take the dough out, punch it down and knead for 1 minute. Roll out the dough until it measures around 25 x 32cm / 10 x 12.5" and put it carefully on an oiled baking sheet. Cover with a tea towel and let it rise for 20 minutes in a warm place.
Set the oven to 220°C / 430°F.
Punch about 6 x 7 holes into the dough with the round bottom of a wooden spoon and put a grape into every second hole. Pour the remaining 50ml / 1 3/4 ounces of olive oil over the dough and into the holes. Sprinkle with rosemary and sea salt and bake for 20 minutes or until golden on top.


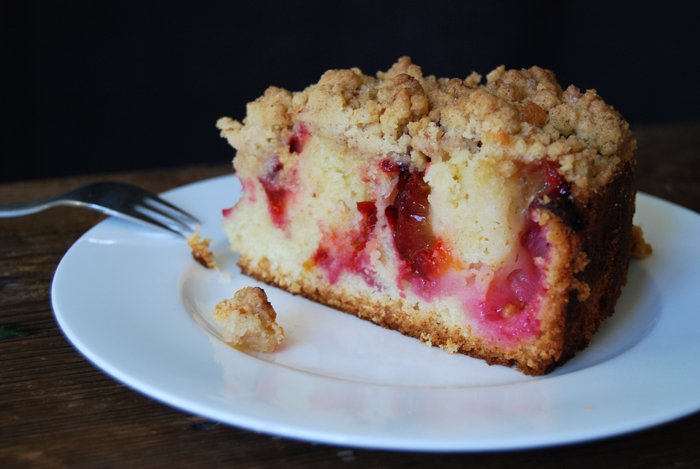
Plum Cinnamon Crumble Cake
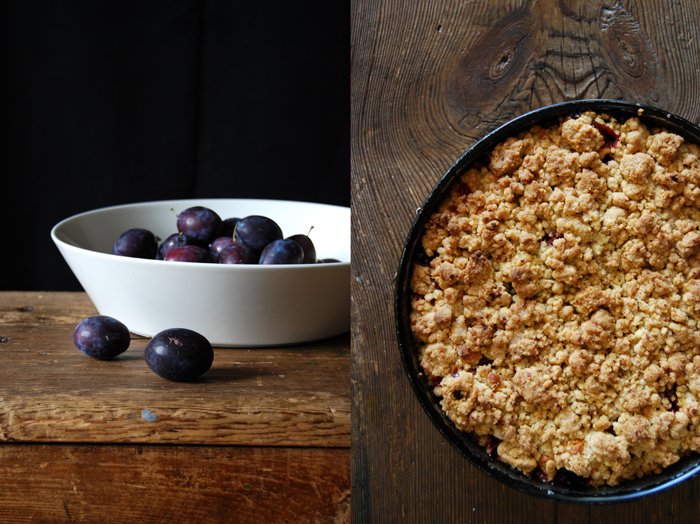
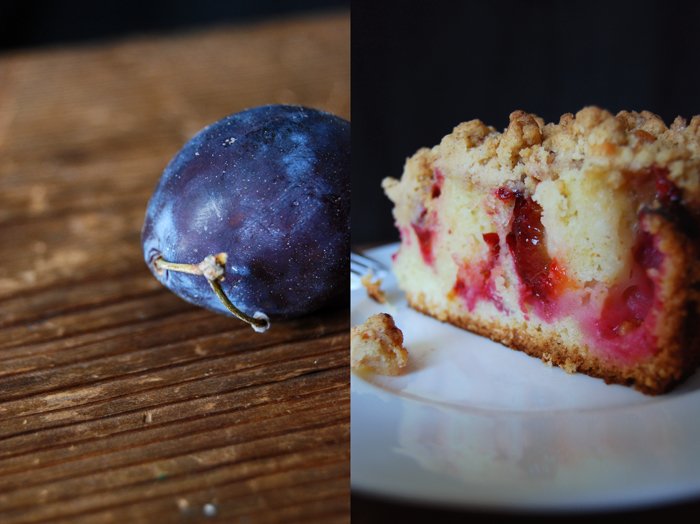
Here is the final of my crumble cake trilogy, the wonderful, Plum Cinnamon Crumble Cake! I started this series in winter, I began with my Apple Crumble, which was one of the first cake recipes on the blog, before I welcomed spring with my Rhubarb Crumble. I love all three of them, I think there is no other sweet recipe I've used more often in my life! These three fruits are my classics but you could easily replace them with gooseberries, peaches, pears or whatever comes into your mind and that fits to cinnamon (which is almost every fruit in my opinion). The base of this cake is spongy but strong enough to carry the juiciest of fruits.
My absolute highlight of this cake are the crumbles, the best buttery crumbles you can imagine! I know I'm repeating myself, but if you find something so perfect in your kitchen you just can't talk about it enough. So, the next layer, the fruits, are as important. I use 2 pounds of fruity juiciness to balance out the two pastry layers of crumbles and the bottom. No matter what fruit you choose they always add a different feel to this cake. The rhubarb's sourness gives it a lighter touch and the plums and apples are perfect for a cosy Sunday afternoon cake in autumn. Relaxed on the sofa, with a cup of tea and a book in my hands, I can't think of a better cake!

Plum Cinnamon Crumble Cake
Prepare the dough for the base first, the plums afterwards and the crumbles at the end.
For a 26cm /10″ springform pan you need
plums, cut in half, 1kg / 2 pounds
For the cake base
butter 125g / 4.5 ounces
granulated sugar 125g / 4.5 ounces
a pinch of fresh vanilla
organic eggs 3
plain flour 250g / 9 ounces
baking powder 2 teaspoons
a pinch of salt
For the crumbles
plain flour 200g / 7 ounces (you might need some more if the crumbles are too sticky)
granulated sugar 125g / 4.5 ounces plus 2 teaspoons to sprinkle over the crumbles
a pinch of vanilla
ground cinnamon 2 teaspoons plus a pinch to sprinkle the crumbles
butter, melted, 125g / 4.5 ounces (plus more if the crumbles are too fine)
Set the oven to 180°C / 355°F.
For the base, beat the butter, sugar and vanilla until fluffy. Add the eggs, one at a time and continue mixing for a few minutes. Add the flour mixed with the baking powder and salt and continue mixing until well combined. Scrape the dough into a buttered springform pan and arrange the plums vertically in circles pushing them into the dough.
The crumbles need good preparation as you have to make sure that the mixture is neither too moist nor too dry. Have some extra flour and melted butter close at hand so that you can add some immediately if necessary.
Combine the dry ingredients in a bowl. Pour the melted butter on top and mix quickly with the hooks of your mixer, stop as soon as it crumbles. If the crumbles are too moist and sticky add a bit more flour (1-2 tablespoons). If they are too fine and don’t form bigger crumbles add more melted butter. Spread quickly on top of the plums. If you have bigger lumps of crumbles you may have to separate and spread them.
Mix 2 teaspoon of sugar with a pinch of cinnamon and sprinkle on top of the crumbles.
Bake in the oven for around 60 minutes or until golden brown on top. Check with a skewer, it should come out clean. Let the cake cool for at least 15 minutes.
You can serve the crumble cake with whipped cream or vanilla ice cream.


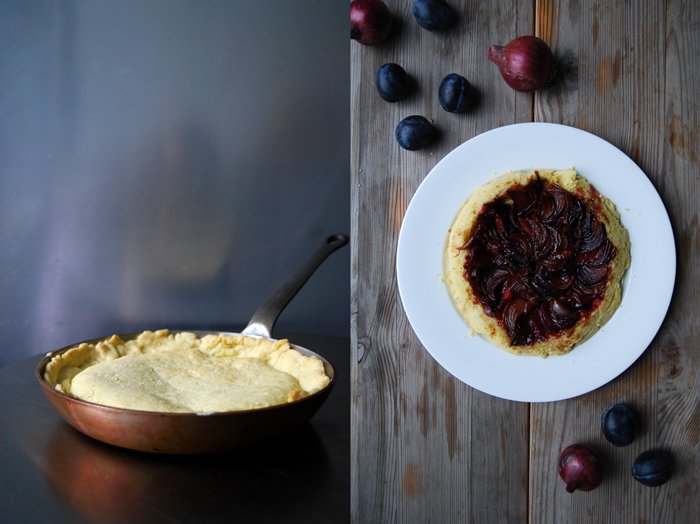
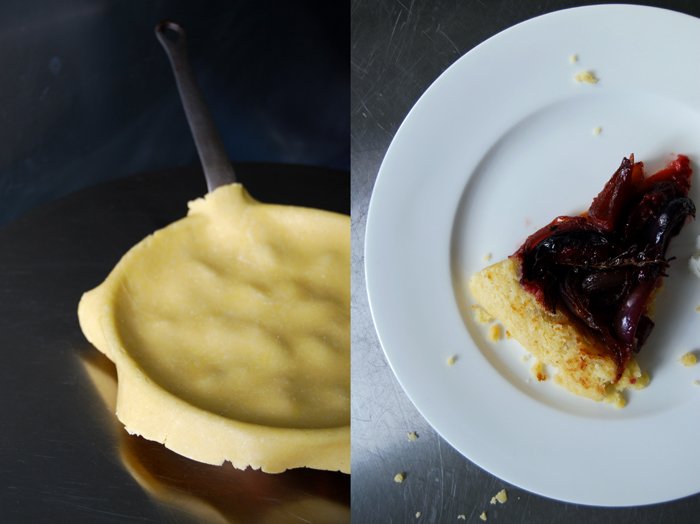
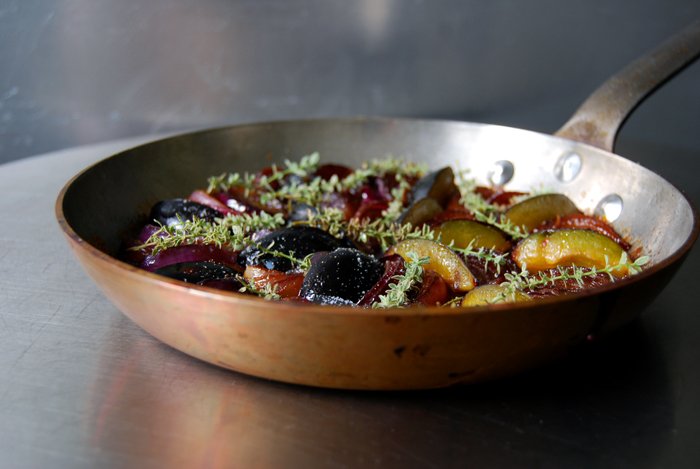
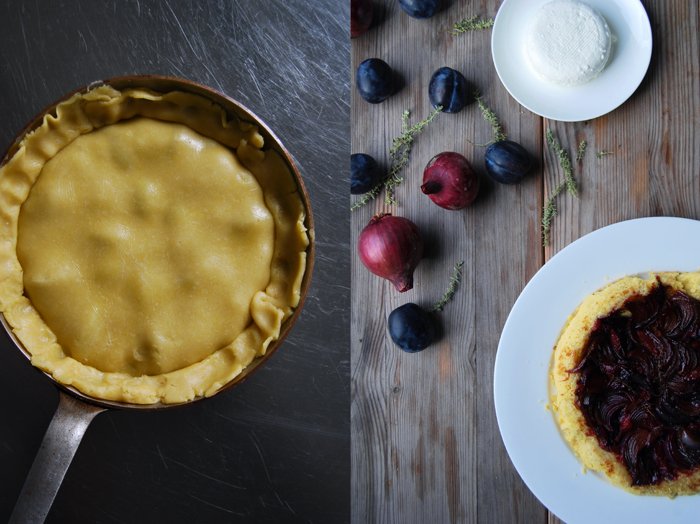
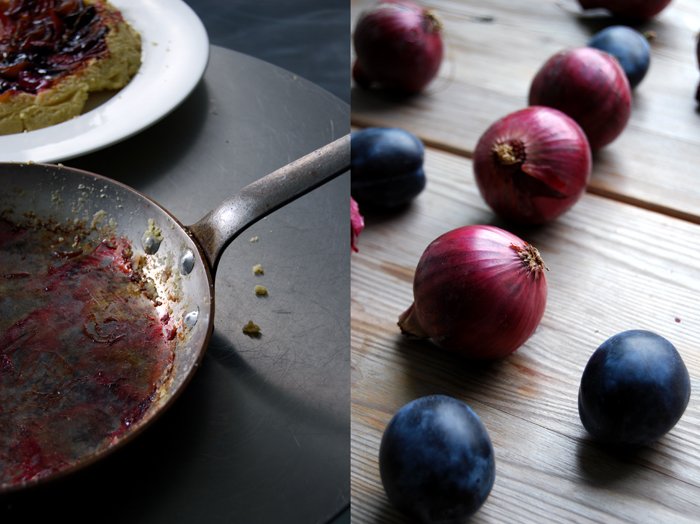
Red Onion and Plum Tarte Tatin with Chèvre
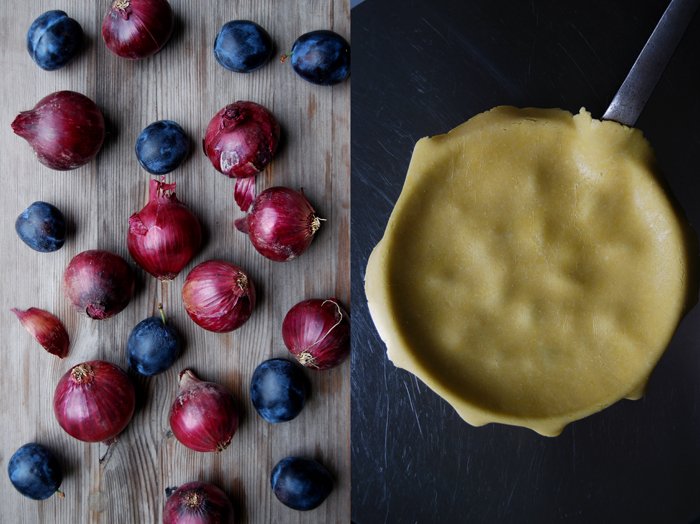
My Tarte Tatin goes savory! Caramelized red onions, sweet and sour plums, aromatic thyme and chèvre replace the apples which I usually choose for this tart, and it's great. This is the taste of late summer!
At the moment I can't get enough of the combination of sweet, fruity and savory flavours. I've always been a big fan of it but I'm a bit obsessed with it right now (so much that my boyfriend already asked for a break). I mix mirabelles, plums, peaches, grapes or figs with saltimbocca, coarse sausages and chicken and I barely eat my cheese without one of my plum, rhubarb or apple chutneys (I will share my plum chutney recipe soon).
I love August and September in northern Europe, the transition to autumn. The light is magical and it's the time to harvest all those wonderful fruits, to cook them and turn them into delicious dishes and colourful jams and chutneys for the colder months. That makes it so much easier to let go of summer!

Red Onion and Plum Tarte Tatin with Chèvre
For the tart you need a 21cm / 8″ Tarte Tatin dish or frying pan which is ovenproof.
mild and soft chèvre 150g / 5.5 ounces, for serving
For the topping
medium sized red onions, cut into 8 wedges each, 4
plums, quartered, 4-6
butter 2 tablespoons
olive oil 1 tablespoon
sugar 1 1/2 tablespoons
balsamic vinegar 1 tablespoon
thyme sprigs 6
salt and pepper
For the shortcrust
plain flour 130g / 4.5 ounces
butter, cold, 75g / 3 ounces
egg yolk 1
salt 1/8 teaspoon
cold water 1 1/2 tablespoons
For the shortcrust, combine the flour and salt. Cut the butter with a knife into the flour until there are just little pieces of butter left. Continue with your fingers and quickly work the butter into the flour until combined. Add the egg yolk and the water, continue mixing with the hooks of your mixer until you have a crumbly mixture. Form a disc, wrap in cling film and put in the freezer for 10 minutes.
Set the oven to 200°C / 390°F.
In a pan (or Tarte Tatin dish), heat the butter with the sugar and oil until it starts to caramelize. Add the onions, arrange them in a circle and cook them for 7 minutes on medium heat. Turn them gently and cook them for another 7 minutes. Mind that they don't burn, they should become golden brown. Tuck the plum wedges in between the onions and cook for 2 minutes. Take the pan off the heat and sprinkle with salt, pepper and thyme.
Roll out the dough, big enough to cover the pan and lay it on top of the onions tucking the edges down the sides. Bake in the oven for 12 minutes or until golden brown. When the tart is done, place a large heat resistant plate on top and turn the pan carefully upside down, keep in mind that it’s very hot!
Serve the Tarte Tatin with a big slice of chèvre.

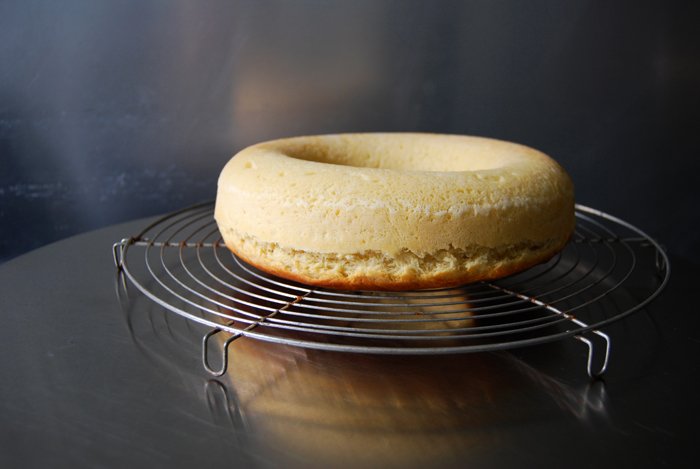
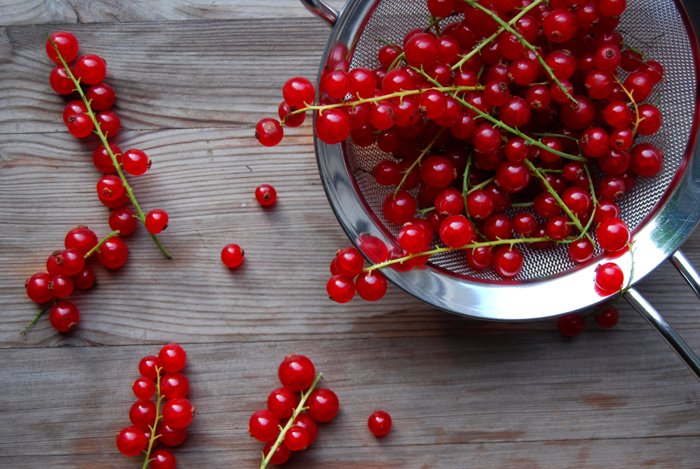
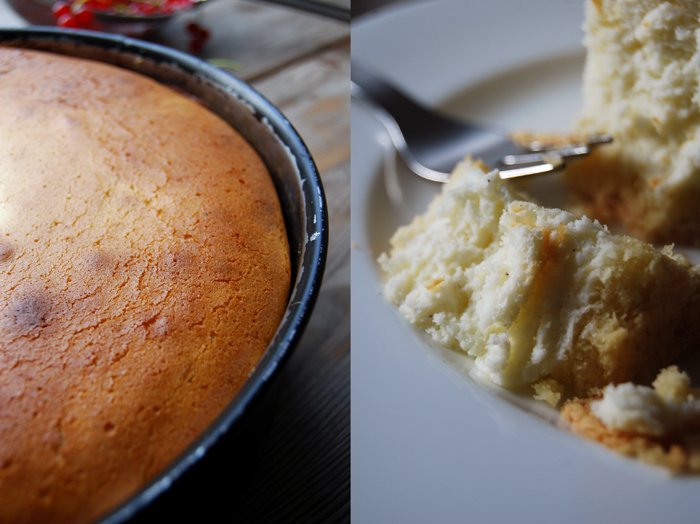
My German Cheesecake with Red Currants
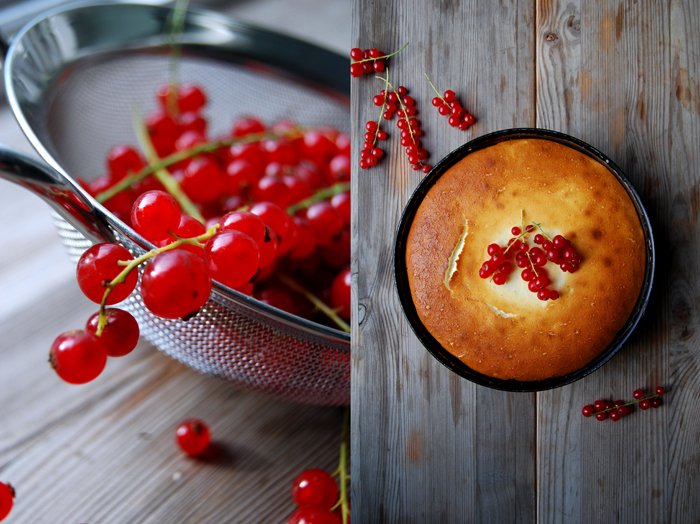
This cheesecake calls for Quark, the famous German cheese which is neither like ricotta, nor cottage cheese or fromage blanc although it's often compared to them. Quark is unique, it's soft, white and fresh with a slightly sour taste, it feels a bit more dry and thicker than yoghurt and although the texture is similar to ricotta it's less heavy. Quark is great for cheesecakes, strudel or Danish pastry or as a savory dip on dark bread, mixed with linseed oil and fresh radish or cucumber. I also use it for my Tzatziki although my Greek-German brother in law doesn't agree on that at all, but he still loves it when I make it for him! I will share that recipe with you next week, then you can judge yourself!
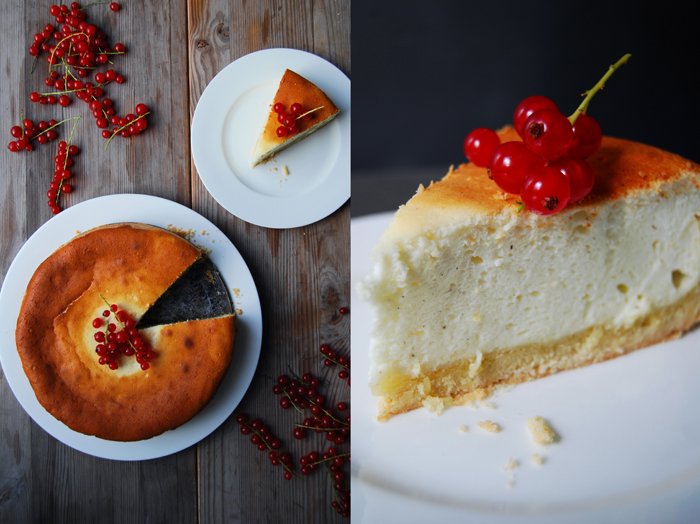
Back to the sweets, this recipe has been with me for as long as I can remember. My mother used to bake it for us, and I still eat it as passionately as I did then. This cake isn't as heavy as a New York cheesecake, the base is made of a crumbly shortcrust and the topping is fluffy, light and lemony. Sometimes I add raisins soaked in brandy but this has to wait for now, it will come later when it gets a bit colder. For now, I keep it fresh and add a few sweet and sour red currants on top.
I know that in some places of the world it's hard or almost impossible to get quark and although I try to write about recipes with ingredients that are easily accessible, there is no alternative for this fresh cheese. You can't use ricotta (at least I've never tried it with this recope) or cream cheese, you just get this fluffy cheesecake result when you use quark.

German Cheesecake with Red Currants
This recipe is measured for a 30cm / 12" springform pan. The one that I use is 26cm / 10", so I bake some of the leftover cheese filling in a small baking dish and scope it out with a spoon when it's still warm and fresh out of the oven, it's delicious!
For the topping
red currants, a big handful
For the short crust base
plain flour 250g / 9 ounces
granulated sugar 50g / 2 ounces
a pinch of salt
cold butter 125g / 4.5 ounces
organic egg 1
Combine the flour with the sugar and salt. Cut the butter into the flour with a knife until there are just little pieces of butter left. Continue with your fingers and work the butter into the flour until combined (there shouldn’t be any lumps of butter left). Add the egg and continue mixing with the hooks of your mixer until you have a crumbly mixture. Form a ball, wrap in cling film and put in the freezer for 10 minutes.
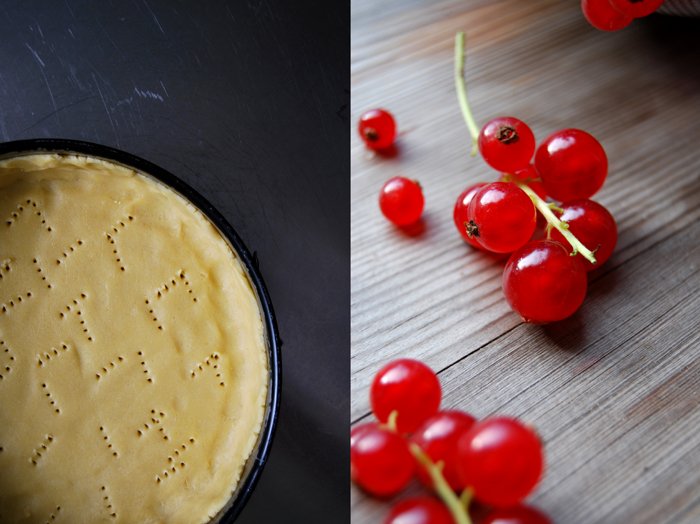
Set the oven to 200°C / 390°F top/ bottom heat.
Roll out the dough between cling film, big enough to come up 2/3 of the rim of the springform pan. Line the pan with the flat pastry, prick it with a fork and blind-bake in the hot oven for 10-12 minutes or until golden.
For the cheese topping
Quark (low fat) 750g / 26.5 ounces
organic eggs 5
cornstarch 80g / 3 ounces
baking powder 1 teaspoon
granulated sugar 150g / 5.5 ounces
milk 125ml / 4.5 ounces
zest of 1 lemon
a pinch of fresh vanilla
Turn the oven down to 175°C / 350°F.
Beat the egg whites with a pinch of salt for a few seconds, add 50g of sugar and continue beating until stiff.
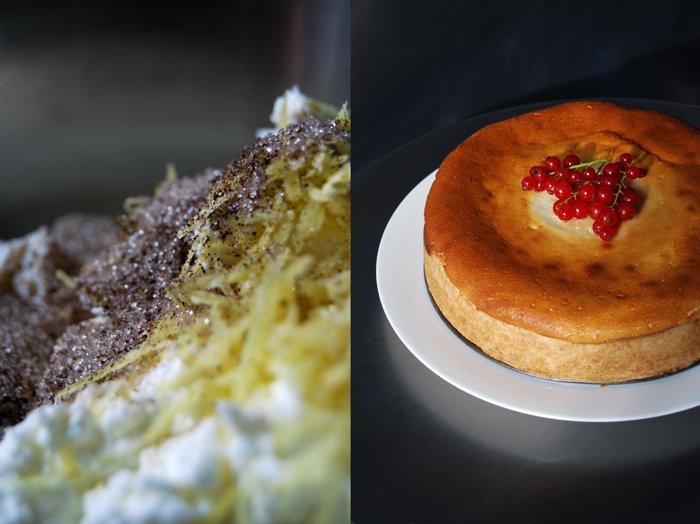
Mix the Quark, egg yolks, cornstarch, baking powder, 100g / 3.5 ounces of sugar, the vanilla and lemon zest until well combined and creamy. Mix in the milk and gently fold in the stiff egg whites with a wooden spoon.
Fill the cheese mixture in the springform pan on top of the baked short crust, if there's too much of it fill the remaining mixture into a separate baking dish. Bake for 60 minutes or until the top is golden brown. Let it cool in the springform for 10 minutes before you take it out. Serve warm or cold with red currants.

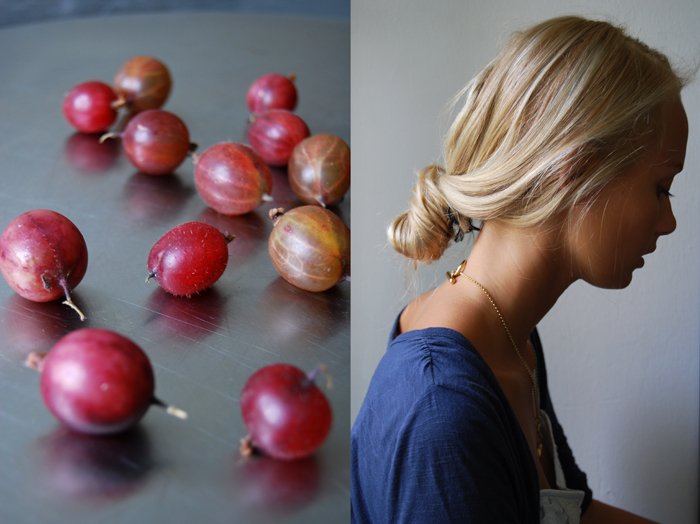
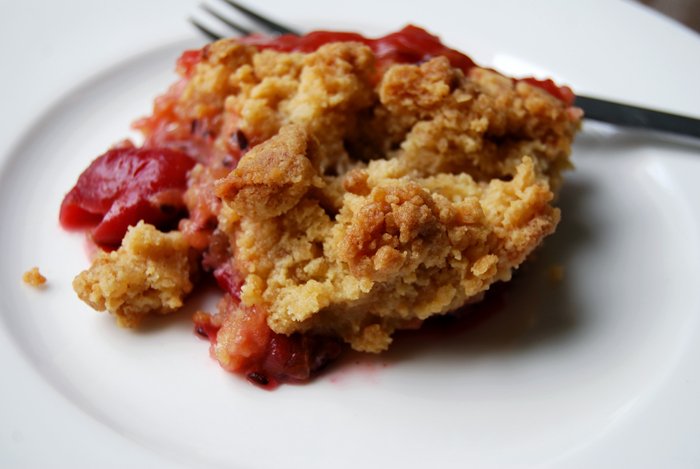
meet in your kitchen | Cristina's crunchy Gooseberry Crumble
It was mid July, a few days before I changed my Berlin kitchen for the one in the Mediterranean, when I got an unexpected message from Cristina. She said she would be in Berlin for a few days and asked if I would like to bake together with her. She is a very close friend of my Maltese sister Emma, both of them love to bake and I have seen the two girls working on delicious cake and cookie creations quite a few times. Whenever I met Cristina in the kitchen we used to talk about German food as her mother is from the south of Germany and her cooking is influenced by both the Maltese and the German cuisine.
Emma and Cristina became friends on a film set a few years ago, they were booked for a few scenes in a big film production on the island and they bonded straight away. They are both exceptional beauties, so it didn't take too long for them to become well known models in Malta, and against all clichés, their friendship managed to survive this business.
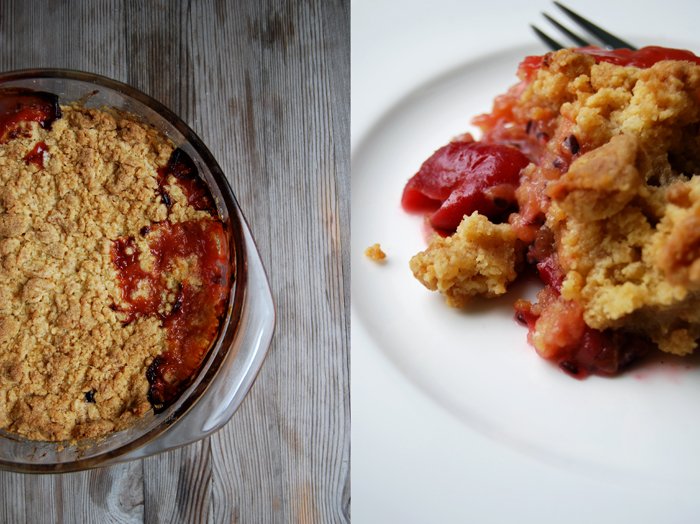
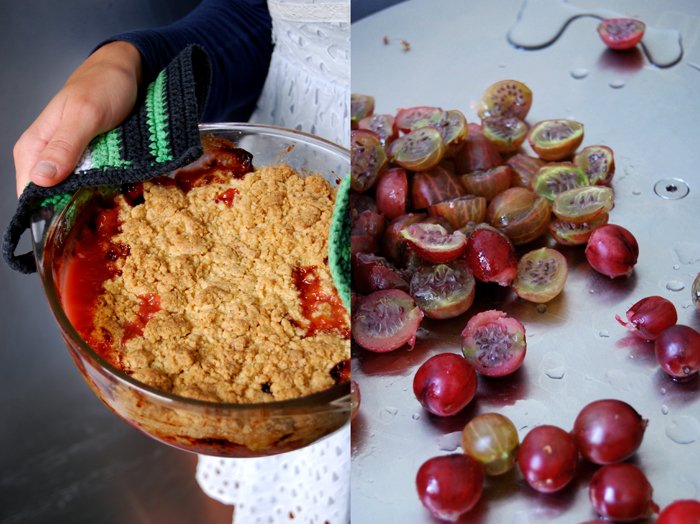
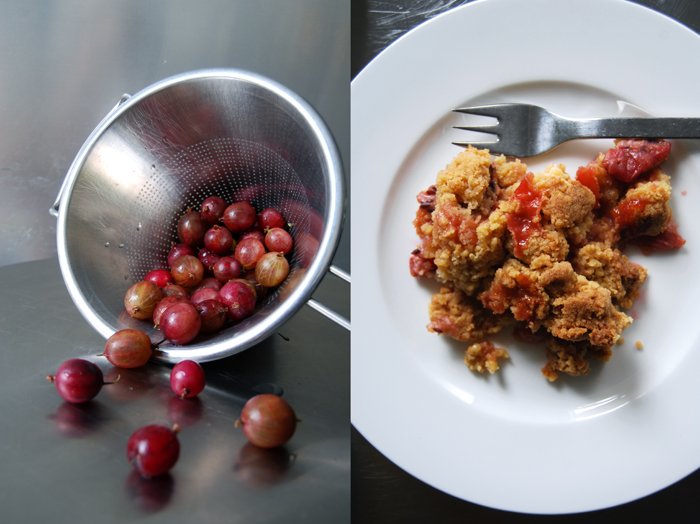
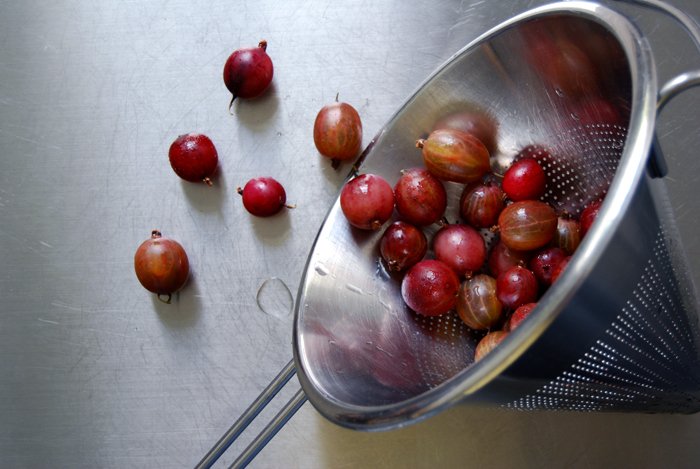
I was happy that Cristina got in touch to meet for a baking session, a meet in your kitchen changed to a meet in my kitchen! We decided to go for a fruity crumble. She suggested an apple crumble but in the end we went for gooseberries, they are in season at the moment and she had never tried these tart little berries before. I bought very ripe red berries as they are less sour than the green ones, I didn't want to shock her too much with her first gooseberry experience! She loved them and they were a perfect addition to her cinnamony crumbles, juicy and fruity at the bottom and crunchy on top!
While we were baking and chatting in the kitchen, I asked her a few questions about her modeling, her studies and her recent travels to Marrakesh. Cristina just finished her bachelor of Science in Earth Systems, the past years of studying influenced her consciousness about environmental issues and affected her lifestyle strongly.
Cristina's Gooseberry Crumble
gooseberries, cut in half or whole, 500g / 1 pound
plain flour 300g / 10.5 ounces
Demerara sugar 175g / 6 ounces plus 2 scant tablespoons for the berries
butter, at room temperature, 200g / 7 ounces
ground cinnamon 1/2 teaspoon
Set the oven to 180°C / 355°F and butter a 20cm / 8" baking dish.
Combine the flour and sugar, add the butter and mix with your fingers until you have a crumbly mixture.
Put the gooseberries in the baking dish and mix with 2 tablespoons of sugar mixed with the cinnamon. Spread the crumbles on top of the berries and bake for 45 minutes, turn the oven up to 200°C / 390°F and bake for further 15 minutes or until the crumbles are golden brown.
You live in Malta, your father is Maltese but your mother is from the south of Germany. How did these two cultures influence your life and personality?
I don't really feel closer to one or the other. Actually I do feel like I am properly half Maltese and half German. I feel inspired by both cultures, I tend to cook more Mediterranean when it comes to savory food. When we're in Germany I really enjoy how green it is and I spend more time outside in the countryside than I would in Malta.
What are your favourites from the Maltese and German cuisine?
From the Maltese cuisine, I love the typical Maltese Ftira bread with its filling (no fish). This is the food I really miss when I'm abroad, as the type of bread is so unique. From the German cuisine it would have to be the typical German dish called Milchreis.
What did you miss the most about Maltese food when you lived in Berlin? What did you discover here that you reallly enjoyed?
The Ftira. I love that in Germany, in Berlin in particular, there are little bakeries at every corner. I have a sweet tooth, so I love buying all kinds of pastries and cakes.
What was the first dish you cooked or baked on your own, what is your first cooking memory?
I don't remember, but my family makes quite a big deal about birthdays. Every year, we all bake a special birthday cake for each other and take time in finding the perfect cake to bake and also work a lot on the decoration and make sure each cake looks different from one we had already done.
What are your favourite places to buy and enjoy food in Malta?
I like places that promote fresh foods, preferably healthy ones also. The view and setting of the restaurant is also important. One of my favorite go to places for lunch, dinner or just any snack is Mint, in Sliema. They offer daily fresh options (and vegetarian ones too) and display their menu for the day in large refrigerators, so that people can see before hand what the food looks like. I recently also discovered the farmers market, where you can buy all sorts of local and fresh fruit and veg, straight from the farmer himself!
You've just finished your bachelor of Science in Earth Systems, can you explain what this is about? How did your studies effect your daily live and your environmental consciousness?
My course is an environmental based subject, which includes studying different branches of the environment, such as biodiversity, geology or hydrology. The course really changed how I think about a lot of things in our world. Apart from the obvious things such as being more environmentally aware, I am starting to reduce what I purchase, in terms of where things are produced, what I eat etc.
I know that you love to travel and you've just come back from Morocco, what were your strongest impressions? Did you make any new culinary discoveries?
Morocco was a wonderful place and very different to what I imagined. In the large cities, the people are not as conservative as you might think, and most citizens are super friendly. With regards to food, I felt that in the main cities such as Marrakesh, there was not much variation, particularly for vegetarian dishes. They mostly served couscous, vegetable tagine or omlettes. All meals however were always colourful in appearance and accompanied by a mix of olives and flat bread.
Besides being at university during the past few years, you also became a successful model. What do you like and what do you dislike about this job?
I just do some modeling in Malta as a hobby, and an easy way to make money rather than a job. Its fun to dress up for a while and play a different character, but I'm not someone that likes to spend time and money on clothes or new accessories. The industry also creates a large demand on animal trade, in particular furs or jewellery made from (for example) rhino horn. I am completely against this, and would refuse to model such items.
What or who inspired you to become an environmentalist?
The course I studied opened my eyes to the problems in our world, but I would say that it originated from my childhood. When I was young (and still now) our family outings always consited of a lot of outdoor activites, such as hikes or picnics in the countryside. When we visit Germany, we always go skiing in winter time and hike different mountains or cycle by lakes during summer time. The school I went to was also situated in a very green part of Malta and a lot of our activities consisted of interacting outside with the environment. This really influenced me.
What did you choose to share on eat in my kitchen and why?
I chose an apple crumble, which Meike interestingly suggested to make a goosberry crumble since the fruit is now in season. I actually came up with this recipe with a friend of mine when we were living in Berlin. We tweaked it so that it would really be ours, and we found it so delicious from the first bite. The streusel, or crumble, is really crisp and just the right texture to complement the slightly softened and flavoured fruit underneath.
If you could choose one person to cook a meal for you, who and what would it be?
It would have to be Ina Garten from the cooking show Barefoot Contessa. I watch all of her cooking shows and have her recipe books.
You're going to have ten friends over for a spontaneous dinner, what will be on the table?
A nice quiche with grilled vegetables, pasta salad with vegetables and crunchy apples and a strawberry cheesecake.
What was your childhood's culinary favourite and what is it now?
My mother used to make pasta with sugar for us sometimes. When I have it now it just really reminds me of when I was younger. Something I would always have an appetite for now are my homemade brownies with nuts and white chocolate topping. Once I ate a whole portion in one day!
Do you prefer to cook on your own or together with others?
I like cooking with others if they know how to cook. It's not so much fun with people who don't really know how to cook or who are not really in the mood.
Which meals do you prefer, improvised or planned?
Improvised!
Which meal would you never cook again?
Once I cooked a chocolate coffee cake and I must have put too much coffee in. Since then the cake put me off coffee.
Thank you Cristina!


Joanna’s amazing Maltese Bread Pudding
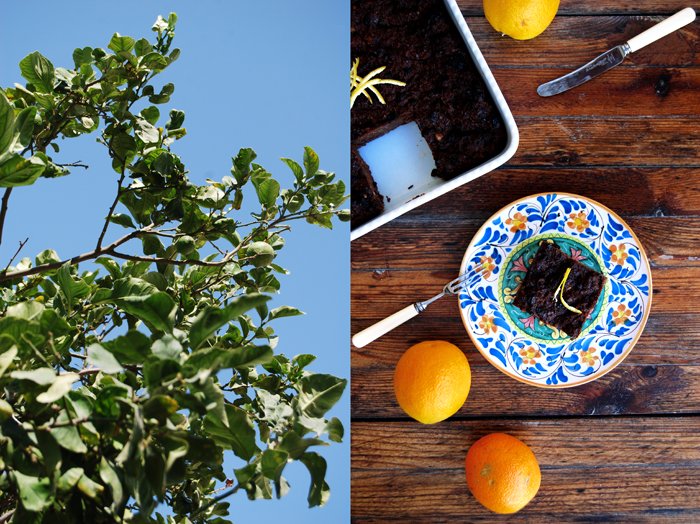
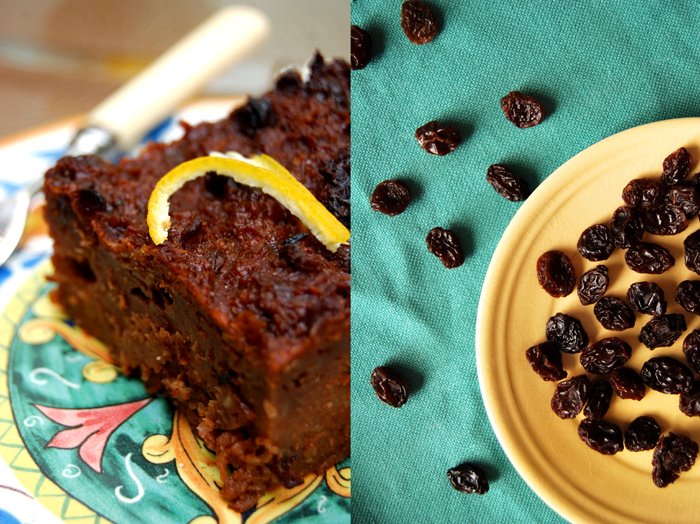
Fruity, sticky and juicy, that's what comes to my mind when I think of Joanna Bonnici's Maltese Bread Pudding. I loved its richness, stuffed with sweet Mediterranean flavours, like tangerine and orange, the bread mixture enhanced by the aromas of nutmeg, vanilla, cinnamon, coconut and whiskey. I got hooked on it after the first bite and couldn't stop cutting piece after piece off this cakey juiciness!
When I met Joanna at her house a few days ago for the meet in your kitchen feature, I was so excited to see her, but I must admit that I had been looking forward to trying her famous pudding for days! Her kind and welcoming character, her big smile made me feel at home straight away. We sat down in her garden, enjoyed a cup of coffee and a slice of her pudding for breakfast and it felt like we had known each other for years! She made us feel so comfortable that, when I finished the first slice of this wonderful sweet, I didn't feel shy to ask for another one!
As I got home I shared another piece with my Maltese Mama Jenny, a true bread pudding connoisseur. We sat down together in her kitchen, prepared for our sweet tasting. Jenny could only agree, she said it was the best Maltese bread pudding that she had ever tasted!


Maltese Bread Pudding
Makes 1 large pudding
stale rolls or panini, torn into bite sized chunks, 6 (about 500g / 17 1/2oz)
fresh milk 1l / 4 1/4 cups
mixed dried fruit 250g / 9 ounces
orange, juice and zest, 1
desiccated coconut 3 tablespoons
dates, chopped, 100g / 3.5 ounces
apricot jam or marmalade (or whatever there is in the pantry) 2 tablespoons
granulated sugar 3 tablespoons
cocoa powder 2 tablespoons
a pinch of nutmeg
a pinch of vanilla
a pinch of cinnamon
tangerine zest 1 teaspoon
amaretto di Saronno (or whiskey) 2 tablespoons
Mix the milk, orange juice, vanilla, amaretto and marmalade. Combine the remaining ingredients in a large bowl and add the milk-orange mixture. Mix with your fingers and let it soak for an hour.
Set the oven to 180°C / 355°F and line a 23 x 28 x 4cm / 9 x 11 x 1 1/2" baking dish with parchment paper.
Fill the pudding mixture into the lined baking dish and bake in the oven until the top of the pudding is firm, just starting to be springy. Insert a skewer to check if the pudding is done. (Joanna does it by feeling, she can’t say the exact baking time, it also varies depending on the rolls, but it takes about 65-75 minutes for me when I bake it.)
May be served with warm custard or on its own with a cup of tea.


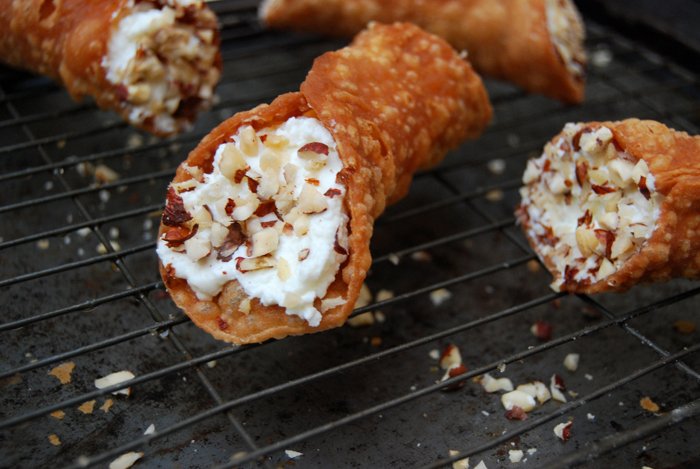
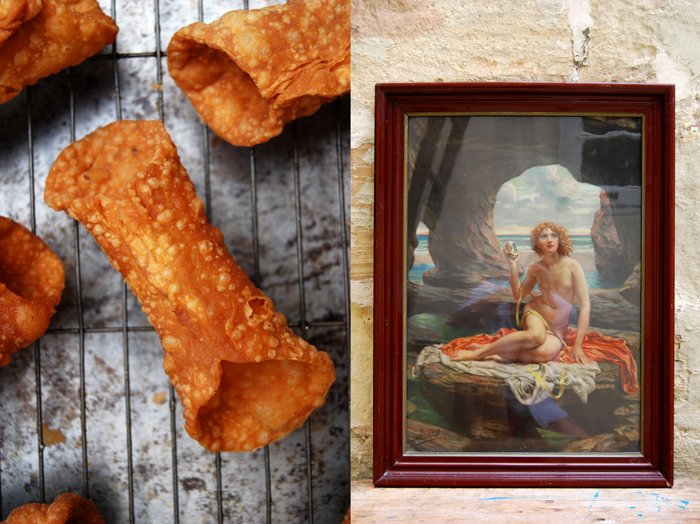
Kannoli filled with Lemon Ricotta

One of Msida's culinary highlights (at least for me) is Busy Bee Confectionery right at the Ta'Xbiex Sea Front and whenever I'm here it becomes my second home. I go there almost every day to stock up with sweet and savory pies, Pastizzi, Qassatat, Cassata Siciliana, chocolate cakes, Ottijiet cookies or cannoli (Kannoli in Maltese). Many of these delicacies are made with ricotta which has a special taste and texture in Malta. It's a bit crumbly, slightly sweet and perfect for fluffy fillings, either pure or flavoured as it mixes very well with all kinds of aromas. My ricotta consumption reaches its annual peak during summertime, luckily our lifestyle also involves lots of physical activities when we're here, so it balances out!
For years I've been buying Busy Bee's Kannoli which are one of the best on the island but I've been thinking about making my own for quite a while. A few days ago my Maltese sister Emma came to visit us and the time felt right to get this project started. Jenny gave me the metal tubes, which you need to fry the Kannoli rolls, as a birthday present and I had already come up with my recipe. I decided to go for a lemony ricotta filling made with lemon zest to give it a lighter, summery feeling. It was a success and we all loved it!
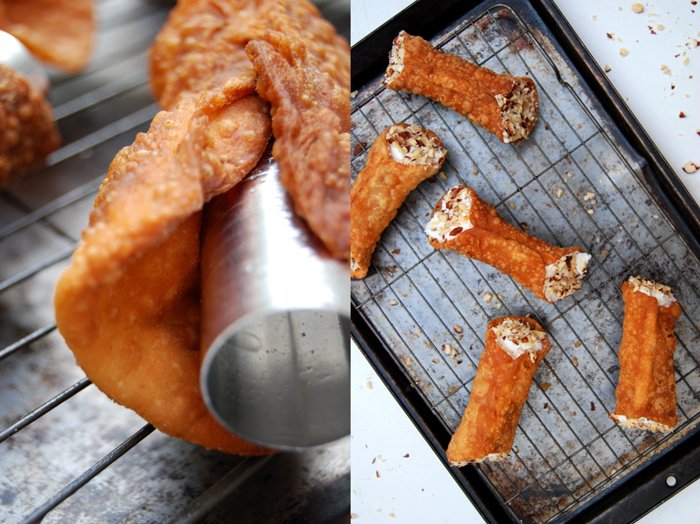
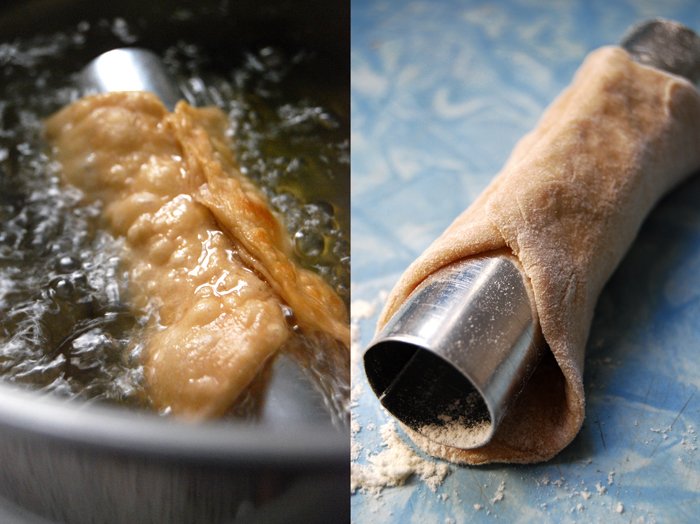
The next exciting step was making the pastry, the Kannoli horns. They have to be thin enough to become crisp but thick enough to carry the filling. The dough is very easy to prepare, I added Maltese Moscato wine instead of Marsala and a little cinnamon and cocoa powder which gives the rolls a nice taste and makes them a bit darker. The first two circles we rolled out were a bit too thick and took a bit longer to fry but the second batch was perfect! We wrapped the thin discs around the metal tubes and folded them twice at the top so that they wouldn't open. They need just 1-2 minutes in the hot oil to turn into the most beautiful, crisp Kannoli horns. We stuffed them with the lemony filling and dipped them into chopped hazelnuts as Busy Bee does - the result was delicious!
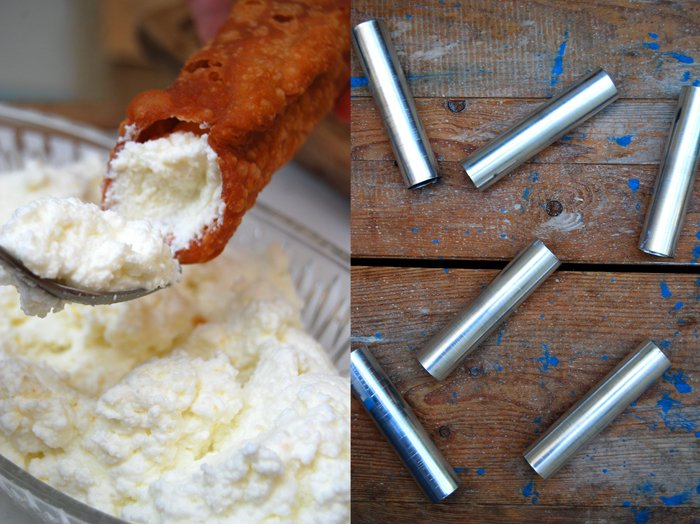
Kannoli filled with Lemon Ricotta
You need Kannoli metal tubes to fry the pastry.
For 18 Kannoli you need
For the filling
fresh ricotta, drained, 1kg / 2 pounds
granulated sugar 120g / 4.5 ounces
zest of 1 lemon
Whisk the ingredients for the filling, season to taste and put in the fridge.
For the Kannoli horns
plain flour 300g / 10.5 ounces
granulated sugar 5 tablespoons
salt 1/2 teaspoon
ground cinnamon 1/4 teaspoon
cocoa powder 1 1/2 teaspoons
butter, at room temperature, 2 tablespoons
organic egg yolk 1
Moscato wine (or Marsala or red wine) 75ml / 2.5 ounces
water 75ml / 2.5 ounces
Combine the dry ingredients and mix together with the butter, egg, wine and water to an elastic dough. Let it rest for 10 minutes.
For the Kannoli
vegetable oil for frying, about 1l / 2 pints
hazelnuts, chopped, 200g / 7 ounces
In a large pot, heat the oil.
Roll out the dough on a floured surface very thinly and cut out 12cm / 5" discs. Wrap the discs around the Kannoli metal tubes, fold twice and seal well. When the oil is hot, fry the pastry for about 1-2 minutes until the Kannoli horns are golden brown (fry 2-3 horns at a time). Take them out carefully, put them on kitchen roll to remove excess oil and let them cool for 1-2 minutes before you remove the metal tubes.
Let the Kannoli cool completely before you fill them with the ricotta mixture and dip the ends into the chopped hazelnuts, serve immediately as they get soggy when they sit for a few hours. You can also keep the Kannoli horns in an airtight container and fill them just before serving.


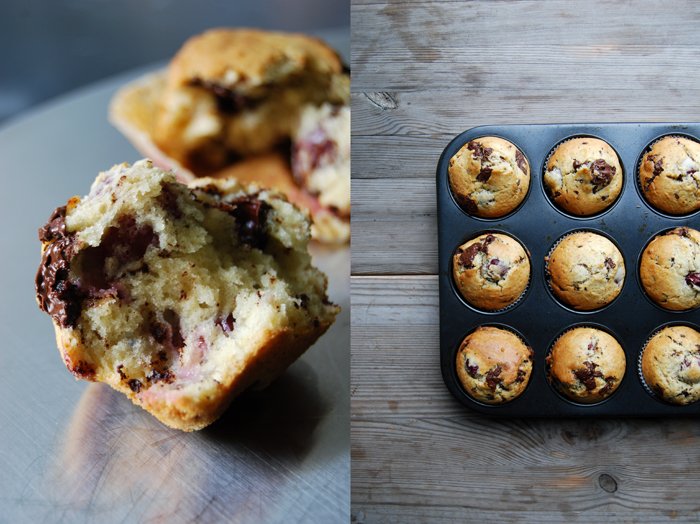
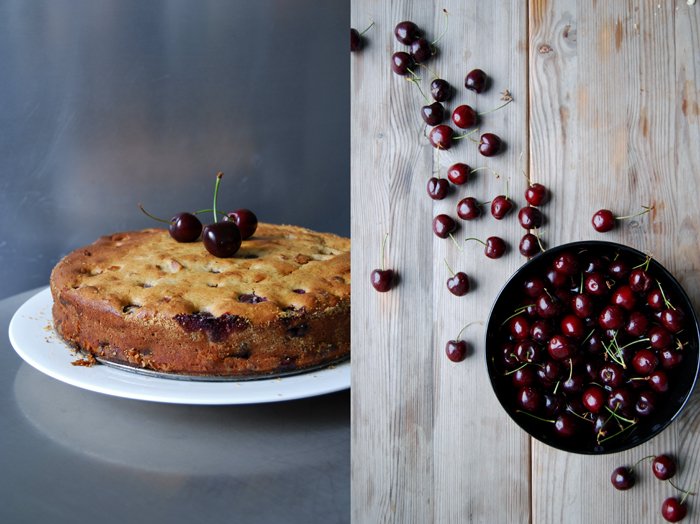
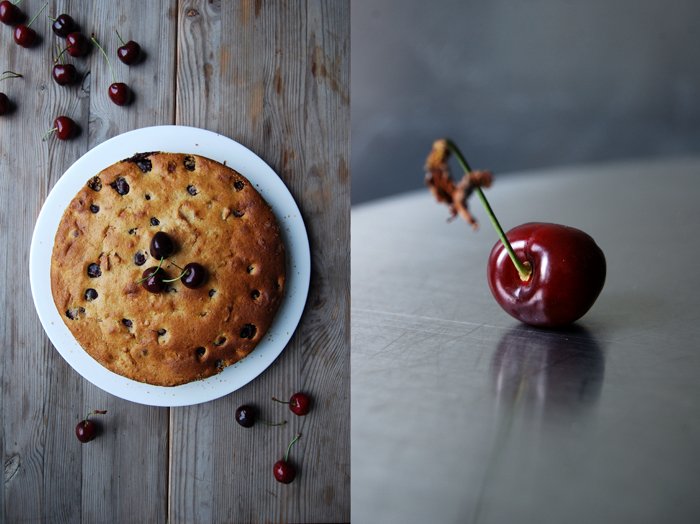
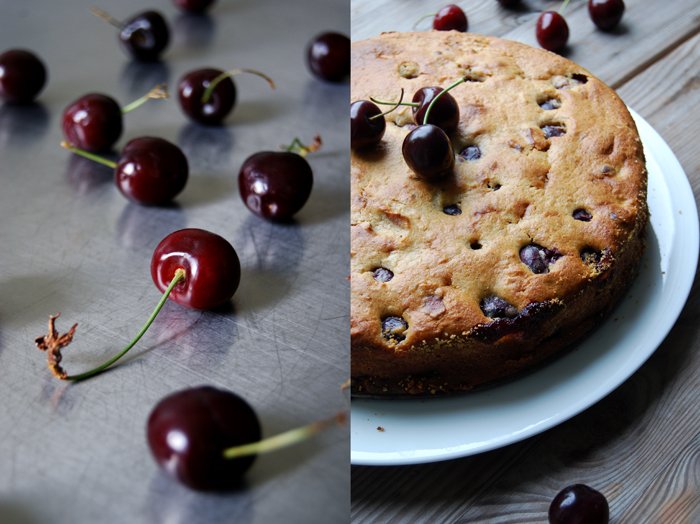
Cherry and Chocolate Muffins
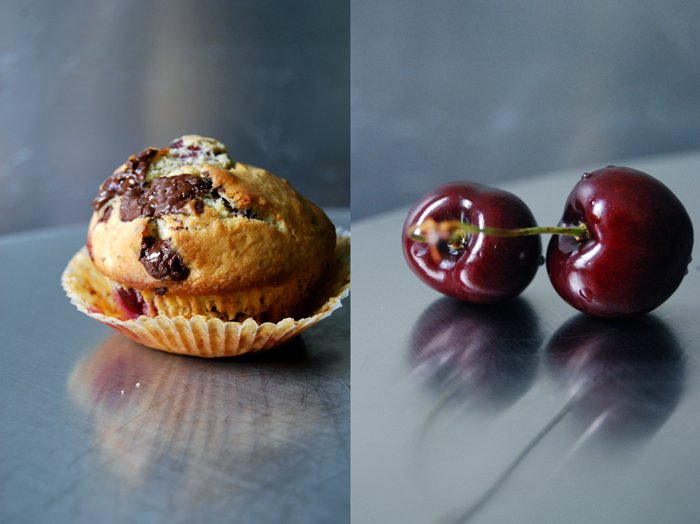
After almost six weeks without baking any muffins it was time to pull out the tray again. I mentioned my excessive cherry shopping last week and this recipe is only one of the baking results that this led too. There was the Swabian Kirschenmichel and a couple other sweets that didn't even make it onto the blog, it was just too much cooking and baking to write about!
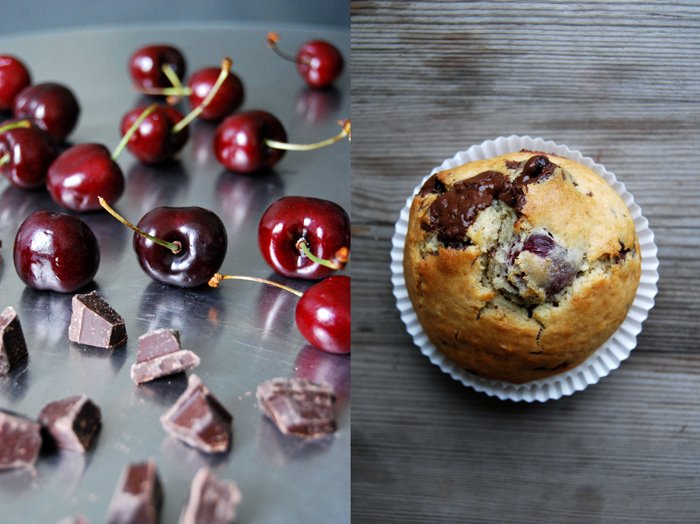
So here's one of my creations, muffins stuffed with chunky bittersweet chocolate and sweet dark cherries, unpitted to keep them firm and juicy. I find this combination is one of the best for muffins. Although I love them with blueberries or with my blood orange marmalade mixed into the dough, but the sweetness of the black fruits and the dark chocolate melted into the cakey sponginess is just too good! So good that I fill each mold with one third more of the dough than I usually do, more dough means bigger muffins!
Cherry and Chocolate Muffins
For a muffin tray with 12 molds you need
fresh black cherries, unpitted or pitted, 250g/ 9 ounces
bittersweet chocolate, roughly chopped, 100g / 3.5 ounces
plain flour 320g / 11.5 ounces
granulated sugar 100g / 3.5 ounces
baking powder 3 leveled teaspoons
baking soda 1/2 teaspoon
salt 1/4 teaspoon
milk 210ml / 7 ounces
butter, melted, 120g / 4.5 ounces
organic eggs 2
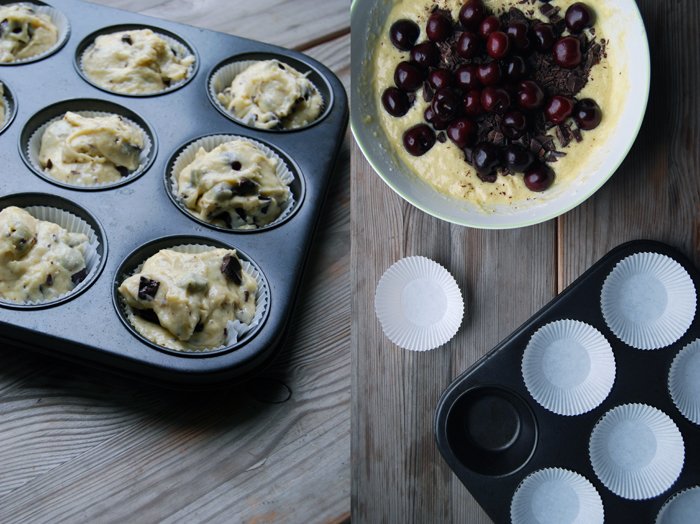
Set your oven to 190°C / 375°F (fan-assisted oven) and put paper baking cups into the 12 molds.
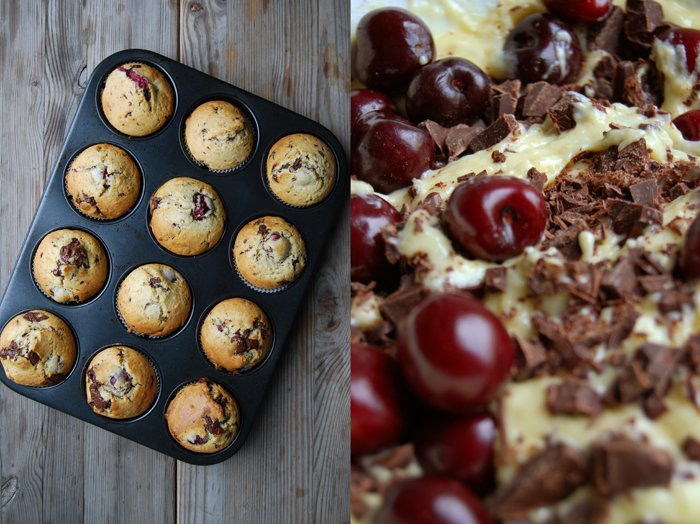
Combine the dry ingredients in a large bowl. Whisk the milk, melted butter and eggs in another bowl. Pour the liquid mixture into the dry mixture, stir with a wooden spoon until you have a lumpy dough. Gently fold in the cherries and chocolate. The more you mix it the more it will lose its light texture.
Fill the muffin tray and bake for 15 minutes or until golden.
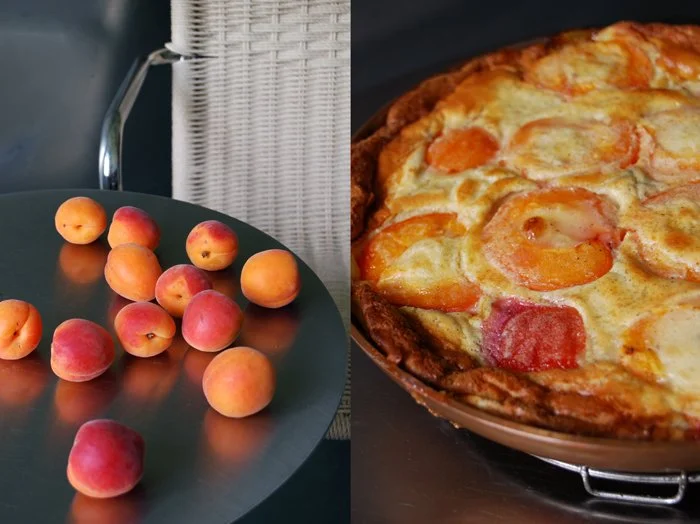
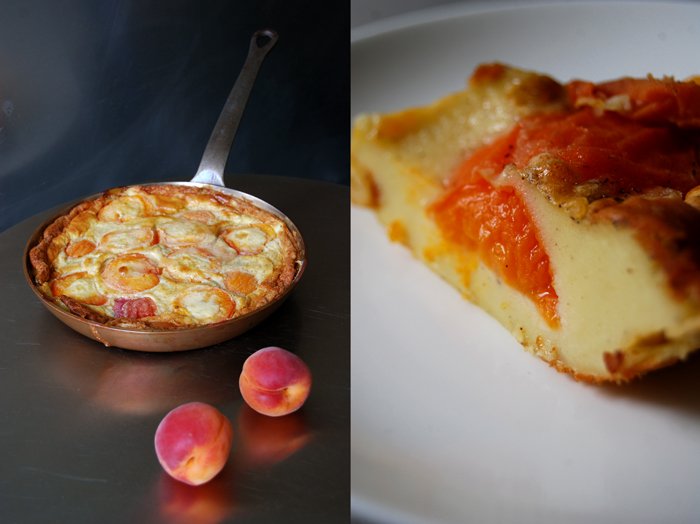
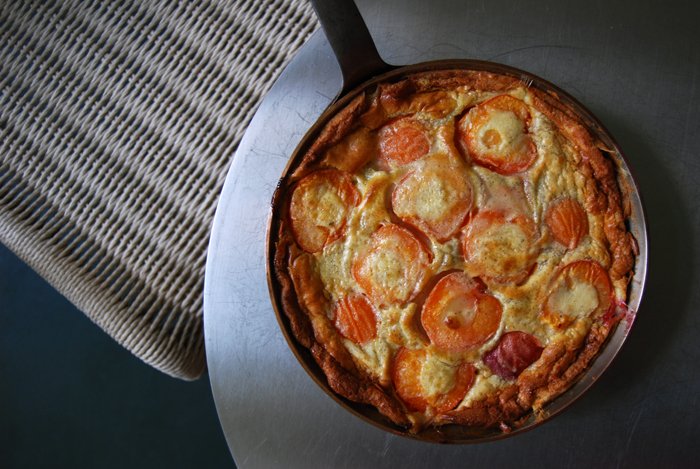
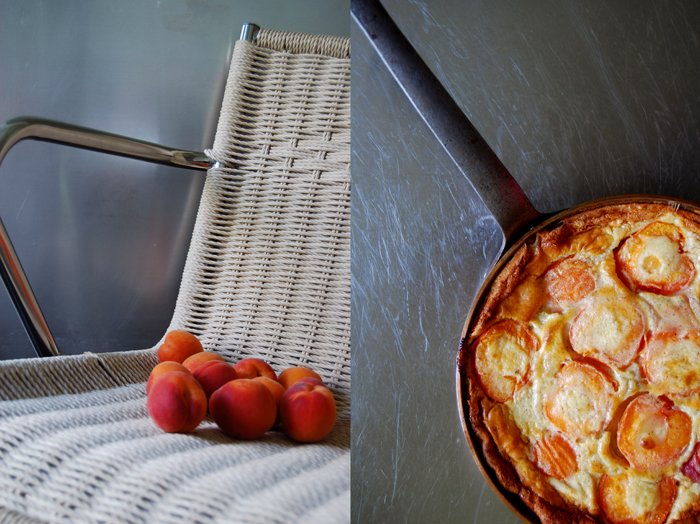
Apricot Clafoutis

My Apricot Clafoutis is as easy to make as pancakes - and it's at least as addictive! It looks like a tart but the texture is more like a flan, it's not too sweet, light and fruity. I can imagine it as a wonderful dessert for a summer dinner, sitting outside in a garden and finishing the meal with a pretty French clafoutis.
We had a friend over and as soon as the clafoutis was out of the oven, we gathered in my kitchen and waited impatiently for it to cool down a bit. We cut this scrumptious little thing into pieces and it was nearly gone in 15 minutes! It's one of those sweet treats that you end up eating in one go without noticing. Our guest had never tried this French dish before and he looked quite taken by its taste - he was the first one who asked for a second piece!
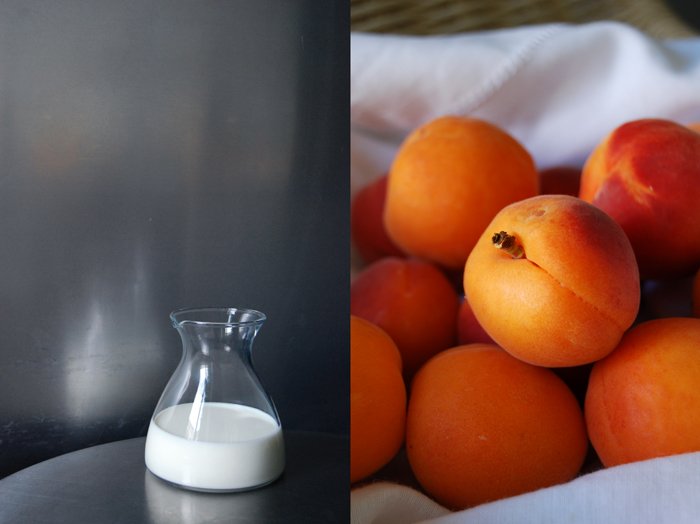
Traditionally, a clafoutis is made with black unpitted cherries but I needed a cherry break as I ate far too many of them in the past few days. Apricots were my first choice, and I almost prefer them in this dish. I like how they blend in with the vanilla flavoured batter. They aren't as sweet as peaches or cherries which fits very well in this composition. I also left out the traditional icing sugar on top, all the flavours were so well balanced that I didn't feel the need to add more sweetness.

Apricot Clafoutis
For a 23cm /9" heavy pan or baking dish you need
apricots, cut in half, 6
plain flour 80g / 3 ounces
granulated sugar 4 tablespoons
a pinch of fresh vanilla
a pinch of salt
butter, melted, 30g / 1 ounce
organic eggs 4
milk 200ml/ 7 ounces
brandy 3 tablespoons
optionally: icing sugar for dusting
Set the oven to 190°C / 375°F (fan-assisted oven) and butter the pan generously.
Combine the dry ingredients. Whisk the milk, eggs, brandy and melted butter and pour into the dry mixture, mixing constantly until well combined.
Spread the apricots in the pan and pour the batter on top. Bake for 20 minutes, turn the oven down to 175°C / 350°F and bake for another 8 minutes or until the clafoutis is golden and set. Let it cool for 5 minutes, leave it in the pan or turn it around and sprinkle with icing sugar if you like, serve warm.

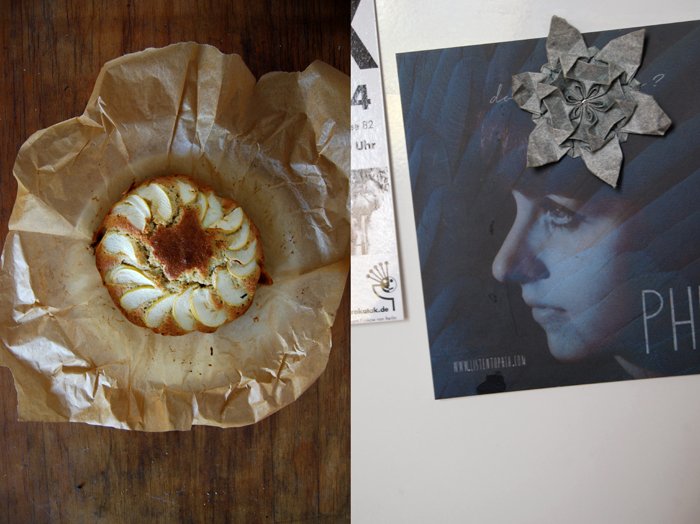
meet in your kitchen | Phia & Josh bake Mum's French Cake
This is the start of a new series of features on the blog - meet in your kitchen! I will be meeting artists, chefs - people with a great passion for what they do, in their kitchen, to cook or to bake while we talk about their culinary life, current projects and inspiration.
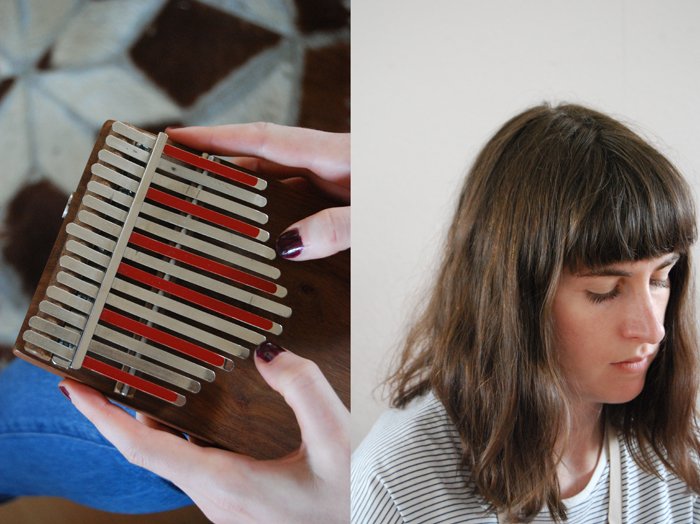
I'm very excited to start with two artists who I first saw live a couple years ago, Phia and Josh! Phia performed on a houseboat on a big lake outside Berlin and mesmerized me with her singing, her Kalimba and the loops she created during her show.
The two artists grew up in Melbourne and decided to move to Berlin three years ago to grow as artists and touch new musical ground. They soon found that their ideas worked well together and the time was ripe for a colaboration. Phia, the singer who plays the kalimba and Josh, the guitarist and producer understand and enhance each other and in a few months they will share their musical vision on the first Phia album!
Although the two are very busy in the studio at the moment they took some time out and invited me to their Berlin kitchen. They arrived in the city with little more than a suitcase and had to piece together everything from scratch. The furniture and every single pot, plate and mug has its own story, mostly coming from friends who moved back home or flea markets, a unique space full of soul and personal memories.
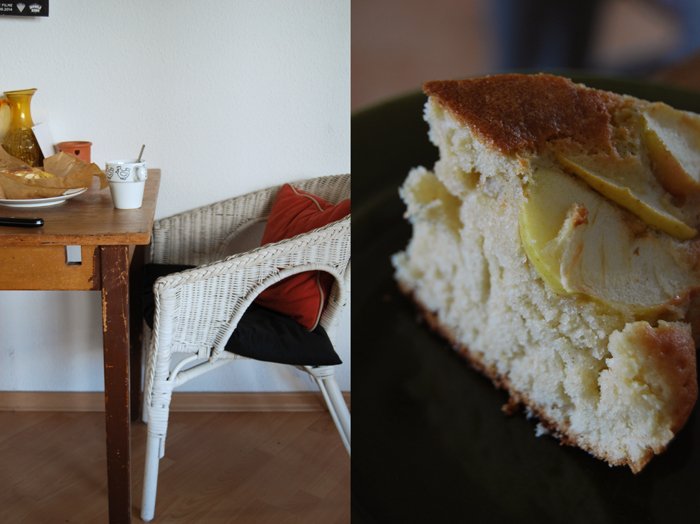
Phia's family is very passionate about cooking, both her parents love to be creative in the kitchen. She chose to share a very special recipe with me that she used to bake with her mother when she was a child, a recipe rich in young kitchen memories! It's Mum's French Cake, a spongy and fruity cake which is as delicious as it is quick and easy to bake, a perfect candidate for those spontaneous late night (or early morning) baking sessions! Phia covered the cake with apples, but plums are another of her favourites for this recipe.

Mum's French Cake
"I chose a really simple cake recipe that my mum taught me. I’m not the most confident baker but this one is so simple. Depending on how large you want the cake, you take 1-3 eggs and weigh them, then put in the same weight of flour, melted butter and sugar. Then choose whatever fruit you want to put on top. My mum actually brought the recipe home from a French class she was in when I was younger. So the first time we made it we did it in French: “… deus oeufs ...” etc!"
For an 18cm / 7" springform pan you need
apple, quartered and thinly sliced, 1
organic eggs 2
weigh the eggs with their shells and measure the same weight of the following 3 ingredients:
plain flour
butter, melted
granulated sugar
plus
baking powder 1 tablespoon
a pinch of salt
Set the oven to 180°C / 355°F and butter the springform pan.
Combine the dry ingredients. Mix the eggs and butter for a few minutes till fluffy and add the dry mixture, mix until well combined. Pour the dough into the springform pan, arrange the apples in circles and bake for 25 minutes or until golden. Check with a skewer, it should come out clean. Serve warm!
You both grew up in Australia, what are your food memories?
Josh: Australia is a fairly wealthy country with really good weather and at various times a great influx of immigrants from around the world (although not currently because of our extreme rightwing government). This has meant that food is in wide variety and really great quality. You could find Indian, Afghan, Vietnamese, Italian, Greek, Chinese, Turkish, Thai, African, Lebanese, Japanese and a lot more (as well as modern fusion) to a beautiful standard all within close proximity. Restaurants just don’t survive if they’re not doing it the way it’s done in the home country. I guess we’re spoilt in a culinary way. This standard or commitment to food is still lagging very much in Germany which I find surprising because there are a lot of people from around the world living there. I’m not saying it doesn’t exist but I still have not found a decent curry.
What effect did the move to Berlin have on your cooking?
Phia: I’ve become a lot more confident since moving here! Last year I became really bored with the recipes that I knew, so I bought a couple of cookbooks and made some new meals. My favourite was Yotam Ottolenghi’s “Plenty”, a vegetarian cookbook. He has this delicious soup made with chickpeas based on a Tuscan ribollita which I make a lot now.
What was the first dish you cooked on your own, what is your first cooking memory?
Josh: I started lifting weights after high school, trying to get buff. At the time I was known as “Mr. Vegetarian” because I was pretty big but still vegetarian. My memory of cooking by myself (that wasn’t frozen dim sims or pizza) was a taco filling that was packed with kidney beans and chickpeas for protein.
What are your favourite places to buy and enjoy food in Berlin?
Phia:We are really spoiled for choice in our part of Neukölln. All of these are within walking distance of us:Favourite coffee: Five Elephant, a super nice place in ReichenbergerstrasseDelicious and cheap tapas: Gaston on WeserstrasseBest gelati: Fräulein Frost on PanierstrasseFresh fruit and veggies: the turkish market on Maybachufer
Josh: Everything Sophia has said plus ‘Il Casolare’ - excellent pizza and atmosphere by the canal.
You live and work in Berlin at the moment, what are your upcoming projects?
Josh: The Phia album is still in full swing, still producing… we’ve mixed some of the tracks and still going over the editing and post-production stuff for quite a few of them. Final mixing should happen at the end of August.
I’ve been producing some music for a few other artists too.
I’m also working on my own project ‘Josh The Cat’. I sing songs, tell stories, dance a little bit with my guitar. Influenced by Bowie, TuneYards and Radiohead but people say it’s sounds a bit like The Whitest Boy Alive with a loop pedal and I look like the guitarist from Incubus. I recently heard The Whitest Boy Alive have disbanded so maybe there is an opening for me.
What or who inspired you to become musicians?
Phia:I grew up in a household filled with music. My mum and my sister and I used to sing three part harmonies, I learnt piano, sung in lots of choirs and did musicals. It never occurred to me that I could be a professional musician though. At school I thought I would be a teacher, or a writer. After high school I made a spontaneous decision to enter a music university rather than the law degree I had been accepted into. I thought I’d complete a year and then go back to academia, but I stayed!
Why did you choose Berlin as the place to live and work?
Josh: I wanted to shake up my life a little. I’d played in a few different bands in Melbourne ranging from Synthpop, FreeJazz to Instrumental soundscape. It was either NYC, Tokyo or Berlin and Berlin won. It’s a great base for branching out, there’s a lot of creatives to bounce off and I find the East meets West, the old crashing into the new, inspiring.
You just finished recording your album, what were your biggest influences during the writing and recording process?
Phia: The songs on the record definitely reflect the period of change of moving from Melbourne to Berlin. Some were written just before the move, and some after, and I think you can hear a continuous thread throughout the album of conflicted feelings change brings. The joy of expanding our experiences to the pull of homesickness.
Our lifestyle has been so different since moving to Berlin. The people we’ve met, the places we’ve toured, even just day-to-day living in Neukölln and having the luxury of working on music. You can definitely hear that on the album.
What did you choose to share on eat in my kitchen and why?
Phia:I chose a really simple cake recipe that my mum taught me. I’m not the most confident baker but this one is so simple. Depending on how large you want the cake, you take 1-3 eggs and weigh them, then put in the same weight of flour, melted butter and sugar. Then choose whatever fruit you want to put on top. My mum actually brought the recipe home from a French class she was in when I was younger. So the first time we made it we did it in French: “… deus oeufs ...” etc!
If you could choose one person to cook a meal for you, who and what would it be?
Phia: Merril Garbus from Tune-yards. I bet she’d have some killer recipes.
Josh: The RZA from Wu-Tang Clan comes to mind. It would be good to have a chat with him too.
You're going to have ten friends over for a spontaneous dinner, what will be on the table?
Phia:Definitely a big salad, maybe with orange and chickpeas, lots of wine, maybe some roast veggies or a baked dish.
Josh: Depends what is in the house. I find lentil soup very satisfying and hopefully the guests would too.
What was your childhood's culinary favourite and what is it now?
Phia: I wasn’t the most adventurous eater as a child so it was probably that Australian staple borrowed from our Italian immigrants - spaghetti bolognaise. Now I love eating new foods from the countries we go on tour. Last year I tried perogi in Poland for the first time, which was amazing.
Josh: My favorite food is Indian or Sri Lankan, I love the spices they use and the vivid flavours. Although I’m not vegetarian I prefer vegetarian food and this goes well for me with all the lentils, vegetables, chickpeas and the occasional paneer their food has. I don’t remember particularly liking food as a very young child but I guess I’ve liked any food from Asia since about the age of 12 or 13. I’ve always hated asparagus and it still makes me gag.
Do you prefer to cook on your own or together with others?
Phia: When I wasn’t so confident I needed to do it on my own, I didn’t like being watched! But now I love learning from others and it is fun to cook together.
Josh: I think someone who is good with food generally needs patience or at the very least a sensibility for how all the elements interact. I don’t really have that. Or perhaps my problem is that I usually try to ignore I’m hungry until I am absolutely ravenous and by that point I have no patience for preparing things properly. So cooking for myself comes out of necessity and cooking with others is probably more fun because it has probably been planned ahead. By others, I mean Sophia, who has good ideas generally, plans ahead and never allows herself to get so hungry as to become irrational and hasty as I do.
Which meals do you prefer, improvised or planned?
Phia: I’m definitely a meal planner - no improvising in the kitchen for me!
Josh: I would admit that conceptually a planned meal should work out the best but I haven’t properly tried that.
Which meal would you never cook again?
Josh: When I was at university I was known by my housemates for my signature dish: “bachelor’s special” which ingredients consisted of pretty much everything cooked in a saucepan served over some sort of carbohydrate. I think I’ll leave that one in the past.
Thank you Phia and Josh!
Here you can listen to Phia and Josh's music and find out when the album will be released: www.listentophia.com


Kirschenmichel, sweet Cherries in a Swabian Bread Pudding
Sweet, dark cherries bedded in an aromatic bread pudding spiced with cinnamon, cloves and Kirsch liqueur, that's the famous Swabian Kirschenplotzer also known as Kirschenmichel! It's a bit more firm and less soggy compared to other bread-based desserts, you can cut it like a cake but it still has the juicy texture that a good pudding should have.
I first found out about this cake through my step father. He grew up in the south of Germany, his mother and grandmother were specialists for traditional bread pudding. He taught me that unpitted cherries create the best result, this thankfully bypasses the pitting and so I enjoy the sweet fruits with all their juiciness. The bread you choose for the batter also has a big effect on the pudding's taste therefore you should always use the best buns you can get. Mine are from a Swabian bakery, tasty, sweet and spongy soft buns. You can use stale white left over bread but I prefer to bake the pudding with cakey buns which aren't too hard, they give it a nicer texture in my opinion. When it comes to the fruits I always buy fresh and not canned cherries. Preserved fruits work as well but their taste is watered down and not fresh enough, there's no crunchiness left.
There's one thing you should keep in mind when you take the first bite of this cake, mind the pits! I almost injured one of my cousins at one of our family gatherings when I forgot to tell her that I left out the pitting. Luckily, her teeth survived and everybody loved the cake. There is lots of spitting involved so you shouldn't serve this cake at a formal afternoon tea, keep it for friends you know well!
Kirschenmichel
For a 25cm / 10" springform pan you need
sweet cherries, unpitted, rinsed, 1kg / 2 pounds
hazelnuts, chopped, 60g / 2 ounces
sweet soft buns, fresh or stale, cut into cubes, 175g / 6 ounces (around 3-4 buns)
milk 350 ml / 12 ounces
organic eggs 3
a pinch of salt
butter, soft, 100g / 3.5 ounces
granulated sugar 120g / 4 ounces
Kirsch liqueur 2 tablespoons
plain flour 100g / 3.5 ounces
baking powder 2 1/2 teaspoons
ground cinnamon 2 1/2 teaspoons
cloves, crushed, 4
dry breadcrumbs to line the pan
Set the oven to 180°C / 355°F (fan-assisted oven), butter and line the springform pan with breadcrumbs.
Bring the milk to the boil, put the chopped bread in a big bowl and soak it in the milk for a few minutes.
Beat the egg whites and salt till stiff.
Mix the butter and sugar till fluffy, add the egg yolks and Kirsch liqueur and mix for 2 minutes till creamy. Stir in the soaked buns with a spoon and mix well.
Combine the flour, baking powder and spices and stir into the butter egg mixture with a wooden spoon. When it's well combined stir in the stiff egg whites. Add the cherries and nuts and pour into the springform pan.
Bake for 50 minutes or until golden brown. Check with a skewer, it should come out clean. Let the cake cool down for a few minutes.
You should keep the Kirschenmichel in the fridge but always serve it at room temperature!


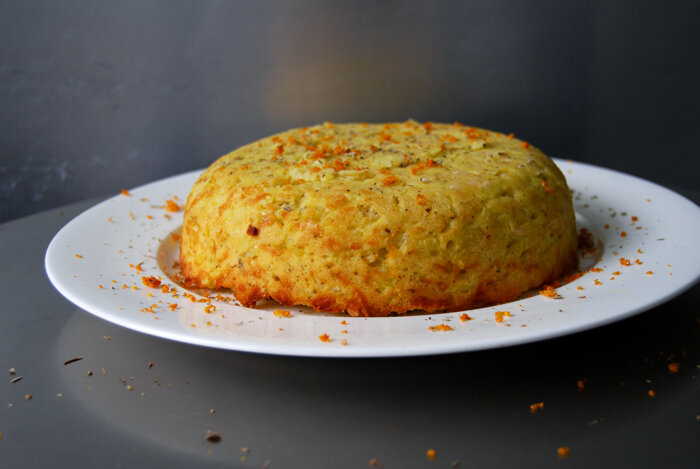
Gattò di Patate, Potato Cake with Orange and Oregano

I ate my first gattò di patate a couple years ago in Sicily, a rich potato pie flavoured with Parmesan and herbs. It's a simple dish, as comforting as a nice bowl of pasta savored on the sofa. I liked it so much that I had to try it in my kitchen when I was back home. Some fill it with minced meat or Mozzarella but mine is a celebration of my favourite Sicilian ingredients, orange and oregano. I first encountered this aromatic combination together with a little olive oil and sea salt, as a refreshing breakfast salad during a holiday on a picturesque farm in Noto. This duo is so good that I've used it in quite a few dishes since then, always with satisfying results!
This pie is another example of the French influence on Sicilian cooking, the name for the Italian dish gattò di patate comes from the French gateau (meaning cake). When I shared my Sfincione recipe with you a couple weeks ago I mentioned that there was a big French movement in Sicilian kitchens in the beginning of the 18th century, very often evident by the generous use of eggs and butter. Today's pie follows this rule as well, eggs, butter, flour, parmesan and spices turn simple mashed potatoes into a savory cake. You can eat it as a primo piatto, thinly sliced as it's so rich, or as a main on a cosy night.

Gattò di Patate, Potato Cake with Orange and Oregano
For 4-6 people you need
potatoes, peeled, cooked and drained, warm, 600g / 21 ounces
butter 70g / 2.5 ounces
Parmesan, grated, 120g / 4 ounces
organic eggs, 2 large or 3 small eggs
a pinch of nutmeg, freshly grated
salt 1 teaspoon
pepper
dried oregano 1 teaspoon plus 1 teaspoon or more for topping
zest of 1 small orange for topping
Set the oven to 180°C / 355°F and butter a 20cm / 8" baking dish or springform pan.
Press the warm potatoes through a ricer and mix with the butter, cheese, eggs and spices. Put in the baking dish, even it out and bake for 45 minutes until the pie is cooked through and the centre is set. Let the pie cool for 5-10 minutes before you turn it around (or take it out of the springform pan). Sprinkle with oregano and orange zest and serve warm.