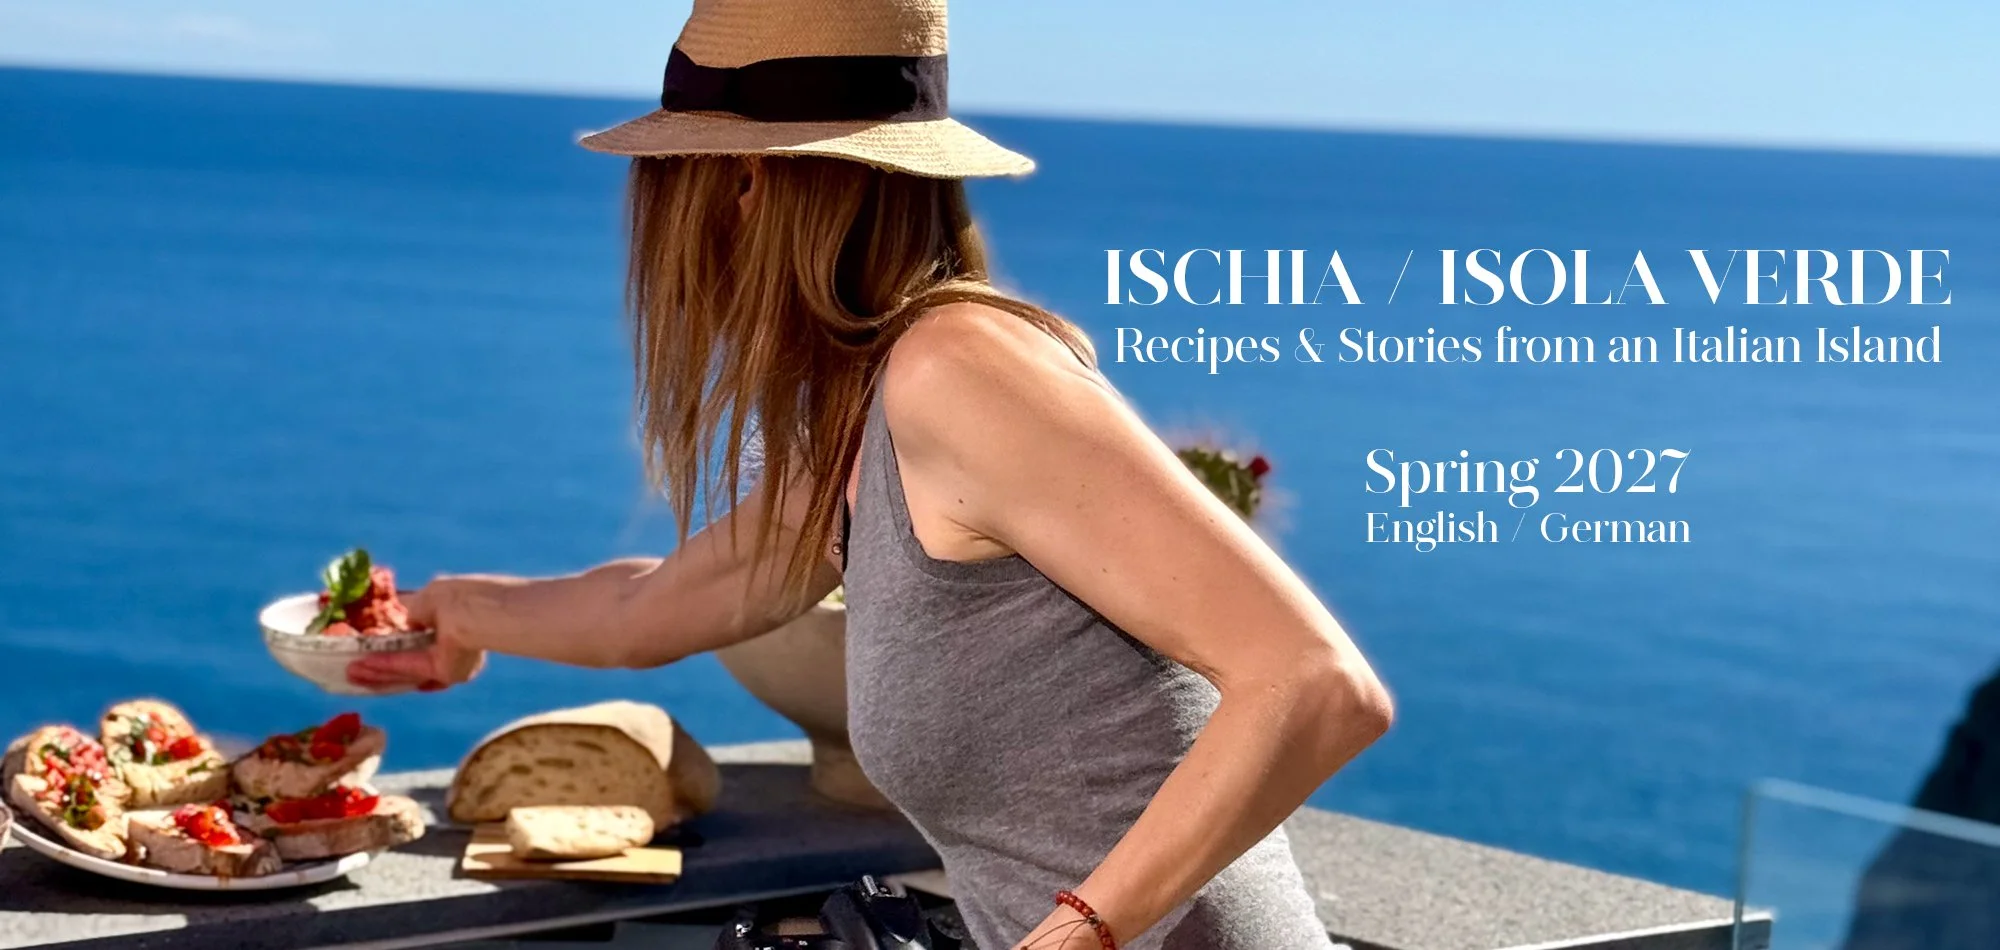
ISCHIA / ISOLA VERDE
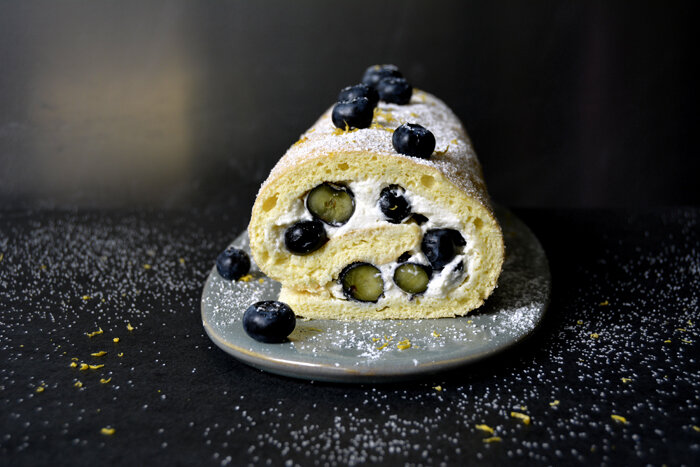
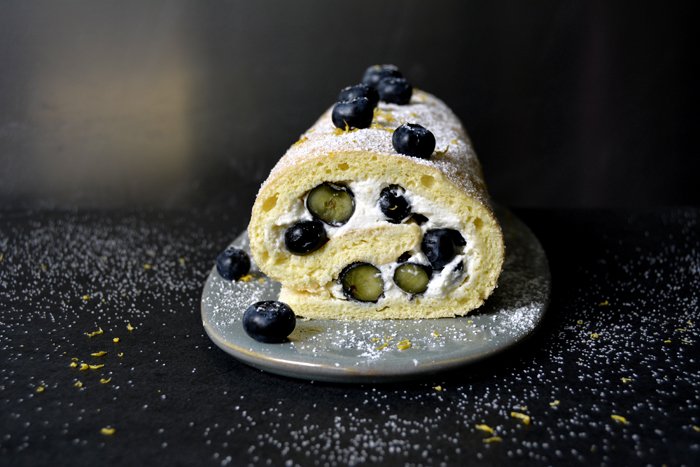
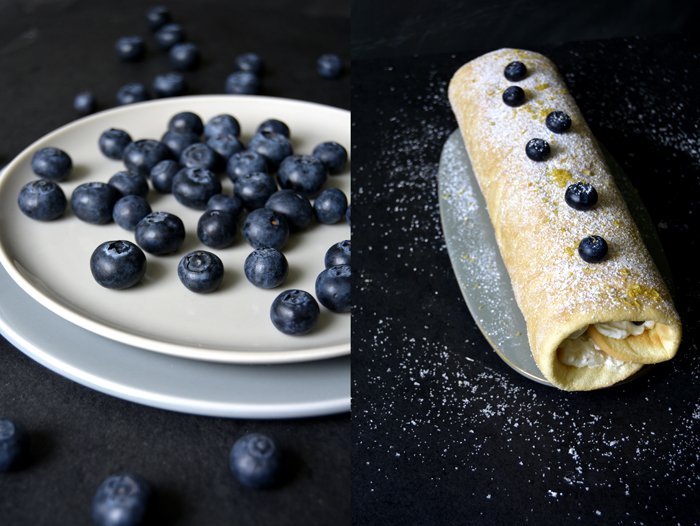
Blueberry Lemon Swiss Roll

My mother doesn't have a sweet tooth at all, we are complete opposites when it comes to cakes and dessert. I have no problem scarfing down a quarter of a cake on my own, and she's happy with a slice so thin that I wouldn't even bother cutting it. We look very much alike, we share the same birthday month and we both love to make a daily feast out of our lives, but our sweet preferences couldn't be further apart.
So when she visited us last week, there weren't many sweet treats on our culinary schedule but when I put my blueberry lemon swiss roll on the table, she impressed me. I was prepared to cut impossibly thin slices for her but, to my surprise, she got hooked on the roll. Usually, I'm the one who takes the last piece of a cake, my reputation is well known in my family when it comes to sweets, my appetite is insatiable. You can offer me the most extensive meal but even if I have to struggle towards the end, there's always space for a well sized dessert. But this time, the last piece wasn't for me, my mother asked for it and I don't think I'll ever forget this moment.
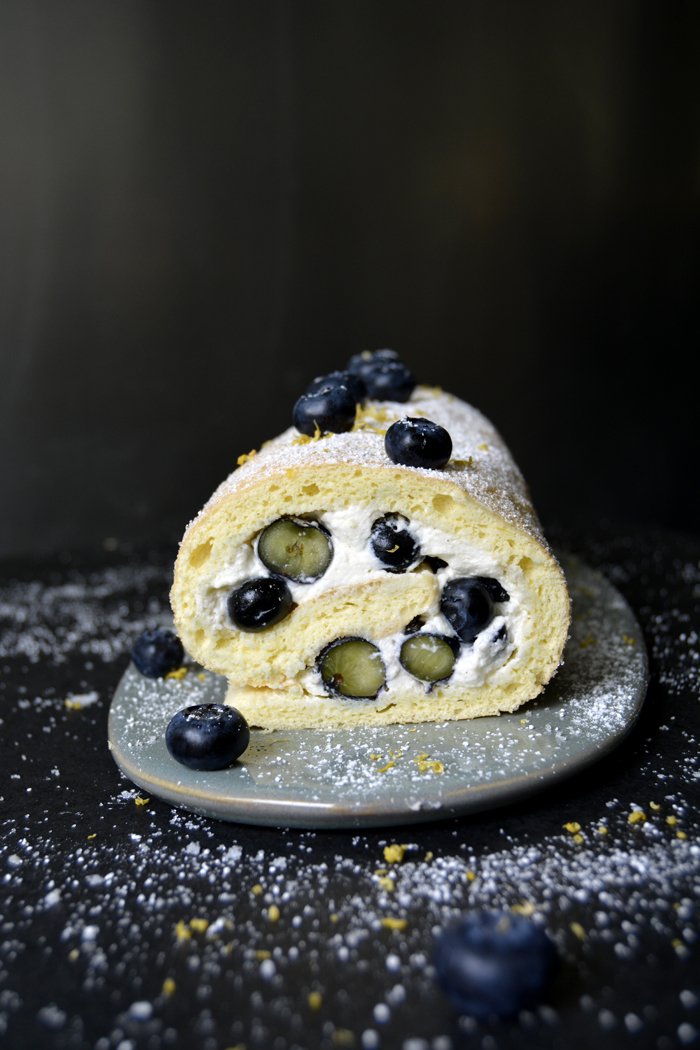
I must admit that my swiss roll was tempting on many levels, the spongy cake is absolutely heavenly, light, fluffy but structured, refined with lots of lemon zest. The blueberries added a juicy crunchiness but the cream filling was the actual star that made the whole composition complete. I whipped the cream with a little sugar and cardamom which creates an addictive deliciousness in combination with the lemony roll. The three of us loved it so much that this huge roll didn't even last 24 hours!
Here's the link to my strawberry swiss roll!

Blueberry Lemon Swiss Roll
For a 30cm / 12" roll you need
organic eggs 4
granulated sugar 70g / 1/3 cup plus 2 tablespoons for the whipped cream and 2-4 tablespoons for sprinkling
a pinch of salt
lemon zest 1 teaspoon
plain flour 70g / 1/2 cup
cornstarch 30g / 1/4 cup
blueberries 250g / 1/2 pound (keep 6 berries as decoration)
whipping cream 220g / 1 cup
ground cardamom 1/2 teaspoon
icing sugar to dust the roll
Set the oven to 220°C / 425°F (top / bottom heat) and line a baking sheet (minimum 30 x 30cm / 12 x 12″) with parchment paper.
Whisk the egg whites with a pinch of salt for a few seconds before you add half the sugar, continue beating until stiff.
Mix the egg yolks, lemon zest and the remaining sugar with an electric mixer until thick and creamy. Fold the egg white into the egg yolks with a wooden spoon. Sieve and combine the flour and cornstarch and fold gently into the egg mixture. Spread the dough on the lined baking sheet (30 x 30cm / 12 x 12″) and bake in the middle of the oven for 6 minutes or until golden and spongy.
Sprinkle a kitchen towel with 2-4 tablespoons of sugar and flip the warm sponge onto the towel. Peel off the parchment paper and carefully roll the sponge with the towel. Leave it rolled up until cool. You can see the picture in my strawberry roll post (link above).
Whip the cream, cardamom and 2 tablespoons of sugar until thick and creamy and adjust sugar and spice to taste.
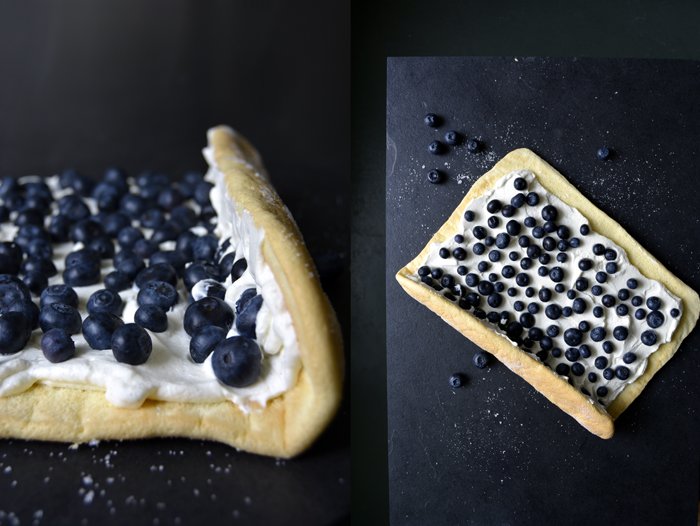
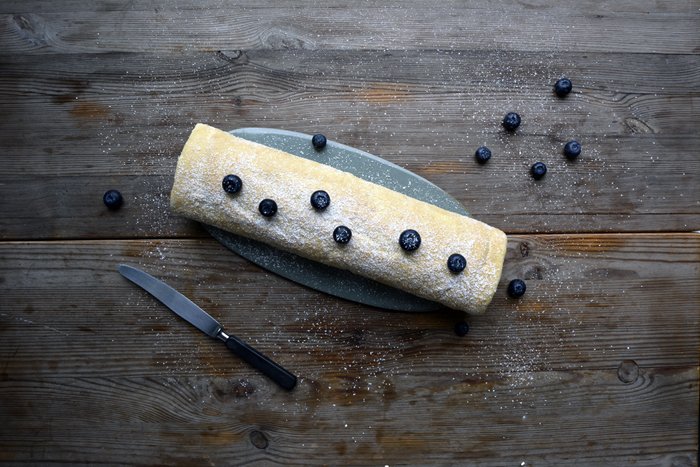
Unwind the sponge roll carefully and lay it onto a working surface. Spread the whipped cream on the cake, leave a rim of 2cm / 3/4". Cover with blueberries and roll it up again, slowly and gently, mind not to squeeze the cream out from the sides. Dust with icing sugar and decorate with the berries and a little lemon zest. Serve immediately or keep in the fridge before serving.

Rhubarb Cardamom Clafoutis
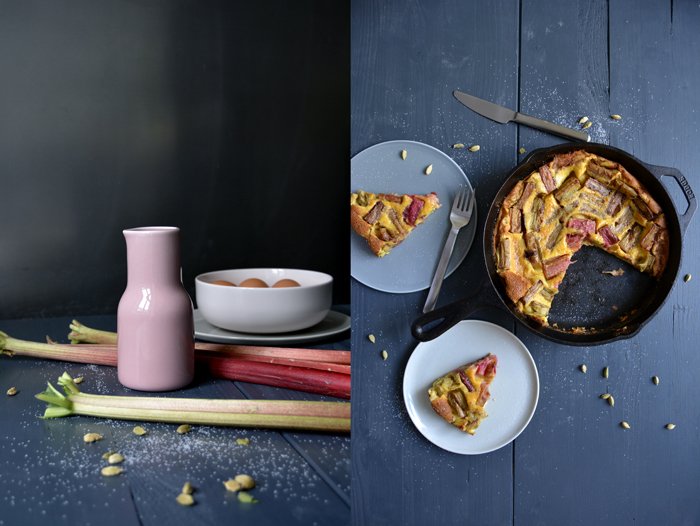
In the past few weeks, my kitchen (and sometimes even the living room and balcony) has looked like a farmer's market. I use every corner, kitchen counter, shelf and cupboard to store piles of fruit and vegetables. Tomatoes, squash and beans sit next to colourful cabbages, lettuce, the whole range of citrus fruits and more pots of herbs than I've ever had in my kitchen before. Plums, strawberries, pears and apples share space with all sorts of roots and greens. Since I started working on my first cookbook, my kitchen became a beautiful mess, completely stuffed and almost bursting. My fridge is always so full that I have problems fitting in the butter tin and milk after breakfast.
If there are no book recipes on my schedule, I only need to look around me and I can pick all the fruit and veg I could possibly ask for. There's everything at hand, whatever my taste desires. Be it spring, summer, autumn or winter, the four seasons are present in my kitchen through all the produce, which also means that there is always something that needs to be used as I don't want to waste anything. I ended up with too many eggs, too much milk and too much rhubarb, this called for a clafoutis! I refined the golden French pan dish with cardamom, you could also add cinnamon but cardamom is my favourite baking spice at the moment. The result was very fluffy, I was impressed how much it rose this time! You never really know what this dessert is going to do when you take it out of the oven. The pleasure didn't last very long, a clafoutis can gracefully rise like a soufflé and then deflate within seconds. But it tasted fantastic, warm and fragrant, slightly sweet and sour, just right for a late Sunday breakfast with your mama - Happy Mother's Day to all the great mamas in the world!
You can find the recipe for my apricot clafoutis here!

Rhubarb Cardamom Clafoutis
For a 23cm /9″ heavy, ovenproof pan or baking dish you need
rhubarb, cut into 3cm / 1 1/4" pieces, 300g / 10 1/2oz
ground cardamom
plain flour 80g / 3 ounces
granulated sugar 4 tablespoons plus 2 tablespoons for the rhubarb
a pinch of salt
butter, melted, 30g / 1 ounce plus 2 tablespoons for the rhubarb
large eggs 4
milk 200ml / 7 ounces
freshly squeezed orange juice 3 tablespoons
Melt 2 tablespoons of butter with 2 tablespoons of sugar and 1/2 teaspoon of cardamom in a heavy pan, add the rhubarb and cook for about 3 minutes or until it softens but still holds its shape, stir once in a while. Set the pan aside.
Set the oven to 180°C / 355°F (top / bottom heat) and generously butter a 23cm /9″ heavy, ovenproof pan or baking dish.
Combine the flour, 4 tablespoons of sugar and a pinch of salt. Whisk 1 teaspoon of cardamom into the warm melted butter and mix with the eggs, milk and orange juice then pour into the dry mixture and mix with an electric mixer until well combined.
Spread the rhubarb in the buttered pan and pour the batter on top. Bake for about 50 minutes or until the clafoutis is golden and set. Sprinkle the warm clafoutis with sugar and ground cardamom to taste and enjoy immediately.


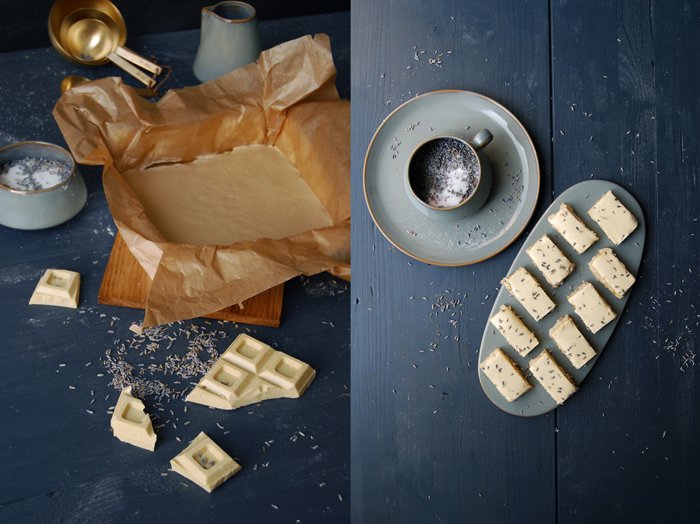
Frances Bissell's Lavender & White Chocolate Caramel Cake

This is advanced lavender baking! When I shared my Lavender Gâteau Breton recipe with you a couple weeks ago, I mentioned Frances Bissell's fantastic baking book, The Floral Baker. The renowned British cookbook author inspired me to give the aromatic blue flowers a try in my kitchen and to add them to my own baking. I started off with the preparation of a jar full of lavender sugar about a month ago, the floral sweetness needs some time to develop its exhilarating qualities. For my buttery French cake, the Gâteau Breton, I sieved the sugar and used the florets just for the topping. I wanted to take it easy at first, to get used to this new flavour and to avoid straining my taste buds without even getting started properly.
So now I felt ready to take the next step, the advanced level of floral baking. I got in touch with Stephen from Serif Books to see if I could share one of the floral master's recipes on eat in my kitchen. We got along very well and I found out that Frances lives in England and Gozo and also includes traditional Maltese recipes in her cooking. I really hope to meet her there one day for a meet in your kitchen feature on the blog!
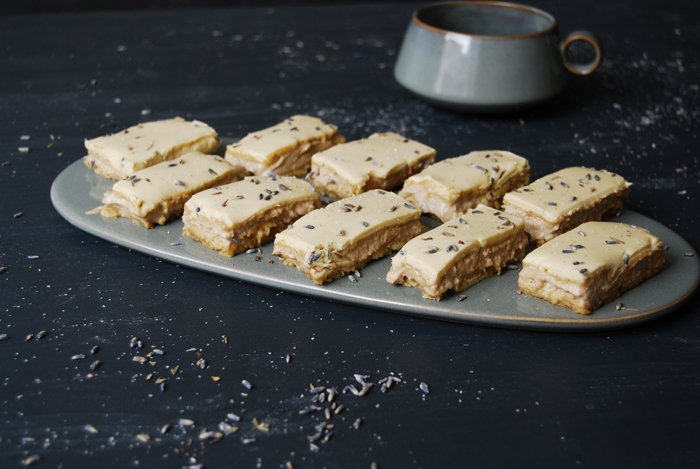
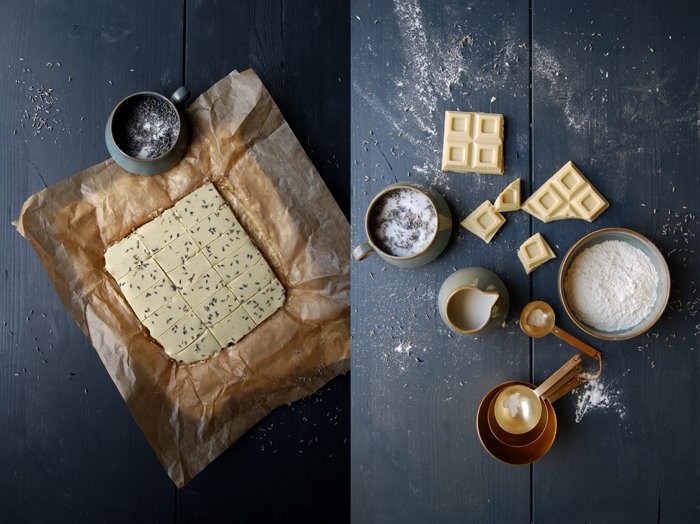
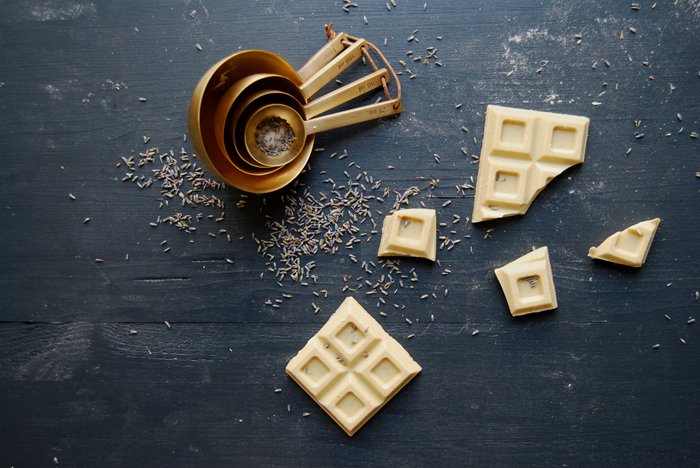
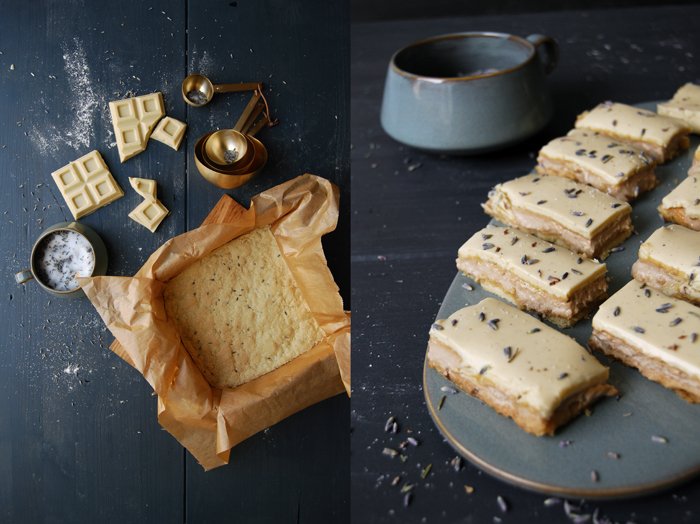
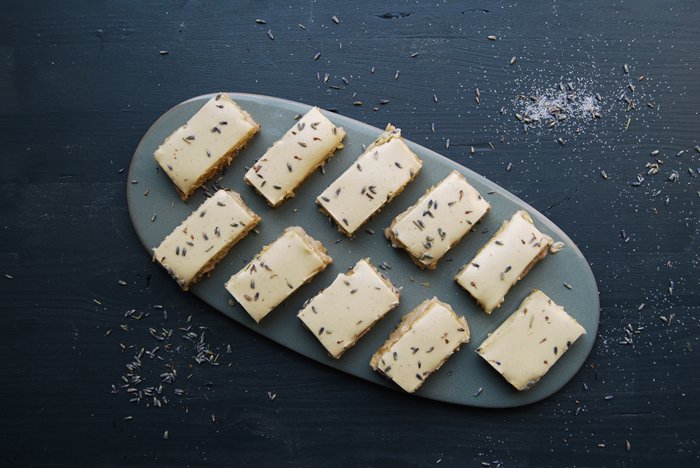
After reading her book I felt quite torn between a few recipes but in the end I went for Frances' Lavender and White Chocolate Caramel Cake. It sounded so decadent and rich that I had to give it a try. The creation is based on her mother's recipe for toffee cake and it has been in her family since the early 1960s. It's like Millionaire's shortbread, just with white chocolate. It starts off with a thin shortcrust base infused with the beautiful aroma of lavender, topped with toffee cream and a final layer of crunchy white chocolate. The creation looks a bit old fashioned which I love, it's the right treat for high tea with the ladies, when you bring out the nice porcelain and get dressed up. I didn't use my bone China at my table but another gem I found recently, the beautiful plates and bowls (and my beloved new measuring spoons!) by Ferm Living in Denmark. It's a clean, grey stoneware collection inspired by Bauhaus classics. My friend Anne, the photographer I mentioned last Sunday, told me about their stunning designs, she knows that I'm always on the lookout for nice tableware. Luckily, we have a similar taste, which is quite minimal, and we're both picky, so I found the perfect design scout for me!
Lavender & White Chocolate Caramel Cake
Recipe by Frances Bissell
Mind that you prepare the lavender sugar a few days (or even weeks) in advance, 10 parts sugar and 1 part organic lavender flowers (L. augustifolia, Hidcote).
For a 20cm / 8" cake tin, about 4cm / 1 1/2" deep, you need
For the shortbread
plain flour 115g / 4oz
lavender sugar 25g / 1oz (I used mainly the sugar and 1 teaspoon of the flowers)
butter, cold, 50g / 2oz
For the topping
Golden Syrup 2 tablespoons
condensed milk 395g / 14oz
quality white chocolate 200g / 7oz
a drop of culinary lavender essence (I left this out and sprinkled the cake with lavender flowers instead)
Set the oven to 190°C / 375°F (fan assisted oven) and lightly butter the cake tin (or line the tin with parchment paper).
For the shortbread, mix the flour, lavender sugar and butter with the hooks of your mixer. Press the dough into the tin and bake for 12-15 minutes. Remove the tin from the oven and leave the shortbread in it.
For the toffee, pour the Golden Syrup and the condensed milk into a saucepan, stir together over moderate heat until well-mixed, then boil precisely 7 minutes, stirring all the time.
Spread the mixture over the shortbread and allow it to cool. Melt the chocolate in a bowl over hot water, mix in the essence if you would like to use it and spread over the cooled toffee, marking into small triangles, squares or fingers, as appropriate, before the chocolate has set. Sprinkle with lavender flowers. Cut when cold.


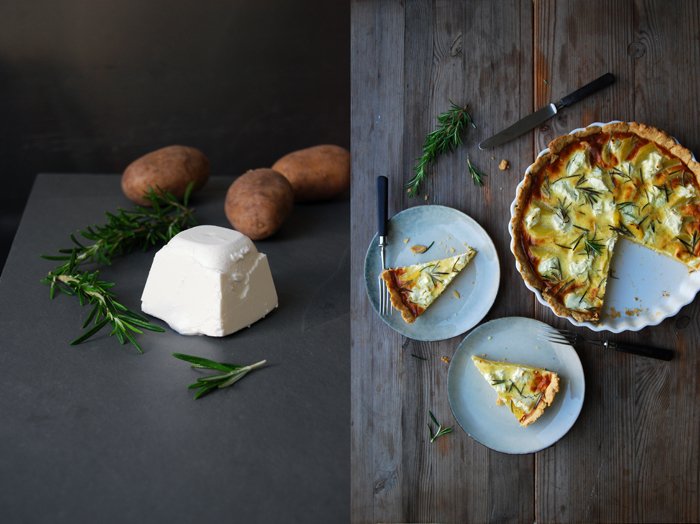
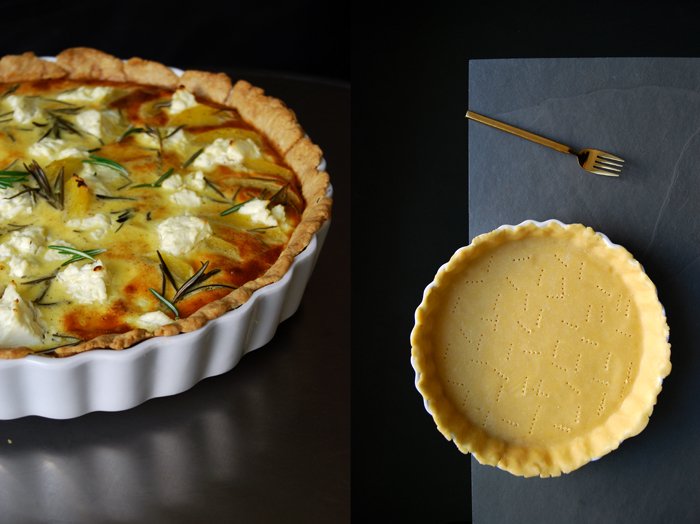
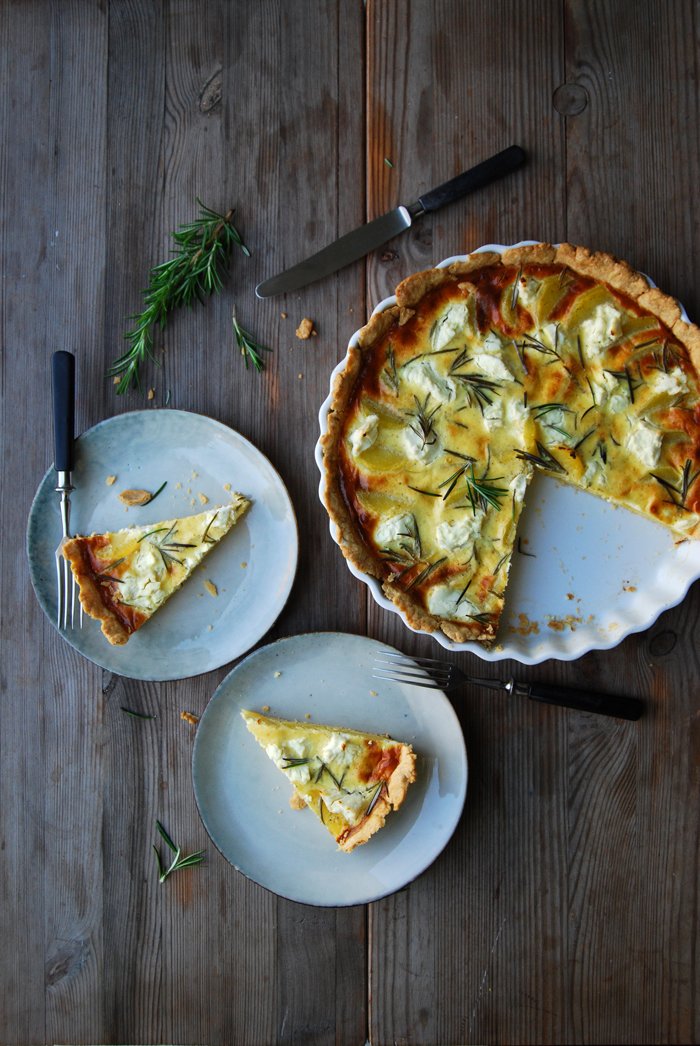
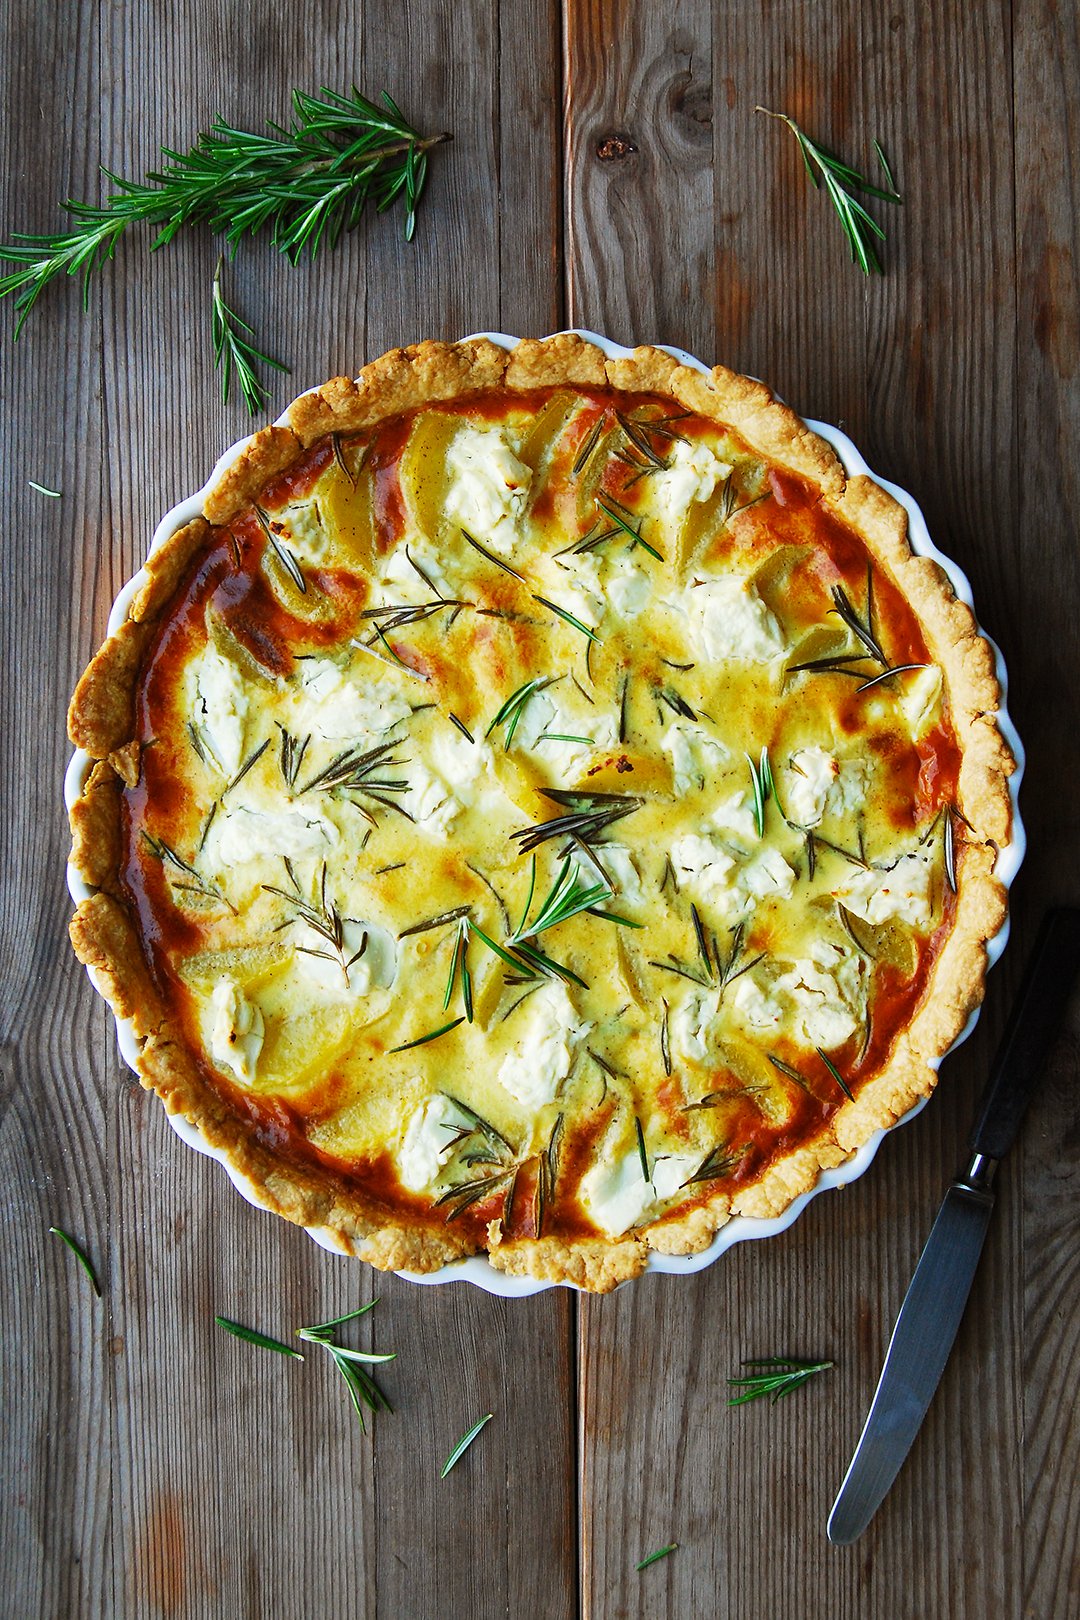
Potato, Chèvre and Rosemary Tart
Quite a few of the recipes that I have collected over time have become my culinary buddies, friends to celebrate good times just as much as giving me comfort when it gets tough. A savory tart, the wonderful French quiche, is definitely one of them. It's as easy and comforting as pizza and I can adapt the topping to my mood and the seasons, which I do with creative passion.
There's something about the buttery pastry base of a tart that gives me great satisfaction. An Italian pizza is a loud feast, preferably enjoyed in the company of friends. The base can be thin and crisp or oily and fluffy like a focaccia - the Italian oven classic is comfort food at its best, always. A quiche however, is more intimate, it's quite a sensual dish. The pastry needs to be thin (at least for my taste), crumbly and flaky. It's delicate, fragile, which makes it perfect for a romantic date or a picnic in the countryside. Add a glass of velvety red wine and you will have a lot of fun.
There are quite a few quiche recipes on the blog and I can't stop adding more: there's one with tomatoes and mozzarella, beans and ramp, with leek, one with fennel … Click here for the entire eat in my kitchen quiche collection. Today's recipe feels like a trip to the Provence, at the peak of summer. The potatoes give it a hearty touch - almost like a German quiche - yet the milky chèvre and woody rosemary make it light and take it right back to the Mediterranean.

Potato, Chèvre and Rosemary Tart
For a 30cm / 12″ tart pan or baking dish you need
For the short crust base
plain flour 260g / 2 cups
fine sea salt 1 teaspoon
butter, cold, 130g / 1/2 cup plus 1 tablespoon
large egg 1
Combine the flour and salt. Add the butter and cut it with a knife into the flour until there are just little pieces of butter left. Continue with your fingers and work the butter into the flour until combined (there shouldn’t be any lumps of butter left). Add the egg and continue mixing with the hooks of your mixer until you have a crumbly mixture. Form a disc, wrap in plastic wrap and put in the freezer for 10 minutes.
Set the oven to 200°C / 400°F (conventional setting).
Roll out the dough between plastic wrap then fit the dough into a 30cm / 12” quiche dish, pushing it into the dish. Prick the dough all over with a fork and bake for 15 minutes or until golden. If the dough bubbles up, push it down with a fork. Take the quiche dish out of the oven and reduce the temperature to 180°C / 350°F.
For the filling
large eggs 4
sour cream or crème fraîche 175g / 3/4 cup
heavy cream 120ml / 1/2 cup
fine sea salt 1 teaspoon
ground pepper
nutmeg, freshly grated, a generous amount
potatoes, boiled, peeled and sliced, 500g / 18 ounces
soft chèvre, broken into chunks, 110g / 4 ounces
fresh rosemary needles, a small handful
For the filling, whisk together the eggs, sour cream, heavy cream, salt, pepper and nutmeg.
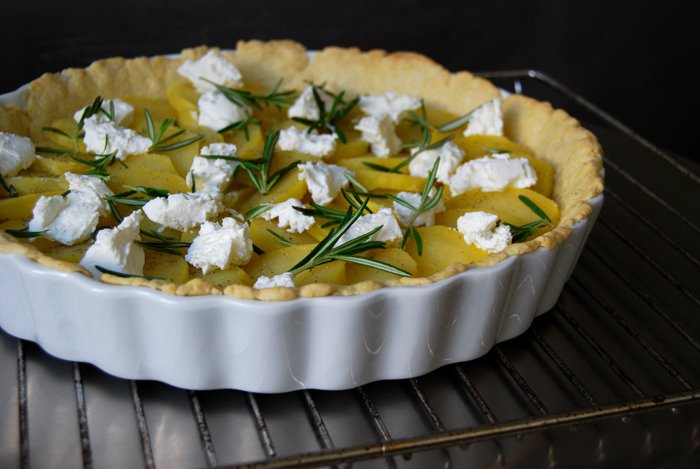
Arrange the potatoes on top of the pre-baked pastry and season with a little salt, pepper and nutmeg. Sprinkle with the chèvre and rosemary then pour the egg mixture into the pastry base. Bake for 50 to 55 minutes or until golden, the top should be firm and the pastry crispy. Let it cool for a few minutes before serving.

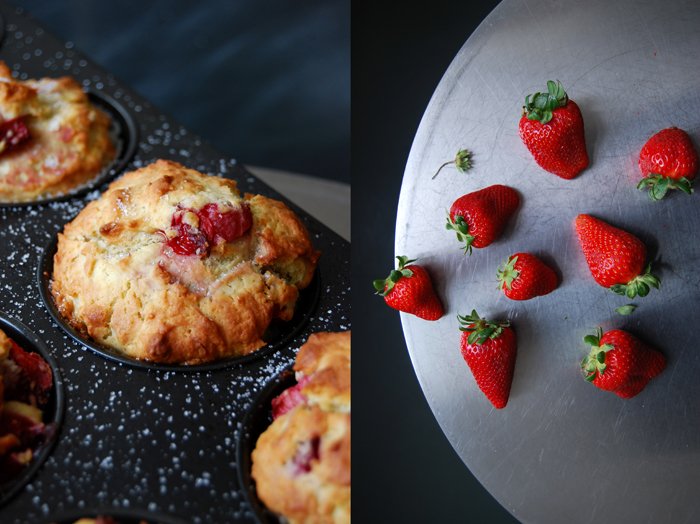
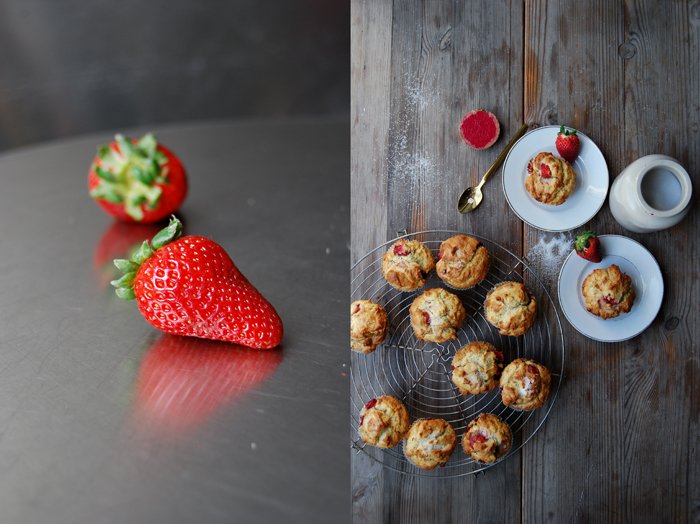
Strawberry Ricotta Muffins
The past 10 days have been packed with excitement - too much for me at times. It started off with an urgent change to a new camera and laptop and I wasn't too happy about this at first. I'm not a very technical person, I prefer sticking to a set up once it's up and running rather than getting used to all sorts of technical novelties every couple years. I'm a bit lazy in that respect, but my forthcoming cookbook pushed me out of my comfort zone and called for new equipment. After 2 days of confusion and desperation, a long talk with my wonderful and patient photographer friend Anne Deppe, I felt ready for a new technical era in my life!
So once all these issues were solved, I could finally get started with the first recipes for my book. It felt a bit intimidating in the beginning when I took the pictures. I thought "wow, this will be printed one day, I'll be able to hold these photos in my hands next year". No more digital flexibility, this is the unchangeable analog world, I'll have to make final decisions together with my editor Holly which will be irreversible at one point and printed onto paper! I stopped for a few minutes, put the camera aside and took my time to process everything that happened in the past month. I looked at the camera and the sandwich on the table right in front of me and made a decision: this is going to be fun, exactly like my blog!
Eat in my kitchen has always been about my love for food and my enjoyment in the kitchen, I've enjoyed every second of this journey and I'll keep it this way. So when this mental hurdle was overcome, the recipe craziness began: I cooked and baked 17 new dishes in the past 5 days, luckily I had family in the house, visiting me in Berlin. Everyone was more than happy to test the recipes and I was glad to hear their feedback. It was a very satisfying experience for both sides and there are hopefully many more to come in the next few weeks and months while I'm cooking and baking for the book.
When I met my friend Anna to talk about my technical issues, I decided to make a bunch of muffins with relaxing and caressing qualities. I needed some soul food for my stressed mind. I threw in my first strawberries of the year and their subtle sweetness matched wonderfully to the smooth dough which I refined with ricotta, olive oil and orange juice. They came out as being perfect spring breakfast muffins, light and fruity - and they relaxed me!

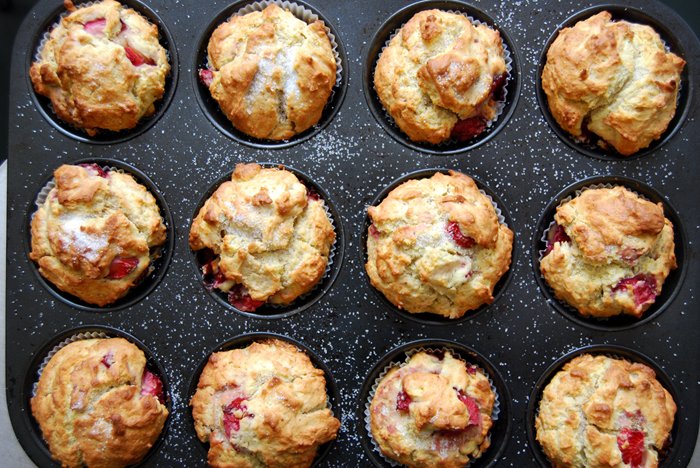
Strawberry Ricotta Muffins
For a muffin tray with 12 molds you need
plain flour 320g / 11 1/4oz
granulated sugar 100g / 3 1/2oz plus 1-2 teaspoons for the topping
baking powder 3 leveled teaspoons
baking soda 1/2 teaspoon
salt 1/4 teaspoon
organic eggs 2
ricotta 250g / 9oz
olive oil 100ml / 3 1/2fl oz
freshly squeezed orange juice 30ml / 1fl oz
strawberries, cut into chunks, 200g / 7 ounces
Set your oven to 190°C / 375°F (fan-assisted oven) and put paper baking cups into the 12 molds of the muffin tray.
In a large bowl, combine the flour, sugar, baking powder, baking soda and salt. Take out 1 heaped tablespoon of the flour-sugar mixture and mix quickly with the strawberries. In a second bowl, mix the eggs, ricotta, olive oil and orange juice until light and fluffy and pour into the bowl with the dry mixture. Stir with a wooden spoon until you have a lumpy dough (with a bit of flour left here and there) and gently fold in the chopped strawberries. Keep in mind, the more you mix it the more it will lose its light texture.
Fill the muffin tray with the dough and bake for about 18 minutes or until golden. Take 1 muffin out of the tray and check with your finger if the bottom is baked through (the strawberries will make it very juicy). Sprinkle the muffins with a little sugar and let them cool on a wire rack for a few minutes before you put them on your breakfast table.


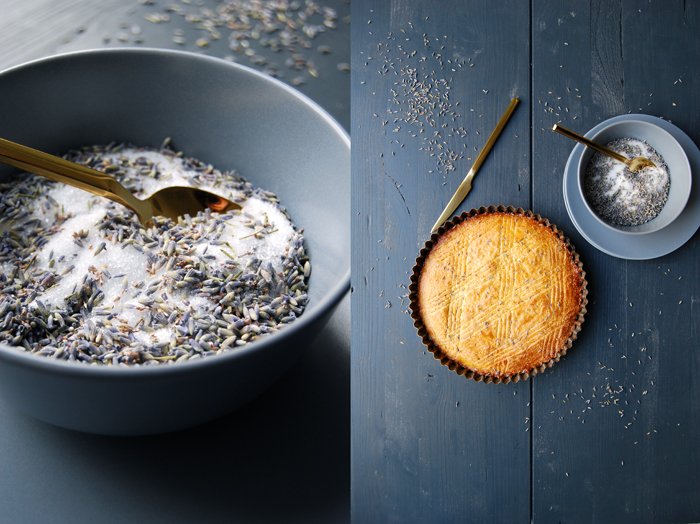
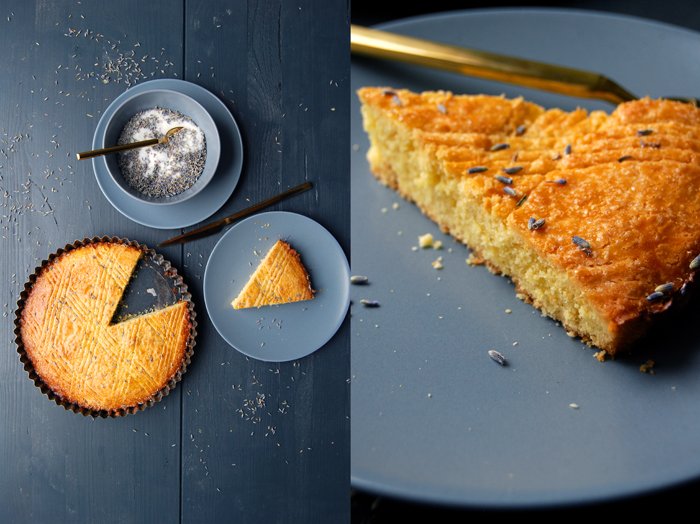
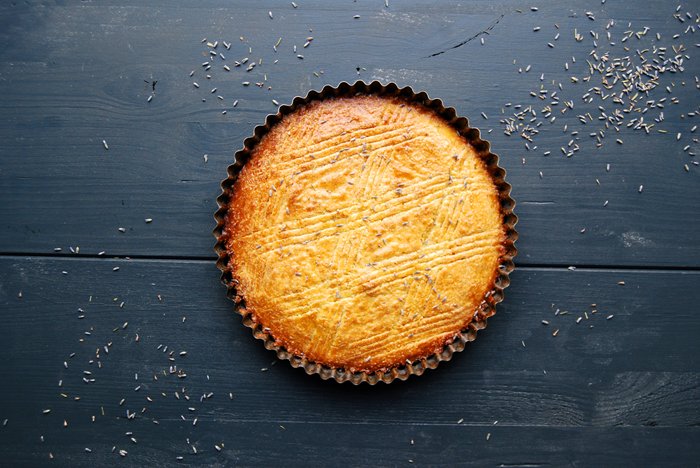
Lavender Gâteau Breton
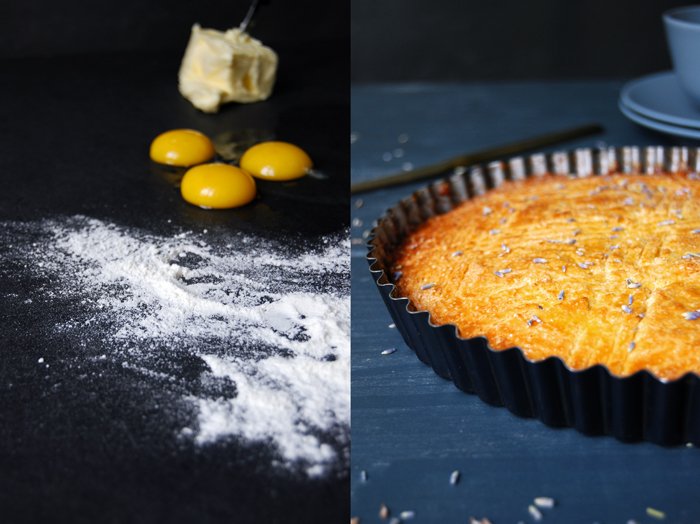
This little Gâteau Breton looks so simple and innocent but there's a rich and buttery depth behind its golden crust that can easily compete with any lavish layer cake. I admire the sweet French cuisine for mastering the art of getting the most out of a piece of butter, a few eggs and some sugar and flour. This is minimalism brought to perfection in baking.
I chose this Brittany butter cake as it seemed the right recipe to try out my new homemade lavender sugar. A spongy shortbread, that's how I would describe it, sprinkled with the most fragrant purple sugar, it sounded so good and it tasted even better. Frances Bissell, the woman behind the wonderful baking book The Floral Baker, is a genius mind responsible for many wonderful sweet and savoury creations refined with lavender, jasmine, rose petals, orange flower water, wild garlic or saffron. Her recipe collection is a journey through nature's opulence, I felt so inspired by the way she introduces new flavours and offers fresh combinations that I had never heard of or thought about. I already decided that her Saffron and Rosewater Biscuits, Lavender and Tomato Tart and the Lavender White Chocolate Caramel Cake will soon make an appearance on my kitchen table!
My first practical approach to her book was the preparation of lavender sugar. Frances suggests 10 parts sugar and 1 part lavender flowers (L. augustifolia, Hidcote), I trust this experienced baker so I decided to fill a huge jar up to the brim. My new pantry project satisfied me instantly, every couple days, I took it off the shelf to shake my flowery treasure and imagined all the recipes it would refine in future. Pure relaxation in a jar!
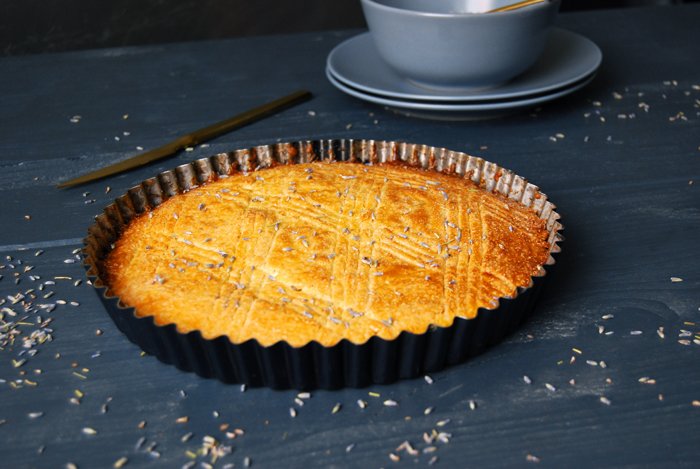
After a few weeks the time had come to give it a go and I think I couldn't have had a better start to my flower project. I didn't mix the sugar in in the dough, I just sprinkled the purple flowers and sugar on top of my warm Gâteau Breton and it instantly spread its beautiful aroma. It looked stunning, it took a French baking classic to another level and my boyfriend, who isn't usually too fond of lavender, couldn't get enough of it (like me)!
I'm with Diana Henry on The Floral Baker: 'So thrilled with this by the wonderful Frances Bissell'! Thrilled and inspired, that's the best a cookbook can do!
Lavender Gateau Breton
Mind that you prepare the lavender sugar a few days (or even weeks) in advance, 10 parts sugar and 1 part organic lavender flowers (L. augustifolia, Hidcote), you'll only need a couple teaspoons for this cake.
For a 25cm / 10" tart pan you need
plain flour 200g / 7oz
baking powder 3/4 teaspoon
a pinch of salt
butter, soft, 150g / 5 1/4oz
organic egg yolks 3 plus 1 egg
granulated sugar 125g / 4 1/2oz
For the glaze
organic egg yolk 1
water 1 tablespoon
For the topping
lavender sugar 1-2 teaspoons, to taste
Set the oven to 170°C / 340°F (fan-assisted oven) and butter the tart pan.
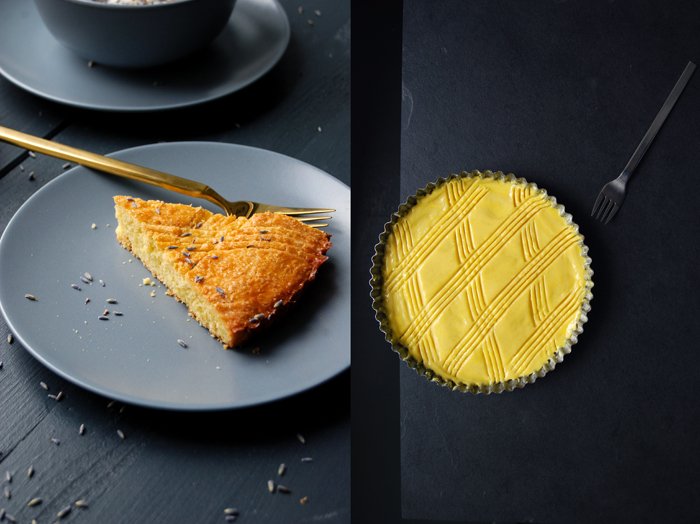
Combine the flour, baking powder and salt in a small bowl. In a large bowl, whisk the egg yolks, the egg and sugar until light and fluffy. Add the butter and mix with the hooks of your mixer, add the flour and continue mixing until combined. Scrape the dough into the tart pan (it will be sticky) and even out the surface a little. Whisk the egg yolk and water for the glaze and brush the top of the dough. Scratch a diamond pattern into the surface (as you can see in the pictures), mind that you scratch deep enough, otherwise the pattern will melt away while baking. Sprinkle with a teaspoon of lavender sugar (without the flowers) and bake for 25-28 minutes or until golden. Sprinkle the warm cake with a little more lavender sugar (this time with the flowers as well).

Happy News: The Eat In My Kitchen Cookbook & Espresso Chocolate Biscotti
An exciting email from New York changed my life! Holly La Due from Prestel/ Verlagsgruppe Random House asked me if I'd be interested in writing a cookbook filled with my recipes, stories and photographs. I had to read this email twice before I ran to my boyfriend who was still in bed, it was 7 in the morning, I put the laptop on his chest and made him read the email to me again. I screamed and laughed out loud hysterically!
Holly is the most patient and helpful editor any author could ask for, she has been following eat in my kitchen for a while and I felt pretty soon that we're a very good match. So the past few weeks were filled with lots of excitement and many, long Skype calls across the Atlantic. Discussing how we're going to do this together, talking about our ideas and our vision for the book which will be published in English and in German. Prestel is highly renowned for its publications in art, design and architecture so I don't have to worry about the aesthetic development of my book. With a great publisher behind me, I have the wonderful freedom to fill almost 300 pages with many new recipes, some blog classics and my own photography. After working only digitally on the blog, it feels like a natural transition into the physical world, everything you find on my blog, my style of cooking and baking and my photos, will be merged into the pages of the Eat In My Kitchen cookbook. There will be many more of my salads, soups and vegetable creations, meat and seafood recipes, sandwiches, and there will be lots of baking happening as well. The American Eater brought it to a point a few days ago, "comfort food with a Mediterranean palate". My German upbringing, my mother's cooking in particular, my boyfriend's Maltese/ American family, many summers spent in Malta and Gozo, these are my influences in the kitchen, my never ending source of culinary creativity.
And now I can do what I love so much, I can cook and bake even more, write new recipes and take many, many pictures so that all of us can hold this book in our hands next year. I feel so inspired, I have so many recipes on my mind, there's so much energy and happiness that I can already feel coming from these pages.
It must have been around a year ago that some of you started to ask me about an Eat In My Kitchen book, a physical alternative to my blog's online platform. I had never really thought about it before, although there were enough recipes to fill a couple books, it wasn't on my mind. That changed in the past few months, to get so much support from all of you, so many emails from happy food lovers who enjoy my recipes so much, this experience let this idea ripen in my head, so Prestel asked me at the right time, I'm ready!
Although there are still quite a few months of work ahead of us before the big release day, which will be in the Fall of 2016, I know that we'll need the time to create a book that touches and inspires everybody like the blog already does. Thank you for your ongoing support, thank your for your wonderful words and trust in my work!
The happiest regards from Berlin!
Meike xx
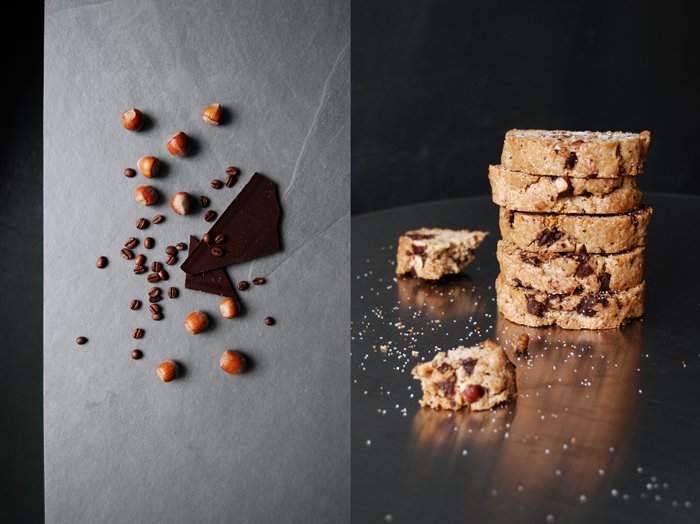
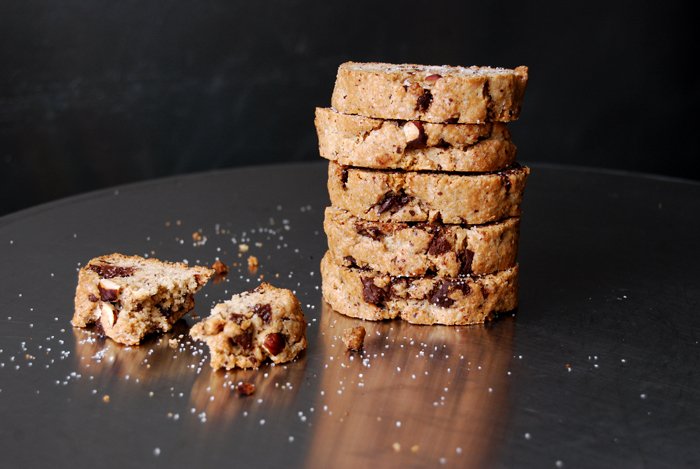
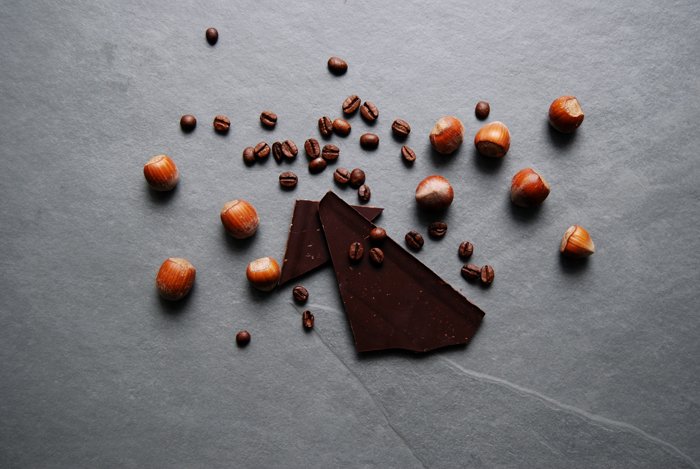
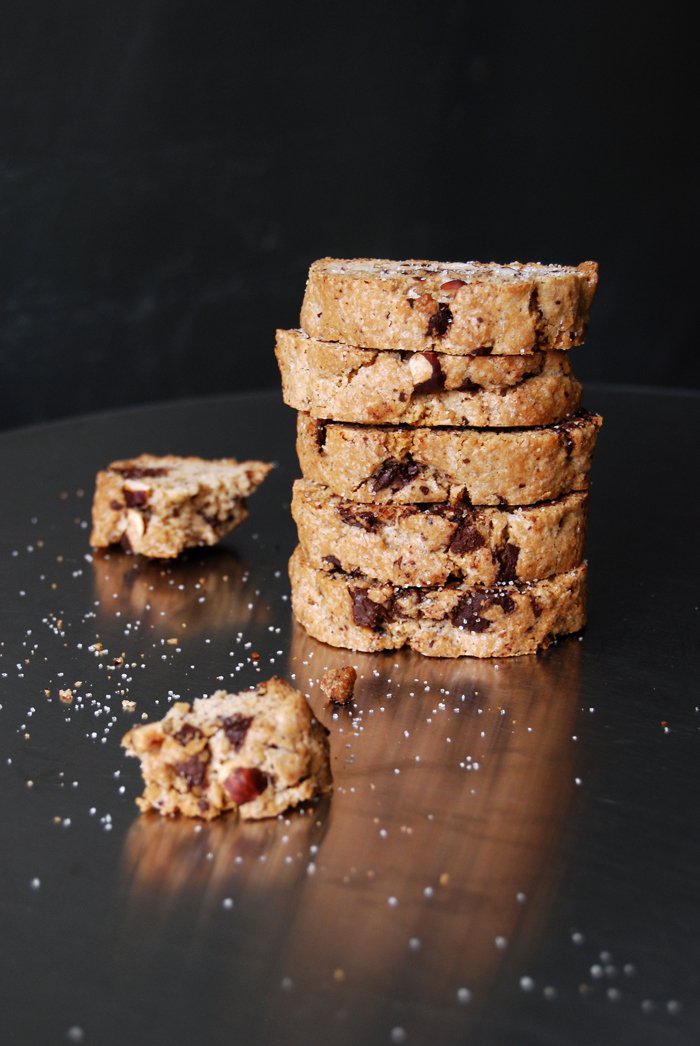
This much excitement asked for a kicking taste experience to feel that I'm actually not dreaming: crunchy biscotti, refined with espresso butter, spices, dark chocolate and hazelnuts. These little treats are so good with a cup of tea or a tiny black espresso, they are definitely for adults who need a moment of intense savouring, bittersweet and full of flavour!
You can read the first announcement of my cookbook on Eater here!
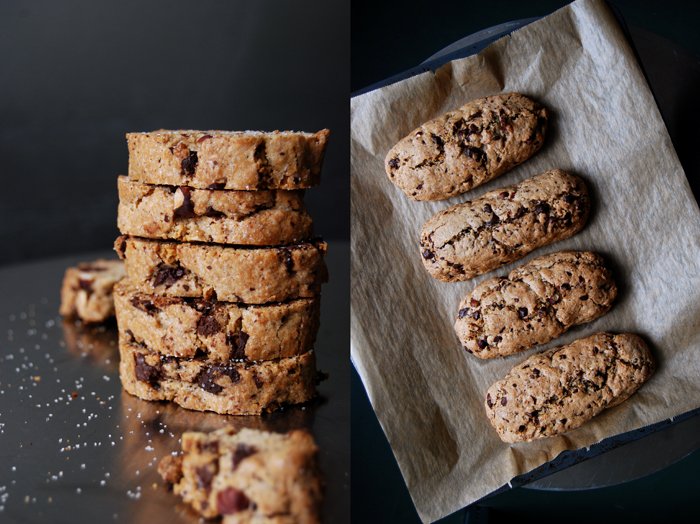
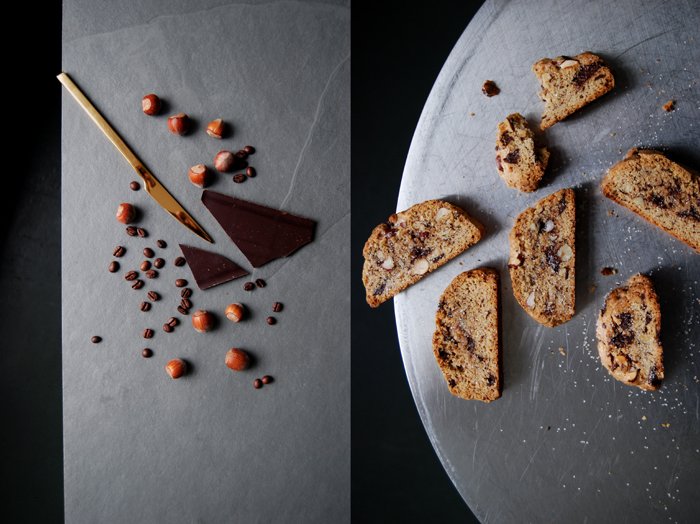
Espresso Butter Chocolate Biscotti
For about 45 biscotti you need
butter, melted, 100g / 3.5oz
instant espresso powder 2 teaspoons
plain flour 400g / 14oz
baking powder 2 teaspoons
granulated sugar 210g / 7 1/2oz
salt 1/4 teaspoon
five-spice powder (fennel seeds, star-anise, cloves, cinnamon, Sichuan pepper) 2 teaspoons
cardamom 1/4 teaspoon
organic eggs 3
bittersweet chocolate, roughly chopped, 120g / 4 1/4oz
hazelnuts, roughly chopped, 50g / 1 3/4oz
Set your oven to 180°C / 355°F (fan-assisted oven) and line a baking sheet with parchment paper.
Whisk the espresso powder into the warm, melted butter and let it cool for a few minutes.
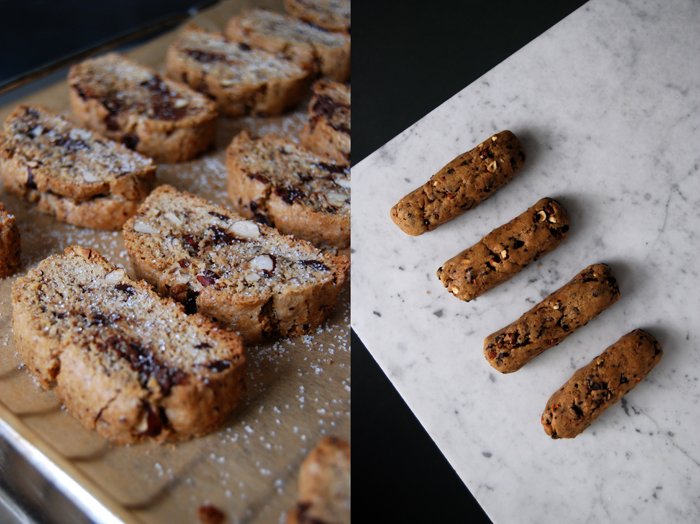
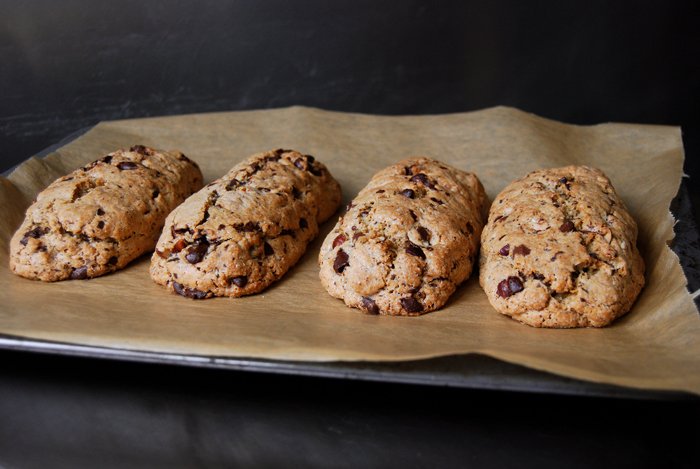
Combine the flour, baking powder, sugar, salt and spices. In a large bowl, whisk the eggs until creamy and mix in the espresso butter. Add the dry mixture and mix with the dough hooks of your mixer until just combined. Stir in the chocolate and nuts, form a ball and divide into four parts. Form each into a long bread shape (around 5cm / 2″ wide) and place on the baking sheet, bake for 25 minutes. Take them out and let them cool for about 20 minutes.
Turn the oven down to 170°C / 340°F.
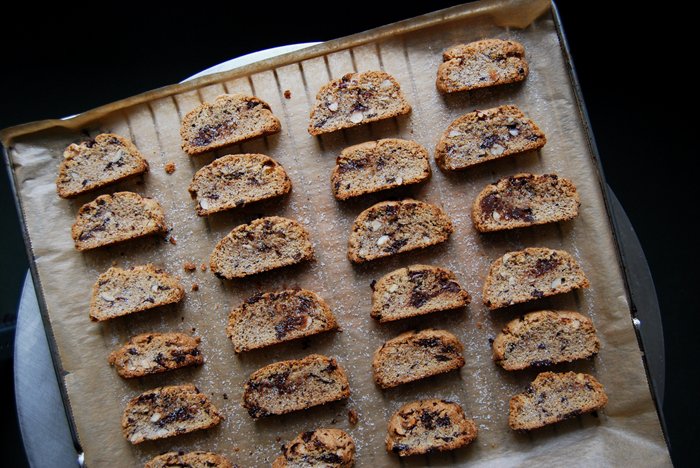
For the second round, cut each loaf gently into 1 1/2cm / 1/2″ slices and lay the biscotti flat on the baking sheet, sprinkle each one with a little sugar. Bake for 6 minutes, turn them over and sprinkle the other side with sugar. Bake them for another 6 minutes or until golden brown, put them on a wire rack and let them cool. You can keep the biscotti in an airtight container for days.
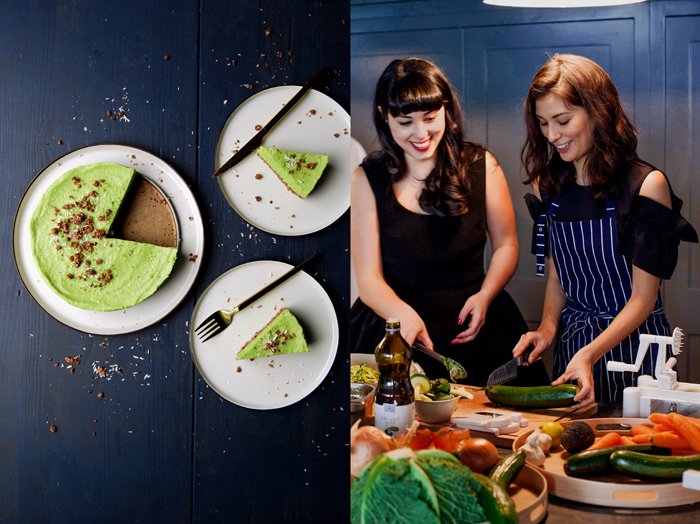
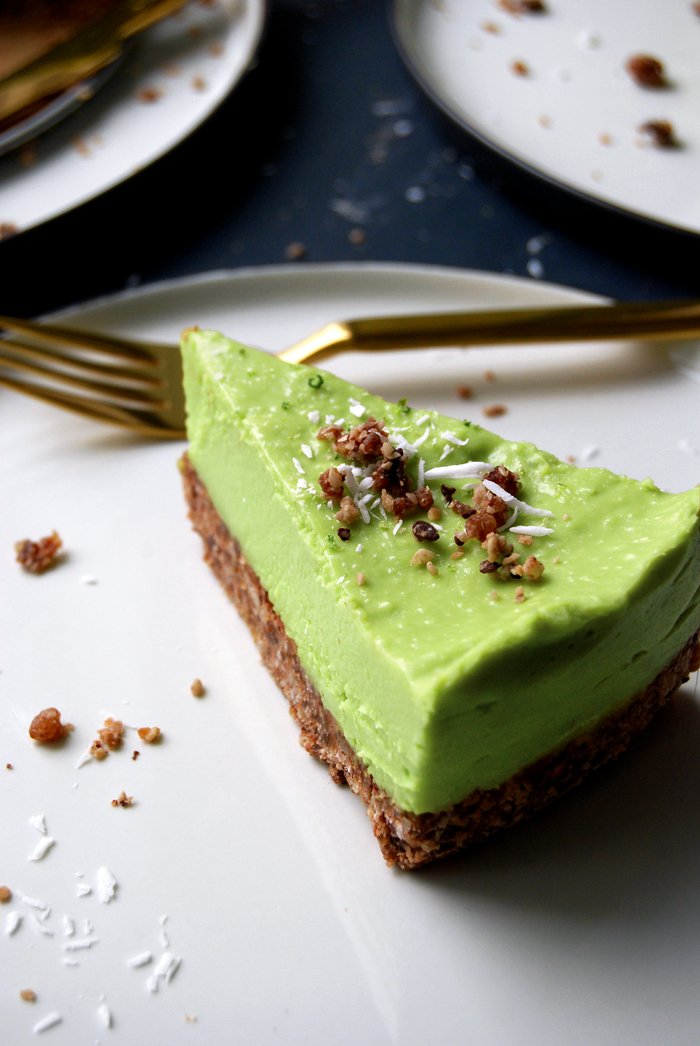
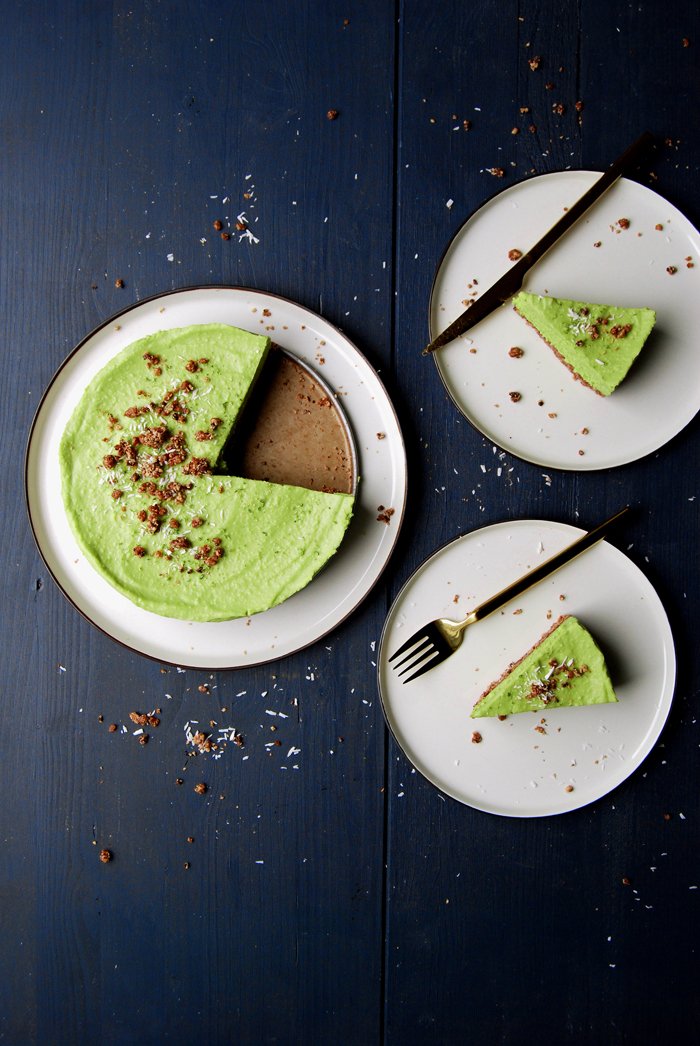
meet in your kitchen | Hemsley + Hemsley's Raw Avocado Lime Cheesecake

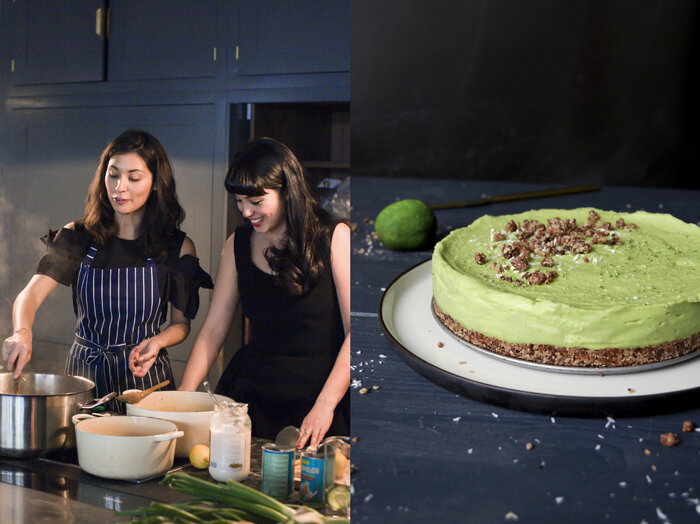
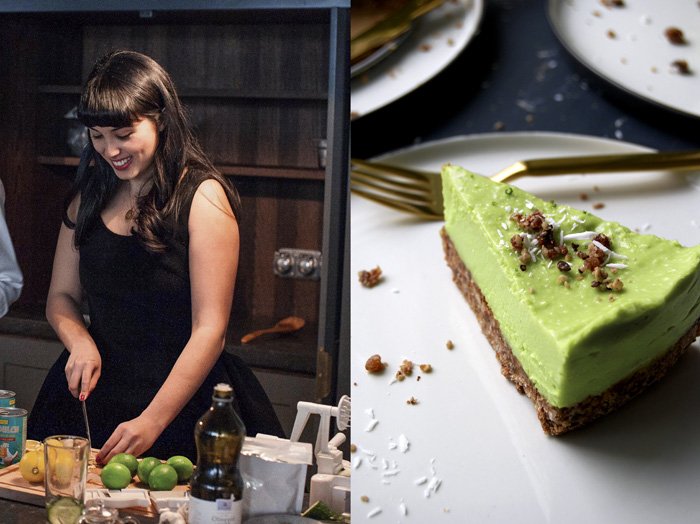
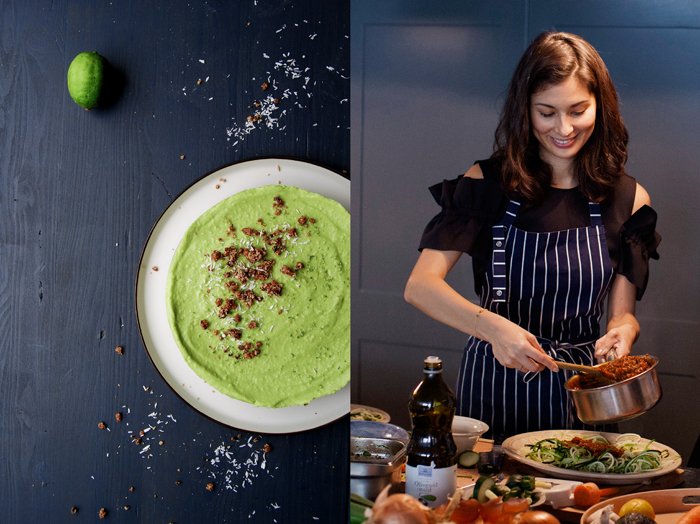
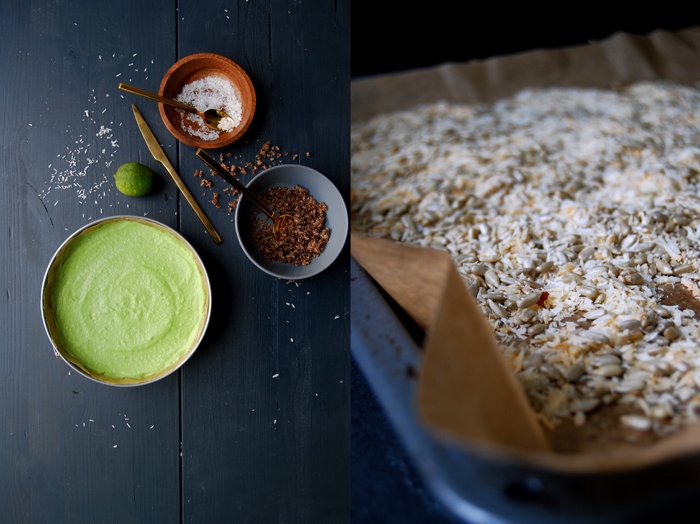
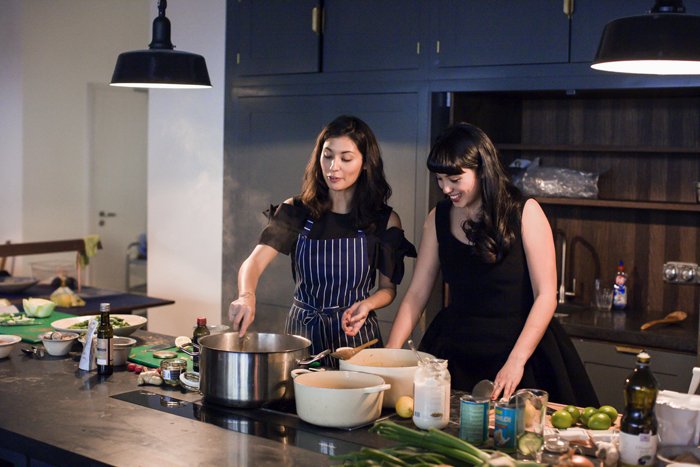
These two ladies are a true force of nature! If you ever have the chance to be in a room together with the charmingly gorgeous Jasmine and Melissa Hemsley, prepare yourself for a wave of energy. I met the two sisters at one of their delicious workshops at The Store Kitchen at Soho House in Berlin and I was equally impressed by their natural beauty and their skills in the kitchen. With infectious smiles and their experienced hands at the chopping block, they prepared one scrumptious treat after the other: smoothies, salads, courgetti with bolognese (the sisters' famous zucchini spaghetti) and a divine raw avocado cheesecake dessert. I sat, listened and savoured!
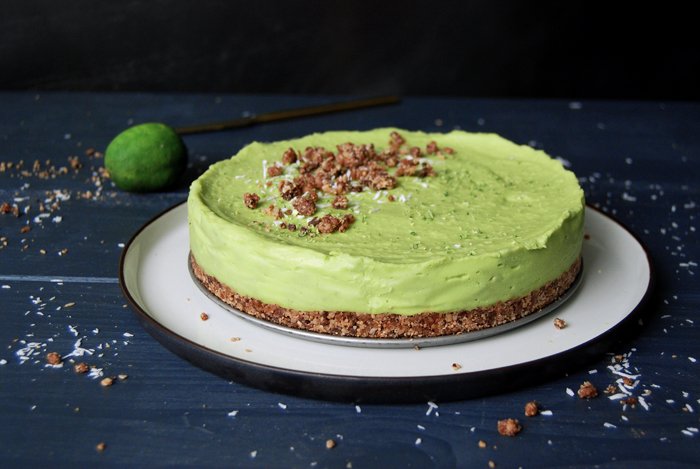
The Hemsley sisters started their careers in different fields before they took over the food world with their concept of no gluten, no grains and no sugar but with lots of taste and pleasure. While Jasmine worked as a model for over 15 years her younger sister Melissa traveled the world as a fashion consultant. Due to their busy lifestyles both women had a strong interest in a diet that would do their bodies good rather than stressing them even more. Their holistic concept convinced many food lovers, it started off with friends who asked for consultancy and cooking classes before the sister's blog and family business Hemsley + Hemsley was born in 2010. As contributors for Vogue UK and The Guardian, the two recipe developers, cooks and food consultants also became responsible for the catering of several celebrities. Nothing could stop them anymore, their popularity grew rapidly. Their first cookbook, The Art of Eating Well published in fall 2014, is a bestseller packed with lots of inspiring recipes and we chose one of them to share with you: the addictive Avocado Lime Cheesecake, raw, vegan and unbelievably delicious!
The pictures of the Hemsley sisters and the avocado dessert in glasses (served at Soho House Berlin) are by Nick Hopper.
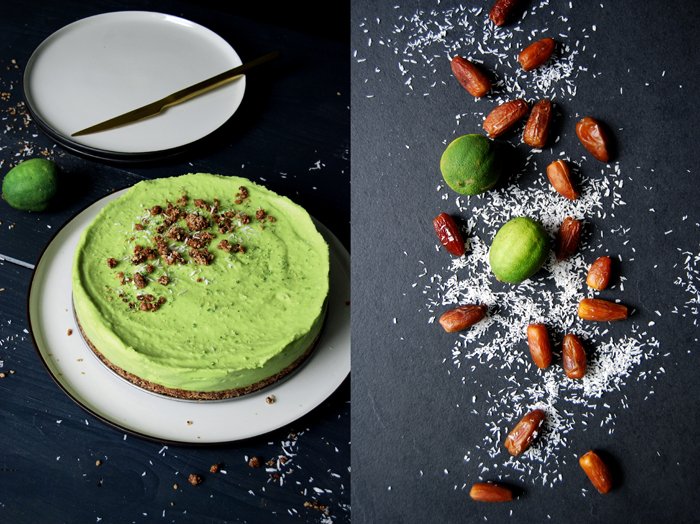
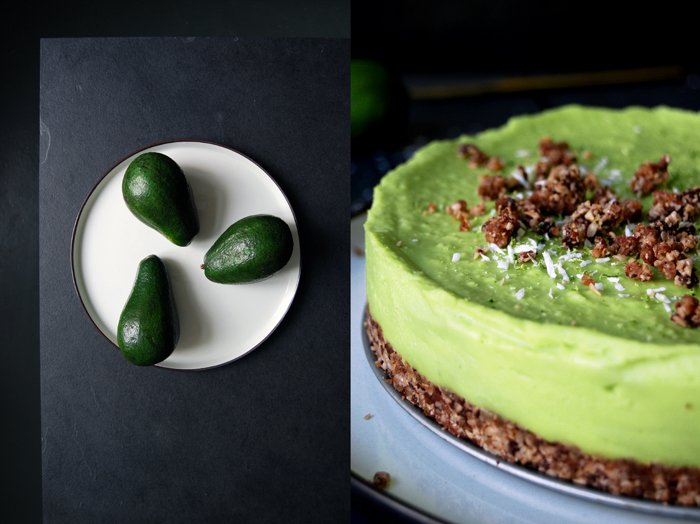
Avocado Lime Cheesecake
Serves 12
For the base
pecans (or sunflower seeds) 125g /4 1/2oz
desiccated coconut 45g / 1 1/2oz
cacao nibs 70g / 2 1/2oz
pitted dates (approx. 32) 185g / 6 1/2oz
coconut oil, melted and at room temperature, 3 tablespoons
For the filling
avocado flesh (from approx. 5 medium-large avocados) 560g / 1 pound 2 1/2oz
lime juice (roughly 8 to 10 limes) 200ml / 7fl oz (I used 100ml / 3 1/2fl oz)
coconut oil, melted and at room temperature, 175ml / 6fl oz
lime zest 1 tsp
honey 190g / 6 3/4oz (I used 100g / 3 1/2oz)
Preheat the oven to 150°C/300°F/gas mark 2.
Place the pecans and desiccated coconut on a baking-tray lined with baking-paper. Place in the oven for seven to eight minutes, until toasted. Transfer the pecans to a food processor and add the rest of the base ingredients. Blend until the mixture is crumbly (don't let it go completely smooth) and holds together when pinched.
Line the base and sides of an 18cm (7") ( mine was 20cm / 8") round cake tin with baking-paper and tip in the base mixture. Press this down firmly and evenly with the back of a spoon, ensuring it is neat and flat where it meets the tin. Transfer the tin to the fridge while you prepare the filling.
Place all of the ingredients for the filling into the food processor and blend until the mixture is completely smooth and silky. Check for taste – add more lime juice, zest or honey according to preference, but it's best to keep this deliciously tangy. Remove the cake tin from the fridge and pour the filling over the base. Cover the tin, using a plate or cling film, and return it to the fridge for a few hours or overnight.
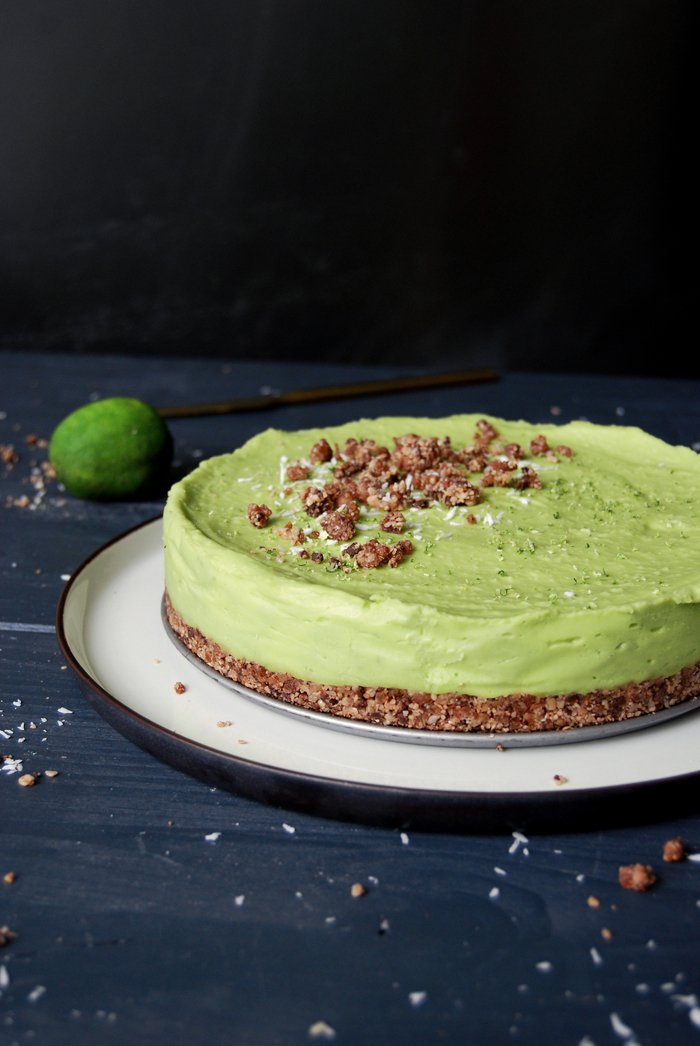
To serve, run a knife between the tin and the cake and carefully push the base up from the bottom. Transfer to a plate and serve immediately.
Before you started your family business Hemsley + Hemsley in 2010, you worked as a model and as a fashion/ brand manager. How did this transition into the food business come about? What moved you to make this step?
Jasmine: Yes, I was working full-time as a model from the age of 19. I was fascinated by the many different ideas surrounding health and nutrition, from paleo to low-fat, juice cleansing and many other ideologies, and began to develop and grow the Hemsley + Hemsley way of eating through research, study and self-practice whilst sharing tips and tricks with friends and family. Mel, who worked as a footwear brand manager and later in marketing and promotion for gastropubs and bars, caught the cooking bug and helped spread the word.
Melissa: We didn’t intentionally ‘launch’ the business - it came about organically. As people reached out to us for help with their digestion and relationship with food, we suddenly found ourselves working as wellness coaches and private chefs. Providing a bespoke service for these clients, we’d clear out their cupboards, fill up their fridges and freezers and show them how to cook our recipes. The results where so positive, they felt better - happier, healthier and more energized. Back then we didn’t have a name, so our clients called us their ‘food fairies’ and from the first week we had a waiting list as everybody recommended us to their friends, families and colleagues.
You seem to complement each others strengths perfectly. What are the advantages of working so closely with your sister? What are your roles, how do you deal with disagreements between the two of you when it comes to your business?
Jasmine: We always said it would be great to have a family business, making the food we all want to eat, food that keeps us happy and energised and be able to share it with everybody. The business has evolved naturally and we now work in areas that we love the most. When it comes to recipes, my sweet tooth means I usually mastermind the puddings and desserts, while Mel is the queen of knock-out curries and one pot dishes. My partner Nick is the third wheel to Hemsley + Hemsley - the man behind the scenes taking all the photos and running the back end of the business.
Melissa: As with all small businesses, you have to roll up your sleeves and get involved. Luckily everyday is different at H+H - cooking, meetings, recipe developments, lots of room for creativity and also plenty of time to work alone and remotely from laptops so we aren’t on each others space the whole time. And when it comes back to just being family we find it remarkably easy to switch off!
Who is your biggest inspiration in the kitchen? What are your culinary roots?
Jasmine: We’ve both always loved good home-cooked food from early on thanks to our Filipina mum being wonderful and inspiring in the kitchen. She would make use of everything we had - definitely where our frugal streak comes from - and each meal was made with great care and attention.
Melissa: Growing up, the more we tuned into how our bodies were really feeling, the more we realised the relationship between food and good health. Being the youngest I lucked out as mum and Jasmine used to do all the cooking and all I had to do was lay the table. As I got older I realised that it was so hard to eat nourishing foods without truly taking charge of it yourself. I realised that if I wanted to eat the same good food I’d have to start putting into practise what I’d absorbed over the years of being around mum, Jaz and all our aunties!
You're big fans of bone broth, how did this start and why does it have such an important role in your food concept?
Bone broth will always be at the heart of our philosophy and intrinsic to everything we do. We love it because it’s a champion all rounder, packed with protein, vitamins, minerals, collagen and keratin - all the building blocks for healthy digestion and glowing skin. Easy to make, frugal and tasty, this ‘liquid gold’ is supremely versatile and a must in anyone's recipe repertoire! Wellness begins from within and good digestion is key - bone broth is an easy to digest source of protein for very little money. At home, we always have broth on the go or a batch in the freezer. You can throw any leftovers in like shredded chicken, roast veggies, yesterday’s salad and swirl through some pesto or miso for a quick soup. We also use it to steam up some quinoa, as the base for sauces, soups, stews and to simply drink it warm from a mug.
How did you develop your holistic food concept, did you work together with food/ health consultants or did you follow your own experiences?
We’ve been developing and growing the Hemsley + Hemsley way of eating for almost ten years through research, study and self-practice. We really tuned in and focused on what made us feel good despite whatever was going on in the media about what you should and shouldn’t be eating. Our philosophy and nutritional ideals take you back to basics with a focus on provenance and digestion. People love our style of cooking and are always intrigued as to how food this tasty could possibly be good for you.
How do you develop new recipes?
We are constantly inspired by our travels when experiencing new cuisines as well as by our readers and client’s who often request Hemsley + Hemsley reworked versions of their favourite foods.
What was the first dish you cooked on your own, what is your first cooking memory?
Jasmine: My mum would make a big soup instead of a Sunday roast, using up all the leftovers from the fridge. I started off cooking one-pot dishes and they are still a Hemsley + Hemsley staple now - a lot of our recipes are simple, quick and frugal dishes which begin with a base of homemade bone broth and can be adapted and added to in order to make use of leftovers.
Melissa: I remember making the perfect creamy scrambled eggs with my mum...lots of butter and a slow-cook.
What are your favourite places to buy and enjoy food in London?
Jasmine: We’ve just discovered Sea Containers (Seamus Mullen) on the Southbank which is stunningly beautiful and the food is incredible with views of the Thames. While we’re over that way, we love Borough Market for fresh produce and The Ginger Pig for delicious, organic meat.
Melissa: For eating out I love Brunswick House in Vauxhall, Elliots in Borough Market, Rochelle’s Canteen in Shoreditch (it’s hidden from the street in a converted school) and Paradise in Kensal Rise (where I used to work).
You shared your Avocado Lime Cheesecake recipe on eat in my kitchen, how did you develop this delicious vegan cheesecake?
People always tell us that our recipes don’t taste healthy and we pride ourselves on coming up with upgraded versions of takeaways, comfort foods and the nostalgia-inducing dishes that our clients, friends, families and followers love best from their childhoods. Keeping texture and flavour in mind, we made clever use of whole foods such as skin-boosting avocado and zesty lime to reinvent this classic and give it the Hemsley + Hemsley stamp of approval. The Avocado Lime Cheesecake is a raw, New York-style cheesecake packed full of goodness. The smooth creamy lime sits atop a nutty, chocolate base with a hint of coconut. It’s tasty, filling and good for you!
If you could choose one person to cook a meal for you, who and what would it be?
Jasmine: Keith Floyd, cooking up a Bouillabaisse in the South of France and enjoying it with plenty of wine in the sunshine. I bet it’d be an afternoon to remember!
Melissa: Rather than have her cook for me, I’d want to cook for the legendary Madhur Jaffrey, probably something like our Chicken Curry and Cauliflower Rice so that she could critique it!
You're going to have ten friends over for a spontaneous dinner, what will be on the table?
Don’t be fooled, these 3 course menus are so easy! And people always tell us they cant believe that it’s healthy food when it tastes that good:
Jasmine: Starter: Baked Chicken Liver Mousse and Carrot and Flax Crackers Main Course: Fish Pie with Celeriac Mash and a side of Garlic Lemon Green Beans Dessert: Instant Berry and Coconut Ice Cream
Melissa: Starter: Cucumber Maki Crab Rolls Main Course: Courgette and Aubergine Curry and a side of Cauliflower Rice Dessert: Pistachio, Fig and Goat’s Cheese Trifle
What was your childhood's culinary favourite and what is it now?
Jasmine: I’ve always had a sweet tooth so it would have to be chocolate brownies. I almost cried the first day I made our Black Bean Brownies and they came out perfectly - fudgy, rich and delicious. They’re now one of our most popular sweet treats from our book The Art of Eating Well; and best of all, they’re free from any processed nasties!
Melissa: Spaghetti Bolognese was one of my favourites growing up and it still is now, except we call it Beef Ragu with Courgetti. Made with the Hemsley Spiralizer, we enjoy the sauce atop a bed of spiralized courgette which we call courgetti and fill the sauce with extra grated carrot and courgette as well as highly nutritious chicken livers if we have any. It’s hearty, warming comfort food that’s perfect with a glass of red wine.
Do you prefer to cook on your own or together with others?
Jasmine: I love to cook with family and friends, it’s always a great way to catch-up and I love seeing how other people do things in the kitchen.
Melissa: I like to have the music on and cook by myself sometimes, as it’s one of the ways I love to unwind, just in the kitchen at home. Saying that, I also love getting together with friends over a glass of wine and have us all chopping away in the kitchen together.
Which meals do you prefer, improvised or planned?
Jasmine: I’m the queen of leftovers so I love getting experimental - it’s a great way to discover new recipes and more often than not you’ll be pleasantly surprised with what you can rustle up.
Melissa: The spontaneous ones that come out of leftovers in the fridge, they’re always the best!
Which meal would you never cook again?
Jasmine: Lactose fermented herring - yes I tried to make fermented fish myself! It’s not something I will be repeating anytime soon, I think I’ll stick to sauerkraut, kimchi and other fermented veg to get my probiotic fix!
Melissa: I can’t think of any one but have definitely recipe tested recipes before that ended up being really complicated so I wouldn’t bother with those again, no matter how tasty. We spend a lot of time experimenting while recipe developing to come up with meals that are simple, delicious and nutritious, so if it’s complicated, it doesn’t make the cut.
Thank you Jasmine and Melissa!


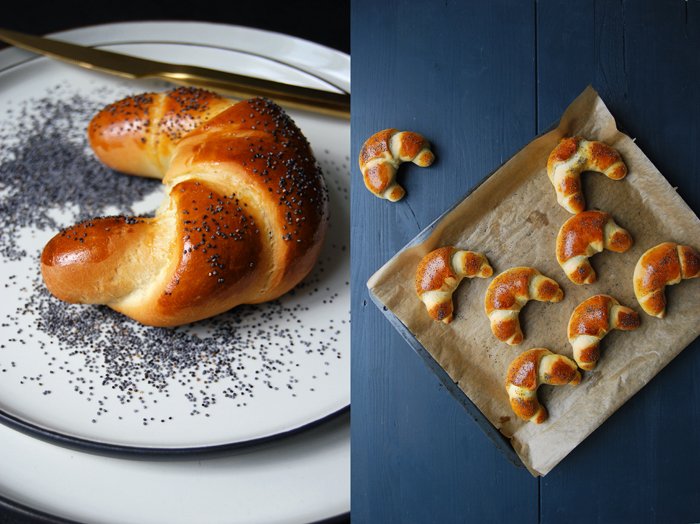
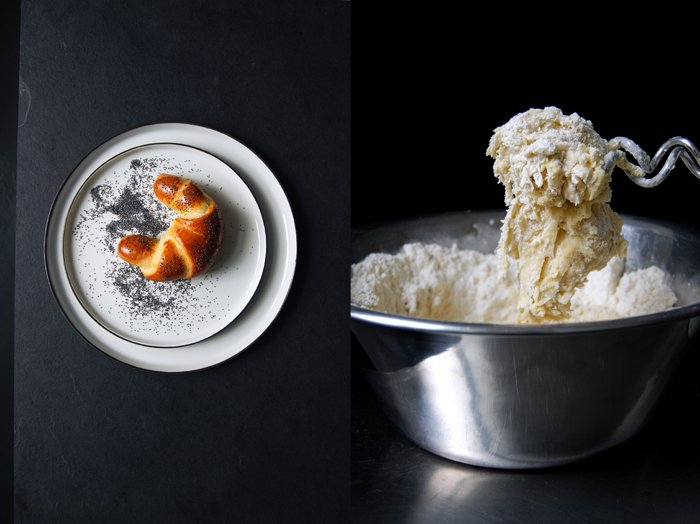
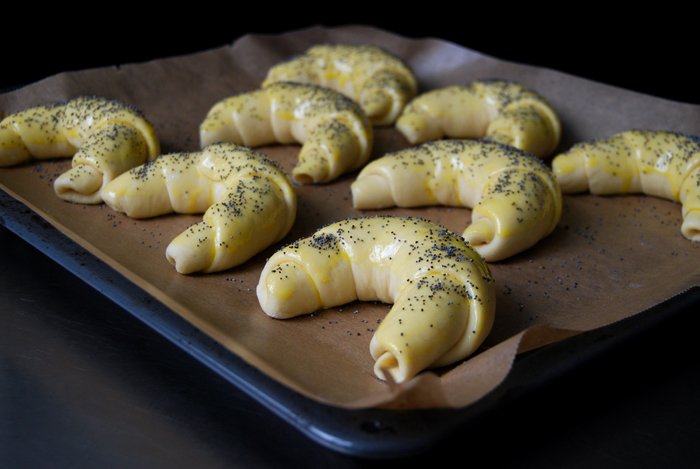
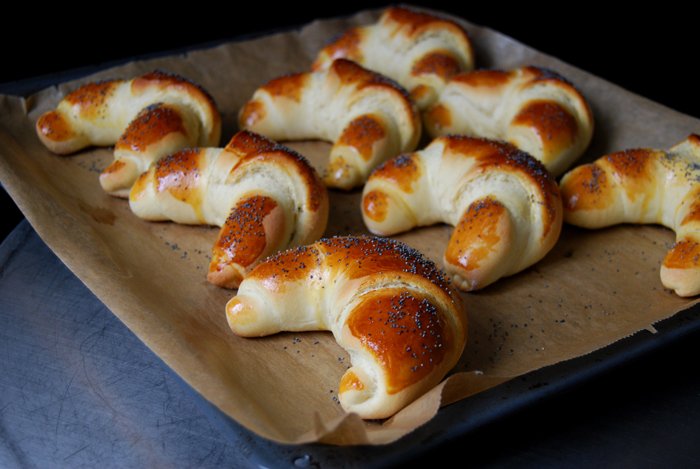
Crescent Milk Rolls with Poppy Seeds for Easter Breakfast
One of my earliest Easter memories is searching for Easter eggs with my sister in the garden of the house we had just moved into. There was no fence around the lawn, the green grass sprinkled with red tulips opened up to a dense forest, my childhood playground. We were young and so excited, the kind of overwhelming excitement we tend to neglect as we get older. On that sunny April day many years ago, we forgot about everything around us as we found our Easter presents hidden behind a group of old oak trees: 80's roller skates in flashing red and white, it was better than Christmas!
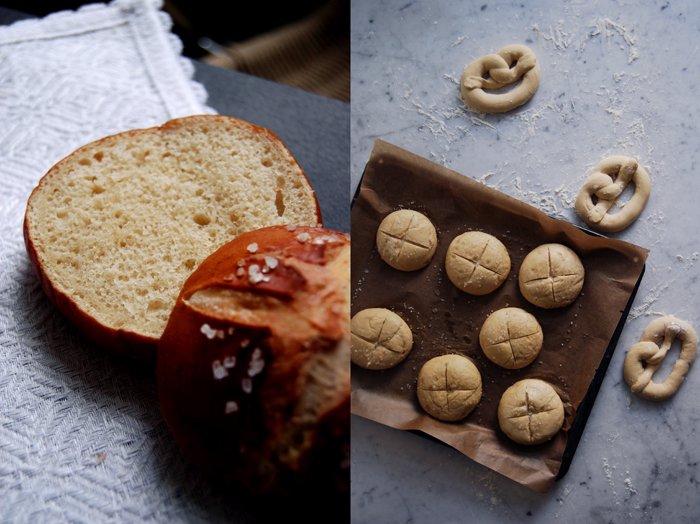
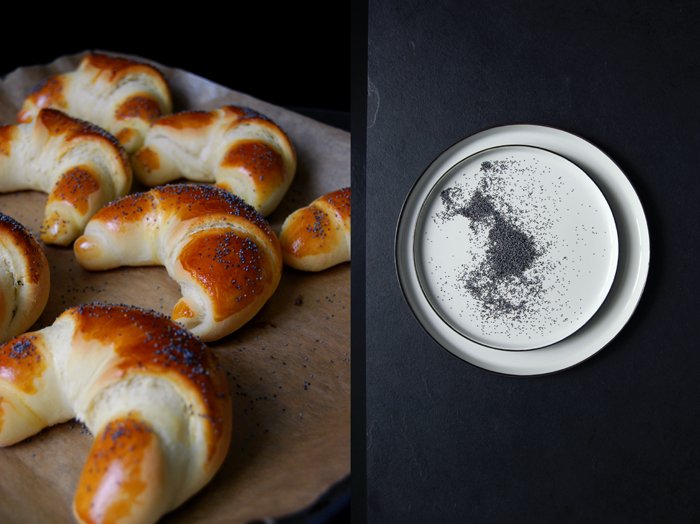
I still love these special feasts, not for the presents but for these pure moments of bliss, when we take a break from our normal routine, slow down the pace and relax a little, or reflect on the memories filling our book of life. To me, memories are as precious as the moment itself and I wouldn't have started a food blog if they weren't inseparably connected with dishes, meals and recipes, at least most of the time. Easter Sunday is perfect for a long breakfast, preferably outside in the sunshine, which, unfortunately, isn't really an option in Berlin at the moment. We're still in the hands of snow, hail and rain! But snuggled into a blanket at our cosy wooden table feels just as nice, especially if there are crescent milk rolls, Milchhörnchen in German, involved. I love these yeast rolls warm, fresh out of the oven, when the soft inside smells almost buttery-sweet. The thin crust is sprinkled with crunchy poppy seeds which adds a slightly nutty nuance, to me they are best with a little butter and maybe, some homemade strawberry jam, but that's not even necessary. Happy Easter!

Crescent Milk Rolls with Poppy Seeds
For 10 rolls you need
plain flour 500g / 1 pound
granulated sugar 3 tablespoons
dry yeast 1 sachet (7g / 1/4 ounce)
salt 1 teaspoon
milk, lukewarm, 220ml / 7 1/2 ounces
butter, melted, 40g / 1 1/2 ounces
organic egg 1 plus 1 egg yolk, beaten, for the glaze
poppy seeds, for the topping
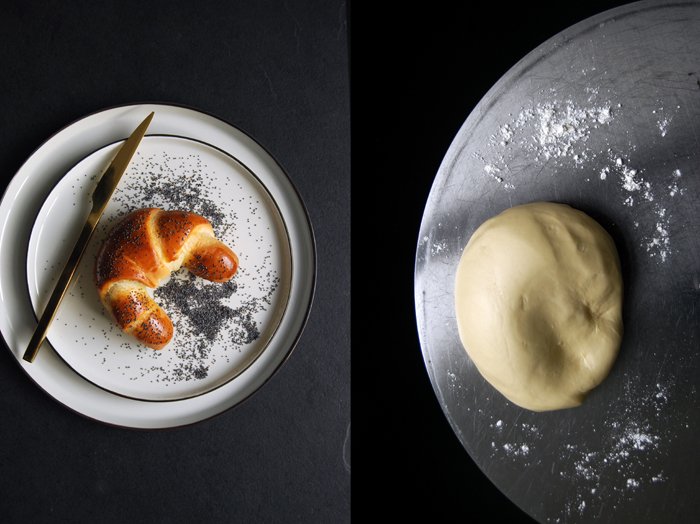
In a large bowl, combine the flour, sugar, yeast and salt. Whisk the milk, melted butter and egg in another bowl, the mixture should be lukewarm. Add to the dry flour-sugar mixture and mix with the dough hooks of your mixer for a few minutes until the dough is well combined and elastic. Continue kneading with your hands for about 5 minutes until you have a soft and silky dough ball. Put the dough back into the bowl, cover with a tea towel and let it rise in the warm oven (35°C / 95°F) for 70 minutes (top/ bottom heat and not fan-assisted!).
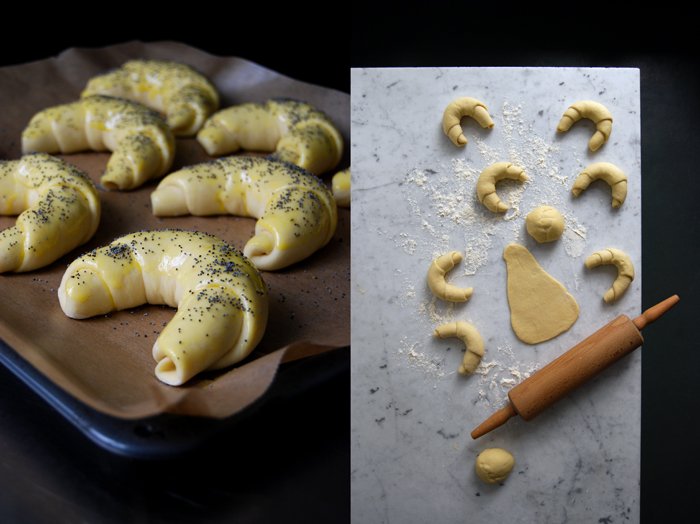
Take the bowl out of the oven, punch the dough down and knead for another 30 seconds. Divide the dough into 10 portions (each about 80g / 3 ounces). Roll each of them to a smooth ball in your hands before you roll it out on the kitchen top with a rolling pin. Give it the shape of a 20cm / 8" long triangle, roll it up towards the tip and bend the roll into a crescent. Continue with the remaining dough and place the rolls on a baking sheet lined with parchment paper. Cover with a tea towel and let them rise in a warm place for another 20 minutes.
Set the oven to 220°C / 430°F (top-bottom heat).
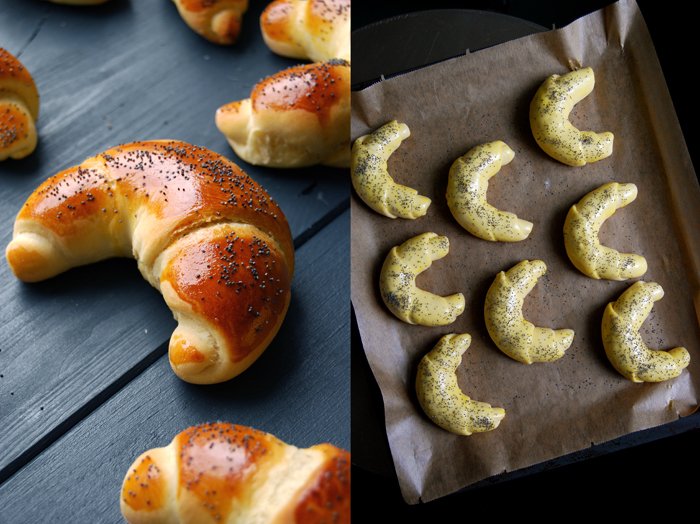
Brush the top of the milk rolls with the beaten egg yolk and sprinkle with poppy seeds (you can use more than you can see in the pictures). Bake in the warm oven for about 10-12 minutes or until golden on top. They are best on the first day!


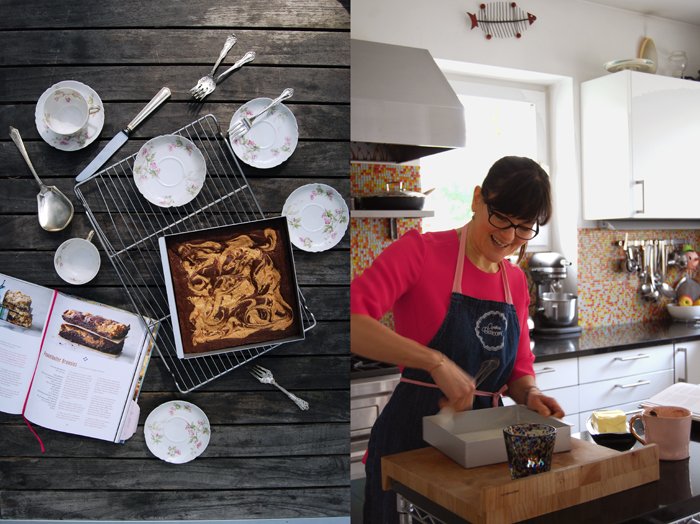
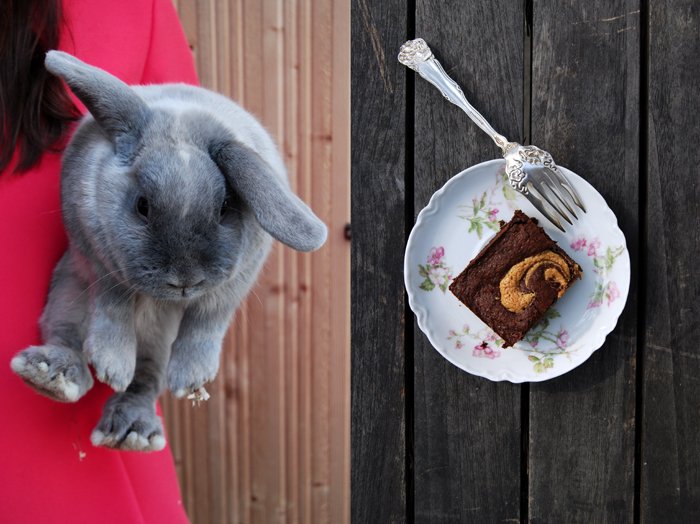
meet in your kitchen | Cynthia Barcomi's heavenly Peanut Butter Brownies
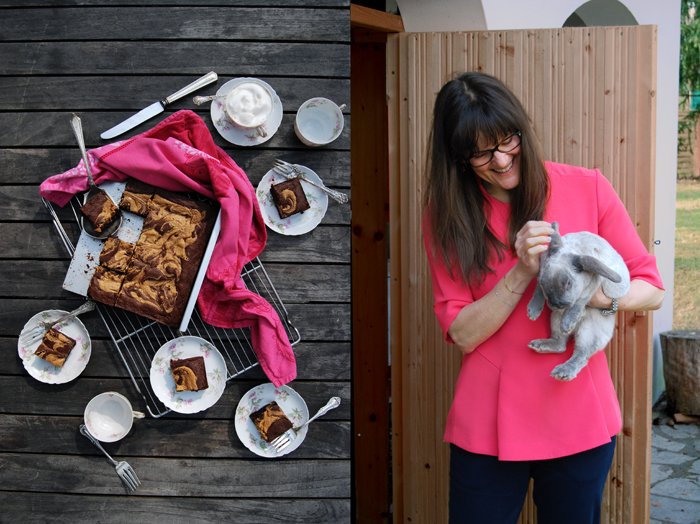
Today's meet in your kitchen feature means a lot to me, with great pleasure I visited the woman who established two beautiful culinary places in my adopted home of Berlin. One of them became my peaceful refuge as soon as it opened its doors a long time ago, in 1997. Barcomi's Café and Barcomi's Deli are both true gems, to me and many others who love good coffee and New York style cakes and sandwiches. I was more than happy to meet the inspiring Cynthia Barcomi in her kitchen, to chat about her life, rabbits and chickens and to bake her delicious peanut butter brownies, what a perfect morning!
Over 20 years ago, Cynthia opened her first Barcomi's in this ever vibrant city that's seen so many changes in the culinary scene over the past two decades. She left New York as a professional dancer to live and work on this side of the Atlantic, in the German capital which was so different when she arrived compared to how we know it today. Cynthia is determined, a disciplined and hard working woman, so it's no surprise that she successfully became a part of the Berlin dance scene. Although she enjoyed her life here, there was something missing: good coffee. This has always been a very delicate topic, all over the world, making coffee is an art, interpreted by different (objective) tastes. Berlin's café scene in those days was a far cry from today's diversity and Cynthia wasn't particularly happy about her discoveries. She's a woman of action, so she decided to roast her own beans and while she was already moving in this new direction, she also had the idea to sell some sweet classics from her American baking heritage. Her New York cheese cake, muffins, raspberry granache and pies, and her fantastic coffee of course, soon gained so much popularity that she opened a second Barcomi's only three years later, a proper deli this time.

Since I first sat at one of her Deli's black and white tables as a traveling teenager it became my all time favourite café, a piece of my Berlin that I never wanted to let go of. So much so that I promised myself that I wouldn't live too far away if I ever moved here, which I managed in the end. It may sound a bit silly, but in this hidden café, tucked away in an old yard, in the dreamy Sophienhöfe, I found a lot of what I was looking for in this city at that point. Although it's a tranquil oasis, it also gave me the feeling that, here, I could dive deep into Berlin's secrets by just sitting on one of the leather benches watching people come and go, drink their coffee or wine, read a newspaper or have a chat. I'd just have to sit and watch attentively.
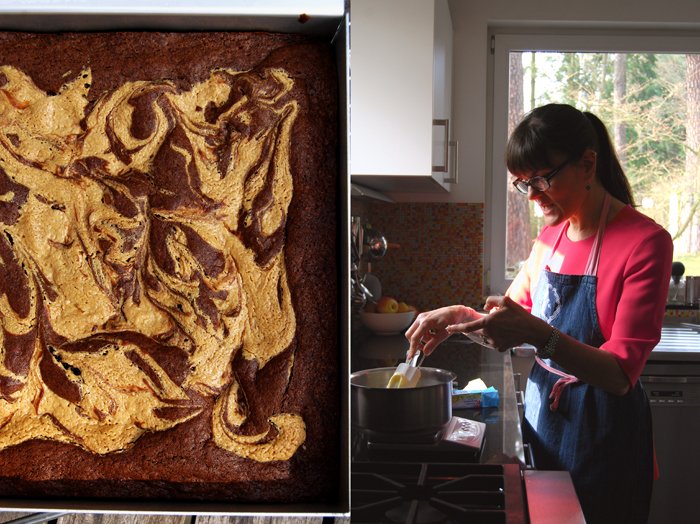
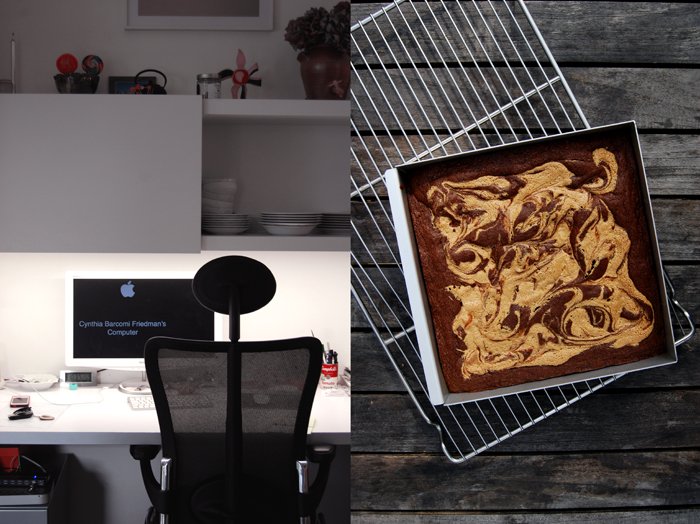
So after all these years, to find myself right in her kitchen is both a surprise and a gift, I can bake with one of my early baking heroes! I felt so excited to visit her creative space, this culinary laboratory where all the Barcomi's magic starts. Her private kitchen is equipped with five ovens, a dream collection of tins and pans, and in the center of this baking heaven stands Mrs. Cynthia Barcomi. She's so chatty and relaxed that one can easily forget that she runs more than a café and deli, she also has a catering company, has written five cookbooks, presents a TV show, and on top of all this, has brought up four children together with her husband. She seems like an endless source of energy and positivity, focussed without forgetting to enjoy her journey, this woman is truly inspirational!
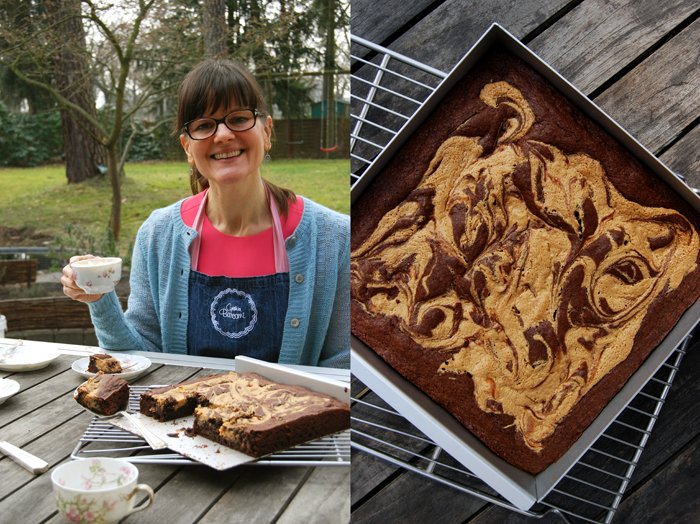
Before we met, Cynthia asked me which of the recipes from her new Cookies cookbook I would like to bake with her. The choice wasn't easy! I was torn between Lemon Lime Cashew Shortbread, Chestnut Flower Brownies, Toffee Crunch Bars and Pesto Twists, but when I spotted her Peanut Butter Brownies I couldn't resist, I had to try them. The creamy, buttery, salty and chocolaty voluptuousness literally jumped out off the pages of her book and I wasn't surprised at all that they tasted exactly as I expected. These brownies were deep and rich, addictive after the first fudgy bite - I just love this woman and everything she creates in her kitchen!
If you want to find out more about Cynthia Barcomi, the Barcomi's cafés and her new book Cookies full of deliciously tempting recipes, click here!

Peanut Butter Brownies
For a 23 x 23cm / 9 x 9" baking tin you need
butter 155g / 5 1/2 ounces
bittersweet chocolate, broken into pieces, 200g / 7 ounces
granulated sugar 150g / 5 1/4 ounces
vanilla extract 1 tablespoon plus 1 teaspoon
plain flour 90g / 3 1/4 ounces
cocoa powder 20g / 3/4 ounce
salt 3/4 teaspoon
baking soda 1/2 teaspoon
peanut butter, creamy, 200g / 7 ounces
icing sugar, sieved, 25g / 1 ounce
eggs 3
Set the oven to 175°C / 350°F (fan-assisted oven) and butter the baking tin.
In a saucepan, melt 125g (4 1/2 ounces) of the butter and the chocolate. Pour the melted chocolate-butter mixture into a bowl and mix with the sugar and 1 tablespoon vanilla extract. Let it cool for about 15 minutes.
In a bowl, combine the flour, cocoa powder, 1/2 teaspoon salt and the baking soda. In another bowl, mix the peanut butter with 30g (1 ounce) butter, icing sugar, 1 teaspoon vanilla extract and 1/4 teaspoon salt.
Whisk the eggs into the chocolate-butter mixture and gently stir in the dry flour-cocoa mixture. Pour the dough into the baking tin and even it out. Place the peanut butter mixture in dollops on top of the chocolate dough and swirl it a little with a tooth pick. Bake in the oven for about 23 minutes or until just firm on top (don't overbake!). Let the brownies cool on a wire rack.
You opened your first Barcomi's in Berlin in 1994, the second one, a deli, in 1997. You also started roasting your own coffee beans, long before this café culture was popular in the city. How would you describe Berlin's café and restaurant scene in those days? What changed over the years?
In 1994 and up until a few years ago, there was really no alternative to industrial roasted coffee beans and industrial produced pastries in Berlin except Barcomi’s. Everything tasted the same and bad! Bad food and coffee corrupts the palette so that at some point, people no longer know how real food and coffee should taste. I have always seen my work as an alternative to the industry – be it feeding our guests or writing books, so that people can bake and cook successfully themselves.
You came from New York to Berlin, arriving as a dancer, and today you're one of Berlin's most popular personalities in the culinary landscape. What led to this personal transformation?
Hard work and a lot of self-criticism let to my success as a gastronome. The transition from dancer to gastronome to cookbook author was simple: I felt inspired and used that inspiration as my starting point. I have never looked back!
How much of the New Yorker is still in you, how would you describe it? What do you miss about this city?
New York is a magical (and tough) city. It is an extremely competitive and fast moving city and if you live there, you have to keep up! Living and going to school there taught me not to be afraid of competition by always doing my best and remaining true to my ideas and beliefs.
As a writer of five cookbooks, a TV personality, caterer and restaurant owner, which of your activities relaxes you and which challenges you the most?
It is always challenging to be good and it’s always challenging to work with lots of people, I have 50 employees between the two stores. I love it though and I simply love to cook and bake. It relaxes and focuses me so I can let the creative process unfold.
You just published your latest book COOKIES, how do you develop new recipes, where do you find inspiration?
Inspiration is everywhere: ingredients, shapes, colors, occasions, dreams, sense memories just to name a few. Inspiration is always the starting point for a new recipe and without it, I cannot create. A baking recipe begins as an intellectual theory of a bunch of ingredients. The magic happens, when I synthesize theory with practice (baking). This involves all of my senses and is partially an intuitive process. When a pastry finally comes out of the oven, theory and practice have united – I love it!
What do you love about Berlin?
I love the people in Berlin. It has become a really exciting city because the people living here are busy making things happen. Whether music, the arts or the food scene – it’s happening in Berlin!
Who is your biggest inspiration in the kitchen?
Actually I find visual artists and music composers inspiring in the kitchen. Layers and layers of details like shapes, juxtapositions, harmonies remind me of the intricacies of my own work.
You brought up four children together with your husband, one of your daughters joined your catering business, how much family is there in Barcomi's?
There is a lot of family in Barcomi’s. My husband and son love to do the store deliveries on Sundays. My youngest daughter is a great helper / baker in the kitchen. Barcomi’s is my family’s existence as well as the existence of many co-workers of mine.
What was the first dish you cooked on your own, what is your first cooking memory?
I used to bake when I was really young (3 – 4 years old) but cooking? I started making omelettes for my parents when I was…maybe 10 years old. Then I discovered Julia Child, Mastering the Art of French Cooking. The floodgate was opened!
What are your favourite places to buy and enjoy food in Berlin?
I love to shop at the weekend market at Mexikoplatz.There is also my favorite farmer who sets up a stand a few days a week at the corner of Sven-Hedin Strasse. I’m originally from Washington, which means that I know my apples. This farmer has the BEST apples I have eaten outside of Washington!
What did you choose to share on eat in my kitchen and why?
Peanut Butter Brownies (from the new Cookies book). I really love your work, Meike: it is detailed, honest and personal. There are many blogs out there, but so few capture the essence of food like eat in my kitchen. I’m impressed!
If you could choose one person to cook a meal for you, who and what would it be?
I would like Jean-Georges Vongerichten to cook his favorite meal for me… or Nobu Matsuhisa, I love his food as well.
You're going to have ten friends over for a spontaneous dinner, what will be on the table?
It is one of my favorite things to do: open my cupboards and simply throw a meal together (often in less than 30 minutes!). As my husband would say, I have done some of my best work in the least amount of time. I love the flow of improvising in the kitchen. It would be my dream TV show to go to someone’s home, open up their kitchen cupboards and cook an amazing meal!
What was your childhood's culinary favourite and what is it now?
Well, I do love chocolate chip cookies but my taste has also evolved over the years. I really love to make and eat simple, straightforward foods. Fresh herbs, seasonal and regional produce is simply the best.
Do you prefer to cook on your own or together with others?
I have a rather large kitchen at home with many ovens and lots of work space. One of the most important elements of my kitchen is the DOOR. I love to cook alone, by myself. It’s like painting to me and it is not necessary a collaborative process. It is a moment, THE moment.
Which meals do you prefer, improvised or planned?
Well, I like to plan a meal for a special occasion as well as the challenge of an impromptu get-together. They are two very different disciplines, each one off-sets the other!
Thank you Cynthia!


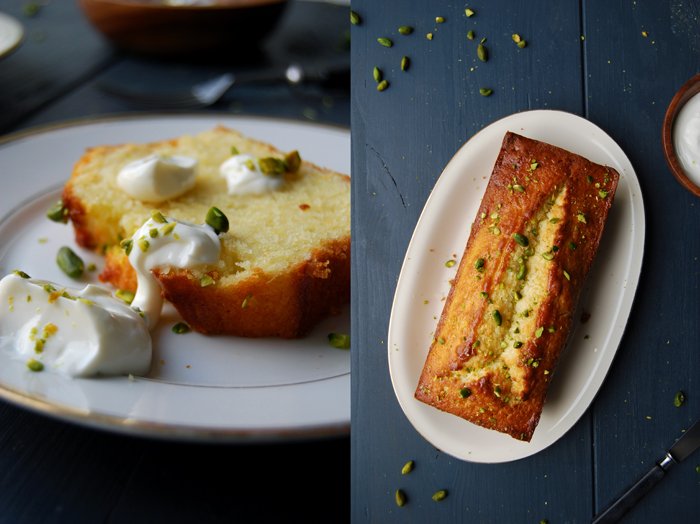
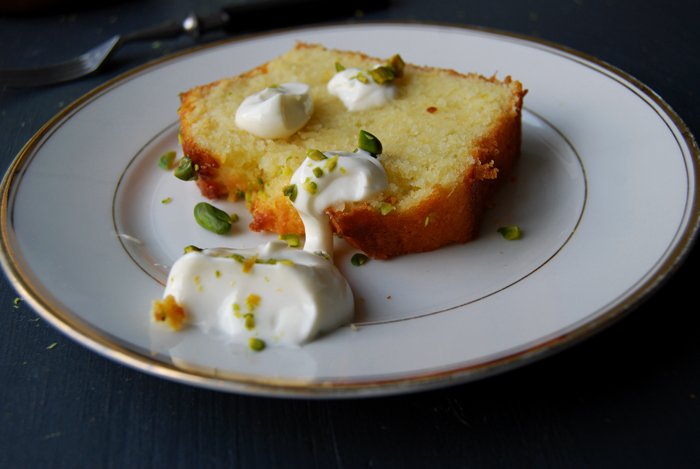
Lime Buttermilk Cake with Pistachios & Orange Blossom Water Yoghurt
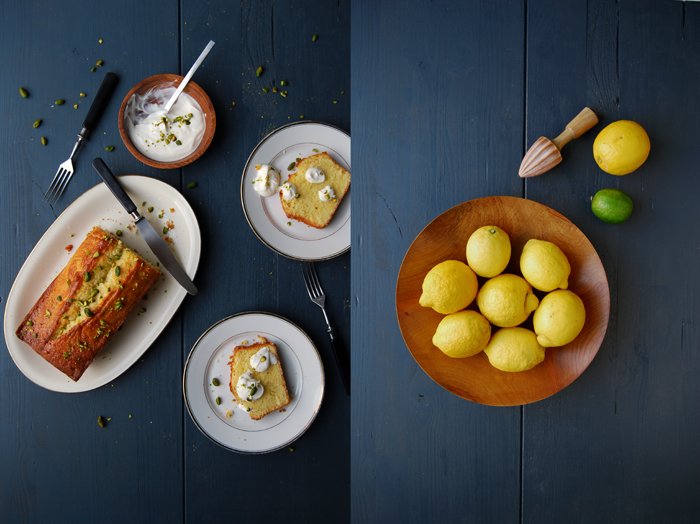
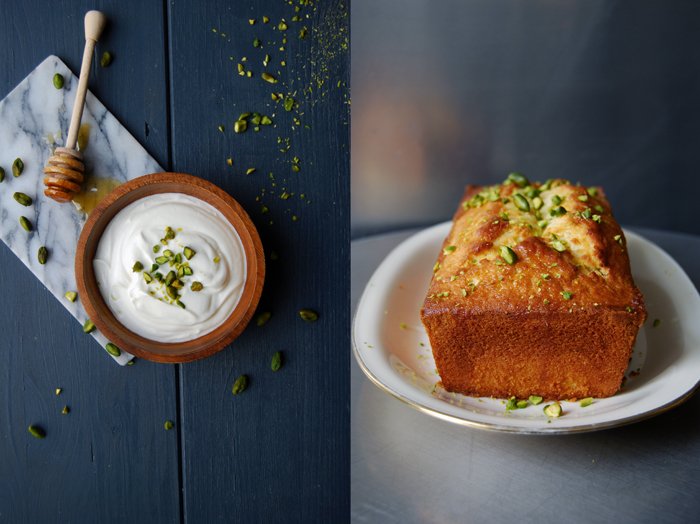
This cake is sweet perfection! It's spongy, juicy, buttery and lemony with a touch of flowery lime which gives it a soft hint of marzipan. It's simply a scrumptious loaf cake and I could have just left it at that, cut into thick slices with a cup of tea and I would have been more than happy. But I asked for more, no puristic cake treat but a rich composition of cakey citrus flavours topped with Greek yoghurt whipped with orange blossom water, Maltese honey and sprinkles of unsalted pistachios. This is a proper dessert, also very convenient as a special Sunday tea time treat, but definitely beyond a simple breakfast cake.
My cake tastes like a summery day in the Mediterranean, the sun at its zenith, so hot that it invites all the beautiful fragrances around you to merge into an enchanting perfume of citrus, salt and warming sweetness. Imagine the smell of your last holiday in a hot and dry country, close your eyes and feel the sun on your skin, all those rich and exotic aromas surrounding you and caressing your senses. That's how this sweet little wonder made me feel and that's why I call it perfection!
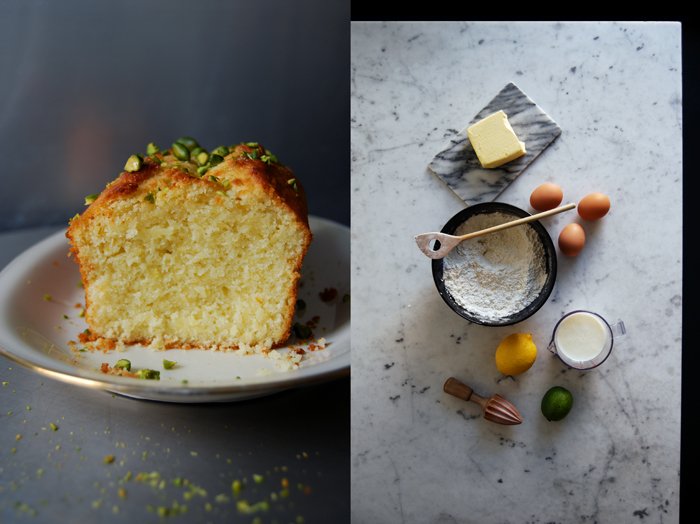
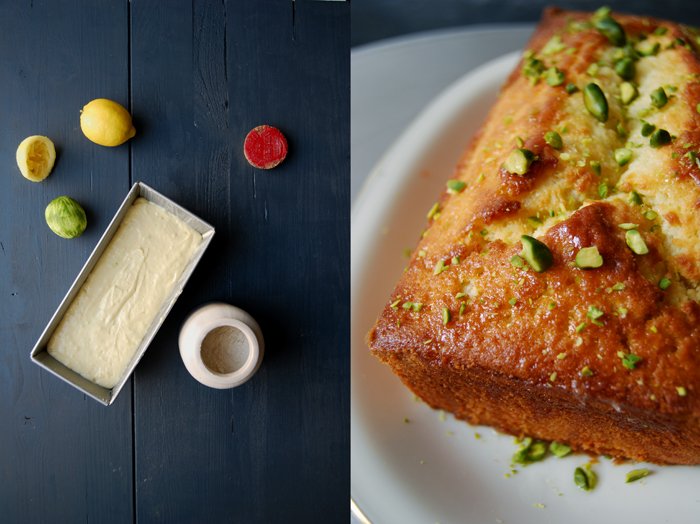
More about the dough which led to this satisfying experience: I mixed some cornstarch into the flour, a trick I already used for my apple breakfast cake, it guarantees a very light and fluffy result. Then there's also buttermilk which adds the right juiciness to keep your fingers moist when you hold a slice of this cake in your hands. You could also reach this pleasant effect with more butter but that would make it heavier. Vegetable oil would also be an efficient alternative to end up with a very juicy cake (it's actually used quite often in combination with buttermilk) but the taste tends to bug me when there are such fine aromas involved. I like it for my nutty Florida carrot cake, but I usually prefer to work with the dairy product.
In the end, everything was just right in this cake, well balanced and harmonic. When that happens I don't ask any more questions, I'm just a thankful baker.
Lime Buttermilk Cake with Pistachios & Orange Blossom Water Yoghurt
For a 24cm x 10,5cm / 9.5″ x 4″ loaf tin you need
plain flour 210g / 7 1/2 ounces
cornstarch 70g / 2 1/2 ounces
baking powder 3 teaspoons
salt 1/4 teaspoon
butter, soft, 180g / 6 1/2 ounces
granulated sugar 180g / 6 1/2 ounces
organic eggs 3
zest of 1 lime
lemon zest 2 tablespoons (about 2 large lemons)
freshly squeezed lemon juice 3 tablespoons
buttermilk 90ml / 3 ounces
icing sugar 2 tablespoons, for the syrup
freshly squeezed lemon juice 3 tablespoons, for the syrup
pistachios (unsalted), chopped, a small handful, for the topping
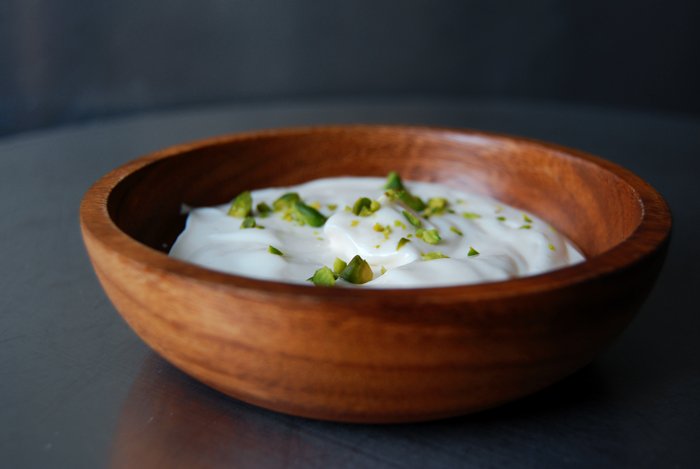
For the orange blossom yoghurt
Greek yoghurt 200g / 7 ounces
orange blossom water (preferably organic) 2 teaspoons, to taste
quality honey 1 tablespoon, to taste
Set the oven to 160°C / 320°F (fan-assisted oven) and butter the loaf pan.
Combine the flour, cornstarch, baking powder and salt.
In a large bowl, whisk the butter with an electric mixer until fluffy, add the sugar and continue mixing until well combined. Add the eggs, one at a time, mix well in between. When the mixture is light and creamy mix in the zest and juice. Gently stir in the flour/ cornstarch mixture with a wooden spoon, in batches, alternating with the buttermilk (about 1/3 of each at a time). Pour the dough into the buttered pan and bake for about 50 minutes or until golden on top. Check with a skewer, it should come out clean. Let the cake cool in the pan for a few minutes before you put it on a wire rack.
For the syrup, whisk the icing sugar and lemon juice until combined. Prick the cake and slowly pour the lemon syrup over the top of the cake, sprinkle with chopped pistachios.
Whisk the yoghurt, orange blossom water and honey, season to taste and serve with the warm cake.

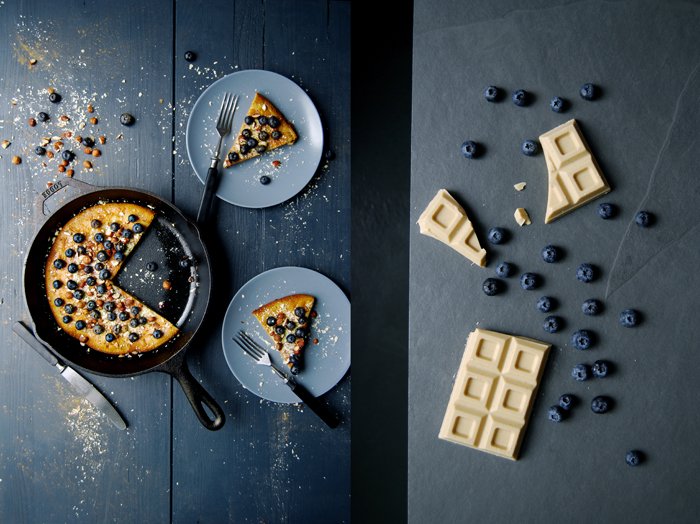
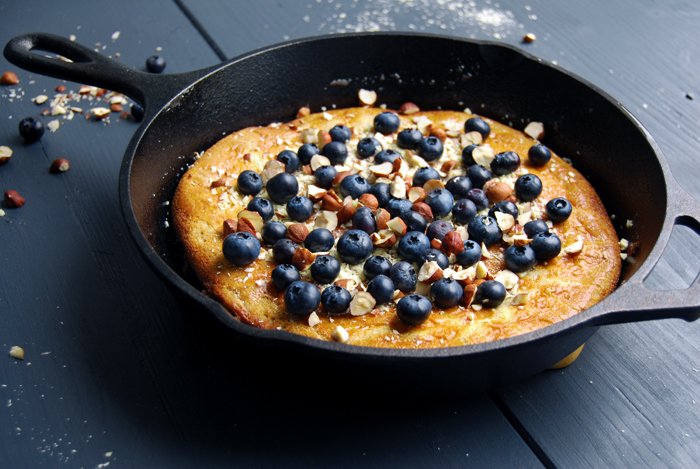
Buckwheat Dutch Baby with White Chocolate, Blueberries and Hazelnuts
I ate my first Dutch Baby in Marta Greber's kitchen, the cook and baker behind the beautiful blog What Should I Eat For Breakfast Today?. We met last October for one of my meet in your kitchen features, I was curious about this woman who is known to be so passionate about the first meal of the day. When Marta told me that she'd like to make a Dutch Baby for me I had to ask her for further information, unfortunately I had no idea what to expect on my plate.
To clear the picture for everyone else who feels as clueless as I did then: a Dutch Baby is a pancake baked in the oven in a heavy cast iron skillet. It rises a bit like a soufflé with a buttery crust on the outside. It's a very simple yet very delicious way to start the day! Marta mastered this dish to perfection, you can find her recipe here in the kitchen feature with her. I didn't want to change her basic formula too much. There are variations on this dish with a thiner result but I particularly liked the richness she created. Her recipe uses more flour than the ones that end up with a paper thin bottom, her Dutch Baby is a proper breakfast and not an airy dessert. I wanted to keep that but there is always room to evolve a recipe, to change it in order to give it a new direction. My new direction is called buckwheat!
Inspired by my hazelnut cake made with this tasty flour which found its way onto the blog only a few weeks before I met Marta, I have been wanting to combine these two creations for months: a hearty buckwheat Dutch Baby refined with cinnamon to underline its nutty flavour. The right cast iron skillet was missing in my kitchen which isn't obligatory for this recipe but I've been longing for this heavy pan from Tennessee for years and I didn't want to start this project without this exact kitchen tool (I know, I sound a bit like a child). Thanks to our family, to lovely Ana and Chris in Florida, my cooking equipment has a few new additions: not only one skillet but three plus a casserole dish, it felt like Christmas when the box arrived. My first Dutch Baby is dedicated to these two wonderful people on the other side of the Atlantic, thank you so much for this kitchen gift!
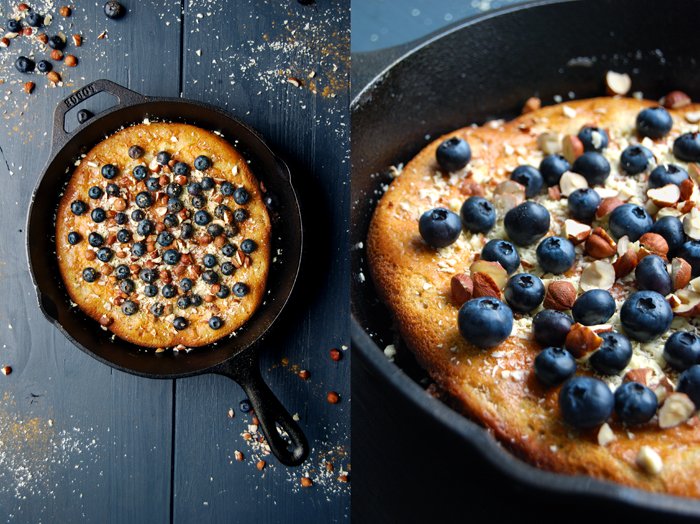
When I finally got started, it took three attempts to learn that you can't expect the same results from buckwheat batter compared to the ones made with lighter wheat or white spelt, it's just not as airy. Buckwheat is simply too heavy to let the pancake rise and bubble like a perfect soufflé, as long as you're not after after a crêpe-thin Dutch Baby which I wasn't. I wanted Marta's thick German pancake texture combined with the buckwheat's distinct taste. So, using only buckwheat was out of the question, it's impossible. For my first batch I used more or less Marta's recipe replacing half the flour with buckwheat. It created a pancake with a certain density that I wanted to lighten up a little. The second batch made with 1/3 less buckwheat flour tasted perfect but I still wanted a different texture and look. The third and final recipe is made with an additional egg and the same amount of the two different flours, and this time I was finally happy. Don't expect a feather-light soufflé but a cosy, nutty, cinnamony warm breakfast treat, slightly cakey, with sweet and creamy white chocolate melted on top. The addition of chopped hazelnuts and fresh blueberries made this comforting morning treat complete!
So where does the name come from? It's another one of these sweet fairy tales. The dish is derived from the German pancake, the word Dutch is a corruption of the word Deutsch, meaning German. A restaurant owner called Victor Manca is supposed to be the person who made the first Dutch Baby in the early 1900 in Seattle, Washington. At least he owned the trade mark. Legend has it that one of his daughters chose the name, referring to the German-American immigrants, the Pennsylvania-Dutch.
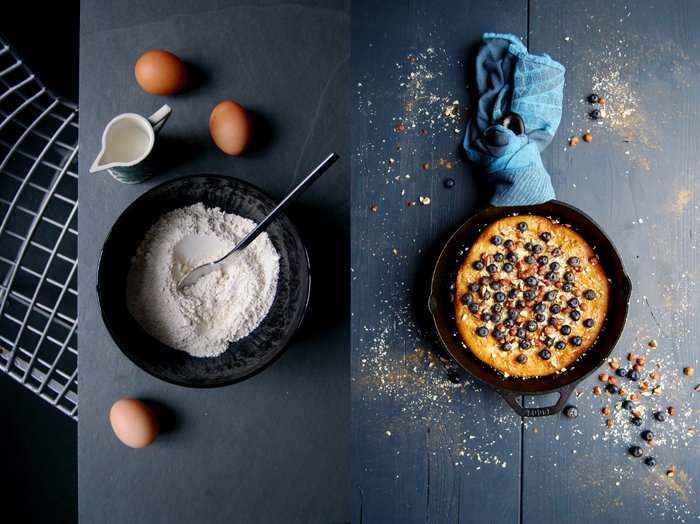
Buckwheat Dutch Baby with White Chocolate, Blueberries and Hazelnuts
For a 25cm / 10" cast iron skillet or heavy baking dish you need
butter 80g / 2 3/4 ounces, to bake the pancake
plain flour 60g / 2 ounces
buckwheat flour 60g / 2 ounces
granulated sugar 2 tablespoons
salt 1/2 teaspoon
ground cinnamon 1 teaspoon
organic eggs 3
milk 125ml / 4 1/2 ounces
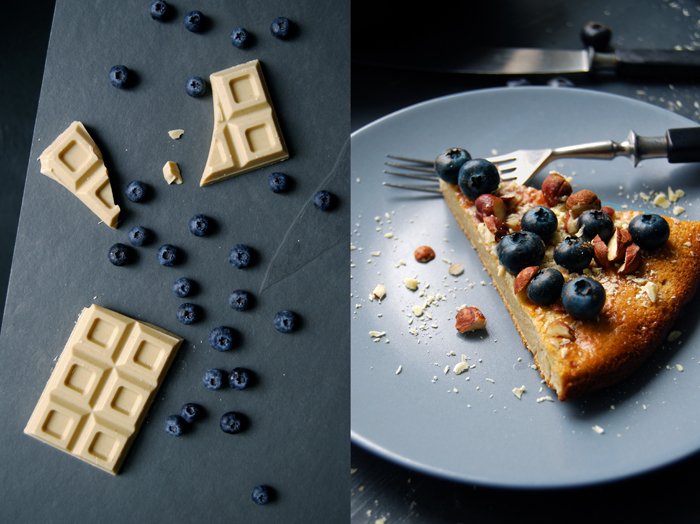
quality white chocolate, grated, 60g / 2 ounces, for the topping
blueberries 125g / 4 1/2 ounces, for the topping
hazelnuts, chopped, 20g / 3/4 ounce, for the topping
Set the oven to 230°C / 450°F (top/ bottom heat).
Place the skillet or baking dish with the butter in the oven. Let the butter melt and sizzle slightly (it should be hot but not brown). Combine the flour, buckwheat, sugar, salt and cinnamon in a bowl, add the milk and eggs and whisk for about a minute until combined. When the butter is melted, gently pour the dough into the middle of the pan and bake in the oven for about 10-12 minutes or until golden.
When the Dutch Baby is done, take the pan out of the oven and carefully pour out the excess butter. Sprinkle the surface with the chocolate immediately. Lay the blueberries and hazelnuts on top and enjoy warm!


Chocolate Ricotta Cheesecake - my take on Russischer Zupfkuchen

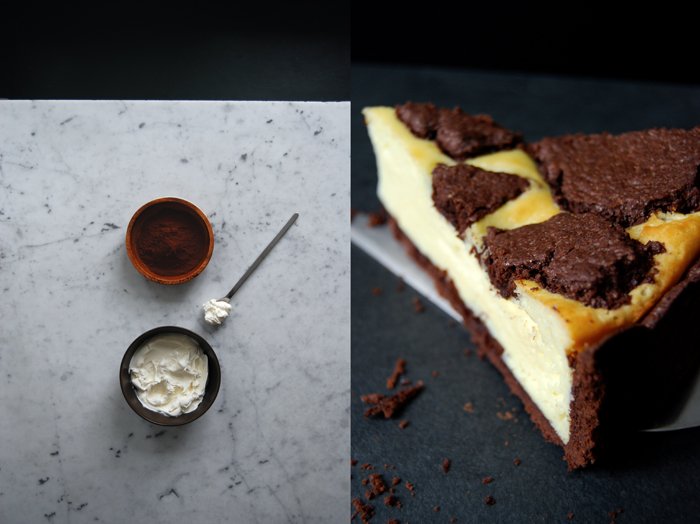
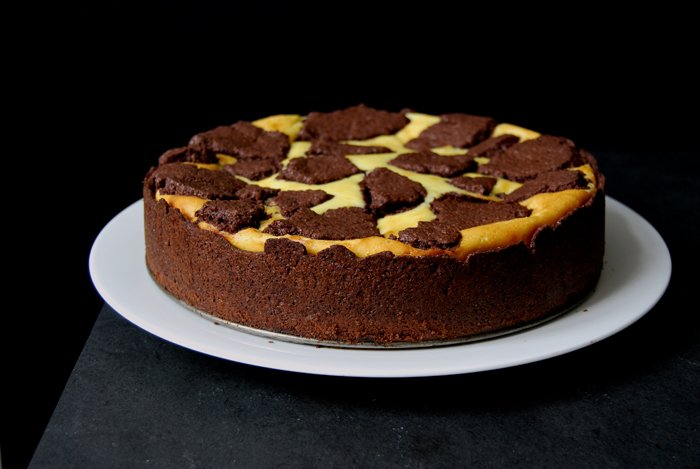
If you like the combination of bittersweet chocolate and creamy cheesecake, this is your recipe! Russischer Zupfkuchen is a German cake classic. Although its history is still relatively young and a little in the dark, this cake gained rising popularity over the past few decades. The name is slightly misleading, there is no proof of a connection to the Russian cuisine, this cake is a culinary mystery, a sweet one, and it might stay that way forever.
Zupfkuchen means plucked cake, which refers to the chocolate dough on top that's also used for the base. It's a dark, crumbly short crust that brings some depth into this sweet and creamy treat. Traditionally, the topping is made with quark, the German dairy product which is similar to ricotta or cottage cheese, it creates a bit of a heavy, more dry texture. I tried many of these cakes in my life and this particular texture was often the reason why I couldn't really warm to it, apart from the fact that many were simply too sweet for my taste.
When I decided to create my own Zupfkuchen I wanted to work on these two points, texture and sweetness. I had something lighter in mind, a filling made with ricotta and a little bit of mascarpone, definitely less sugar and more eggs than you'd find in the usual recipes. The texture turned out to be a cross between a soufflé and a flan, it's like a French take on this rather rustic cake. Especially when you try a piece while it's still warm, it tastes a bit like custard, resembling the fine eggy note of a crème caramel which fades away as soon as the cake cools down. If you're a Zupfkuchen traditionalist, you might be a bit disturbed by this new nuance, but if you savour with an open mind, you can enjoy the contrast of chocolaty darkness and light milkiness. Just add some more sugar if there are children at the table, this is a less-sweet-adult cake.
Before I forget, we found the cake best on the second day!


Russischer Zupfkuchen
For a 26cm / 10″ springform pan you need
For the chocolate short crust
plain flour 300g / 10.5 ounces
granulated sugar 80g / 3 ounces
unsweetened cocoa powder 50g / 1 3/4 ounces
baking powder 1 1/2 leveled teaspoons
a pinch of salt
cold butter 175g / 6 1/4 ounces
organic egg 1
cold milk 1 tablespoon
Combine the flour with the sugar, cocoa powder, baking powder and salt. Cut the butter into the flour with a knife until there are just little pieces of butter left. Continue with your fingers and rub the butter into the flour. Add the egg and milk and continue mixing with the hooks of your mixer until combined. Form a ball, wrap in cling film and put in the fridge while you prepare the cheese topping.
For the cheese topping
fresh ricotta 500g / 18 ounces
mascarpone 250g / 9 ounces
organic eggs 4
cornstarch 50g / 1 3/4 ounces
baking powder 1 teaspoon
a pinch of salt
granulated sugar 120g / 4 1/2 ounces
milk 1 tablespoon
a pinch of vanilla scraped out of its pod
In a large bowl, mix all the ingredients for the cheese topping with an electric mixer until well combined and creamy.
For the Zupfkuchen
Set the oven to 180°C / 355°F (top/ bottom heat) and butter the springform pan.
Divide the short crust in 2/3 for the base and 1/3 for the chocolate topping.
Roll out 2/3 of the dough between cling film, big enough to come up about 2/3 of the rim of the springform pan and line the pan with the pastry. Continue rolling out the remaining 1/3 of dough between cling film (about 1/2cm / 1/4" thick) and pluck it into roundish pieces for the topping, set this dough aside.
Pour the cheesecake topping in the pastry lined springform pan and bake for 20 minutes. Open the oven and gently (and quickly) lay the plucked chocolate dough pieces on top of the cheese topping. Bake for another 35 minutes or until golden and firm on top. Switch off the oven, open the oven door and keep the cake in the oven for another 5-10 minutes. Take it out and let the cake cool before you take it out of the springform pan.


Butter Buchtel Buns with Cherries and Vanilla Custard
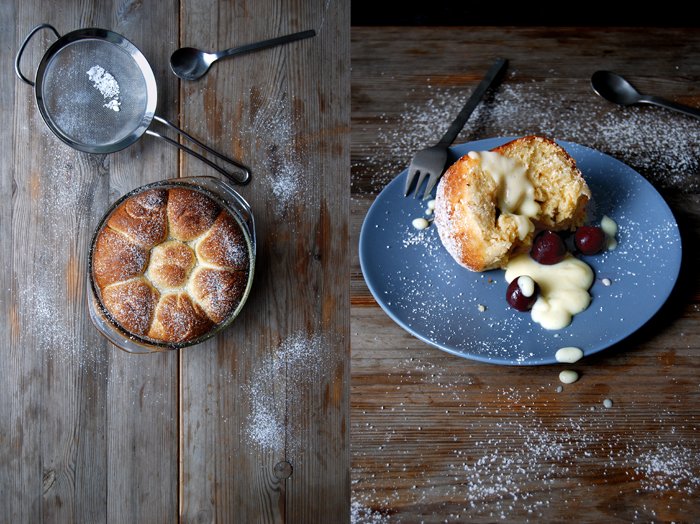
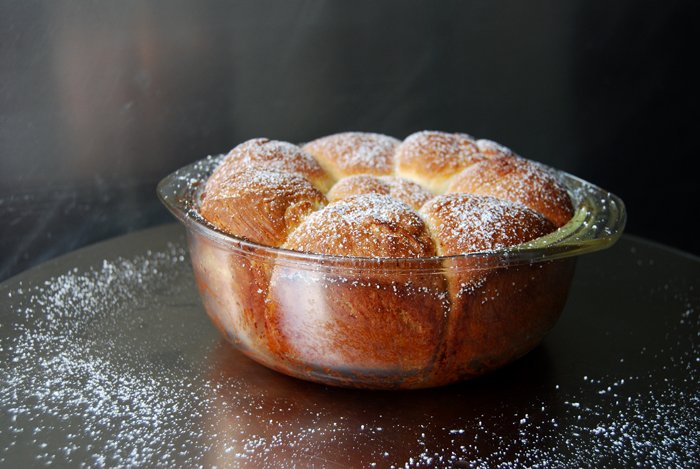
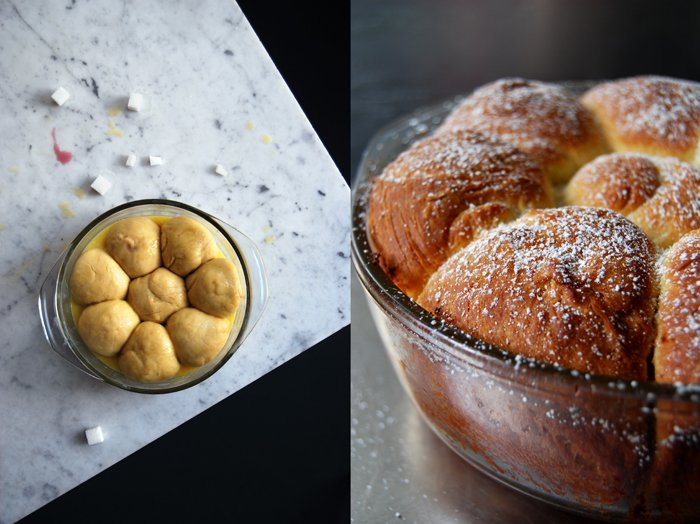
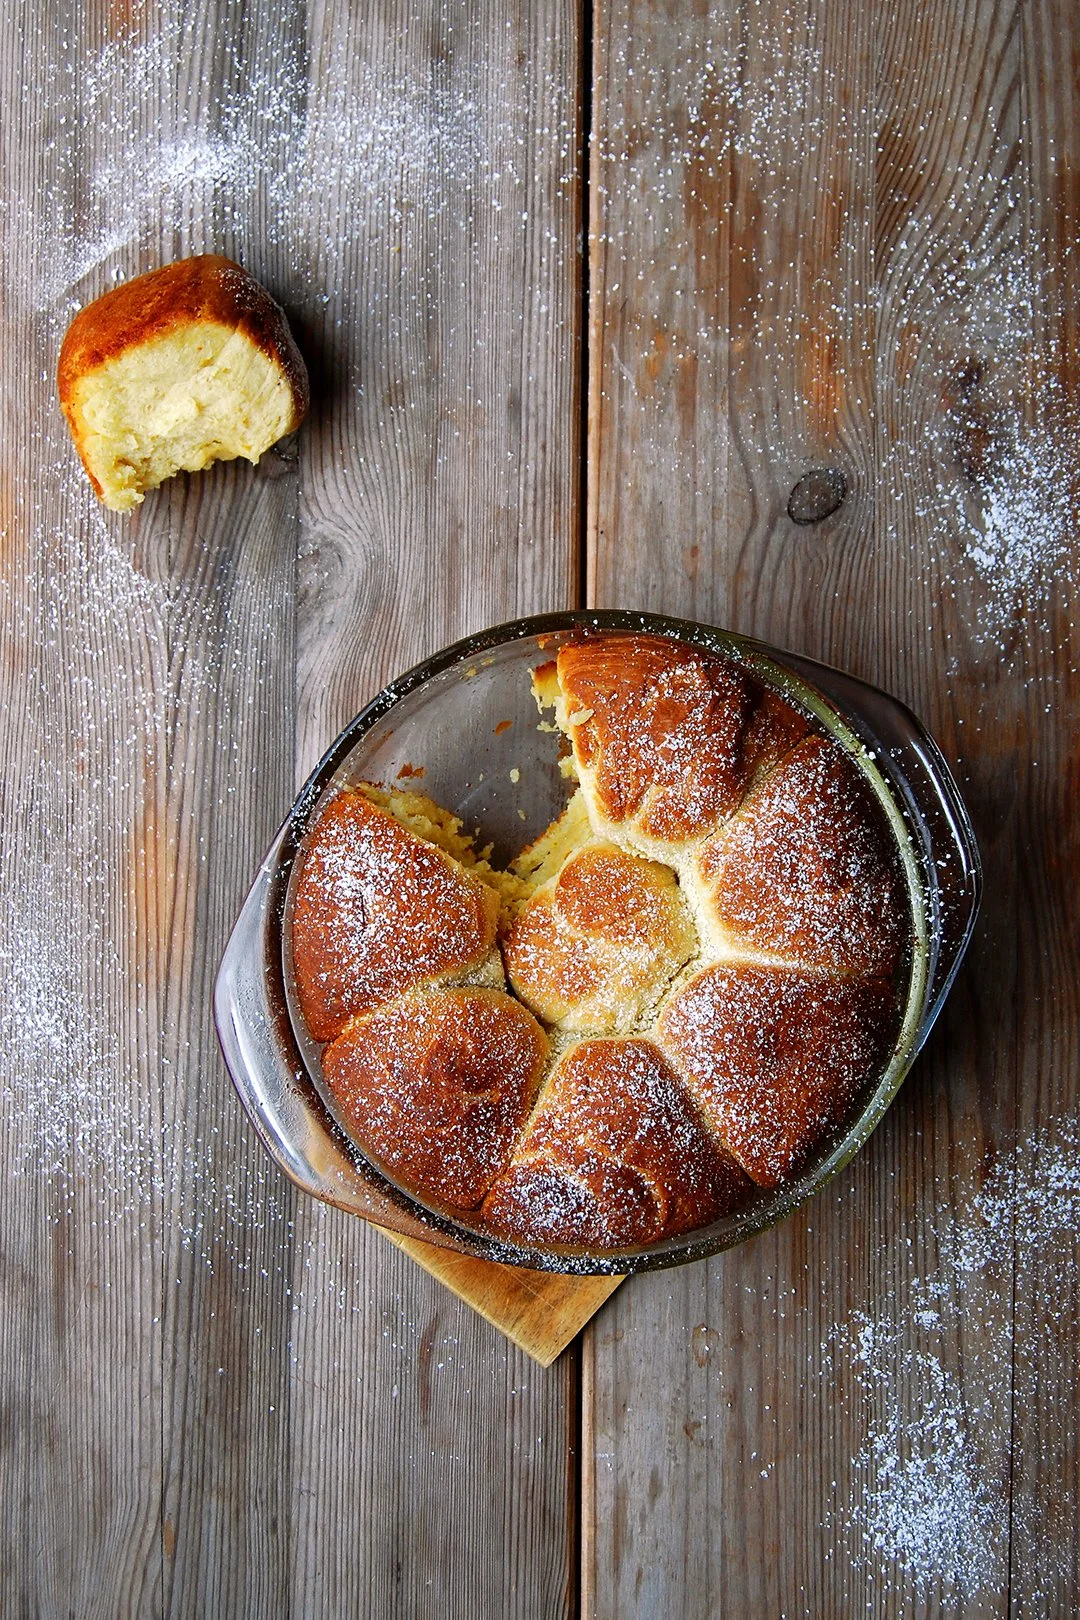
Fragrant and fluffy! Buchteln are buttery sweet yeast rolls tucked together in a baking pan to keep them juicy. Break the warm buns apart when they are freshly out of the oven and you can enjoy the sweetest smell that yeast dough can possibly create. To get an even better idea of what to expect, imagine brioche, just softer, with a flowery aroma and a sweet filling of juicy cherries. Although this is the prefect Sunday morning breakfast treat, they also make a fantastic, rustic dessert, especially when you serve them with a thick vanilla custard. You can replace the cherries with your favourite jam, curd or poppy seeds, basically with everything that fits to a buttery sweet bun. I used canned fruits stuffed with a little lump of sugar to release their juices, there's no need to wait for their harvest in summer. It worked great! This is the right recipe to pull out all the preserved fruit cans and jars piled up in your pantry, apricots, peaches, plums are great too, just stuff them into your butter buchteln and enjoy their juicy sweetness.
Buchteln have been with me for quite a while, when I went to university I used to go to my favourite bakery at least twice a week to buy a couple of their fabulous plum cinnamon buchteln. I'll never forget the satisfaction I felt with each bite, and even today, after all those years, they still manage put me right back to this comforting feeling.
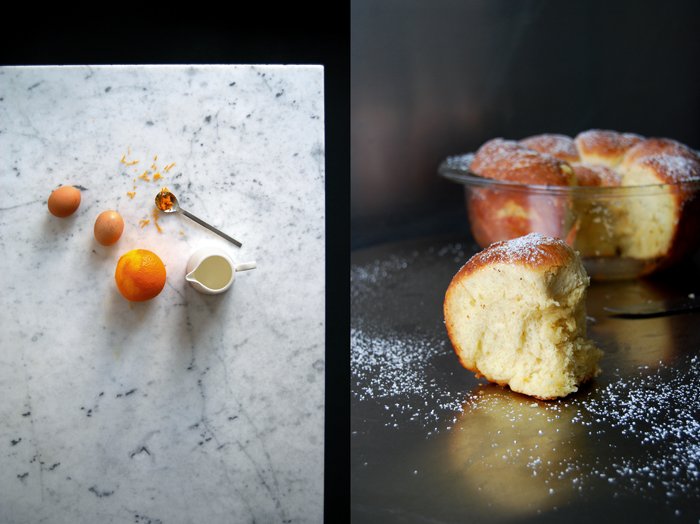
Buchteln (also known as Ofennudel or Rohrnudel in German) are very popular in Southern German, Austrian, Hungarian, Czech and Slovenian cuisine, several variations on this recipe spread into Polish, Croatian and Serbian baking over the years. However, they remind me a lot of Italian baking, the rich dough is almost yellow, made with lots of butter and eggs refined with orange zest and vanilla, it's as fragrant as a panettone. Simple and pure, yet so satisfying!

Butter Buchtel Buns with Cherries and Vanilla Custard
I used a round 19cm / 7.5" (6cm / 2.5" high) baking dish. The buchteln should sit close to each other.
For 8 buchteln you need
plain flour 400g / 14 ounces
granulated sugar 60g / 2 1/4 ounces
dry yeast 1 sachet (7g / 1/4 ounce)
salt 1/4 teaspoon
vanilla, scraped, 1/4 pod (or 1 package vanilla sugar)
orange zest 1 teaspoon
milk 125ml / 4 1/4 ounces
butter, melted, 80g / 3 ounces plus 80g / 3 ounces to coat the buchteln
organic eggs 2
jarred cherries, for the filling 16-24
sugar cubes, quartered, 4-6
icing sugar, for the topping
In a large bowl, combine the flour, sugar, yeast, salt, vanilla and zest. Whisk the cold milk with 80g (3 ounces) of the hot melted butter and the eggs (the mixture should be lukewarm) and add to the dry flour mixture. Mix with the dough hooks of your mixer for a few minutes until the dough is well combined and elastic. Continue kneading with your hands for about 4 minutes until you have a soft and silky dough ball. Put the dough back into the bowl, cover with a tea towel and let it rise in the warm oven (35°C / 95°F) for 70 minutes (top/ bottom heat and not fan-assisted!). The dough will need the last 10 minutes to reach the right volume.
Melt the remaining 80g (3 ounces) of butter in a sauce pan, take it off the heat as soon as it's liquid, it shouldn't be brown.
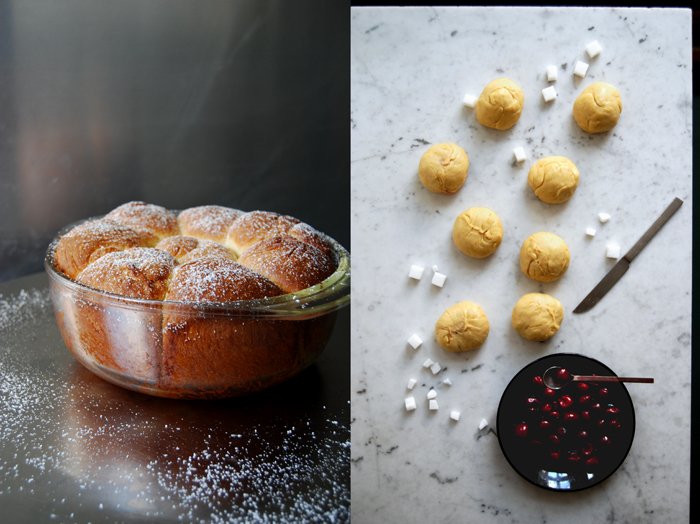
Take the bowl out of the oven, punch the dough down and knead for another 30 seconds. Divide the dough into 8 portions and roll each in your hands to a smooth ball. Fill each cherry with a quarter of a sugar cube. Use your thumb to make a hole in each dough ball and stuff it with 2-3 cherries. Close the ball well, use 2 fingers to close the fold of the hole tightly. Pour 3 tablespoons of the melted butter into the baking pan. Turn the little dough balls in the remaining melted butter and tuck them closely next to each other in the baking pan (the fold should be at the bottom). Pour the remaining butter over the buchteln. Cover with a tea towel and let them rise in a warm place for another 15-20 minutes.
Set the oven to 180°C / 355°F (fan-assisted oven).
Bake the buchteln for 30 minutes or until golden brown, check with a skewer, it should come out clean. When they are done, brush the warm top with a tablespoon of butter. Sprinkle with a little icing sugar and serve with warm vanilla custard.
For the vanilla custard
organic egg yolks 4
cornstarch 4 tablespoons
granulated sugar 100g / 3.5 ounces
milk 500ml / 17 ounces
a pinch of salt
vanilla pod, slit slightly, 1
Whisk the egg yolks with the cornstarch, sugar, salt and 50ml / 2 ounces of the milk until well combined.
In a saucepan, bring the remaining milk with the vanilla pod to the boil. Take the vanilla pod out and scrape the seeds out of the bean into the milk. Add the egg mixture to the hot milk, whisking well. Take the sauce pan off the heat after 1 minute and continue whisking for 2 minutes, serve immediately.


Olive Oil Bundt Cake with Orange Icing - 10 Years in Berlin

Kitchen remodeling! Finally, after having been in Berlin for exactly 10 years I used this special anniversary to change a part of my kitchen that has been bugging me since my first day. When I moved into my apartment I took over an oven and a rather simple and unpractical sink/ cupboard which were already set up. The oven made space for my new one after 5 years but, somehow, the sink which was supposed to leave after a week survived 10 years. Thanks to procrastination and my indecisiveness!
So, a few weeks ago I fell in love with a white ceramic sink and I took this love at first sight as an incentive to get my kitchen project started. Although I only had a one and a half meter space for the sink, cupboard and shelves, I don't think that the planning would have taken much longer for the whole kitchen. All the little details which make it or break it (literally) were much more time consuming than expected (which explains my hesitance to get started). I didn't want to break with the look that I already have, Carrara marble kitchen tops and aluminium wall panels. White is the dominant colour which is helpful as it makes the room brighter. The only thing I did change, are the closed cupboards under and next to the sink. In the past I only had an open shelving system with metal supports and wooden racks which looks great but is rather unpractical when there is water involved.
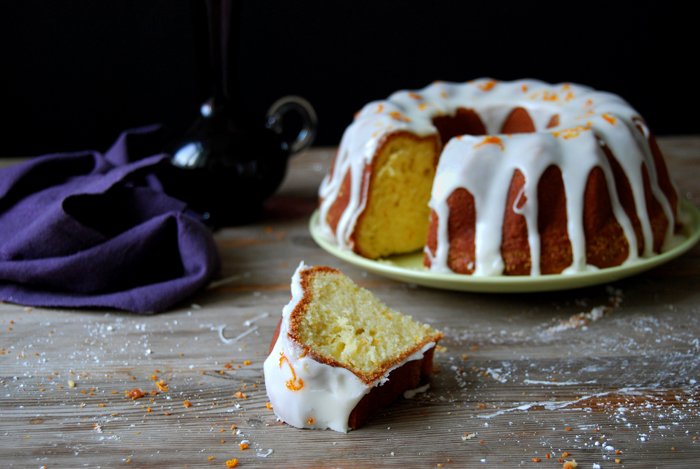
I made the final choices when I visited my mother last week, kitchen remodeling is a perfect mother-daughter project. We spoke about materials and the layout while we sat outside on her terrace in the sunshine with a glass of chilled white wine and lots of pictures, brochures and drawings scattered all over the table. As soon as I got back home, I made my orders and prepared myself for the building, I baked a cake! I love home works and renovations but to me good catering is essential to keep up the spirit in moments of frustration and we had a few of them. My cake of choice was the juiciest, spongiest gugelhupf (bundt cake) made with lots of olive oil. I covered this piece of simple bliss in a fruity orange icing to give it a more festive anniversary look. It doesn't really need it but it made it pretty! If you're looking for a cake that you can eat with your fingers as a little snack (while you're remodeling your kitchen) or for breakfast, or if you're after an honest tea time cake with a bit of finesse, go for it! The olive oil adds some moisture without making it soggy and it leaves a subtle hint of its rich aroma.
So, it's been 10 years of Berlin and the city has been very good to me. I fell in love with it when I visited it for the first time many, many years ago and it has inspired me every day since then, it made me grow and filled me with such happiness like no other place in the world (apart from Malta). Thank you Berlin!

Olive Oil Bundt Cake with Orange Icing
For a 1 3/4l / 3 1/2 pint bundt pan you need
plain flour 250g / 9 ounces
granulated sugar 200g / 7 ounces
baking powder 3 teaspoons
a pinch of salt
organic eggs 5
olive oil 150ml / 5 ounces
milk 100ml / 3.5 ounces
orange zest 2 heaping teaspoons plus more for the topping
butter and breadcrumbs for the bundt pan
For the orange icing
icing sugar 200g / 7 ounces
freshly squeezed orange juice 3-4 tablespoons
Set the oven to 180°C / 350°F (fan-assisted oven). Butter the bundt pan well and coat generously with breadcrumbs.
Combine the flour, sugar, baking powder and salt. Quickly mix in the eggs, olive oil and milk with an electric mixer. Pour the batter into the bundt pan and bake for 40 minutes or until golden and firm on top. Check with a skewer, it should come out clean. Let the cake cool for a few minutes, shake the pan a little and turn the cake onto a plate, let it cool completely.
Whisk the icing sugar and orange juice (spoon by spoon) until it's thick and slightly runny.
Glaze the cake with the orange icing and sprinkle with orange zest.
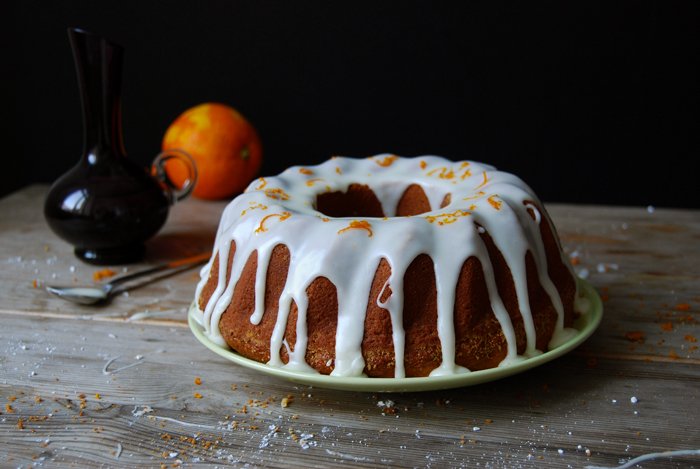

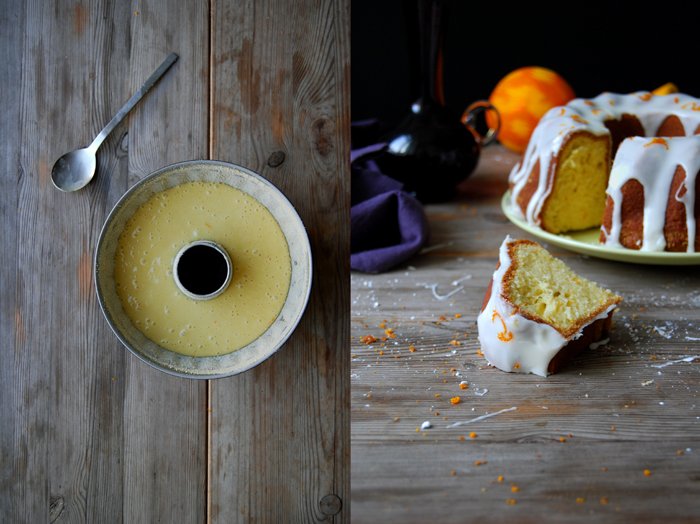

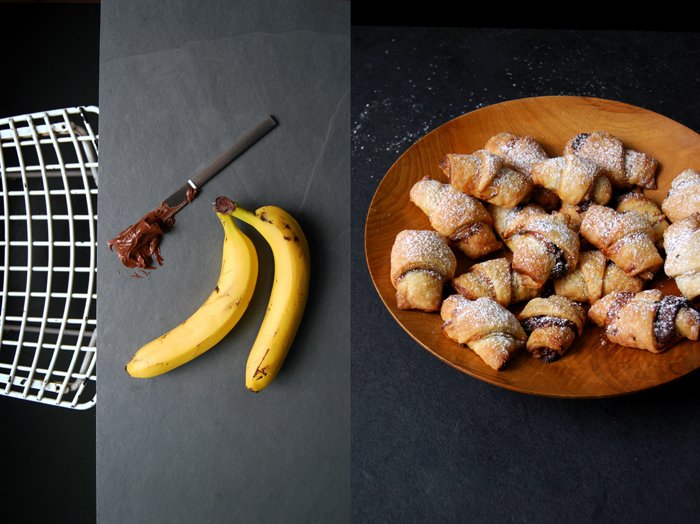
Banana and Chocolate Spread Rugelach
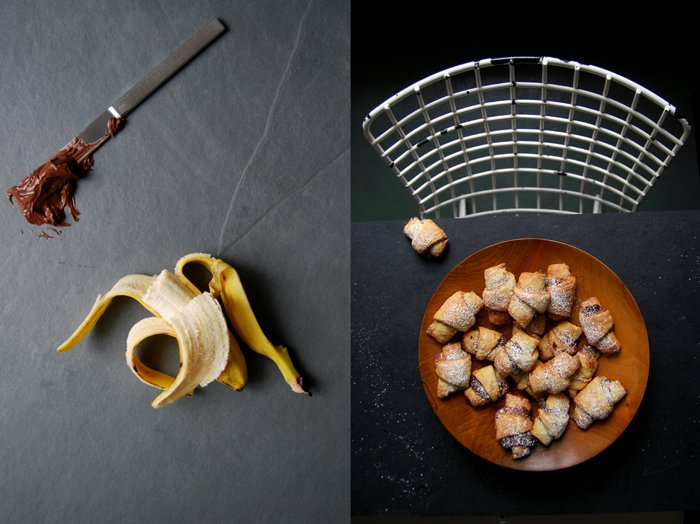
I've never baked croissants in my kitchen, I'm a bit scared of puff pastry at least when I'm the one who has to prepare it. Unfortunately, I love to eat them, sometimes I literally crave their buttery flakiness that leaves your fingers sticky and fills your mouth with the wonderful taste that only the excessive use of butter can create. Luckily, there is an easier and quicker alternative to the French treat coming from the Jewish cuisine. In case of urgent need of croissants, just bake rugelach!
The delicate pastry is in no way behind croissants, neither in richness nor in tender lightness. It's the addition of cream cheese that creates this easy miracle, easy as it's far from being as time consuming as the French breakfast classic. When the ingredients are mixed and the dough has cooled in the freezer for half an hour, the rolling and filling can begin!
My last rugelach recipe was one of the first posts I shared on eat in my kitchen, I baked them for a festive Hannukah party at a friend's house. I used bittersweet chocolate and cinnamon, a combination that can never go wrong. For my new recipe I had a bit of a childish combination in mind, chocolate breakfast spread and puréed bananas, the perfect kiddy treat! I'm quite sure that a few of our friend's young children would have loved to join in my messy kitchen activity. My first batch of rugelach turned out to be a bit difficult as I tried to cut the single pieces after I spread the banana and chocolate on top of the pastry, messy! I can't recommend this, it's almost impossible! Instead, start with the banana layer, cut the triangles and then put on the chocolate spread, that's much easier.
So, what can I say about the taste? My partner was quite skeptical when I told him about this combination but then, as soon as he smelled the sweetest aroma coming out of the kitchen, he couldn't stop himself anymore. Both of us actually, as we ate them like peanuts. It's one of those sweets that hits the right spot with the first bite and calls for more and more!
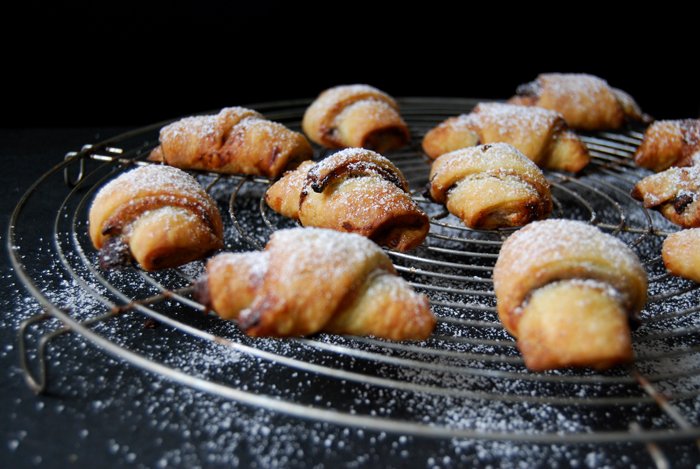

Banana and Chocolate Spread Rugelach
For 24 rugelach you need
plain flour 150g / 5 ounces
icing sugar, 2 heaping tablespoons plus more for the topping
a pinch of salt
butter, cold, 125g / 4.5 ounces
cream cheese 125g / 4.5 ounces
ripe bananas 2 (around 200g / 7 ounces)
chocolate spread (like nutella) 6 tablespoons
Combine the flour, icing sugar and salt. Cut the butter with a knife into the flour mixture until there are just little pieces left. Continue with your fingers and work the butter quickly into the flour. Add the cream cheese and continue mixing with a fork or the hooks of the mixer until the mixture is combined. Form 2 discs, wrap them in cling film and put them in the freezer for about 30 minutes, the dough should be hard but still rollable.
Set the oven to 185°C / 365°F and line a baking sheet with parchment paper.
Purée the bananas in a food processor until smooth.
When the dough is firm, keep one disc in the fridge and roll out the other disc between cling film dusted with flour. You should end up with a circle of about 30cm / 12″. Flip the dough onto a new piece of floured cling film, this will make it easier to roll the rugelach. Spread half of the banana purée on the dough and cut it like a cake into 12 triangles. Divide half of the chocolate spread roughly into 12 portions and sprinkle on each triangle. Gently roll up the rugelach from the wider side to the tip. Bake in the oven for about 19-20 minutes or until golden brown. Continue with the remaining disc.
Let the rugelach cool on a wire rack and dust with icing sugar.
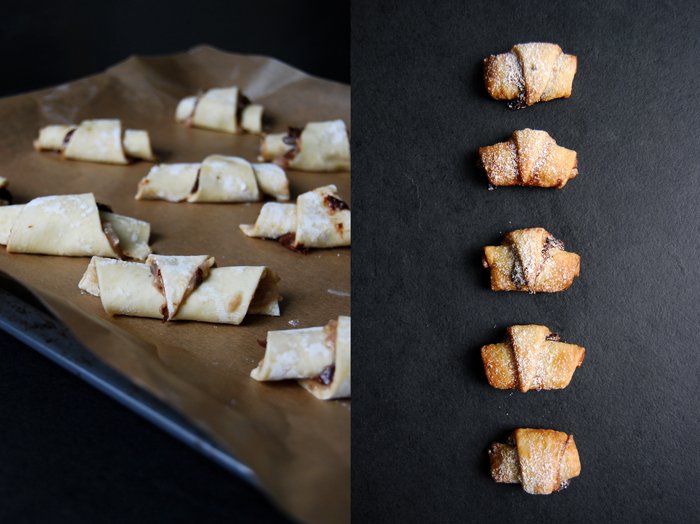
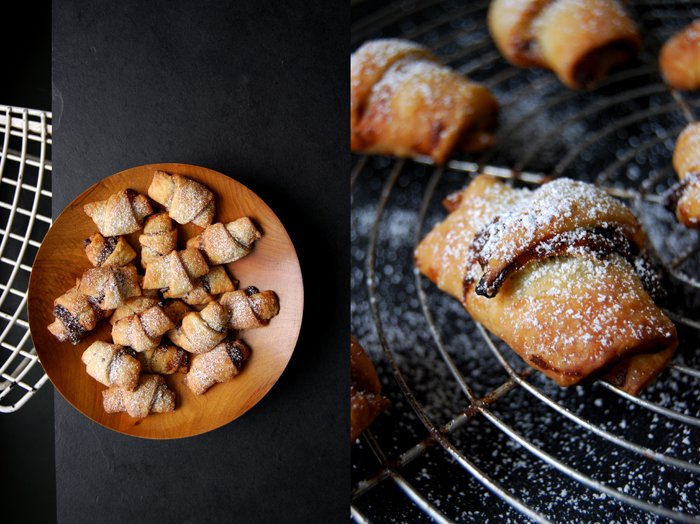
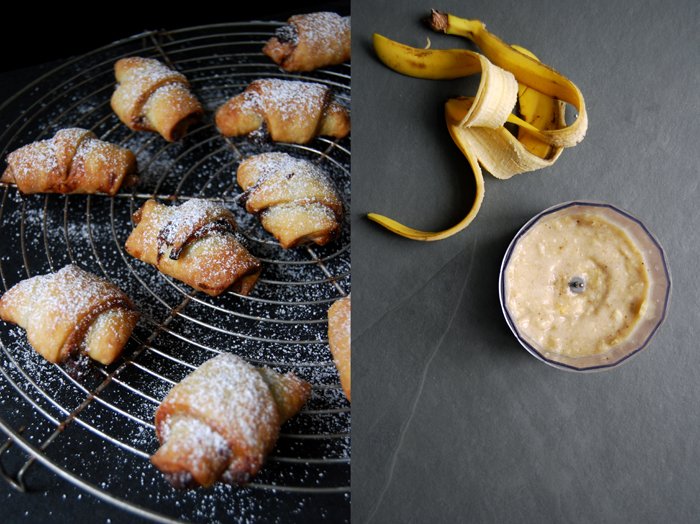
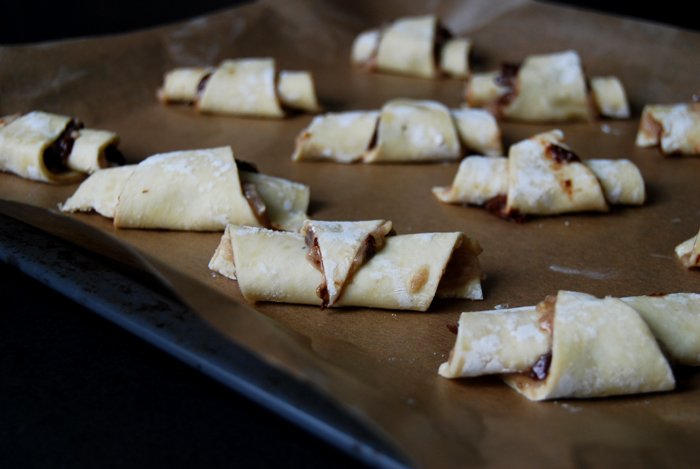
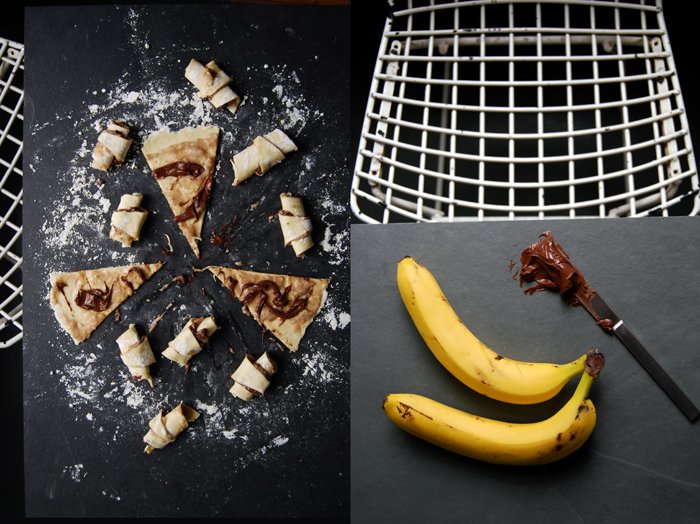
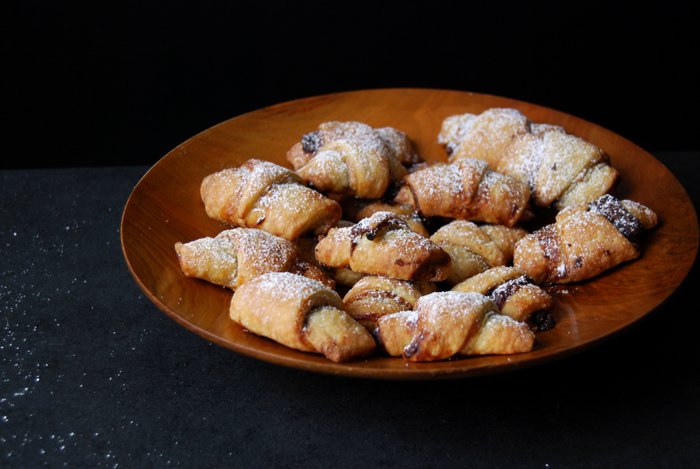

Loukoumades - Greek Doughnuts with Honey, Cinnamon and Pistachios

Every year at carnival, my family meets at my mother's house to make Berliner, a jam filled doughnut dusted with cinnamon sugar. It's a heavenly ball of sweet sponginess so tempting that all of us end up eating far more than we should. We all have our favourite filling, so we use a selection of blueberry, raspberry, blackberry and red currant jam. The only problem is, once they are cooked, you can't really see the difference anymore. So we guess blindly and exchange Berliner across the table when we pick the wrong one. It's quite a funny scene! You could also use chocolate, gianduja or eggnog to customize them to your personal taste and come up with your own perfect creation. Unfortunately, after this culinary experience, you might never be satisfied with store-bought doughnuts ever again! It's already been a year since I shared our traditional Berliner recipe, and next week, it will be that time of year again, we'll all meet in my mother's kitchen in the countryside to celebrate our silly little family feast!
Although I'm not the biggest fan of deep-fried sweets, at carnival I love them. They belong to this season like spooky costumes and exuberant music. In Cologne, where I went to university, I used to buy Muzen from a little bakery. They look like tiny diamond shaped doughnuts, crisp on the outside with a spongy centre. It's a local speciality only made at this time of the year. They are so good, I could eat them by the dozen! In Berlin, Berliner are called Pfannkuchen (meaning pancakes in German) and they are often filled with plum jam. There are many other names all over the world, Krapfen, Fastnachtküchle, Krof in Slovenia or Pączki in Poland, all customized after the regional preferences.
After some research, I discovered something new, Greek doughnuts called Loukoumades! I called my sister as her husband is half Greek and they often spend their summers in Greece. Nina got very excited about this sweet and told me that they savoured it all the time during their last holiday on the island of Thassos. Her husband would play Bouzouki in a mountain village in the evenings with his friends while my sister enjoyed plates of Loukoumades, with lots of honey and cinnamon. After her colourful description, my decision was made, I had to try them! The next morning I made an orange flavoured yeast dough, a bit softer and with more yeast than my usual recipe. You have to scoop out the little Loukoumades with a spoon and cook them in hot fat. It only took a few minutes and I had a plate full of golden doughnuts in front of me, coated voluptuously with orange-honey syrup and sprinkled with chopped pistachios and a bit of cinnamon. It was amazing, I know I can trust my sister when it comes to sweet treats!
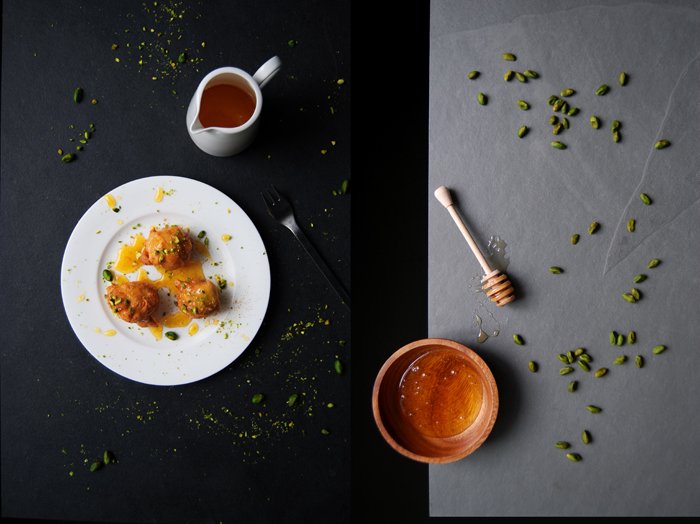
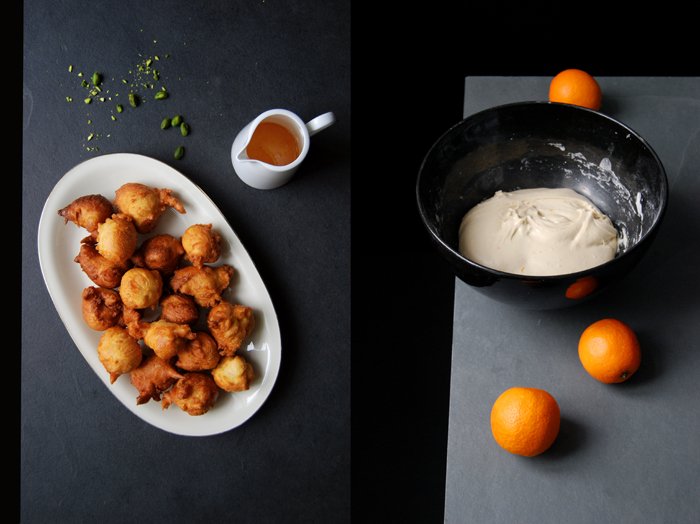
Loukoumades with Honey, Cinnamon and Pistachios
For 24 small Loukoumades you need
plain flour 400g / 14 ounces
dry yeast 2 sachets (each 7g / 1/4 ounce)
granulated sugar 1 tablespoon
salt 1 teaspoon
milk, lukewarm, 150ml / 5 ounces
water, lukewarm, 125ml / 4.5 ounces
orange zest 1 heaped teaspoon
honey 1 tablespoon
pistachios, unsalted, chopped, 60g / 2 ounces
ground cinnamon, for serving
vegetable shortening for deep-frying 1kg / 2 1/4 pounds
For the syrup
quality honey (liquid) 150g / 5.5 ounces
freshly squeezed orange juice 50ml / 1 3/4 ounces
granulated sugar 1 tablespoon
orange zest 1 teaspoon
In a large bowl, combine the flour, yeast, sugar and salt. Add the milk, water, honey and zest to the mixture and mix with the dough hooks of your mixer for about 5 minutes. The dough should be elastic and come off the sides of the bowl, it will be a little sticky so don't mix with your hands. Cover the bowl with a tea towel and let it rise in the warm oven (35°C / 95°F) for 45 minutes (top/ bottom heat and not fan-assisted!).
For the syrup, bring the honey, orange juice and sugar to the boil and cook on medium heat for about 5 minutes or until it's a thick syrup. Stir in the zest and keep warm.
In a large pot, heat the vegetable shortening. Check the temperature with a wooden spoon, it's hot enough when little bubbles form around it. Scoop out a small walnut sized ball off the dough (this works best with 2 tablespoons) and carefully drop it into the hot fat. Start off with one ball, the Loukoumades should cook for 3-4 minutes to turn into golden balls. If they become too dark after a shorter cooking time, turn down the temperature (which is what I had to do after the first batch), they will need at least 3 minutes for the centre to cook through. They should be golden and not dark brown. Take them out with a slotted ladle and put them on a kitchen paper to remove excess fat. Serve with the warm syrup, chopped pistachios and a little cinnamon.

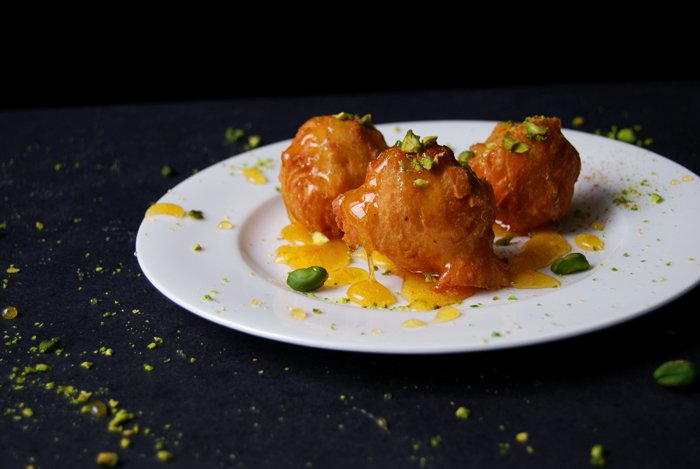
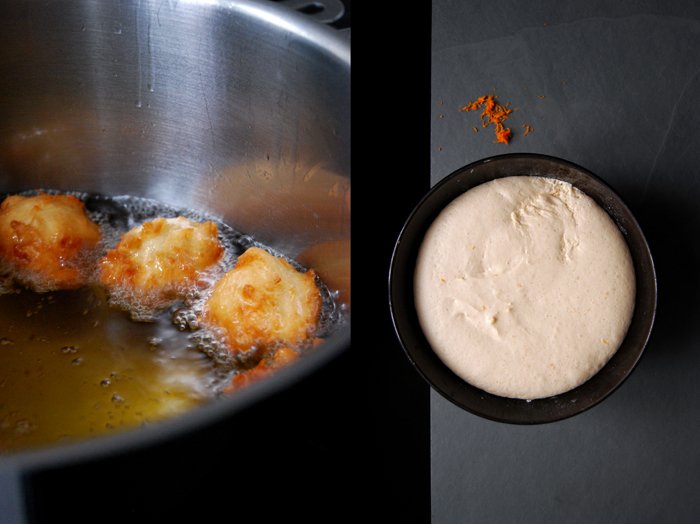

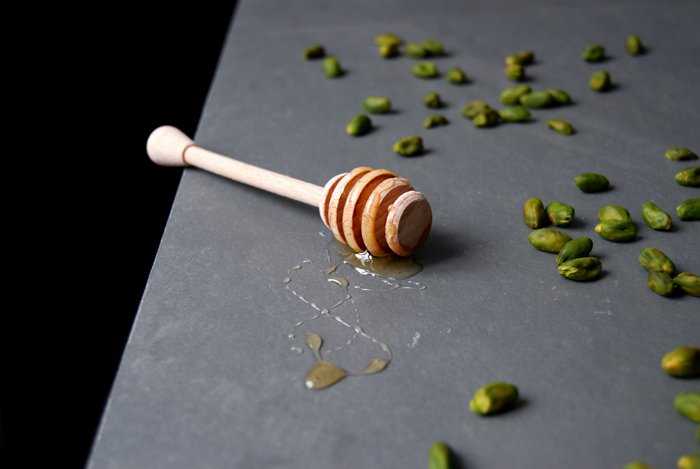
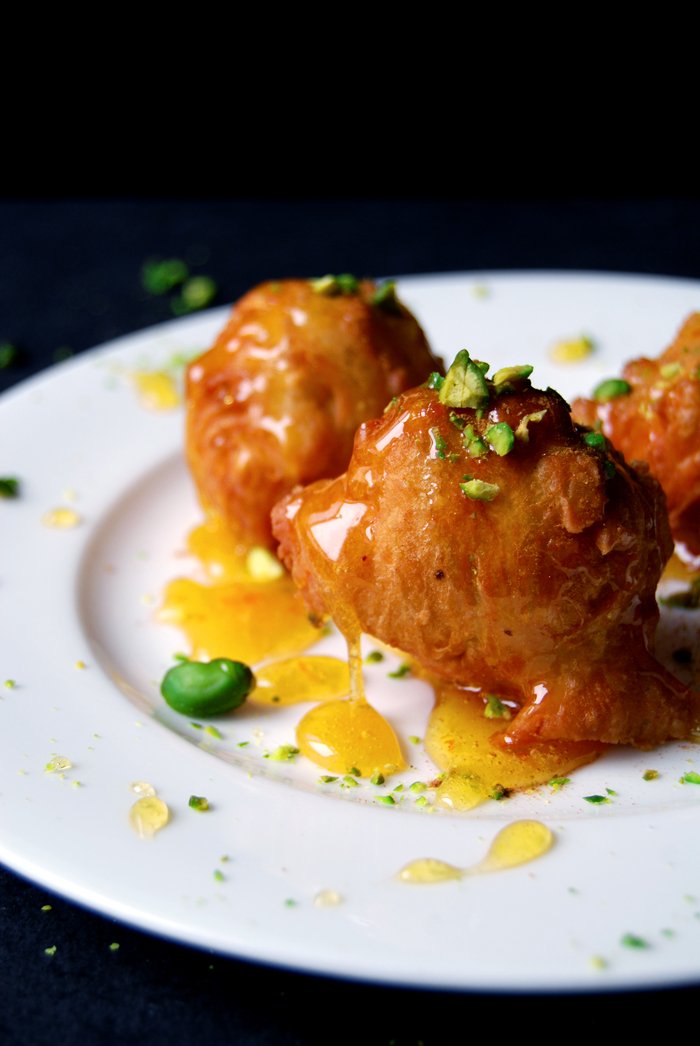
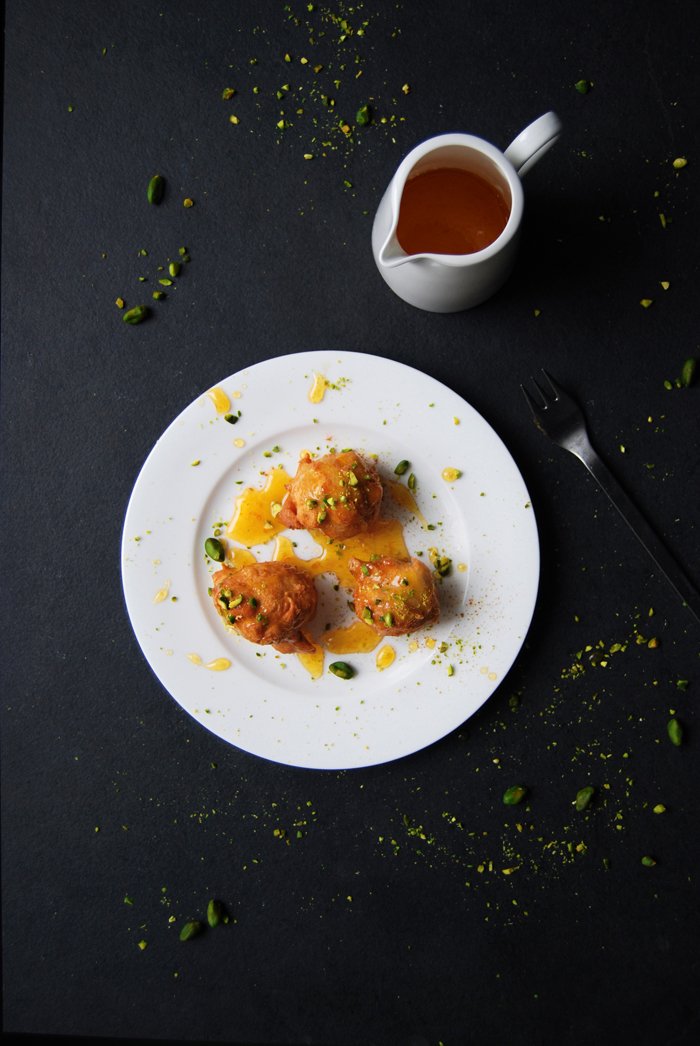

Blueberry Ricotta Cheesecake
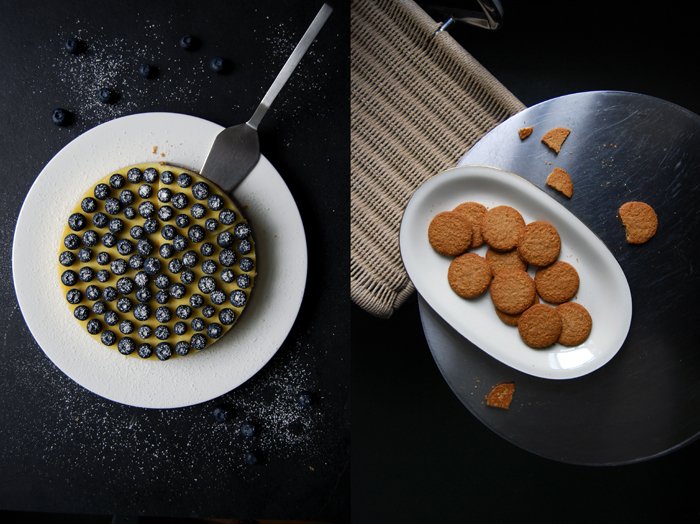
My last cheesecake creation is definitely too long ago, it was a dense treat with lots of orange and lemon flavours, rich in cream cheese with a little addition of Mediterranean ricotta. It was more like a classic New York cheesecake and was so good that for more than a year I haven't bothered to come up with a new recipe. I baked it all winter, its citrusy richness is just perfect for a cosy tea time, and then in summer, I moved on to our old family recipe for the German version of this cake. German Käsekuchen is made with quark and stiff egg whites which gives it a lighter, fluffier texture, it's delicious with fresh berries for a Sunday morning brunch on the balcony!
Despite the wintery temperatures, my mood has already moved on to the next season, spring, sunshine and fragrant flowers. This calls for a new cheesecake recipe!
I was after a lighter version so a good amount of the usual cream cheese had to make way for ricotta. For the first time in my life I looked at the amount of fat in both dairy products, something I'm not very interested in most of the time as I want to enjoy my food and not feel guilty. The Italian cheese is definitely the winner (in a good way). It still creates a creamy texture but it's not as filling. I refined the cheesecake mixture with lots of lemon juice and zest and baked it on top of a base of buttery digestive cookies. A fruity topping brought a spring feeling to the recipe, I brushed the cake with a thin layer of apricot jam and spread lots of crisp blueberries on top. It was amazing, one bite after the other was pure bliss!
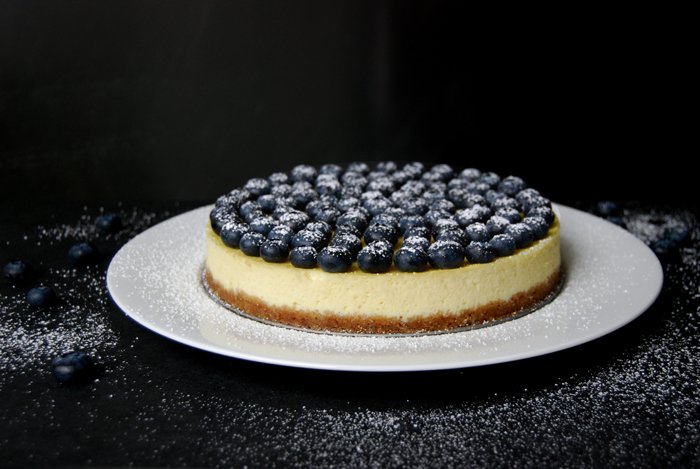
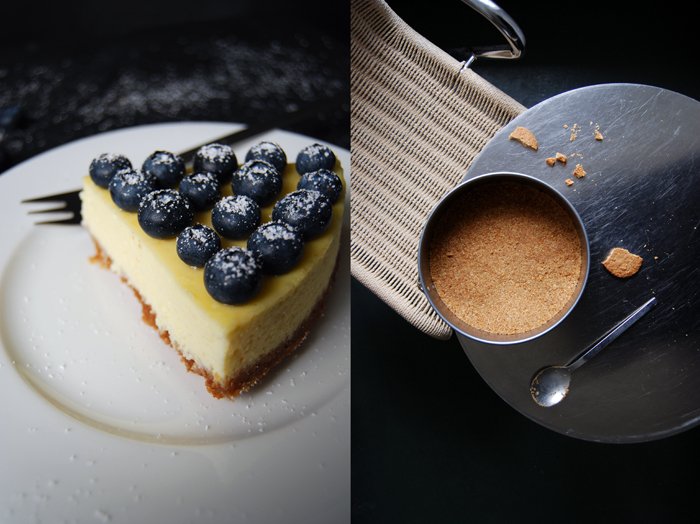
Blueberry Ricotta Cheesecake
For a 20.5cm / 8″ springform pan you need
digestive cookies (Graham crackers) 210g / 7.5 ounces
butter, melted, 70g / 2.5 ounces
ricotta, at room temperature, 250g / 9 ounces
cream cheese, at room temperature, 300g / 10.5 ounces
granulated sugar 100g / 3.5 ounces
vanilla pod, scraped, 1/4
organic eggs 3
cornstarch 1 teaspoon
zest of 1 large lemon
juice of 1 lemon (4 tablespoons)
a pinch of salt
fresh blueberries about 200g / 7 ounces, for the topping
apricot jam 2 tablespoons, for the topping
water 2 tablespoons, for the topping
icing sugar, for the topping
Crush the cookies in a blender until very fine, or in a plastic bag, and mix with the melted butter until combined. Press the mixture into the springform pan and put in the freezer for 15 minutes.
Set the oven to 165°C / 330°F and put a deep tray or roasting tin in the oven on the lowest position. Boil water in a kettle.
Mix the ricotta, cream cheese, sugar, vanilla, eggs, cornstarch, lemon juice, zest and salt with an electric mixer until well combined.
Take the springform pan out of the freezer and wrap it in aluminium foil twice so that the bottom and sides are well covered to protect the cheesecake from the water while it's baking. Pour the cheesecake mixture on top of the hardened crumbs and place the tin carefully into the tray in the oven. Fill the tray with the boiling water from your kettle. The water should come half way up the wrapped springform pan. Bake for 50 minutes, switch off the oven, open the door a little bit and leave the cake in the oven for about 15 minutes. Take the cheesecake out of the oven, take off the foil but leave the cake in the springform pan. When the cake is completely cool, chill it in the fridge (or outside in winter) for about an hour.
In a saucepan, bring the jam and water to the boil and cook for about 30 seconds, push through a sieve and brush on the cake. Spread the berries evenly on top of the cake and sprinkle with icing sugar before serving.
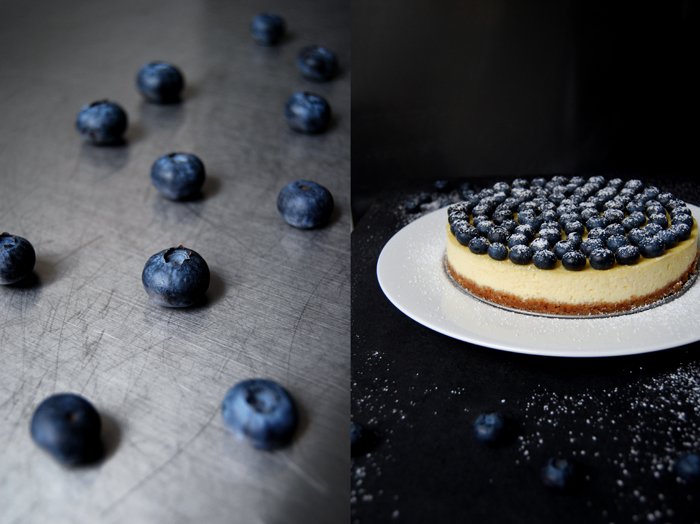
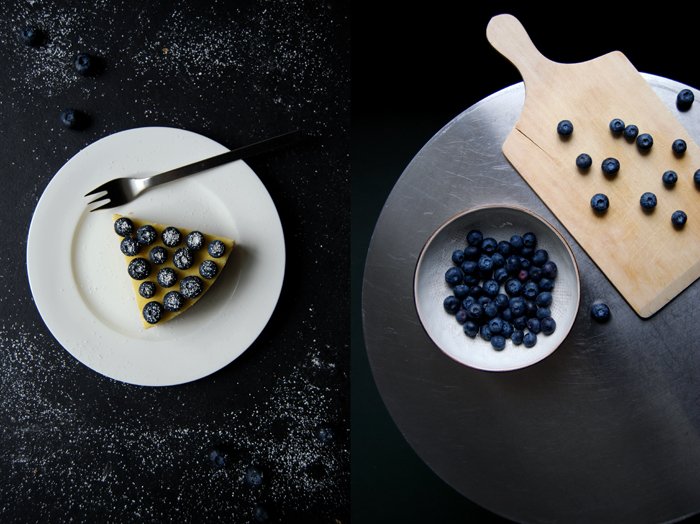
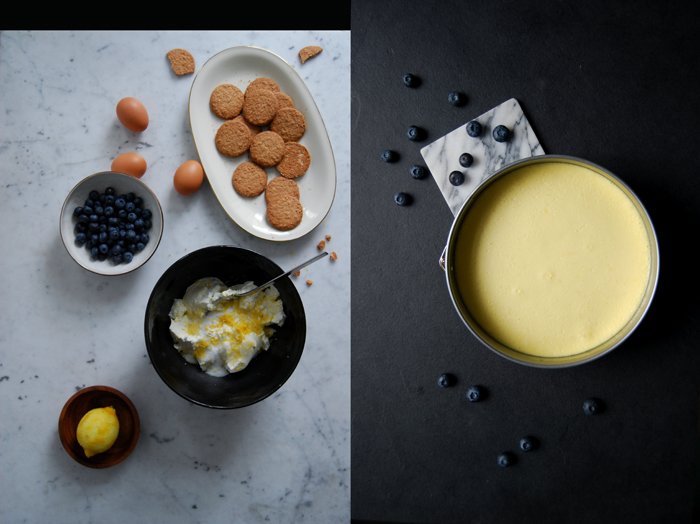
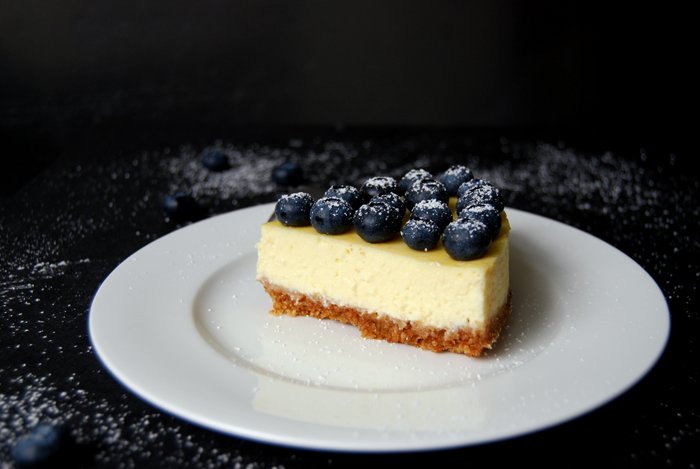
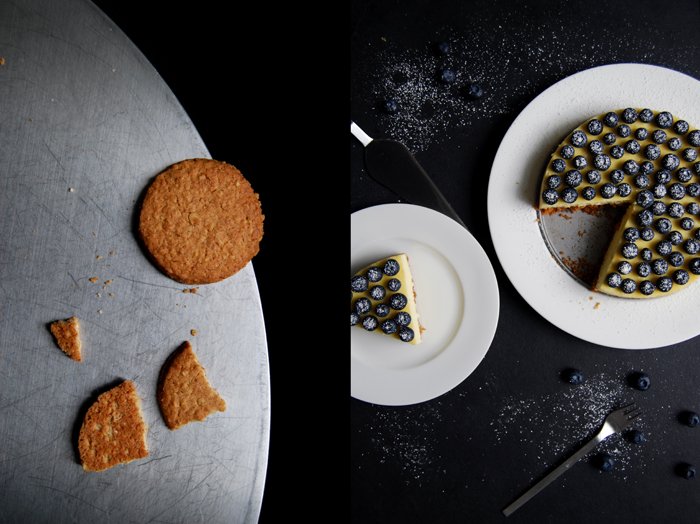


German Poppy Seed Strudel with Cinnamon Crumbles
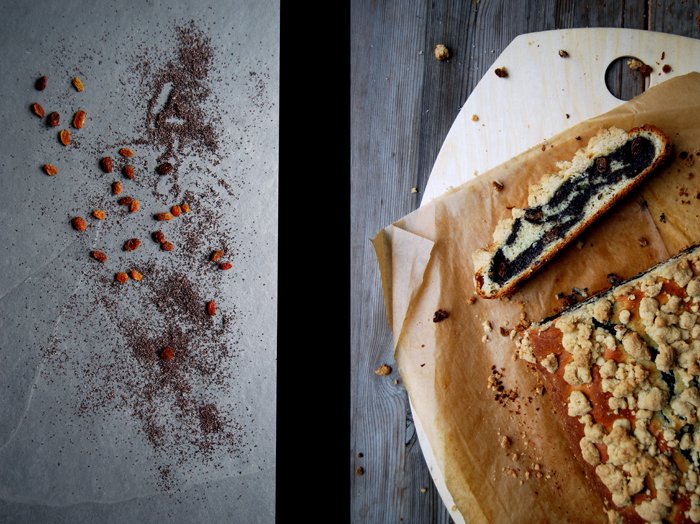
As a child I went through different sweet phases with quite an obsessive persistence. There were times, if not years, when I bought a scrumptious short crust ring topped with gianduja cream and chocolate at least once or twice a week from my hometown's confectionery, it's a decadent treat called Nougatring in German. When I fell in love with a cinnamony cherry crumble cake from a French bakery as a young teenager I bought a piece of it every day after school. For months I wanted nothing more than this buttery pleasure, it felt like the best culinary discovery of my young life. Luckily, I was always quite tall and didn't have to worry much about the effect of my obsessions on my weight, my culinary enjoyment was always greater than my vanity!
I remember that my family, especially my mother and aunts, used to tell me that I should enjoy it to the fullest as with age, I wouldn't be able to eat these amounts without repentance. They were so right! I simply can't eat so many sweets anymore, a fact which I regret, especially when I have to refuse a piece of tempting cake, this would have never happened in my early years! The only thing that didn't change is my excitement for these treats and my complete misjudgment of the amount of cake that two people can actually eat. I prefer my baked sweets well sized, you never know if an unexpected guest may appear at the door step. The same happened to me a few days ago when I decided to make a traditional German poppy seed cake. This was another one of my childhood favourites, soft and spongy yeast dough wrapped around a juicy poppy seed and raisin filling. In the North Rhine Westphalia area where I grew up, this rich strudel is topped with sweet and buttery crumbles which is simply amazing in combination with the seeds and pastry. When I prepared all the ingredients on the kitchen counter I remembered how much I used to love this cake and decided to make a huge strudel, ignoring the fact that my partner isn't too fond of poppy seeds or yeast cakes for that matter. I didn't expect guests either but I had a rustic picture of a huge strudel in mind, with impressive proportions.
I got what I asked for! The strudel woke up all the culinary memories of my childhood and tasted exactly how I wanted it to be, even my partner liked it a lot, but still, after 2 big slices we just looked at each other and thought "what are we going to do with this massive strudel?". Luckily, I can always rely on my family. My aunt Ursula came for a quick visit, she is as much a fan of this cake as I am. She replaced her dinner with two slices of my strudel monster and she looked very happy when I offered her to take half of it home. The lesson is, a cake can never be too big, there will always be friends and family who enjoy it as much as the baker does!
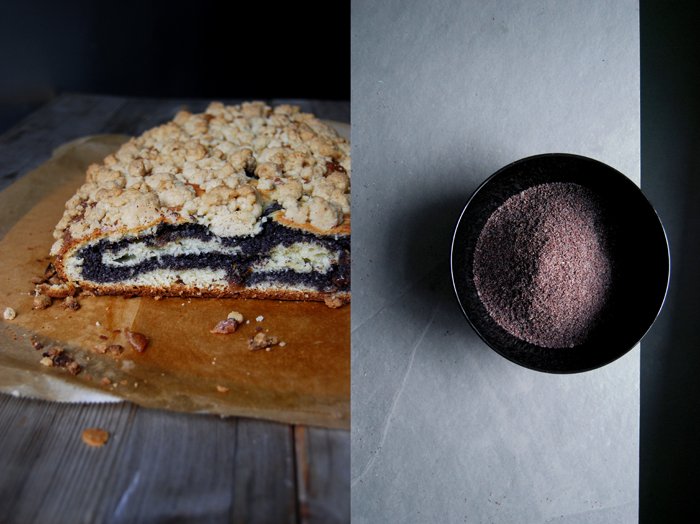
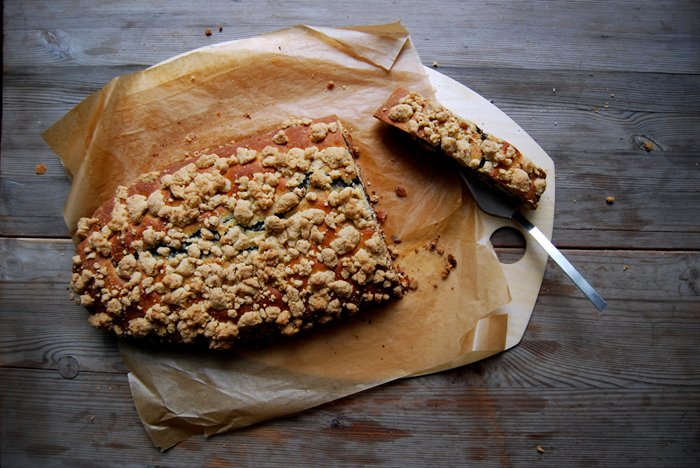
German Poppy Seed Strudel with Cinnamon Crumbles
For 1 huge strudel for about 10 people you need
For the yeast dough
plain flour 480g / 17 ounces
granulated sugar 80g / 3 ounces
dry yeast 1 sachet (7g / 1/4 ounces)
a pinch of salt
butter, melted, 80g / 3 ounces plus 1 tablespoon to brush the strudel
milk 175ml / 6 ounces
In a large bowl, combine the flour, sugar, yeast and salt. Mix the milk with the melted butter (the mixture should be lukewarm) and add to the dry flour-mixture. Mix with the dough hooks of the mixer for a few minutes, the dough will be quite moist. Dust the kitchen counter with a little flour and continue kneading and punching with your hands for a few minutes until you have a soft and elastic dough ball (if the dough sticks to your fingers add more flour). Put the dough back into the bowl, cover with a tea towel and let it rise in the warm oven (35°C / 95°F) for 70 minutes (top/ bottom heat and not fan-assisted!).
For the poppy seed filling
milk 420ml / 14 ounces
granulated sugar 100g / 3.5 ounces
ground cinnamon 2 leveled teaspoons
orange zest 2 teaspoons
poppy seeds, cracked, 250g / 9 ounces
raisins 80g / 3 ounces
In a sauce pan, bring the milk, sugar, cinnamon and orange zest to the boil. Stir in the poppy seeds and let the mixture cook on lowest heat for about 5 minutes, stirring constantly. When the filling is thick and the milk is soaked, add the raisins, mix and let it cool.
For the crumbles
Prepare the crumbles shortly before baking the strudel.
plain flour 100g / 3.5 ounces (plus more if the crumbles are too sticky)
granulated sugar 60g / 2 ounces
ground cinnamon 1 teaspoon
butter, melted, 60g / 2 ounces (plus more if the crumbles are too fine)
Combine the dry ingredients in a bowl, add the melted butter and mix quickly with the hooks of your mixer, stop as soon as the mixtures crumbles. If it doesn't form crumbles, add a little more flour and sugar, if the crumbles are too fine add a bit more melted butter.
The strudel
Set the oven to 180°C / 355°F (top/ bottom heat).
Take the dough out of the bowl, punch it down and knead for 1 minute.
Dust a piece of parchment paper (big enough to cover a baking sheet) with a little flour. Roll out the dough on the parchment paper until it's roughly 35 x 35cm / 14 x 14". Spread the poppy seed filling on it evenly, leave a rim of 1-2cm / 1/2-1". Roll the dough up tightly, gently pull off the parchment paper while rolling the dough. The fold should be at the bottom. Close the sides well, cover with a tea towel and let it rise for 15 minutes (on a baking sheet lined with parchment paper).
Brush the strudel with 1 tablespoon of melted butter. Prepare the crumbles, spread them over the strudel and gently push them into the yeast dough. Bake for 50 minutes or until the yeast dough is golden brown.
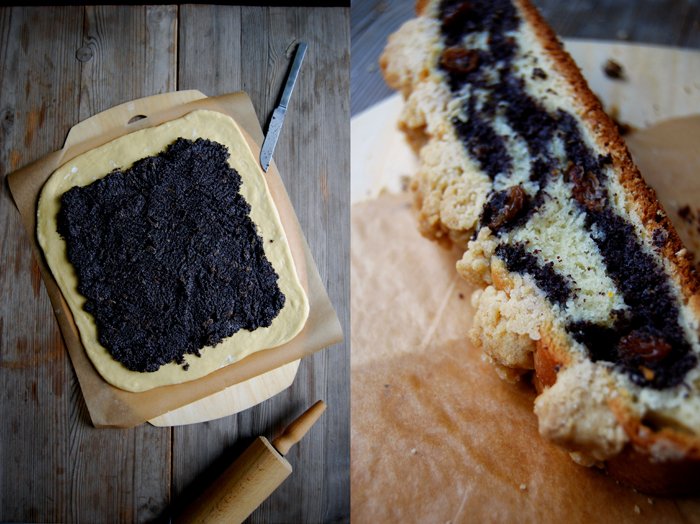

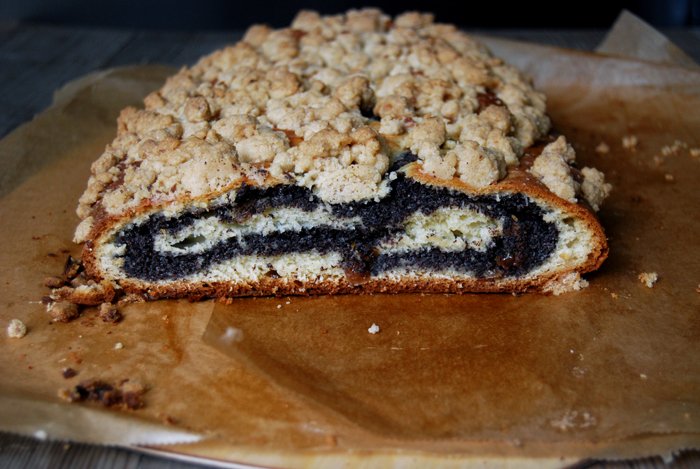
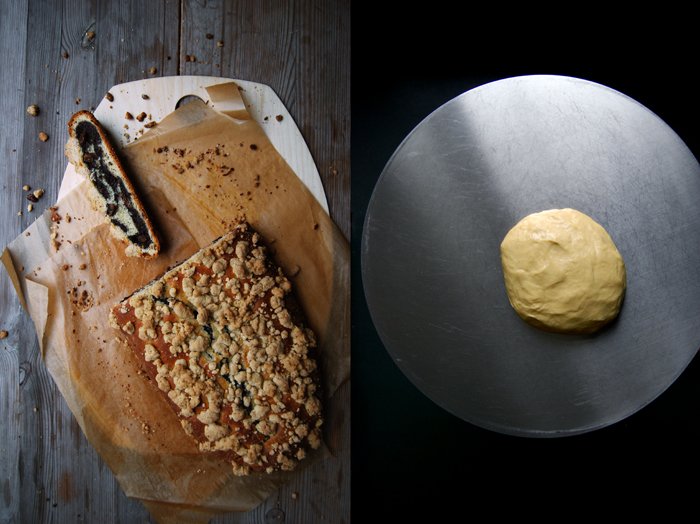
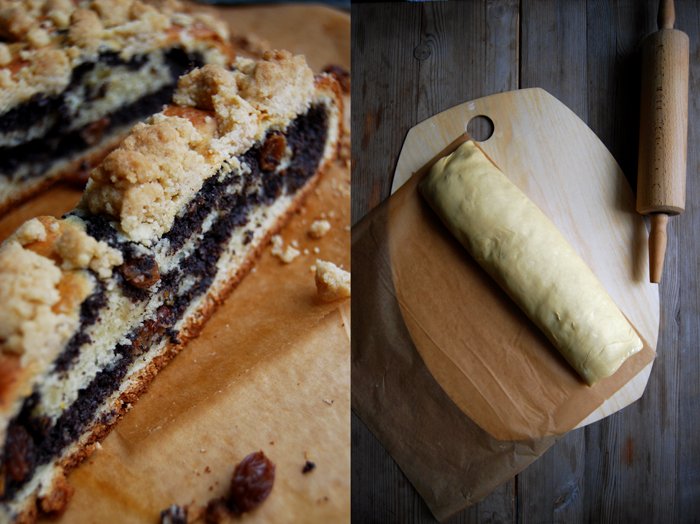
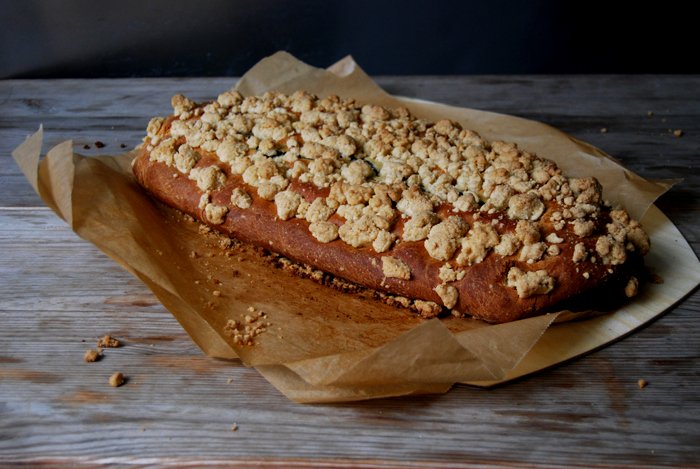
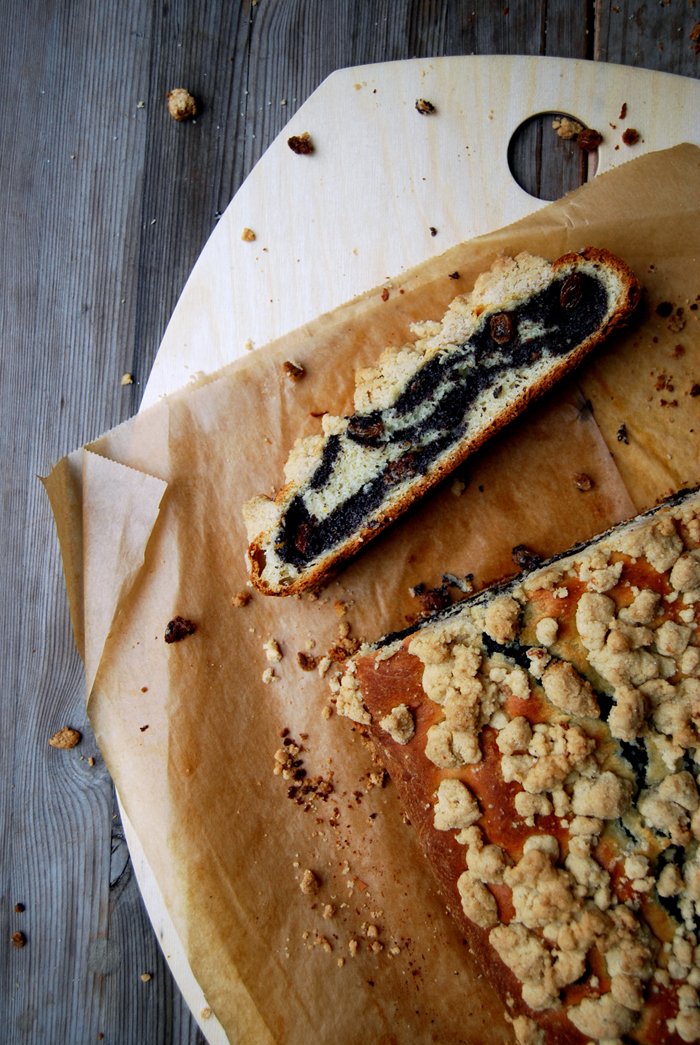

How to make your own Pretzel Buns

When I made my Bavarian sandwich with pretzel buns and Obatzda camembert spread last week I completely underestimated how many people would actually be interested in a recipe for the buns rather than the spread (which is absolutely delicious nonetheless!). I bought the pretty Laugenbrötchen (their German name) which I used for the recipe from my favourite pretzel bakery in my area which, in my opinion, can compete with the products from their origin in the south of Germany. However, there is an ongoing discussion about the pretzel's (and the bun's) quality produced here in Berlin, and if you ask anyone from the Bavarian or Swabian region, they will all agree that it's impossible to find acceptable results anywhere in this city. I disagree! I lived in the South, I still regularly enjoy some of the best pretzel buns from my step father's Swabian hometown Stuttgart, an unchallenged stronghold of pretzels, so I consider myself an experienced critic. The buns you saw last week on the photos were soft and spongy inside, they taste slightly buttery, wrapped in a thin brown crust with coarse sea salt sprinkles. That's all I can ask for!
Motivated by the last sandwich, excited and a bit nervous, I made a brave decision a few days ago, I wanted to make my own pretzel buns! I started some research, learnt about lye, washing and baking soda solutions for the crust, the right yeast dough mixture and the final shaping of the buns and here are my conclusions:
The dough has to be made with a bit of butter for the rich taste, it has to rise twice and once the buns are shaped with the right technique (which I describe in the recipe), they have to cook in boiling water mixed with baking soda for one minute before baking, basically like bagels. The soda solution provides a high ph-value, not as high and strong as lye solution which is often used in professional bakeries, but it's safer and creates a similar browning effect.
When I pulled a piece off my first warm pretzel bun freshly out of my own oven, I was impressed, the texture was right, the crust perfect and the taste was fantastic. I also made a few pretzels which were nice and juicy and not dry (which I don't like at all), but here I still have to improve. The look wasn't right, I know this is not so relevant and, usually, not important for me at all as long as it pleases my taste buds, but we're talking about pretzels! The top part with the knot wasn't slim enough. They looked quite puffed up and out of shape, but they tasted amazing with some butter spread on them so I forgot about that completely. I prefer buns anyway!


Pretzel Buns
For 10 pretzel buns you need
500g / 3¾ cups plus 1 tablespoon all purpose flour (white spelt, type 630, or wheat flour)
1 envelope (7g / ¼ ounce) fast-acting yeast
2 teaspoons fine sea salt
300ml / 1¼ cups lukewarm water, plus water for boiling the buns before baking
40g / 2½ tablespoons unsalted butter, melted and cooled
3 tablespoons baking soda, for boiling the buns before baking
coarse sea salt, for the topping
In a large bowl, combine the flour, yeast and salt.
In a medium bowl, mix the 300ml / 1¼ cups of water with the melted butter (the mixture should be lukewarm) and add to the dry flour-mixture. Mix with the dough hooks of the mixer for a few minutes, it shouldn't be too sticky, add more flour if necessary. Continue kneading and punching with your hands for a few minutes until you have an elastic dough ball. Put the dough back into the bowl, cover with a tea towel and let it rise in the warm oven (35°C / 95°F) for 60 minutes (top/ bottom heat and not fan-assisted!).
Punch the dough down, take it out and knead for 1 minute. Divide the dough into 10 portions, each about 80g / 2¾ ounces. Dust your hands with flour, put a portion of dough on the palm of your hand and roll with the other hand, holding it like a dome. Turn the dough for about 10 seconds on the flat hand until its top is round and firm. This process builds up surface tension and prevents the buns from becoming flat. Continue with the remaining dough. If you make pretzels, roll each portion into a 50cm / 20" long sausage shape with thin ends and twist into a pretzel shape. Cover the buns / pretzels with a tea towel and let them rise for 20 minutes in a warm place.
Set your oven to 220°C / 425°F top / bottom heat and line a baking sheet with parchment paper.
To boil the buns, in a large pot, bring 1000ml / 4¼ cups of water and the baking soda to a boil, watch it as it will start bubbling. The pot should be wide enough for 2 buns to fit in, they don't need to be completely covered by the water. Using a slotted ladle, gently slip two buns into the boiling water and cook for 1 minute (not longer !). Mind that they don't stick to the bottom of the pot and turn them after 30 seconds. Take them out after 1 minute and transfer them to the lined baking sheet. Mind to work quickly, if they sit for too long after cooking them in the baking soda-water mixture the surface won’t be shiny after baking (you can also boil and bake them in batches of 6 and 4 buns.) Score a cross on the tops of the buns, sprinkle with coarse sea salt, and continue cooking the remaining buns. Bake for 16 minutes or until golden brown, the pretzels need just 12 minutes.
If you want to freeze the baked buns / pretzels, don't sprinkle them with salt.