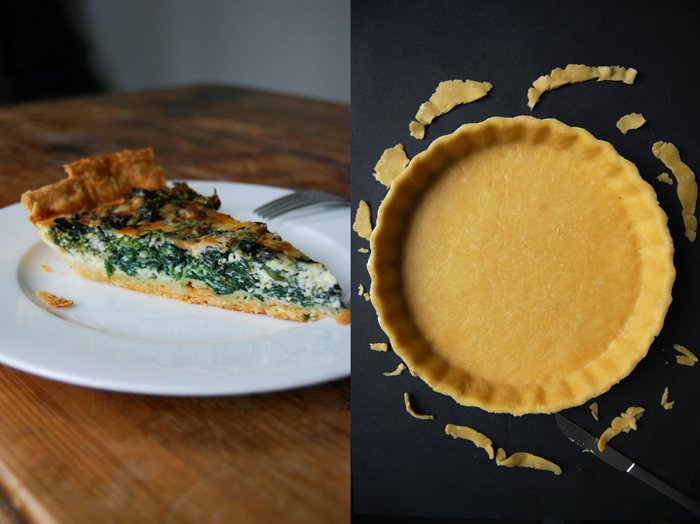
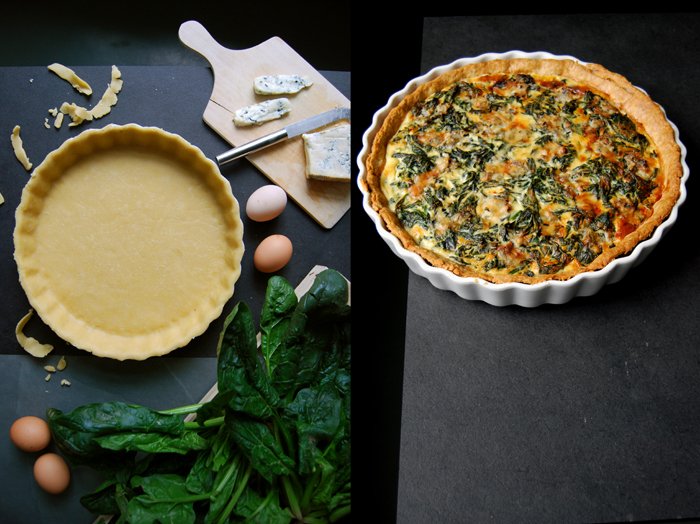
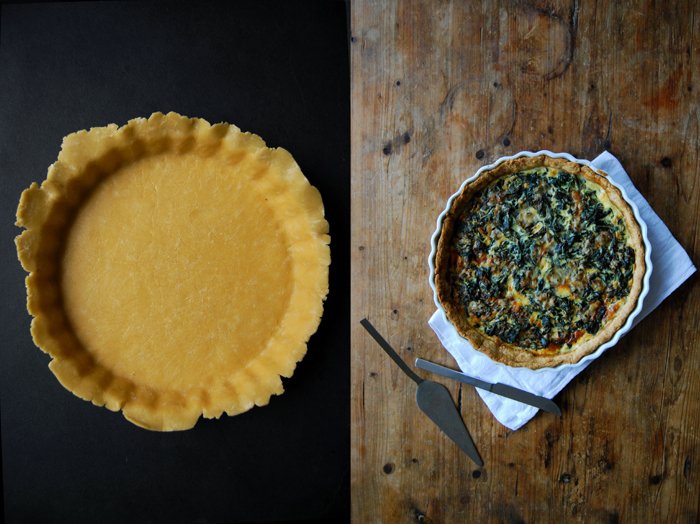
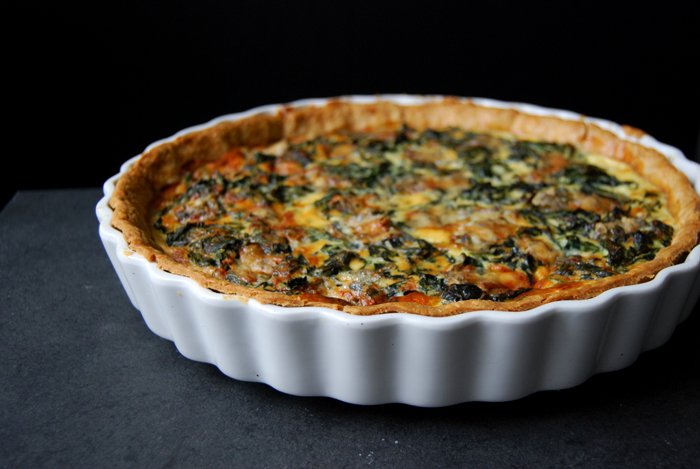
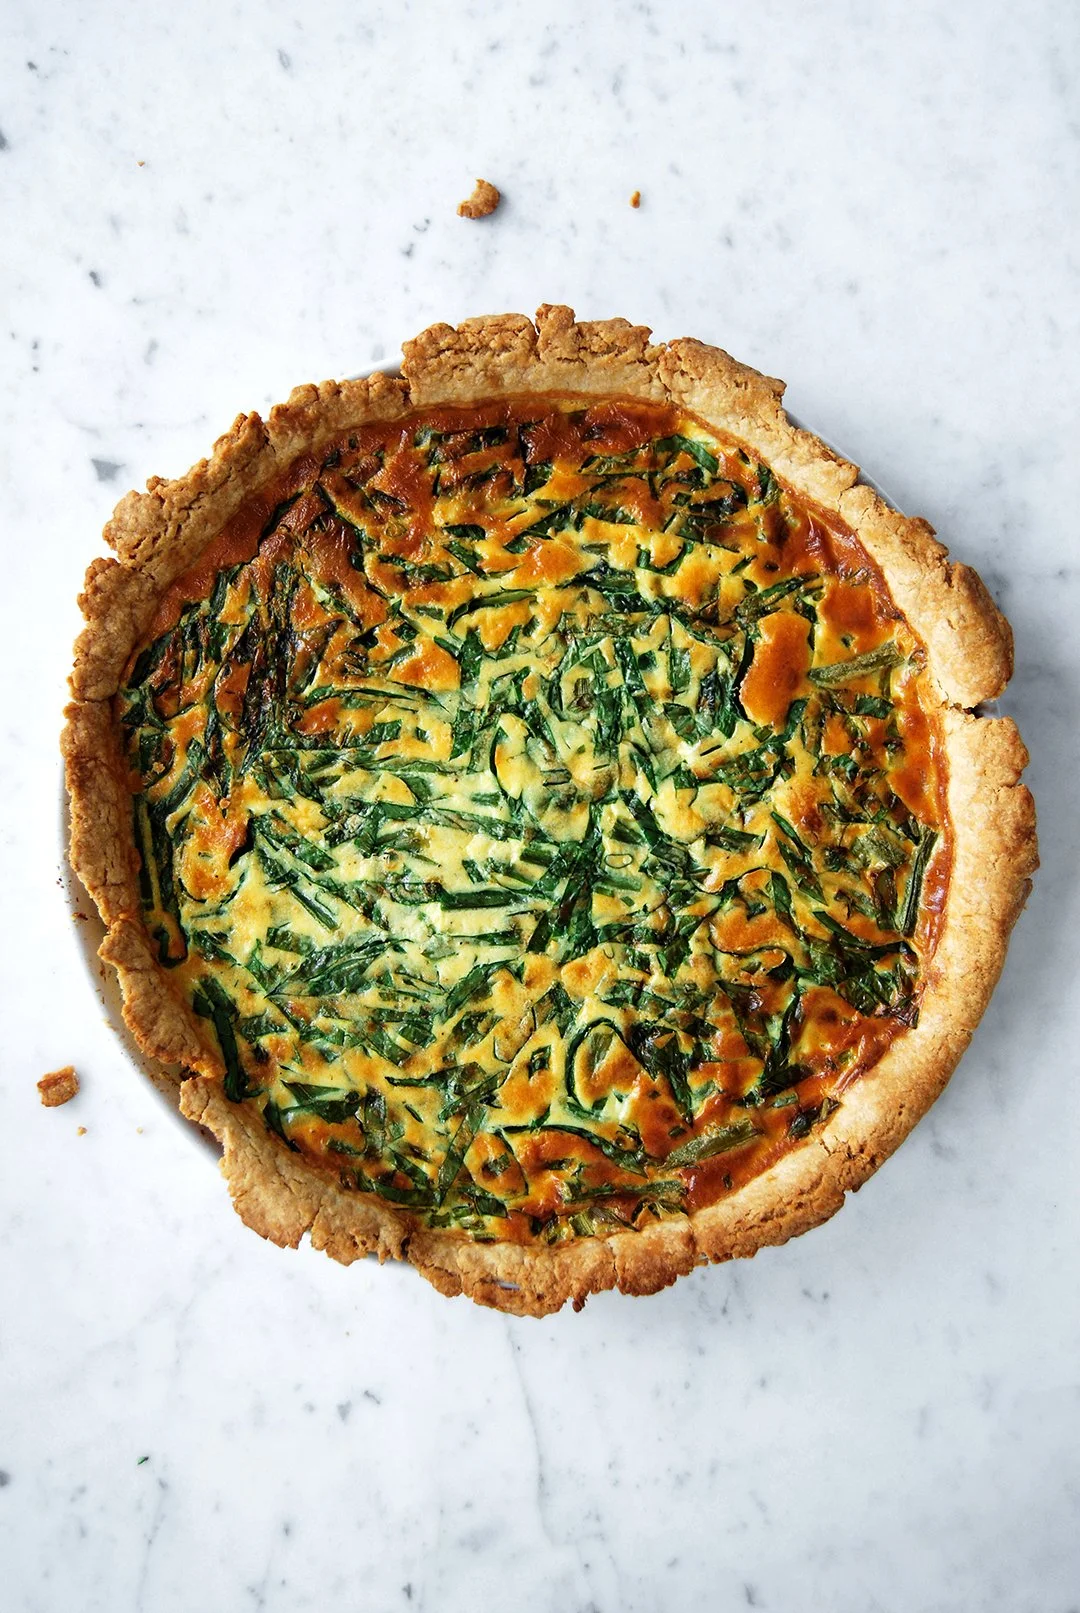
Spinach and Gorgonzola Quiche

Here's my perfect starter for the soon to come Christmas lunch (or dinner): a golden spinach and gorgonzola quiche! It tastes fantastic, looks beautiful and I can prepare it in advance which means I can spend more time nibbling cookies with friends and family in front of the tree. The wonderful buttery pastry and the aromatic topping of hearty greens and cheese add a rustic touch to the festive table with linen, candles and ornaments. Just garnish it with some sprouts and nuts on the side and it's done!
Although there will be lots of activity, excitement and people at the table next week, I refuse to put myself under pressure. I want to enjoy these days in peace with my full attention on the people and food around me. Last year, I made a silly decision, I took pictures of our Christmas dinner for the blog before we ate and that didn't really help the festive mood. This time I don't want a camera, my computer, a phone or any other technical device around me, this Christmas will be analog!
When it comes to festive cooking, the right organization can make life so much easier. I always try to finish my grocery shopping 1-2 days before there's the big run on the supermarkets, butchers and delicatessen stores. It makes me nervous to wait in long queues for half an hour to buy a few pieces of cheese and paté. As soon as everything is gathered in my kitchen, I can relax. I always choose dishes that I can prepare in advance as much as possible, especially the starter and dessert. When the main course is an oven dish, a roast or a slow cooked stew which does the job on its own without my help, there are just the side dishes left to prepare, which is fun to do together with the guests (and a glass of wine or champagne)!
If you go for the quiche, you can eat it warm or cold, we like both, especially if you serve it with a salad, but you could also warm it up quickly if your oven is on anyway.
Here are more quiche / tart variations:
Spinach and Gorgonzola Quiche
For a 30cm / 12" quiche in 1 baking dish or tart pan you need
For the short crust base
plain flour 250g / 9 ounces
butter, cold 125g / 4.5 ounces
organic egg 1
salt 1 teaspoon
Combine the flour with the salt. Cut the butter with a knife into the flour until there are just little pieces of butter left. Continue with your fingers and work the butter into the flour until combined (there shouldn’t be any lumps of butter left). Add the egg and continue mixing with the hooks of your mixer until you have a crumbly mixture. Form a disc, wrap in cling film and put in the freezer for 10 minutes.
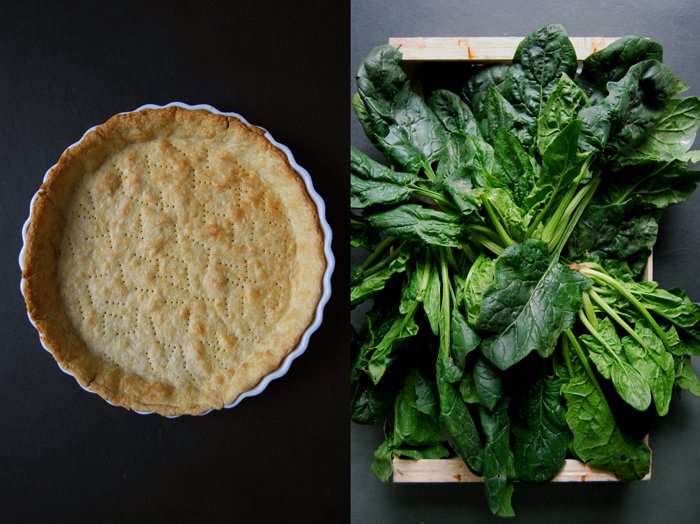
Set the oven to 200°C / 390°F top/ bottom heat.
Roll out the dough between cling film and line your baking dish with the flat pastry. Prick it with a fork and blind-bake in the hot oven for 12 minutes or until golden. Take your baking dish out of the oven and set the temperature down to 175°C / 350°F.
The quiche
spinach leaves, rinsed, 500g / 1 pound
Gorgonzola, torn into pieces, 80g / 3 ounces
organic eggs 5
heavy cream 100ml / 3.5 ounces
crème fraîche or sour cream 200g / 7 ounces
salt 1 teaspoon
pepper
nutmeg, freshly grated, a generous amount
Blanche the spinach in salted water for 1 minute, drain and rinse with cold water, drain again. When the spinach is cool enough to touch with your hands (mind that it's hotter in the centre), squeeze it well and chop it roughly.
Mix the eggs with the heavy cream, crème fraîche, salt, pepper and nutmeg.Spread the spinach on top of the pre-baked pastry base and pour the egg and cream mixture over it.
Spread the gorgonzola on top and bake the quiche for about 40 minutes or until golden brown, the top should be firm. Let it cool for a few minutes before serving.


Tarte Flambée - Alsatian Flammkuchen with Taleggio, Apples and Bacon

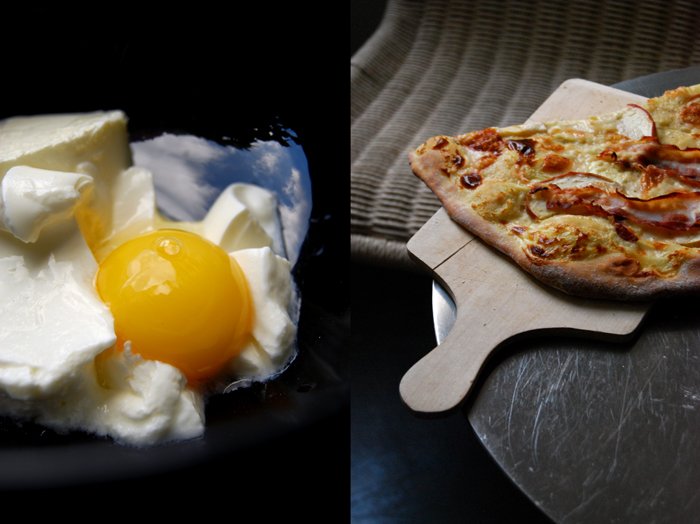
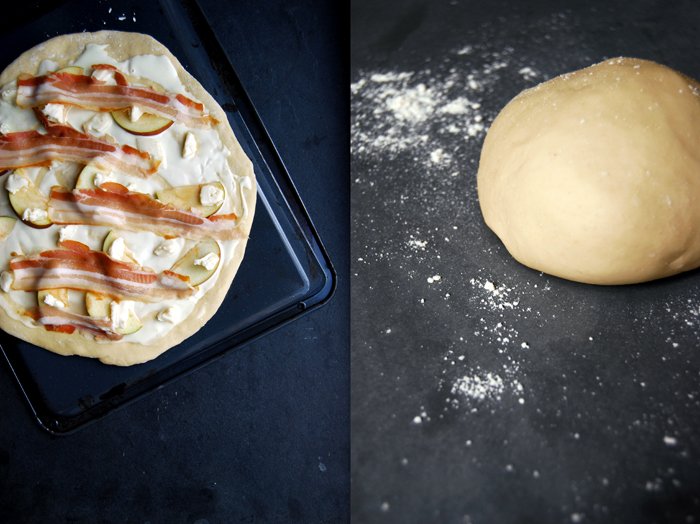
When I lived close to the French border a few years ago I loved to drive over to France on a Sunday morning for a short day trip to the Alsace region, especially at this time of the year! The vineyards were all red and golden and the first young wines were ready to be enjoyed. I mentioned these trips about a month ago when I wrote about my Zwiebelkuchen which I used to eat at the traditional restaurants in the small villages. Another Alsatian classic to accompany the new harvest is the Flammkuchen (Flammkueche in the Alsatian dialect), the famous Tarte Flambée! It's similar to pizza but the dough is made with milk instead of water, it's spread with a thin layer of sour cream mixed with an egg yolk and the result is crunchy and light. The basic version is made with onions and bacon but after years of visiting this region I started experimenting with the toppings in my own kitchen and here's one of my favourites.
The combination of cheese and fruit works just as well as on a sandwich. I like to mix thin slices of sour apples like boscoop with a creamy Italian taleggio cheese from the Val Taleggio in the Lombardy region. I baked some thin slices of bacon on top of the Flammkuchen to bring in some smoky saltiness. It's important to put them on top so that they become crispy and release their juices into the fruity cheese mixture.

Flammkuchen with Taleggio, Apples and Bacon
I bake my Flammkuchen and my pizza on a hot baking sheet which has a similar effect to a pizza stone. I preheat it on the bottom of the hot oven and turn it around to bake on the hot surface.
For 1 big Flammkuchen you need
plain flour 250g / 9 ounces
dry yeast 1 package (for 500g / 1 pound of flour)
salt 1/4 teaspoons
sugar 1/2 teaspoon
milk, lukewarm, 120ml / 4 ounces
olive oil 2 tablespoons
For the topping
sour cream 120g / 4.5 ounces
organic egg yolk 1
a pinch of salt
taleggio, cut into cubes, 80g / 3 ounces
sour apple (like boscoop), cored, quartered and cut into thin slices, 1/2 -1
thin bacon slices 6
pepper
In a large bowl, combine the flour, yeast, salt and sugar. Add the lukewarm milk and the olive oil and mix with your dough hooks for 5 minutes until well combined. Continue kneading with your hands for a few minutes until you have an elastic dough ball. Put the dough back into the bowl and cover with a tea towel. Let the dough rise in a 35°C / 95°F warm oven ( top / bottom heat, no fan!) for about 1 hour.
Take the dough out, punch it down and roll it out into a flat circle on a well floured surface. It should be a bit smaller than the size of your baking sheet. Cover with a tea towel and let it rise for another 10-15 minutes.
Set your oven to 260°C / 500°F. My oven has a special pizza setting but you can use top / bottom heat as well. Put the baking sheet on the bottom of your oven to heat it (for around 10 minutes).
Whisk the sour cream, egg yolk and a pinch of salt.
Take the hot baking sheet out of the oven, turn it around and place it carefully on two stable wooden boards or mats as it will be very hot. Quickly place your risen dough onto the baking sheet.
Spread a thin layer of the sour cream egg yolk mixture on top of the dough, you might not need all of it. Spread the apples and taleggio on top and season with pepper. Top with the bacon and bake in the hot oven for a few minutes until the Flammkuchen is golden brown and crisp.


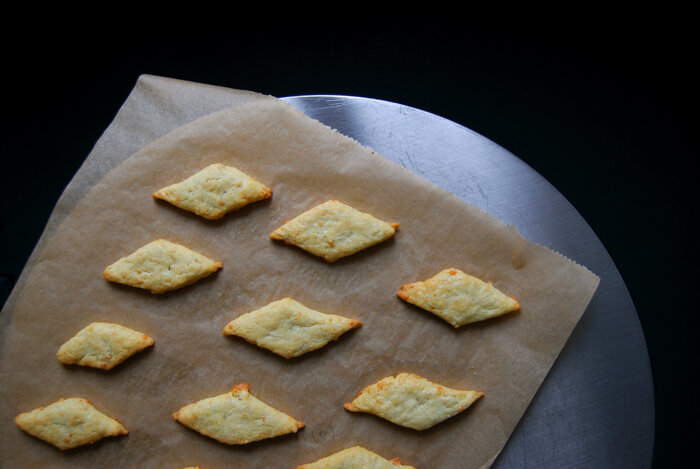
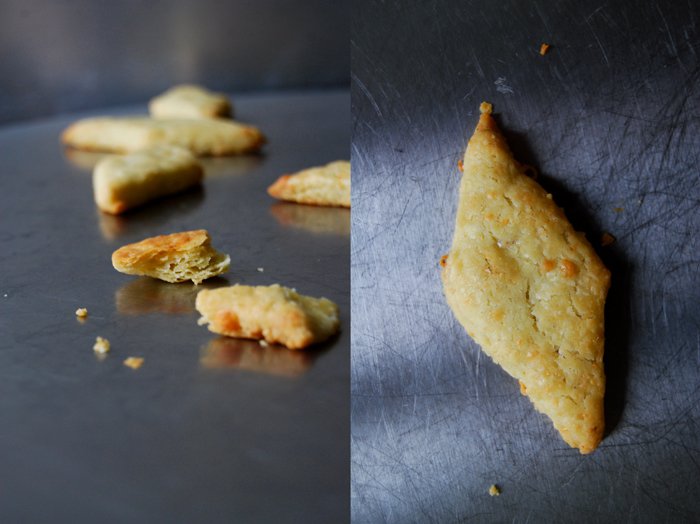
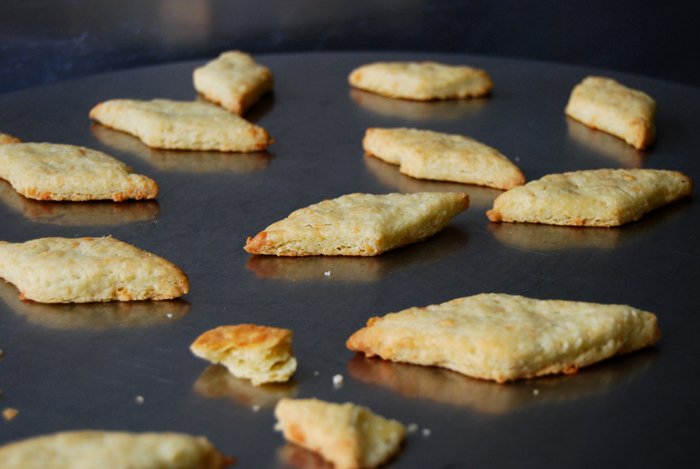
Buttery Blue Cheese Crackers

Buttery, flaky little bites of blue cheese! These crackers are the perfect savory snack, too good actually and a bit addictive but that's often the case when butter and cheese are combined in a recipe. I just made a few more than 20 crackers, that was a mistake that I regret, I should have doubled the amount!
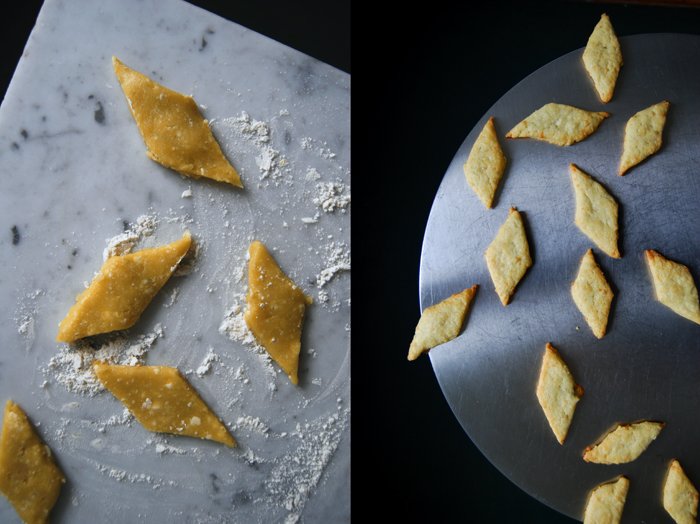
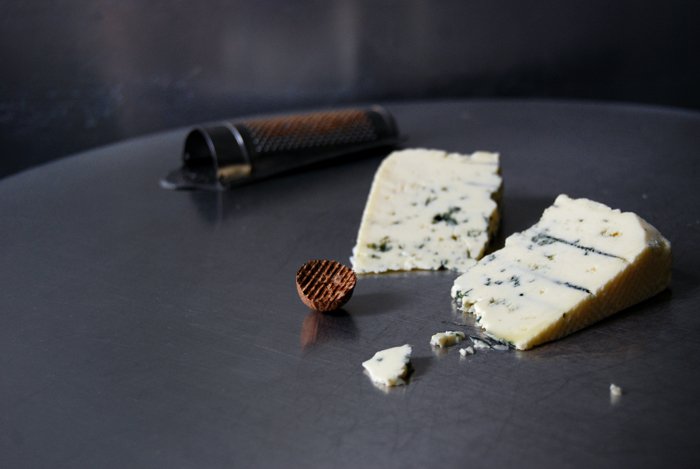
For the right cracker texture, you need a crumbly blue cheese, mine was a Bavarian strong in taste and not creamy, more on the dry side. Stilton would be perfect as well, or Roquefort, but I wouldn't use Gorgonzola. The dough is made like a simple short crust refined with nutmeg and cheese mixed in at the end. I kept it in the freezer for 15 minutes to make it workable and less sticky. It's a little fiddly but if you roll out the dough between cling film and always use a floured knife you will have the diamond shaped crackers ready on your tray in less than half an hour.

Blue Cheese Crackers
For 22 crackers you need
plain flour 150g / 5.5 ounces
salt 1/4 teaspoon
a pinch of freshly grated nutmeg
cold butter 120g / 4.5 ounces
organic egg yolk 1
crumbly blue cheese (like Stilton), crumbled, 100g / 3.5 ounces
Set the oven to 200°C / 390°F (fan assisted oven). Line a baking sheet with parchment paper.
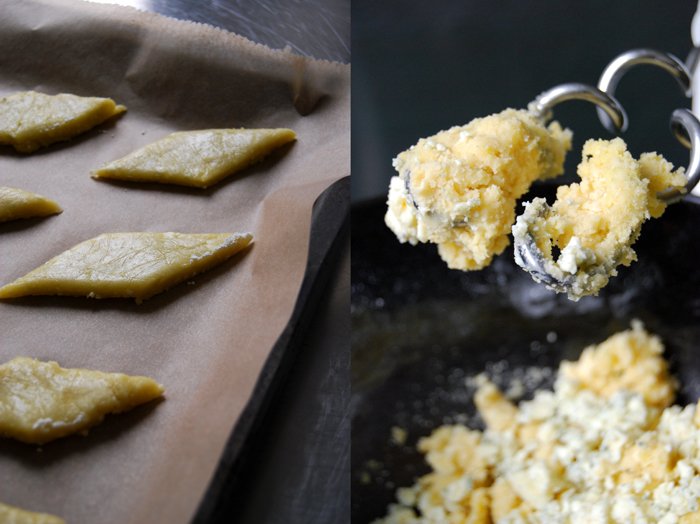
Combine the dry ingredients. Cut the butter with a knife into the flour mixture until there are just little pieces of butter left. Continue with your fingers and rub the butter into the flour until combined. Add the egg yolk and mix with the hooks of your mixer for 1-2 minutes. Add the cheese and continue mixing until you have a crumbly mixture. Form a thick disc, wrap in cling film and put in the freezer for 15 minutes.
Roll out the dough between cling film (about 1/2cm / 1/4" thick). With a floured knife, cut square or diamond shaped crackers, about 4 x 4cm / 1 1/2 x 1 1/2". Lift the dough gently with a knife (always dip it in flour when it becomes too sticky) and put the crackers on the baking sheet. Bake for 11 minutes or until golden and cooked through.

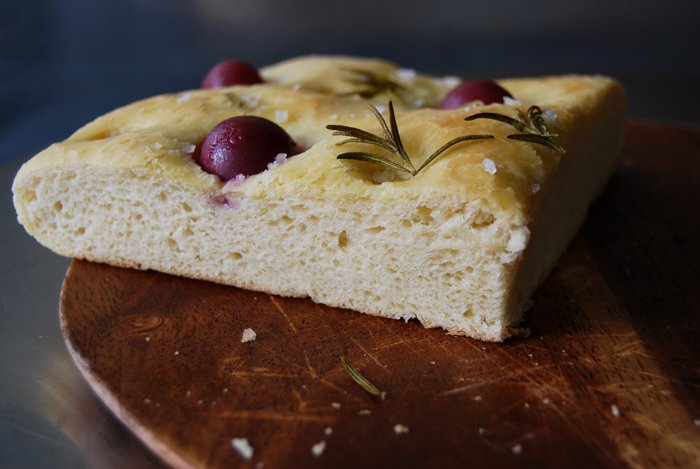
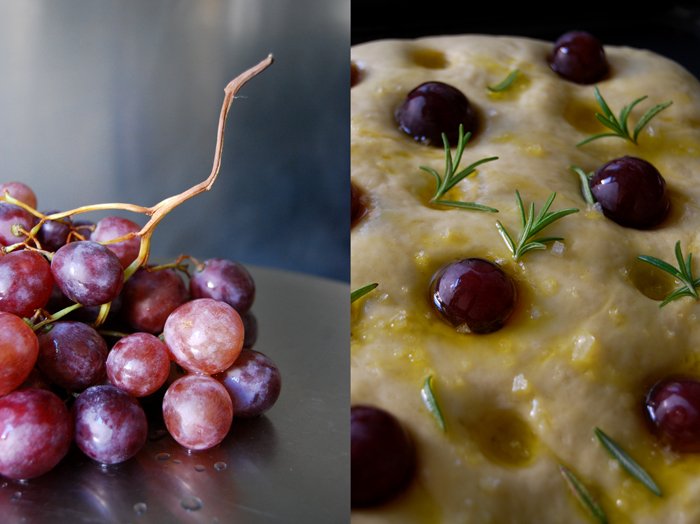
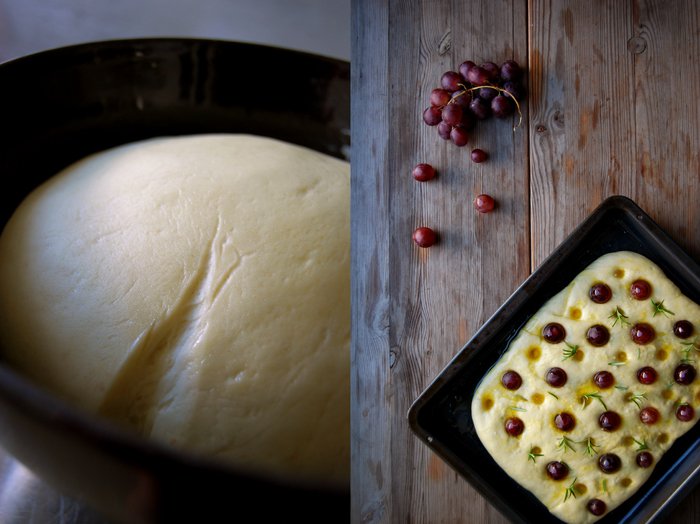
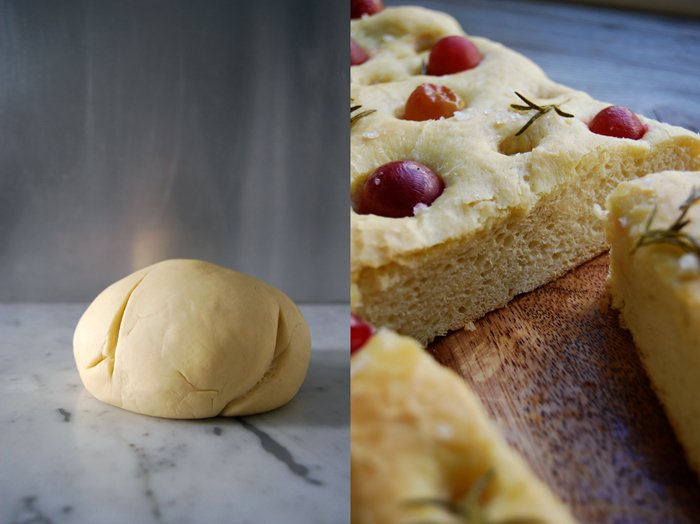
Focaccia with Grapes, Rosemary and Gozitan Sea Salt

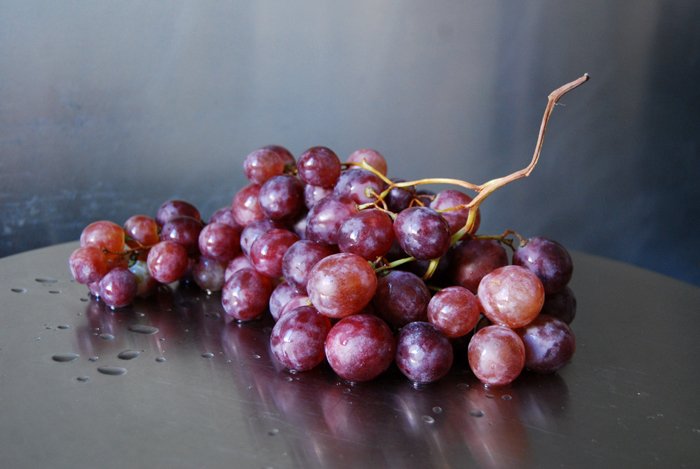
This is the best focaccia I ever made! One reason might be the excessive use of very good olive oil. Sometimes there's just no way around, if you spare on oil you spare on taste and texture, it's just that simple. The second reason is the unbelievably delicious combination of baked ripe dark grapes and rosemary! The fruits add a soft sweetness and juiciness to the bread which is better than any other flavouring I ever tasted in combination with this Italian classic.
So, the air in my kitchen was filled with the addictive smell of freshly baked bread mixed with the woody aroma of rosemary. I sat in front of the oven like a hungry cat and I couldn't wait for the focaccia to be done, it was so tempting! I took the photos as quickly as possible as the aromas teased my nose even more after I cut the first piece off the thick and flat loaf. Then, finally, when I took the first bite, I just enjoyed the spongy softness, the oily crust which was almost flaky, the grapes which released their juices and this heavenly taste topped with roast rosemary sprigs and my Gozitan salt from the Cini family!
More focaccia inspiration:
Focaccia with Grapes, Rosemary and Gozitan Sea Salt
For a 25 x 32cm / 10 x 12.5" focaccia you need
plain flour 500g / 17 1/2 ounces
dry yeast 1 sachet (7g / 1/4 ounce)
salt 1 teaspoon
granulated sugar 1 heaped teaspoon
water, lukewarm, 260ml / 9 ounces
olive oil 110ml / 3 3/4 ounces (60ml / 2 ounces for the dough and 50ml / 1 3/4 ounces for the topping)
red grapes around 25
fresh rosemary needles, a small handful
flaky sea salt for the topping
In a large bowl, combine the flour, yeast, salt and sugar. Add the water and 60ml / 2 ounces of olive oil and mix with your dough hooks for 5 minutes until well combined. Continue kneading with your hands for around 5 minutes until you have an elastic dough ball. Put the dough back into the bowl and cover with a tea towel. Let the dough rise in a 35°C / 95°F warm ( top / bottom heat, no fan!) oven for 40 minutes.
Take the dough out, punch it down and knead for 1 minute. Roll out the dough until it measures around 25 x 32cm / 10 x 12.5" and put it carefully on an oiled baking sheet. Cover with a tea towel and let it rise for 20 minutes in a warm place.
Set the oven to 220°C / 430°F.
Punch about 6 x 7 holes into the dough with the round bottom of a wooden spoon and put a grape into every second hole. Pour the remaining 50ml / 1 3/4 ounces of olive oil over the dough and into the holes. Sprinkle with rosemary and sea salt and bake for 20 minutes or until golden on top.


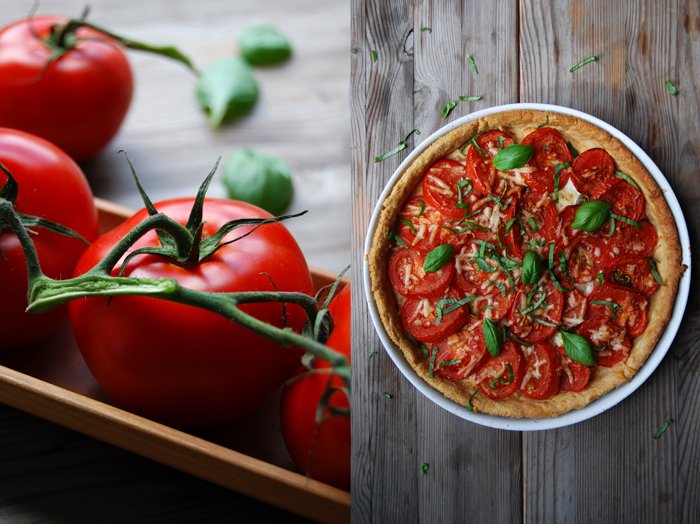
Tomato and Buffalo Mozzarella Quiche
7 months and 210 recipes ago I started eat in my kitchen, it was last November when this adventure began and I had no idea what to expect. I just knew that I wanted to write a post about our food every day, to share my recipes and my love for cooking and baking and that's what I've done till today and what I will continue in the future. When I saw the amount of recipes gathered on the blog, I realized how much has happened since that grey day in November. So much that my webpage can't even keep up with it, the Recipe page seems to have reached its capacity limit (which I'm working on fixing at the moment!). For now you might not find all the older recipes in the recipe index.
It's been an overwhelming time, I have received so many emails, so much support and interest in my culinary activities. I want to thank you for that, it's an amazing experience and a wonderful chance to meet food lovers all over the world who want to join me in my kitchen! I'm very happy about every single comment I get from you, every email and photo I receive about my recipes that you've cooked or baked in your kitchen!
I've been asked quite often if my cooking has changed in the past few months through the blog. Not really, I've always loved creating delicious food with my pots and pans, quite excessively to be honest, but luckily we have many friends who help out whenever I miscalculate how much 2 people can eat! It doesn't matter how many cakes I bake there are always enough hungry people around me!
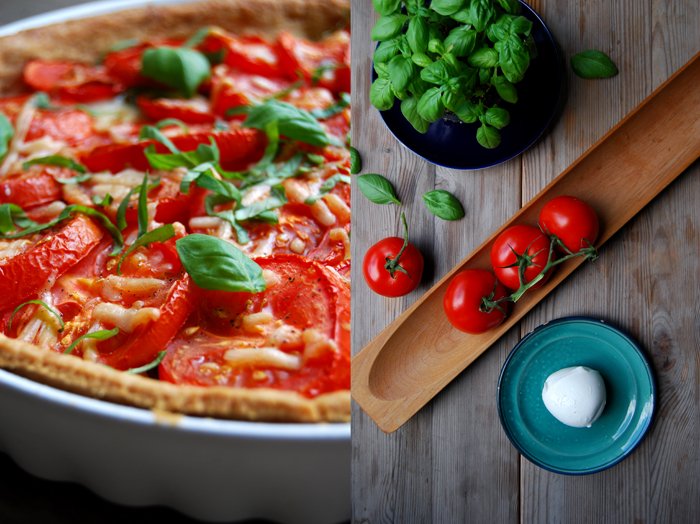
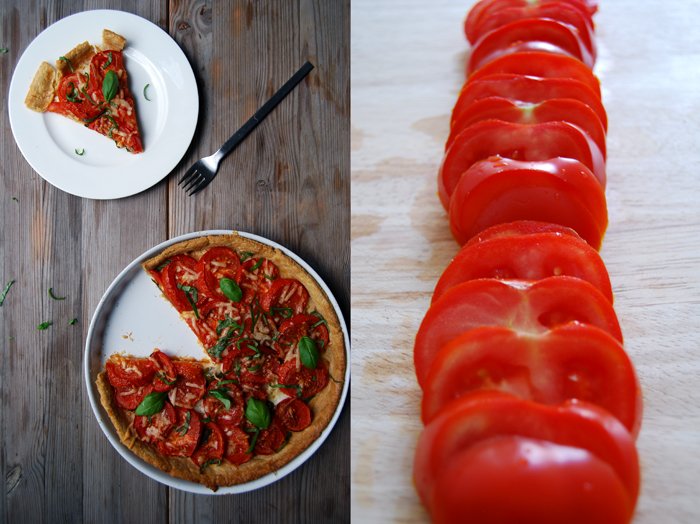
There's no better way to celebrate than with one of my favourite recipes, my beloved quiche! It made its first appearance with leek and tomato, followed by a fennel tart and my bean and ramp quiche. Today's tart is a delicious tomato, Buffalo mozzarella and basil quiche, the pastry buttery and crisp (as always) but with a little change, I added some olive oil to the dough. The topping is a celebration of Italian summer flavours, sweet tomatoes, creamy Buffalo mozzarella and fresh green basil leaves. It reminds me a bit of pizza, just more fine and buttery!

Tomato and Buffalo Mozzarella Quiche
For one quiche you need a round (27cm / 10.5″) or oval baking dish or tart pan.
For the short crust base
flour 250g / 8.5 ounces (I use white spelt flour type 630 but you can use any other plain flour)
butter, cold 125g / 4.5 ounces
olive oil 1 tablespoon plus more for brushing the pastry
organic egg 1
salt 1 teaspoon
Combine the flour with the salt. Cut the butter with a knife into the flour until there are just little pieces of butter left. Continue with your fingers and work the butter into the flour until combined (there shouldn’t be any lumps of butter left). Add the egg and olive oil and continue mixing with the hooks of your mixer until you have a crumbly mixture. Form a disc, wrap in cling film and put in the freezer for 15 minutes.
The topping
medium tomatoes, sliced, 4
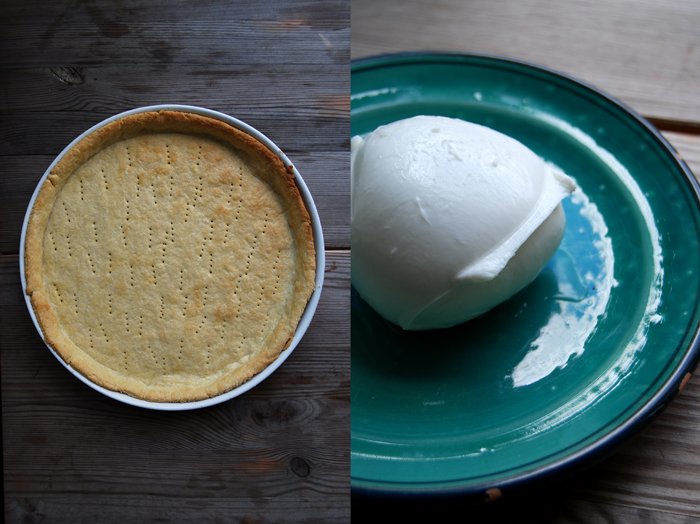
Buffalo mozzarella, drained and very thinly sliced, 125g / 4.5 ounces
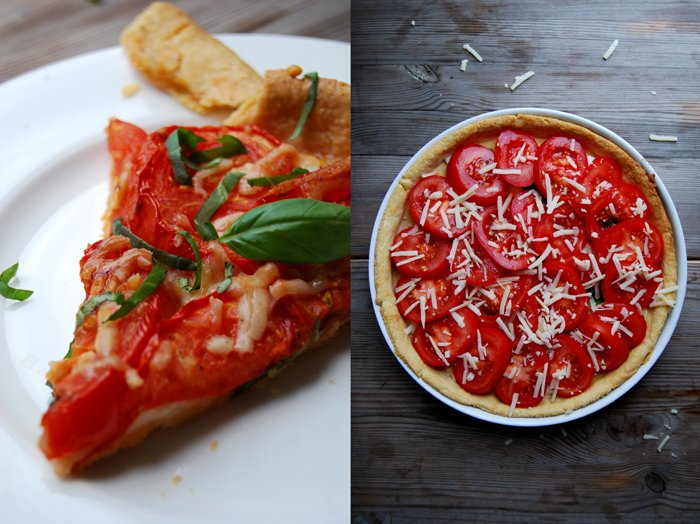
Parmesan, grated 30g / 1 ounce
fresh basil leaves 14 plus 8 leaves (chopped) for topping when the quiche is done
salt and pepper
The quiche
Set the oven to 210°C / 410°F top/ bottom heat.
Roll out the dough between cling film and line your baking dish with the flat pastry. Prick it with a fork and blind-bake in the hot oven for 10 minutes. Take it out of the oven and set the temperature down to 180°C / 355°F.
Brush the pastry with a thin layer of olive oil, spread the mozzarella and basil on top and cover with the tomatoes. Sprinkle with the parmesan, season with salt and pepper and bake for about 25 minutes or until the tomatoes are soft. Let it cool for 10 minutes and sprinkle with the fresh basil.

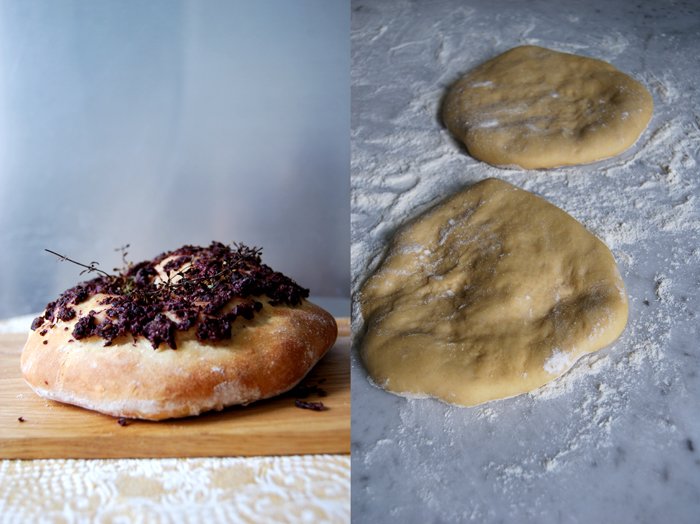
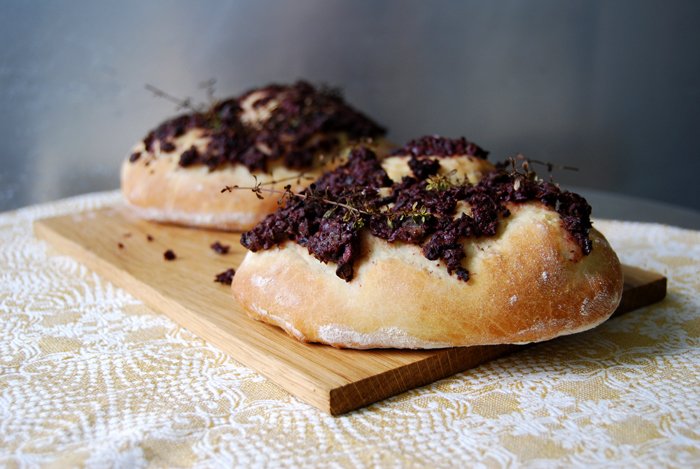
Sicilian Sfincione with Tapenade
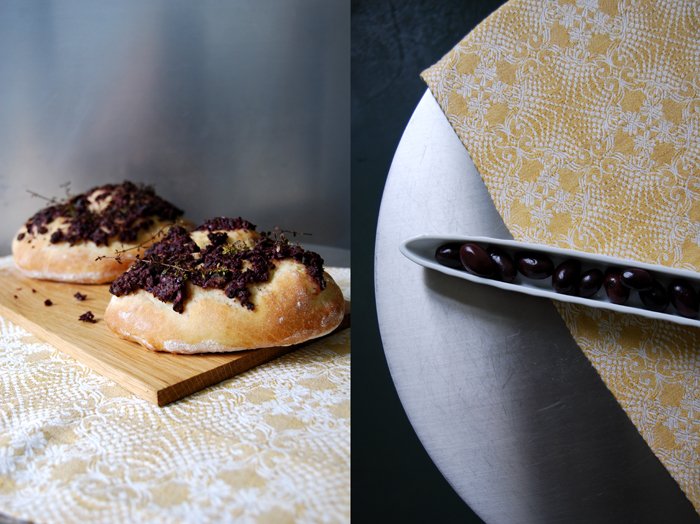
Forget thin and crisp, this pizza is thick and juicy! The Sicilian Sfincione is more like a focaccia, the dough is made with eggs and milk which gives it a bit of a sweet bread feeling. Its origin dates back to the late Baroque when the aristocratic Sicilian families liked to employ French chefs, the "Monzu" coming from the French Monsieur, some of them became famous Sicilian chefs. Here's the beauty of culinary exchange between two cultures, they influence each other, they don't confine each other but merge and evolve! If only cultural exchange was always so easy and well received!
In the beginning of the 18th century, these chefs started to influence Sicilian cuisine and left quite a few marks in the kitchen, also in the making of pizza. Eggs and milk, sometimes even butter, found their way into this famous dish and created completely different textures and tastes, like the popular Sfincione.
As there is already a French touch involved I thought I might as well continue working with it in the topping. I went for a rich Provençal tapenade made of lots of black olives, capers, anchovies, olive oil, brandy and lemon juice topped with thyme sprigs. It was great! This pizza is perfect for a picnic, as a starter or with a salad on the side. I love pizza, so much that I bake it every Sunday and this Sicilian variation is definitely a summer favourite!
Sfincione with Tapenade
For 4 Sfincione (15cm / 6") you need
For the dough
plain flour 500g / 1 pound
dry yeast 1 package (for 500g / 1 pound of flour)
salt 1/2 teaspoon
organic egg 1milk, lukewarm, 250ml / 8.5 ounces
Combine the flour with the yeast and salt, add the lukewarm milk and egg and mix with your dough hooks for a few minutes. Continue kneading and punching with your hands until you have an elastic dough ball and put it back in the bowl. Cover with a tea towel and let it rise in a 35°C / 95°F warm ( top / bottom heat, no fan!) oven for 45 minutes.
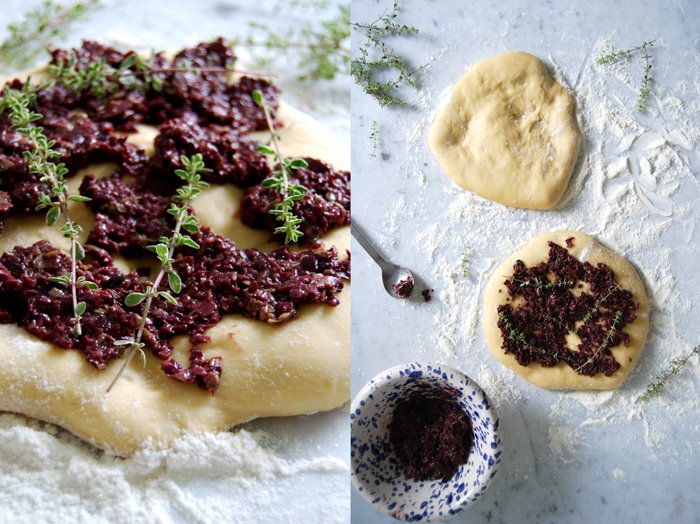
Divide the dough into 4, stretch into thick 15cm / 6" disks on a floured surface and cover with a kitchen towel. Let them rise while you continue the preparation for the tapenade.
For the tapenade
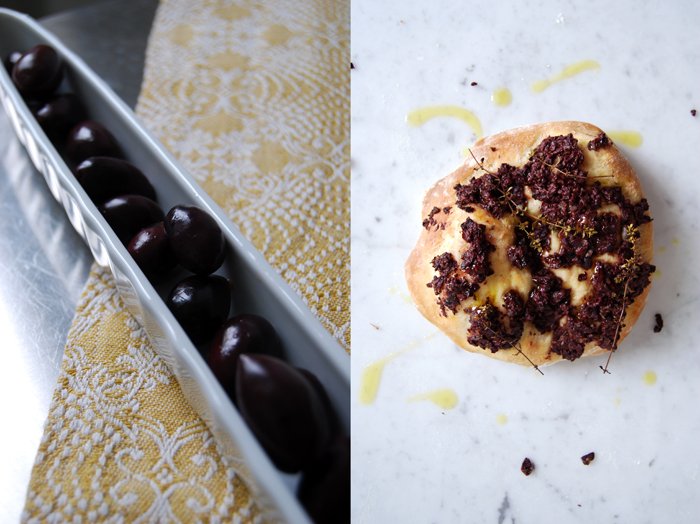
black olives 200g / 7 ounces
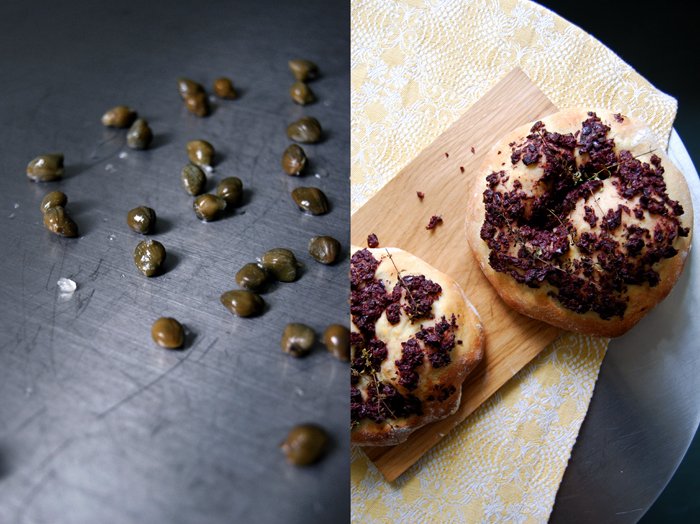
capers 40
anchovy, rinsed and dried, 2 fillets
olive oil 2 tablespoons plus more for sprinkling
brandy (or cognac) 2 tablespoons
freshly squeezed lemon juice 2 tablespoons
mustard 1 teaspoon
pepper
thyme 16 small sprigs for topping
Mix the ingredients for the tapenade in a blender and season with pepper to taste.
The Sfincione
Set the oven to 250°C / 480°F, my oven has a special pizza setting but you can use top / bottom heat as well. Line a baking sheet with parchment paper.
Spread a quarter of the tapenade on each pizza, put 4 thyme sprigs on top of each and bake for 6 minutes or until golden brown. Sprinkle with olive oil immediately and serve warm or cold.

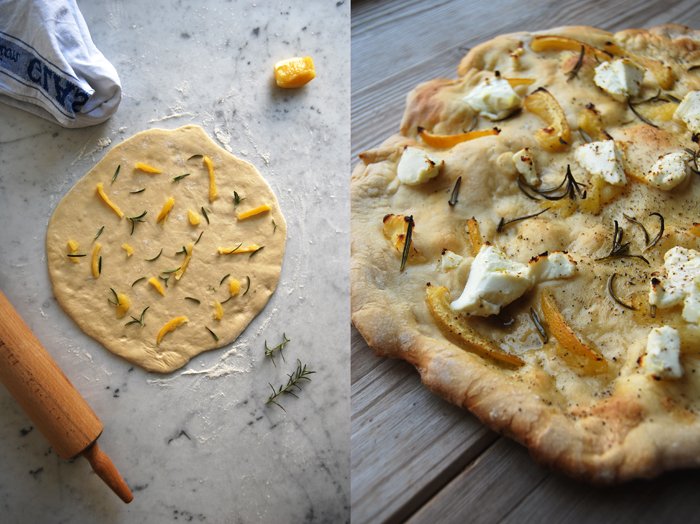
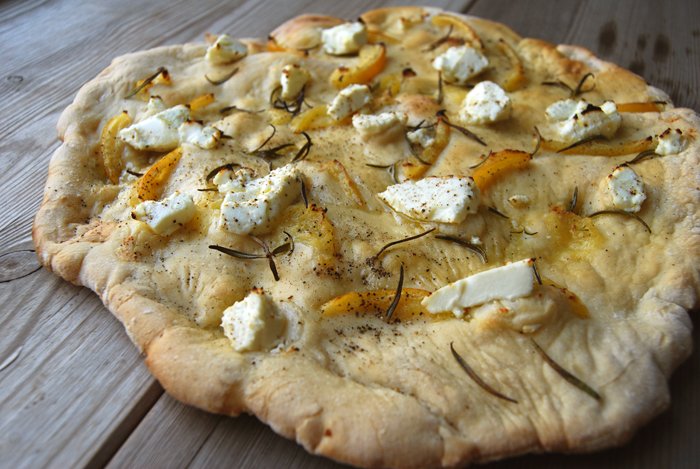
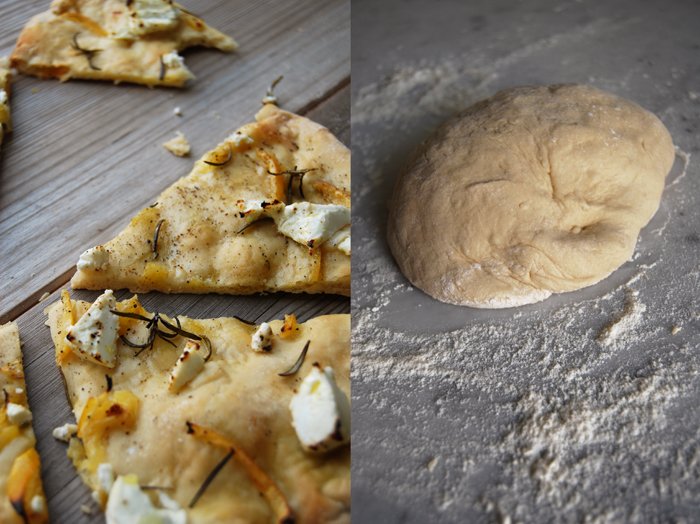
Pizza Bianca with Moroccan Lemons, Chèvre and Rosemary
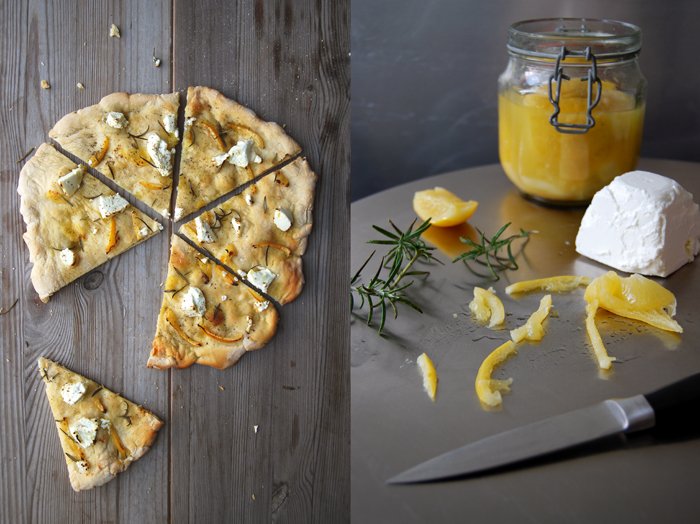
When I wrote about my Moroccan Preserved Lemons about a month ago, Kelly from My Soulfull Home got in touch. I met Kelly through a blog tour in February which she had organised. She asked me to join the tour together with 15 other bloggers, it was carnival and I shared my family's Berliner experience. A few weeks ago she told me about a delicious pizza bianca with lemons and rosemary which one of her friend's makes and she told me that I should give it a try as soon as my lemons were ready. Here they are, sour, soft and juicy!
When I had the first piece of my own preserved lemons in my mouth, I felt a bit excited! My aunt was with me in my kitchen, she was the one who inspired me to preserve lemons in the first place. The first bite was intense, a bit salty as I forgot to rinse the slice of lemon, too much excitement! When I let some water rinse off a bit of the saltiness (for 2-3 seconds), they were perfect! The preserving liquid, concentrated juices of all the lemons, tastes as good and is great for strong sauces and stews.
For my pizza bianca, I decided to add some chèvre to mix its smooth milkiness with the lemon's sourness and the woody rosemary. Ricotta would have worked too, but I wanted the strong aroma of this soft goat cheese. I sprinkled some olive oil on top which gave it a bit of a focaccia feeling, some sea salt and pepper and enjoyed this absolutely delicious summery snack. Thank you Kelly!
If you like pizza as much as I do, you can also try my Aubergine and Pecorino Pizza or my Spinach and Ricotta Pizza.
Pizza Bianca with Moroccan Lemons, Chevre and Rosemary
I always start to prepare the dough 2 hours before I bake it to give it enough time to rise. I bake my pizza on a hot baking sheet which has a similar effect to a pizza stone.
For 1 large pizza (size of 1 baking sheet) you need
For the topping
chèvre or ricotta, 200g / 7 ounces
preserved lemon, rinsed and thinly sliced, 1(you could also use lemon zest)
fresh rosemary, the needles of 5 sprigs
olive oil 4-6 tablespoons
salt and black pepper
For the dough
plain flour 350g / 12.5 ounces plus more for mixing
dry yeast 1 package (for 500g / 1 pound of flour)
water, lukewarm, 190ml
olive oil 3 tablespoons
salt 1 teaspoon
Combine the flour with the yeast and salt, add the lukewarm water (you might not need all of it) and olive oil. Mix with your dough hooks for a few minutes. The dough shouldn’t be moist and sticky at all, more on the dry side. Continue kneading and punching with your hands until you have an elastic dough ball, not too hard, not sticky. Put the dough back in the bowl, cover with a tea towel and let it rise in the warm oven (35°C / 95°F) for 40 minutes. This works really well but make sure that your oven is set to top/ bottom heat and not to fan.
When the dough is well risen, roll it out on a very well floured working surface (this is very important or you'll have problems taking it off again). It should be a bit smaller than the size of your baking sheet. Cover with a tea towel and let it rise for another 10-15 minutes.
The pizza
Set your oven to 260°C / 500°F. My oven has a special pizza setting but you can use top / bottom heat as well. Put the baking sheet on the bottom of your oven to heat it (for around 10 minutes).
Take the hot baking sheet out of the oven, turn it around and place it carefully on two stable wooden boards or mats as it will be very hot. Place your risen dough carefully but quickly (best done by two people) on the baking sheet, push it gently into place if necessary. Sprinkle with the slices of lemon, rosemary and olive oil and dollop the chèvre with a tea spoon on top.
Put the baking sheet back into the oven, on the bottom again, and bake for a few minutes until the pizza is golden, season with salt and pepper.


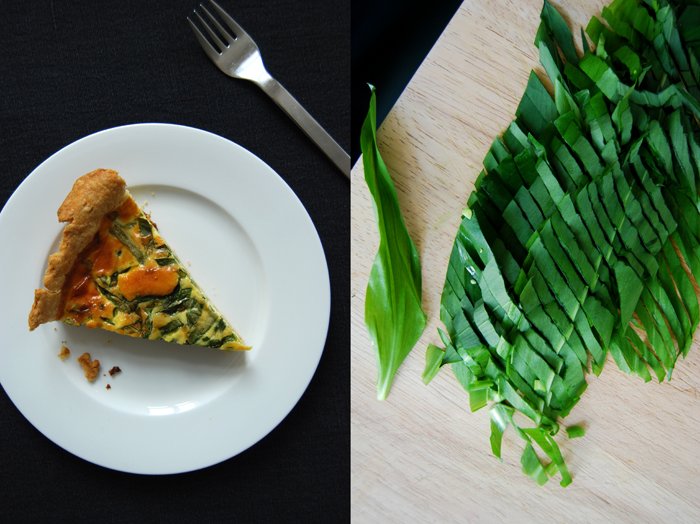
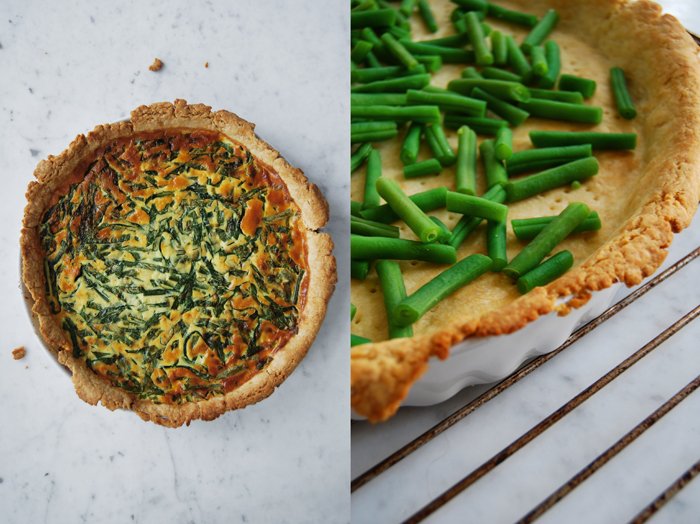
Bean and Ramp Quiche

Quiche is one of those dishes which makes me feel good, always, no matter what my day has been like. As soon as I see a quiche in my oven and smell its buttery aroma spread through the kitchen I have to smile. Maybe it's the butter, or the eggs or the fact that I can look forward to another tart on my plate! That's why I've already written about a couple of my quiche recipes, my classic quiche with leek, tomatoes and thyme, an Italian-style tart with fennel and parmesan and here is another one, packed with greens. I fill this savory tart with beans, ramp (wild garlic) and spring onions and it has a deliciously light spring feeling!
I've praised its short crust at length which is so crisp and buttery, to me it's just perfect. My quiches always have a thin layer of an eggy and creamy mixture to keep it light and to leave space for the vegetable filling. Some recipes focus on the creamy filling which can make a quiche too rich and heavy, at least for my taste. I want to be able to eat a piece of quiche with my fingers, a tart for a picnic!

Bean and Ramp Quiche
For one quiche you need a round (27cm / 10.5″) or oval baking dish or tart pan.
For the short crust base
flour 250g / 8.5 ounces (I use spelt flour type 630 but you can use any other plain flour)
butter, cold 125g / 4.5 ounces
organic egg 1
salt 1 teaspoon
Combine the flour with the salt. Cut the butter with a knife into the flour until there are just little pieces of butter left. Continue with your fingers and work the butter into the flour until combined (there shouldn’t be any lumps of butter left). Add the egg and continue mixing with the hooks of your mixer until you have a crumbly mixture. Form a disc, wrap in cling film and put in the freezer for 10 minutes.
For the filling
green beans 200g / 7 ounces
ramp (wild garlic), just the leaves, cut into slices, 30g / 1 ounce
spring onion, cut into slices, 1/2
organic eggs 3
heavy cream 125 ml
crème fraiche or sour cream 125ml
salt 1 teaspoon
ground black pepper
nutmeg, freshly grated, a generous amount
The quiche
Set the oven to 210°C / 410°F top/ bottom heat.
Blanche the beans in plenty of salted water for a couple minutes until al dente.
Mix the eggs with the heavy cream, crème fraiche, salt, pepper and nutmeg.
Roll out the dough between cling film and line your baking dish with the flat pastry. Prick it with a fork and blind-bake in the hot oven for 10 minutes. Take your baking dish out of the oven and set the temperature down to 180°C / 355°F.
Spread the beans, ramp and spring onions on top of the pre-baked pastry base and pour the liquid mixture over it. Put the quiche on a baking sheet in the oven and bake for about 45 minutes or until golden, the top should be firm. Let it cool for 10 minutes.


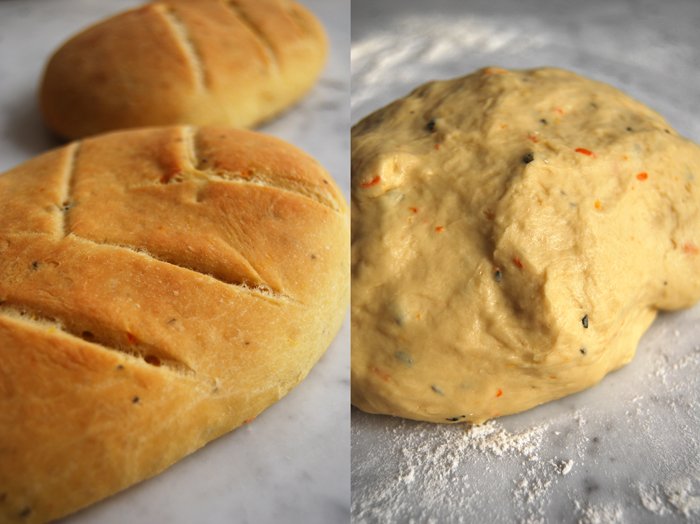
Fougasse Bread with Orange, Sage and Olive Oil
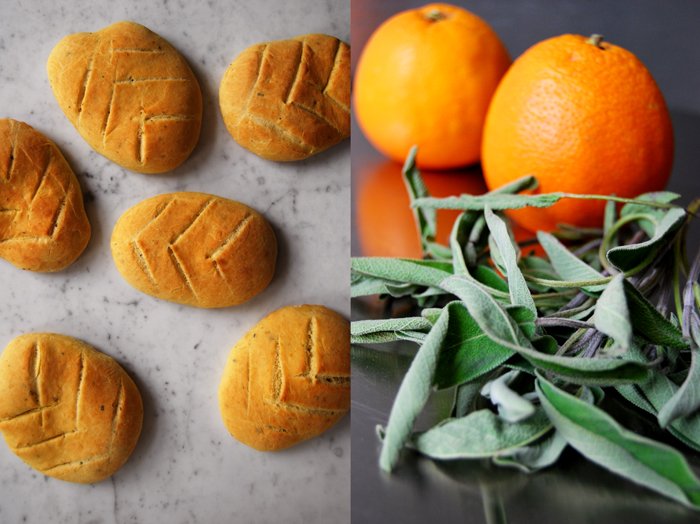
It's time to bake bread again! I use a recipe which involves sage and my beloved blood oranges, they'll be out of season soon, so I'm using every possible occasion that allows me to cook or bake with my sweet citrus fruits. I mix generous amounts of their zest and juice into the dough and the result is impressive!
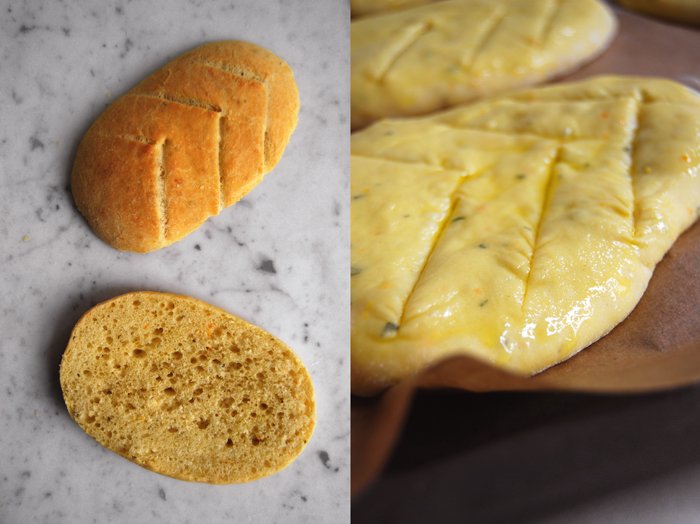
My bread is a light and aromatic Fougasse, a French flatbread very popular in Provence where it's often made with olives, herbs and cheese. It's similar to the Italian Focaccia but with a leaf pattern of cuts in the dough. In some recipes, the cut goes all the way through creating holes in the bread while it's baking which makes the bread harder. I prefer to leave mine juicy with shallow cuts on the surface. Besides the orange and sage I add good olive oil in and on the bread. I use the wonderful extra virgin olive oil from the Molise region which I got from Marilena. Its strong and fruity taste is just what my Mediterranean flatbread needs!
I already have a great idea for a sandwich I can make with this bread for tomorrow's Sandwich Wednesday!
Fougasse with Orange, Sage and Olive Oil
For 6 flatbreads you need
plain flour 400g / 14 ounces (I use spelt flour type 630 but you can use any other plain flour)
dry yeast 1 package (for 500g / 1 pound flour)
salt 1 teaspoon
fresh sage, chopped, 8-10 leaves
zest of 1 medium sized orange
freshly squeezed blood orange or orange juice 100ml
water, lukewarm, 100ml
olive oil 5 tablespoons plus more for brushing the bread
organic egg 1
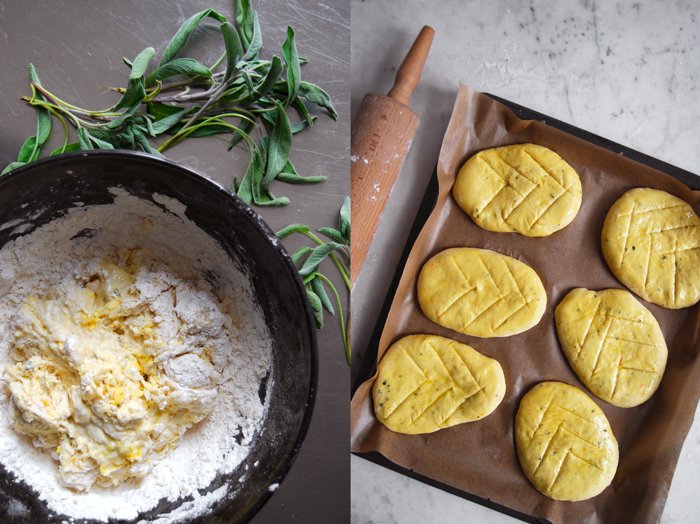
Combine the flour, yeast, salt, orange zest and sage in a large bowl. Add the water, orange juice and egg and mix with your dough hooks for 5 minutes. On a floured surface, continue kneading with your hands for a few minutes until you have an elastic dough ball. Put the dough back into the bowl and cover with a tea towel. Let the dough rise in a 35°C / 95°F warm oven for 45 minutes. This works really well but make sure that your oven is set to top/ bottom heat and not to fan.
Take the dough out and punch it down. Divide it into 6 pieces and roll them out into egg shaped discs (on a floured working surface, around 1 1/2 cm / 1/2″ thick). Put them on a baking sheet lined with parchment paper, cover with a tea towel and let them rise for 20 minutes.
Set your oven to 210°C / 410°F.
Brush the flatbread with olive oil and cut a pattern of 6-8 diagonal slashes into the dough to make a leaf pattern. Bake the flatbread on the lowest level for 12-15 minutes or until golden brown. Take them out and let them cool for 2 minutes.
I cut the warm flatbread in half and drizzled some more olive oil over it, it merged perfectly with the orange and sage aromas!

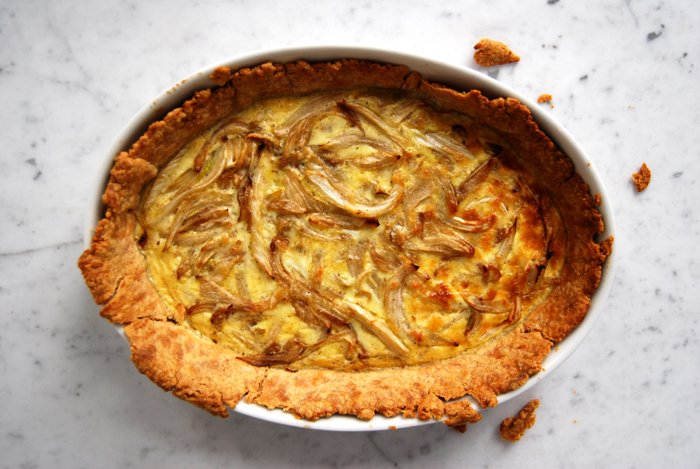
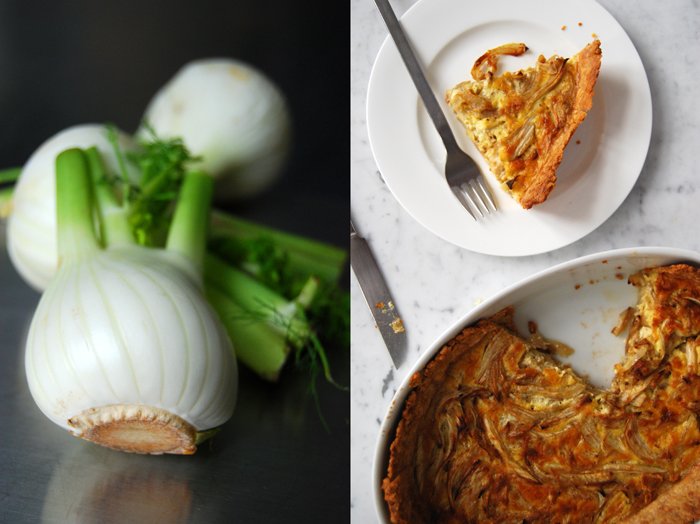
Buttery Crisp Fennel Tart
A tart, a quiche, a pie, call it whatever you like, anything that involves buttery short crust is heavenly food to me. I'm the happiest person in the world when I have one of these in my oven, filling the air with that buttery smell, teasing me as I can't wait to have the first bite in my mouth. Most of the time I use my all time favourite quiche crust recipe for any kind of savory tart or quiche. I wrote about that recipe in December. It has been with me for nearly twenty years and I never found a better one. It's crisp, it's buttery, yet still light. Just perfect!
If you follow eat in my kitchen you'll find that I tend to buy too much of this and that (I'm talking about food). This time it's fennel, three bulbs! I never throw any food away, I use everything I buy, but I become too excited when I see all the nice food at the market and a million things come into my mind that I'd like to cook with them. So I buy whatever arouses my appetite. Sometimes, my fridge just reaches its limits.
I haven't made a tart in a while so I will use the fennel for the filling, mixed with Parmesan, a few eggs, milk and cream, and the buttery smell can take over my flat!
Fennel Tart
For one tart you need a round (27cm / 10.5″) or oval baking dish or tart pan.
For the short crust base
flour 250g / 8.5 ounces (I use spelt flour type 630 but you can use any other plain flour)
butter, cold 125g / 4.5 ounces
organic egg 1
salt 1 teaspoon
Combine the flour with the salt. Cut the butter with a knife into the flour until there are just little pieces of butter left. Continue with your fingers and work the butter into the flour until combined (there shouldn’t be any lumps of butter left). Add the egg and continue mixing with the hooks of your mixer until you have a crumbly mixture. Form a disc, wrap in cling film and put in the freezer for 10 minutes.
For the filling
fennel, cut in half and sliced thinly, 400g / 14 ounces
organic eggs 2
milk 100 ml
heavy cream 100 ml
Parmesan, grated, 2 heaped tablespoons
salt 1 teaspoon
black pepper
nutmeg, freshly grated
The tart
Set your oven to 210°C / 410°F.
Sauté the fennel in a big pan in a little oil for 5 minutes until golden.
Mix the eggs with the milk, heavy cream, Parmesan, salt, pepper and nutmeg.
Roll out the dough between cling film and line your baking dish with the flat pastry. Prick it with a fork and blind-bake in the hot oven for 10 minutes. Take your baking dish out of the oven and set the temperature down to 180°C / 355°F.
Spread the fried fennel on top of the pre-baked pastry base and pour the liquid mixture over. Put the tart carefully on a baking sheet in the oven and bake for about 30 minutes or until golden, the top should be firm. Let it cool for 10 minutes.


A Ladin Sandwich with Spices and Tyrolean Prosciutto
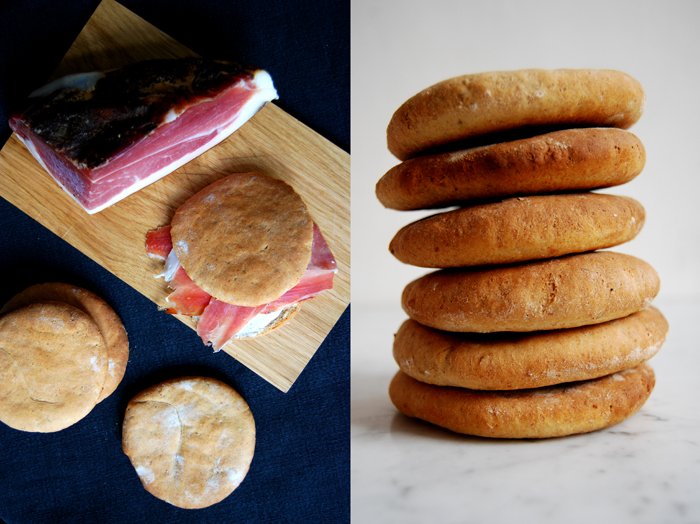
I used to eat this sandwich whenever I arrived in Corvara, I went straight to the bakery to get some local flatbread and then to the butcher for prosciutto. Outside the shop, I prepared my sandwich, sat on a bench in the snow and enjoyed the start of my holiday.
Last week I read about this bread, the bread of my mountain village of choice. It is a flatbread made with rye flour mixed with coriander, fennel and aniseed. It's a speciality in the Ladinia region around the Sella mountains in the Italian Dolomite Alps. In Italian this area is called Val Badia and the Ladin name (which is an autonomous language) is Alta Badia.
There are two ways to prepare this bread, one is more flat, it becomes dry, hard and brittle after baking. It's very thin and you "shake" the dough to loosen it up which gives it its name, "Schuettelbrot" (shaken bread). This method was used to preserve the bread for the long and lonely time in the mountain huts where the supply of fresh bread and food was an unfrequent and laborious task. It keeps for months, the texture is hard but it retains its strong taste of spices.
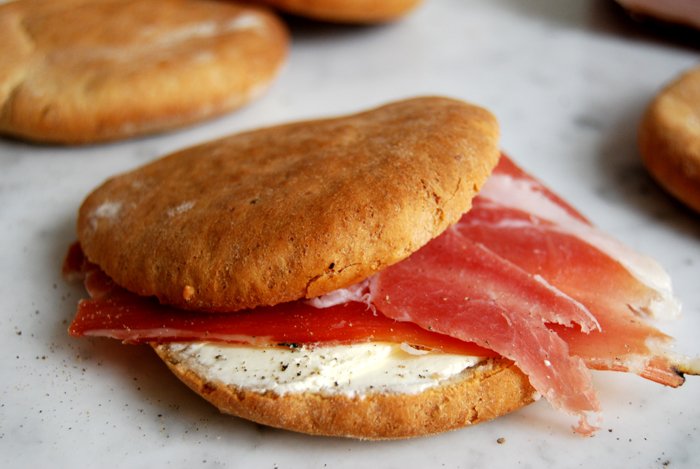
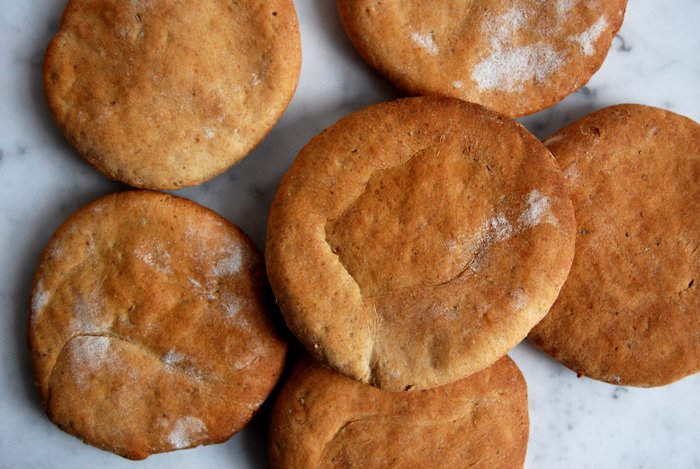
The second one is thicker and this is the one I choose to make, at it's best when fresh and warm. Although it's not as light and fluffy as a flatbread made with wheat flour, it's denser and more complex in taste. Traditionally you eat this bread together with Tyrolean Prosciutto at Vesper time, in the afternoon or evening when you feel like a little snack. My mother sent me a nice piece of prosciutto from San Cassiano, so I use this special occasion for this week's Sandwich Wednesday.
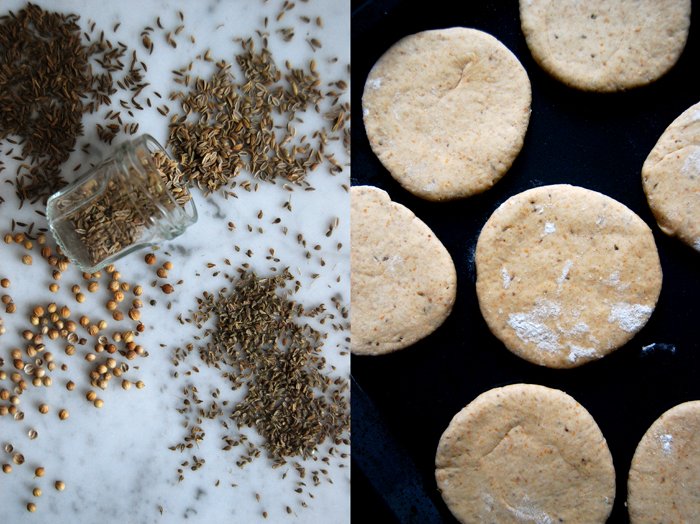
A Ladin Sandwich with Spice Flatbread and Tyrolean Prosciutto
I spread some cream cheese on the flatbread, traditionally it's made without, but I was in the mood for it.
For 8 little flatbreads you need
rye flour 180g / 6.5 ounces
spelt flour 180g / 6.5 ounces
dry yeast 1 package (for 500g / 1 pound of flour)
water, lukewarm, 125ml
milk, lukewarm, 50ml
coriander seeds, ground, 1 teaspoon
fennel seeds, ground, 1/2 teaspoon
aniseed, ground, 1/2 teaspoon
caraway seeds, ground, 1/4 teaspoon
salt 1/2 teaspoon
olive oil to grease the baking sheet
For the sandwich
Tyrolean Prosciutto 3 slices for each flatbread
cream cheese (optional)
crushed black pepper
Combine the flour with the spices, yeast and salt, add the lukewarm water and the milk, slowly, not all at once (you might not need all of it). Mix with your dough hooks for a few minutes. The dough should be more on the dry side. Continue kneading and punching with your hands until you have an elastic dough ball, not sticky at all. Put the dough back into the bowl, cover with a tea towel and let it rise in the warm oven (35°C / 95°F) for 45 minutes. This works really well but make sure that your oven is set to top/ bottom heat and not to fan.
Take the dough out and punch it down. Divide it into 8 pieces and roll them out into discs (on a floured working surface, between 1 - 1 1/2 cm / around 1/2" thick). Cover with a tea towel and let them rise for another 25 minutes.
Set your oven to 250°C / 480°F. My oven has a special pizza setting which I use for this recipe but you can use top / bottom heat as well. Grease your baking sheet with some olive oil.
Put your flatbreads on the baking sheet and bake them on the lowest level for 10 minutes or until golden brown. Take them out and let them cool for 2 minutes. Cut a bread in half, spread with cream cheese and cover with a few slices of the prosciutto. You can sprinkle some crushed black pepper over it too.

White Pizza with Spinach and Ricotta
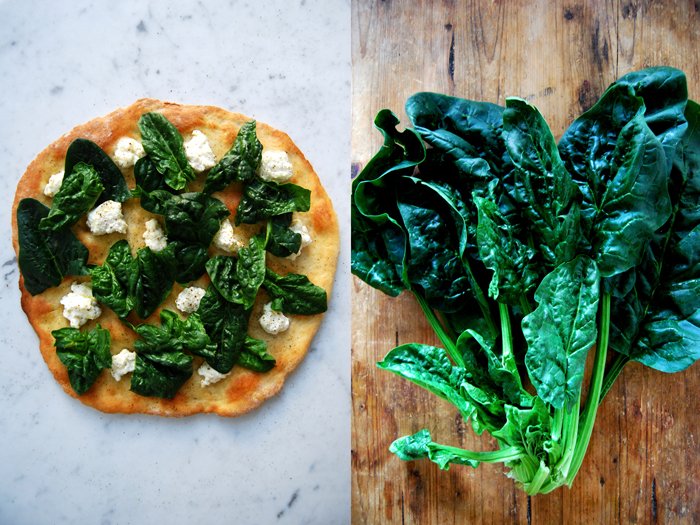
A few years ago curiosity got the better of me and I tried a "white pizza" at one of my favourite pizza restaurants. White pizza is made without tomatoes and I didn't quite know what to expect. I had my virgin white pizza moment with a spinach and ricotta topping and all my reservations melted away after the first bite. Lighter and with more space for the single ingredients, the absence of tomato sauce didn't lessen that feel good pizza pleasure.
I wrote about my Sunday pizza tradition a few weeks ago and yesterday was no exception. It has been ages since my last white pizza and, as it's been on my mind for a while, I bought some crisp winter spinach and ricotta. To finish it off I added some olive oil infused with garlic and some crushed black pepper. The dough was light and crisp, it soaked some oil, but not too much, a bit like a Focaccia. The spinach was crisp and had some bite as in winter it's a bit thicker while the ricotta brought a touch of velvety smoothness.
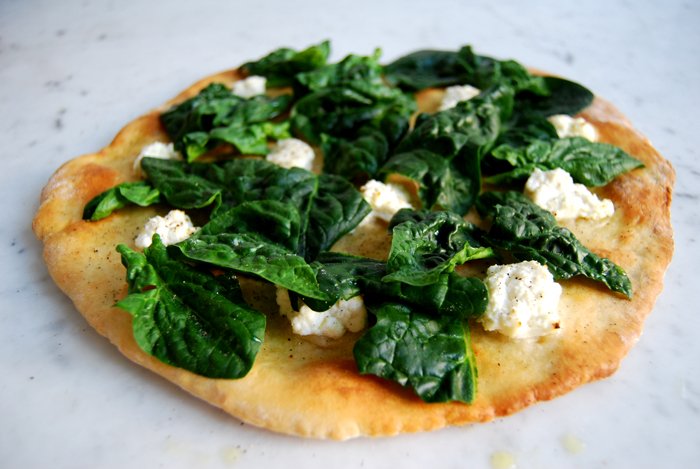
White Pizza with Winter Spinach, Ricotta and Olive Oil
I start to prepare the dough 2 hours before I bake it to give it enough time to rise.
For 1 big pizza (size of 1 baking sheet) you need
For the topping
fresh spinach, rinsed, 250g / 9 ounces
fresh ricotta 250g / 9 ounces
olive oil 4-6 tablespoons
garlic, cut in half, 1 clove
salt and crushed black pepper
Warm up the olive oil together with the garlic for 2-3 minutes.
For the dough
plain flour 350g / 12.5 ounces plus more for mixing
dry yeast 1 package (for 500g / 1 pound of flour)
water, lukewarm, 190ml
olive oil 3 tablespoons
salt 1 teaspoon
Combine the flour with the yeast and salt, add the olive oil and the lukewarm water, slowly, not all at once (you might not need all of it). Mix with your dough hooks for a few minutes. The dough shouldn’t be moist and sticky at all, more on the dry side. Continue kneading and punching with your hands until you have an elastic dough ball, not too hard, not sticky. Put the dough back in the bowl, cover it with a tea towel and let it rise in the warm oven (35°C / 95°F) for 40 minutes. This works really well but make sure that your oven is set to top/ bottom heat and not to fan.
When the dough is well risen, roll it out on a very well floured (this is very important!) working surface. It should be a bit smaller than the size of your baking sheet. Cover with a tea towel and let it rise for another 10-15 minutes.
The pizza
Set your oven to 260°C / 500°F. My oven has a special pizza setting but you can use top / bottom heat as well. Put the baking sheet on the bottom of your oven to heat it.
Take the hot baking sheet out of the oven, flip it over and place it carefully on two stable wooden boards or mats as it will be very hot. Place your risen dough carefully but quickly (best done by two people) on the baking sheet, push it gently into place if necessary. Sprinkle the olive oil and the ricotta in lumps on top. Put the baking sheet back into the oven, on the bottom again, and bake for a few minutes until the pizza is golden. Take it out and spread the spinach on top immediately. Season with salt and pepper, sprinkle some more olive oil on top if you like and enjoy!


Umbrian Torta al Testo with Rucola and Mozzarella

This week's sandwich is my version of Torta al Testo - the Umbrian flatbread - stuffed with rucola and mozzarella together with a dressing of olive oil and balsamico. Originally, this bread is unleavened, just made with flour, salt and water. I add some dry yeast, some use baking soda or sourdough. The name Torta al Testo comes from the fact that, traditionally, it is cooked on a hot disc of clay or metal - al testo - over the open fire, as I don't have that I use a skillet on a normal cooker.
Torta al Testo has everything a good sandwich needs: amazing bread and a tasty filling. What I also like about it, is the way it's cooked. It's fun to see the flat disc of dough rising and cooking in the hot pan within a couple minutes. It's very entertaining! I recently had friends over for dinner and Torta al Testo was the starter. We gathered in the kitchen, crowded as always, I cooked the bread and we all watched it rise. The kitchen was packed with people and food, I cooked one batch of flatbread after the other (I had to make quite a few of them) and the room got more and more smokey from the hot pan. Thankfully no one left, even though you could barely see anymore after I had left one in too long. We were all kind of mesmerized by the rising bread but don't worry, if you watch your bread it will be fine, no need for a fire alarm!

Torta al Testo with Rucola and Mozzarella
For 6 Torta al Testo you need
For the dough
plain flour 250g / 9 ounces plus more for mixing (I use spelt flour type 630 but you can use any other flour)
dry yeast 1 1/2 teaspoons
water, lukewarm, 140ml
salt 1/4 teaspoon
For the filling
mozzarella, cut into cubes, 125g / 4.5 ounces
rucola around 100g / 3.5 ounces
olive oil (6 tablespoons) mixed with balsamic vinegar (3 tablespoons) and seasoned with salt and pepper
Mix all the ingredients for the dough with the hooks of your mixer. Add some more flour if the mixture is too sticky. After 5 minutes continue mixing with your hands for a couple minutes. Put the dough back into the bowl, cover it with a tea towel and let it rise in a warm place or the warm oven (35°C / 95°F, top/ bottom heat, no fan) for 40 minutes.
Divide the dough into 6 pieces. On a well floured working surface, roll each one out into a flat disc. Leave the discs on the floured surface, cover with a tea towel and let them rise for another 20 minutes.
Heat a large skillet on highest temperature (no oil!). Cook the bread on one side for 1 - 1 1/2 minutes, turn and cook on the other side for another minute, at that point it will start to rise rapidly. You might have to cook it for a few seconds more or less - but keep an eye on it so as not to burn it.
Take the bread out of the pan and let it cool for a minute. Cut your flatbread in half and fill with the mozzarella and rucola. Drizzle some dressing on top and close your Torta al Testo.


My Sunday Pizza Tradition

Another tradition of mine - I always bake pizza on Sundays, always. My friends joke about my unwavering dedication (I barely break this tradition) but to me pizza is the ultimate cosy mood food. Nothing beats an evening on my sofa with a nice big piece of pizza in my hands and a good movie. It's the perfect preparation for a smooth transition into a new week. So why change it. The only variation is what's on top which depends on the season, my appetite and spontaneous inspiration. So far, my Sunday tradition has never seemed boring.
For today, my pizza gets a topping with aubergine slices (grilled with garlic and oregano oil), Pecorino slices and one part with ricotta. A very concentrated tomato sauce with lots of oregano and slices of organic Mozzarella go with it, that's all it needs. I make the pizza dough with olive oil which makes it richer and very tasty. A very easy recipe, it takes its time to rise but it's worth it. Nothing beats homemade pizza dough! It makes such a big difference to the taste - and kneading the dough with your own hands is great stress relief!
For years I made my pizza base the same way. First I let it rise in a bowl and then, a second time, on a baking sheet before I put the topping on. This summer I got a great tip from a friend of mine from Switzerland. He told me to put the baking sheet for the pizza on the bottom of the oven while the oven is heating up. As soon as the baking sheet is hot you take it out of the oven and flip it over. You take the well risen pizza dough (which has been rolled out) and place it on the hot baking sheet. The dough will start to rise and bake straight away which makes an amazing crust - like pizza stone. Once the topping is on, bake it in the oven for a few minutes and you will get the crispiest pizza you can imagine!

Pizza with Aubergine and Pecorino
I start to prepare the dough 2 hours before I bake it to give it enough time to rise.
For 1 big pizza (size of 1 baking sheet) you need
For the dough
plain flour 350g / 12.5 ounces plus more for mixing
dry yeast 1 package (for 500g / 1 pound of flour)
water, lukewarm, 190ml
olive oil 3 tablespoons
salt 1 teaspoon
Combine the flour with the yeast and salt, add the olive oil and the lukewarm water, slowly, not all at once (you might not need all of it). Mix with your dough hooks for a few minutes. The dough shouldn't be moist and sticky at all, more on the dry side. Continue kneading and punching with your hands until you have an elastic dough ball, not too hard, not sticky. Put the dough back in the bowl, cover it with a tea towel and let it rise in the warm oven (35°C / 95°F) for 40 minutes. This works really well but make sure that your oven is set to top/ bottom heat and not to fan.
When the dough is well risen, roll it out on a very well floured (this is very important!) working surface. It should be a bit smaller than the size of your baking sheet. Cover with a tea towel and let it rise for another 10-15 minutes
For the tomato sauce
tinned tomatoes 400g / 14 ounces
oregano, dried or fresh, 1 tablespoon plus more for the topping
salt (1 teaspoon) and pepper
Mix the ingredients in a small sauce pan, chop the tomatoes and let everything cook down until very concentrated and thick. If you leave the sauce too liquid it will be soaked up by your pizza base.
For the topping
I prepared the grilled aubergine (eggplant) a day before. You can keep it in the fridge for days and use it for other recipes as well, or enjoy it as antipasti.
aubergine, cut in thick slices, 1
garlic, crushed, 1 clove
olive oil, to brush the aubergine and to drizzle on top of the pizza
salt and pepper
pecorino cheese, cut in thin slices, 100g / 3.5 ounces
mozzarella, cut in cubes, 125g / 4.5 ounces
ricotta, 100g / 3.5 ounces (I sprinkled just 1/4 of the pizza with ricotta)
Brush the aubergine slices with olive oil, sprinkle with oregano and garlic and season with salt and pepper. Grill in the oven until golden brown and soft and cut in long strips.
The pizza
Set your oven to 260°C / 500°F. My oven has a special pizza setting but you can use top / bottom heat as well. Put the baking sheet on the bottom of your oven to heat it.
Take the hot baking sheet out of the oven, flip it over and place it carefully on two stable wooden boards or mats as it will be very hot. Place your risen dough carefully but quickly (best done by two people) on the baking sheet, push it gently into place if necessary. Spread the tomato sauce on top and sprinkle with oregano, continue with the aubergine, Pecorino, mozzarella and ricotta. Put the baking sheet back into the oven, on the bottom again, and bake for a few minutes until the pizza is golden brown, bubbling and crisp!


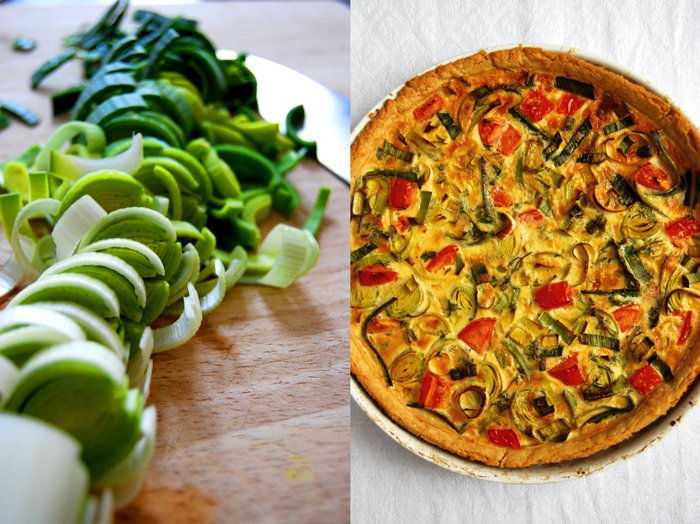
A trusted companion, my beloved Quiche
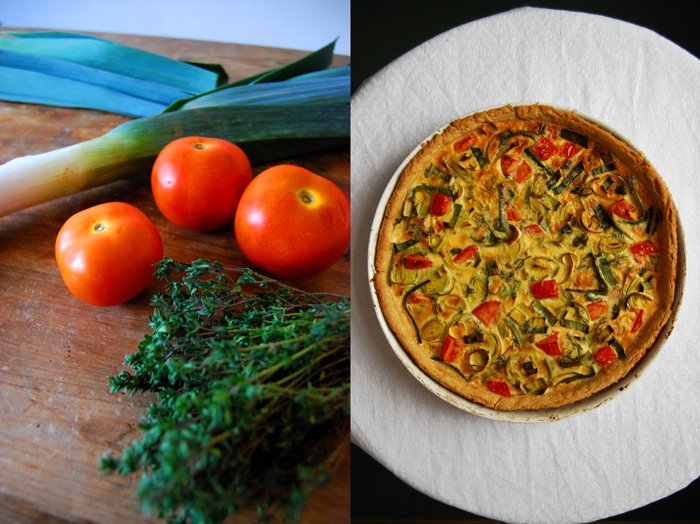
This recipe has been with me for a very long time. I think I cooked it for the first time nearly twenty years ago. And since then it has made lots of people very happy (including myself). My time trusted companion is a quiche with a wonderful crisp and buttery short crust base and a simple but perfect filling of leek, tomatoes and thyme. What I also like about it is that the egg and cream filling isn't as high and heavy as in many other versions of this famous French dish. There is still something light about mine.
In past years I tried out different fillings with spinach or broccoli but I still prefer the combination of leek and tomatoes. The taste is just perfect. I once covered the base with slices of pear and crumbled Stilton for a party, very nice too, and perfect finger food.

Quiche
Usually I double the amount and make two quiches, one to eat warm straight away, the other to eat cold the next day. I can't say which I prefer as the different flavours come through very strongly when the quiche has cooled down.
For one quiche you need a 27cm / 10.5" baking dish or tart pan. I use spelt flour type 630 (but you can use any other plain flour) and organic eggs.
For the short crust base
flour 250g / 8.5 ounces
butter, cold 125g / 4.5 ounces
egg, organic 1
salt 1 teaspoon
Combine the flour with the salt and cut the butter with a knife into the flour until there are just little pieces of butter left. Continue with your fingers and work the butter into the flour until combined (there shouldn't be any lumps of butter left). Add the egg and continue mixing with the hook of your mixer until you have a crumbly mixture. Form a disc, wrap in cling film and put in the freezer for 10 minutes.
For the filling
medium leek, thinly sliced, 1
tomato, cut into cubes, 1
thyme, leaves of a few sprigs
eggs, organic, 3
heavy cream 125ml
crème fraiche or sour cream 125ml
salt 1 heaping teaspoon
pepper
nutmeg, best freshly grated, a generous amount
Set your oven to 210°C / 410°F.
Mix the eggs with the heavy cream, crème fraiche, salt, pepper, nutmeg and thyme.
Roll out the dough between cling film and line your baking dish with the flat pastry. Prick it with a fork and blind-bake in the hot oven for 10 minutes. Take your baking dish out of the oven and set the temperature down to 175°C / 350°F.
Spread the leek slices and tomato cubes over your pre-baked pastry base and pour the egg / cream mixture over. Put the quiche carefully on a baking sheet in the oven and bake for about 40 minutes or until golden. Let it cool for about 10 minutes before you eat.
Bon appétit!