Crème Brûlée Tangerine Cheesecake in a Jar for Christmas
Eat In My Kitchen turned 3! So much has happened around me in the past few weeks that I forgot my blog's birthday on the 23rd November.
I usually create a recipe for this special day - at least in the past 2 years - but now we're all so busy contemplating lunch and dinner menus for December's upcoming festivities, that I decided to skip the birthday bash and move straight on to Christmas. I came up with a dessert that's delicious, gorgeous, and practical in equal measure, a crème brûlée cheesecake in a jar. Its shiny golden prettiness is the perfect finish for a festive table. You can easily bake the cake a day in advance and keep it in the fridge. Sprinkled with sugar, it only needs a few seconds under the hot flame of a blow torch before you and your guests can indulge in the sweeter things in life.
My cheesecake base is made with oat cookies (you can find a recipe for oat cookies in my book on page 234), the filling is a mixture of rich mascarpone and cream cheese refined with tangerine, cinnamon, and vanilla. You could also bake one big cake in a 20cm / 8" springform pan, but it's so much more fun to present these beautiful little jars to your friends and family.
Before you jump to the recipe, I'd like to ask you for two favours:
Food52's cookbook competition, the famous Piglet Tournament, is now open. You can nominate your favourite cookbook and I'd be jumping with joy if you consider giving your vote to the Eat In My Kitchen book. 2016 has brought many wonderful cookbooks to the shelves, but luckily you can vote for more than one book. You can find the form to nominate here, the deadline is the 30th December.
And here's my second question:It would be fantastic if you could also drop a review for my book on Amazon, here are the links:
Thank you so much! Happy 3rd Advent!! xx

Crème Brûlée Tangerine Cheesecake
You'll need 10-12 maison glass jars or ramekins for this recipe.
Serves 10-12
For the base
oat cookies 210g / 7 1/2 ounces
unsalted butter, melted and cooled, 60 / 1/4 cup
For the filling
cream cheese, at room temperature 300g /11 ounces
mascarpone, at room temperature 250g / 9 ounces
granulated sugar 100g / 1/2 cup
vanilla pod, split and scraped, 1/2
large organic eggs 3
cornstarch 1 heaping teaspoon
freshly grated tangerine zest 1 tablespoon
freshly squeezed tangerine juice 3 tablespoons
ground cinnamon 1/4 teaspoon
fine sea salt 1/8 teaspoon
For the topping
granulated sugar
tangerine zest (optional)
For the base, crush the cookies in a food processor or blender until finely ground. Transfer to a large bowl, add the melted butter, and stir until well combined. Divide the cookie mixture between the glass jars or ramekins, using the bottom of a shot glass to press it firmly and evenly into the jars, especially along the edges. Freeze for 20 minutes.
Place a deep roasting pan, large enough to fit the glass jars comfortably, on the lowest rack of the oven. Preheat the oven to 160°C / 325°F. Fill a kettle with water and bring to the boil.
For the filling, in a large bowl, use an electric mixer to beat the cream cheese, mascarpone, sugar, vanilla seeds, eggs, cornstarch, tangerine zest, tangerine juice, cinnamon, and salt until well combined.
Pour the cheesecake batter on top of the chilled cookie base and transfer the jars to the roasting pan in the oven. Slowly pour the boiling water into the roasting pan until it comes about one third to half way up the sides of the jars. Bake for about 20 minutes or until the filling is just set but still slightly wobbly in the center. Turn off the oven, leave the oven door slightly open, and let the cheesecake cool for about 5 minutes, then take the cheesecake out of the oven and let cool to room temperature. Once cool, the cheesecake can be refrigerated for 2 to 3 days. Or, you can finish the crème brûlée topping right away for serving. (Don't refrigerate the cheesecake when it's still warm, or the base will turn soggy.)
For the topping, sprinkle a generous amount of sugar on top of the cheesecakes, about 1 teaspoon for each jar. Using a blow torch, burn the sugar until golden brown. Let it cool for a couple minutes until the burnt sugar is hard, sprinkle with tangerine zest, and serve immediately.


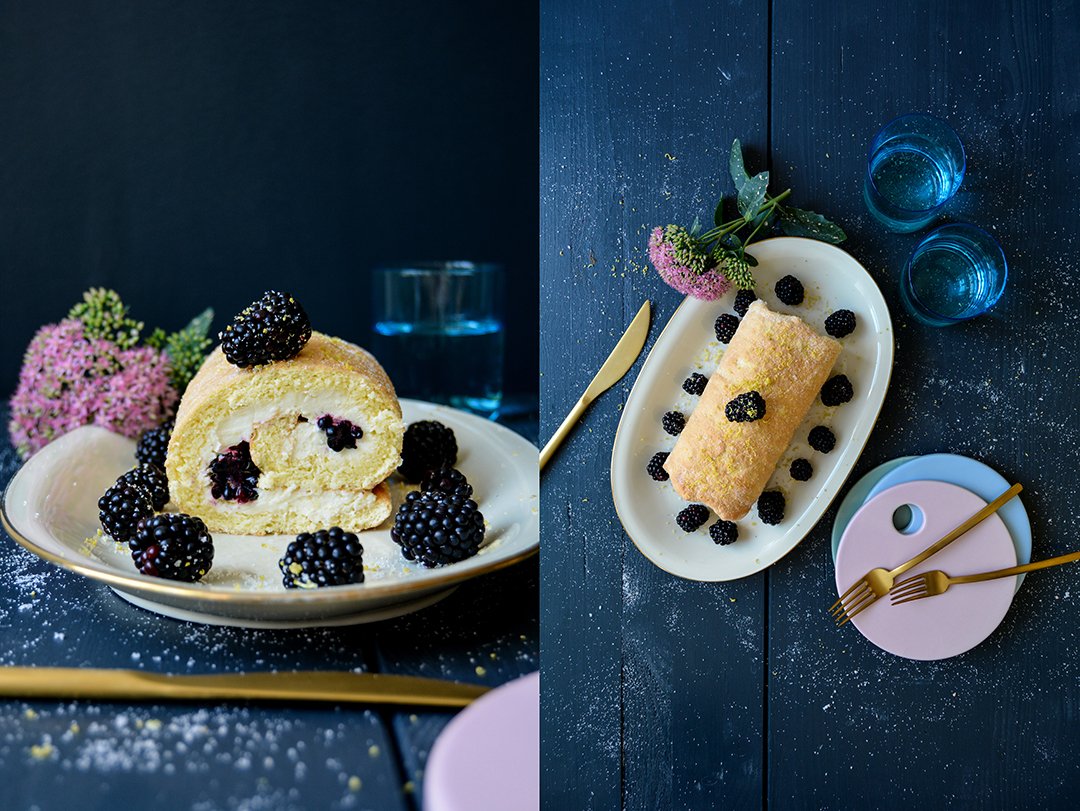
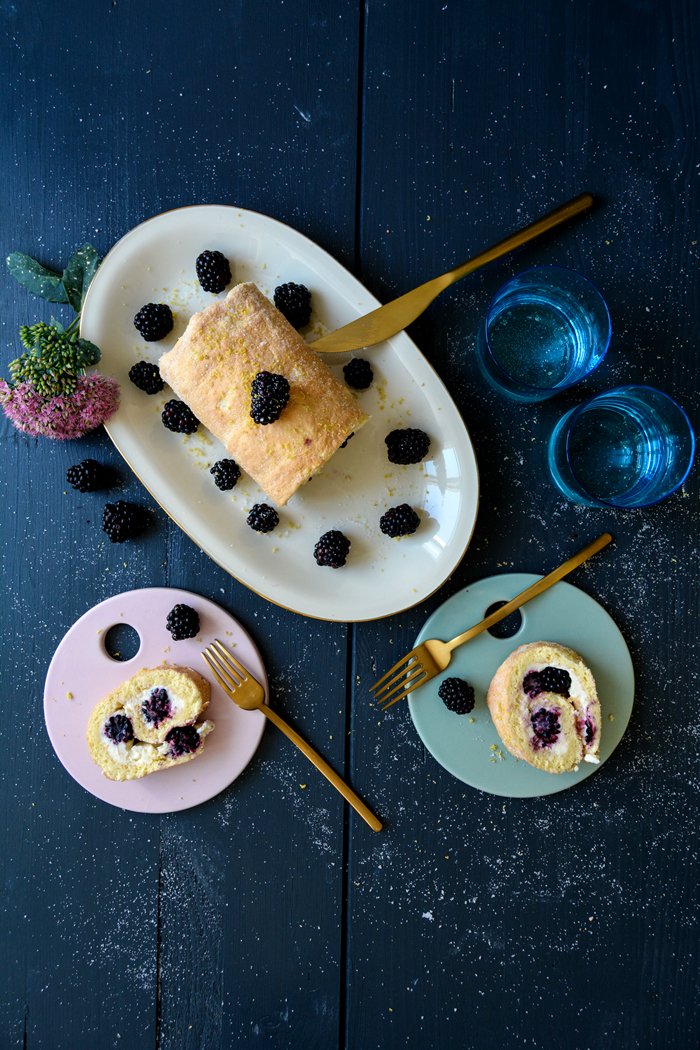
Cheesecake Swiss Roll with Mascarpone and Blackberries

Some days call for lavish teatime treats, especially when it's Sunday and I'm in the mood to spoil myself with some tasty calories. The 7th day of the week should be dedicated to rest and calm, but in my life it's also dedicated to baking. I take advantage of the fact that there are no duties and tasks waiting to be taken care of, so I can give my full attention to a quiet kitchen instead. I'm willing to share my baked treats with my loved ones, it's my kitchen credo after all, which led to my blog and my book's subtitle: To cook, to bake, to eat, and to treat. Cake always tastes better when you share it, but the process of baking it gives me some time just for myself.
So this week I got hooked on the idea of combining a swiss roll with New York cheesecake - without the cookie base obviously. I was after a spongy roll, fluffy but structured, and I know that my beloved swiss roll recipe manages to satisfy this demand with ease. It's been with me for two decades, I trust this roll. My usual filling would be whipped cream, as in my Blueberry Lemon Swiss Roll recipe. But it seemed too light for my current mood, I wanted creamy richness, a denser filling, with cream cheese and mascarpone - and a few plump blackberries - for my cheesecake swiss roll. My body's ready for the next season and it doesn't care that I'll be in Malta again in a few weeks, sitting on the beach in a bikini under the burning sun. I'm set for autumn and my Maltese boyfriend deeply disapproves of my decision - I think every Mediterranean man or woman suffers when summer comes to an end. But for a northern girl, the next season promises coziness and hearty treats, lonely walks in golden forests, and a chilled breeze whistling through the streets.
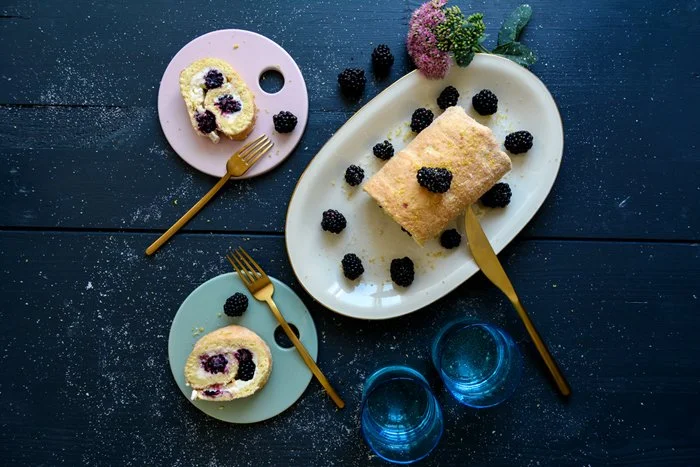
Cheesecake Swiss Roll with Mascarpone and Blackberries
Makes a 15cm / 6″ swiss roll
For the swiss roll
organic eggs, separated, 2
a pinch of salt
granulated sugar 40g/ 1/4 cup, plus 3 tablespoons for sprinkling
plain flour 35g / 1/4 cup
cornstarch 15g / 2 tablespoons
For the filling
mascarpone 110g / 4 ounces
cream cheese 110g / 4 ounces
granulated sugar 2 tablespoons
lemon zest 1 teaspoon, plus 1 teaspoon for sprinkling
freshly squeezed lemon juice 1 tablespoon
blackberries 125g / 4 1/2 ounces
Set the oven to 220°C / 425°F (conventional setting) and line a baking sheet with parchment paper.
In a large bowl, whisk the egg whites with a pinch of salt for a few seconds before adding half the sugar, continue beating until stiff.
In a second large bowl, mix the egg yolks and the remaining sugar with an electric mixer until thick and creamy. Using a wooden spoon, fold the egg white into the egg yolks. Sieve and combine the flour and cornstarch and fold gently into the egg mixture. Spread the dough on the lined baking sheet, covering a rectangle of roughly 15 x 30cm / 6 x 12″ and bake on the middle rack of the oven for about 6 minutes or until golden and spongy.
Sprinkle a kitchen towel with 2 tablespoons of sugar and flip the warm sponge onto the towel. Peel off the parchment paper and carefully roll the sponge with the towel, the roll should be 15cm / 6" long. Leave it rolled up until cool.
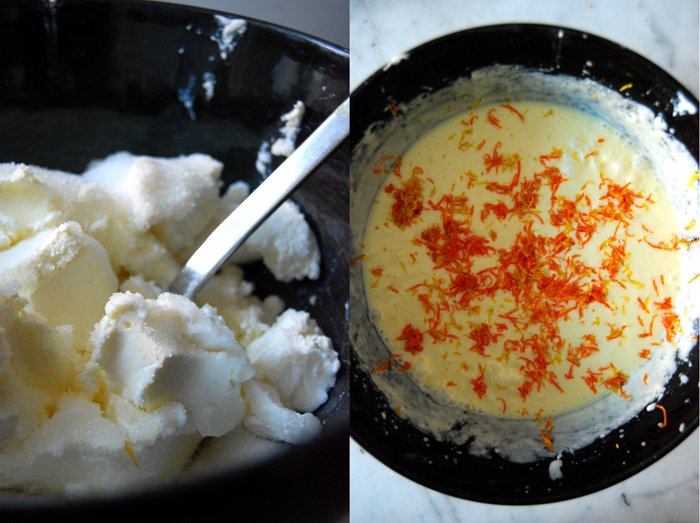
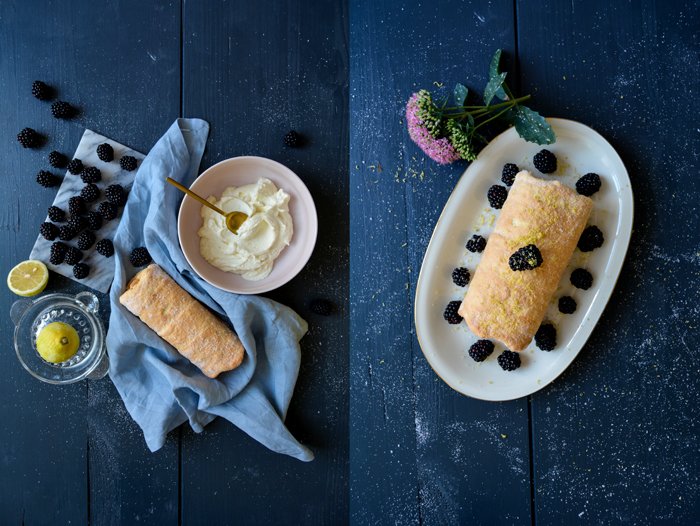
For the filling, in a medium bowl, whip the mascarpone, cream cheese, sugar, lemon zest and juice until creamy.
When the sponge is cool, unwind the sponge roll and spread the filling on top, leave a small rim (see picture below). Cover with the blackberries and roll it up tightly. Sprinkle with the remaining 1 tablespoon of sugar and a little lemon zest. Serve immediately or keep in the fridge before serving.


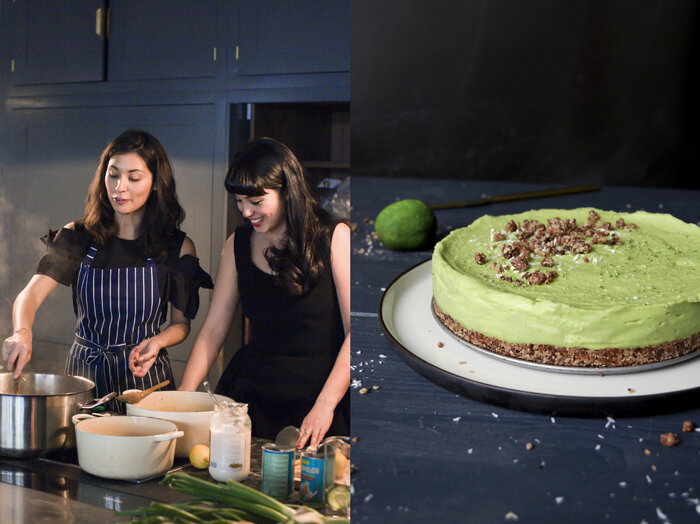
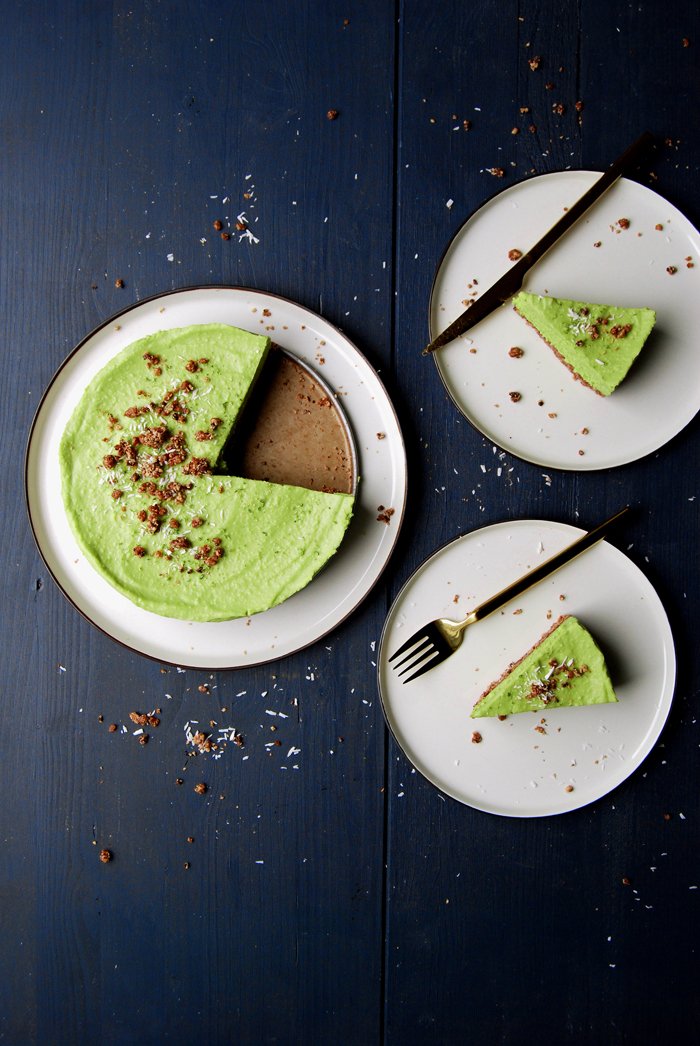
meet in your kitchen | Hemsley + Hemsley's Raw Avocado Lime Cheesecake

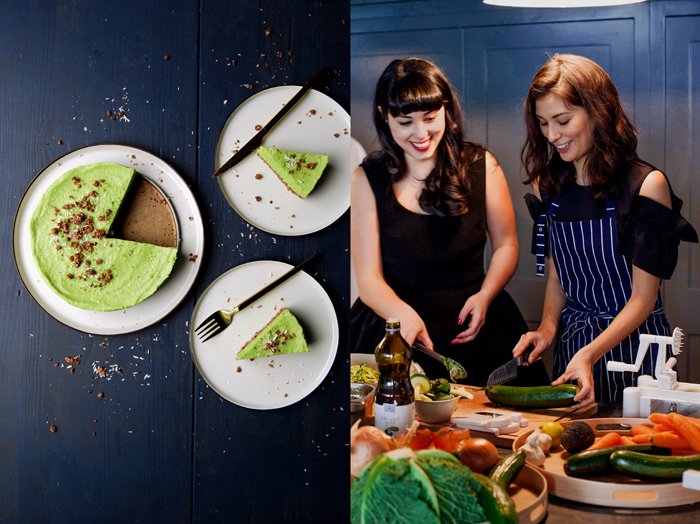
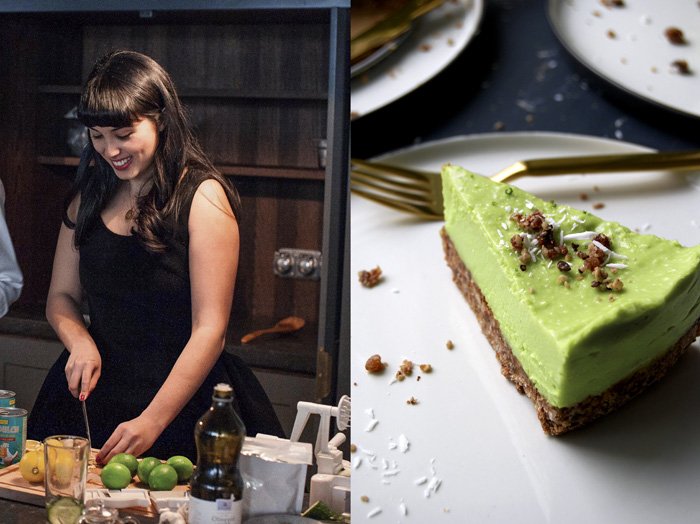
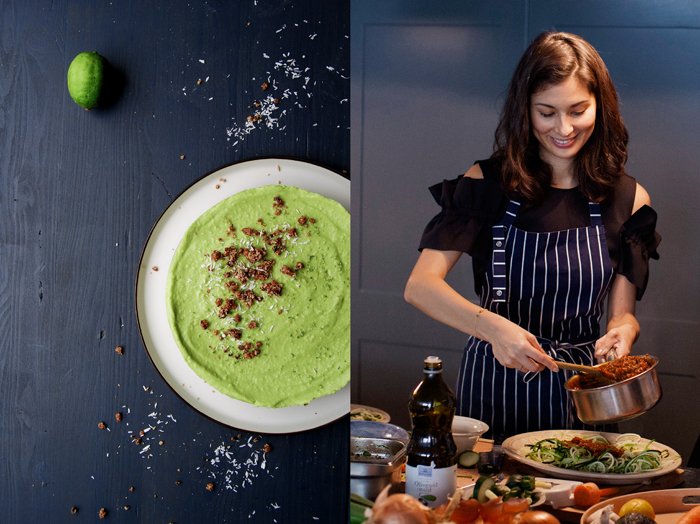
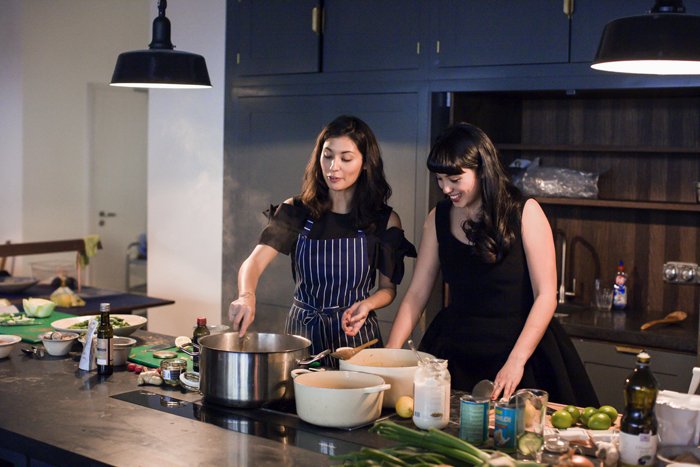
These two ladies are a true force of nature! If you ever have the chance to be in a room together with the charmingly gorgeous Jasmine and Melissa Hemsley, prepare yourself for a wave of energy. I met the two sisters at one of their delicious workshops at The Store Kitchen at Soho House in Berlin and I was equally impressed by their natural beauty and their skills in the kitchen. With infectious smiles and their experienced hands at the chopping block, they prepared one scrumptious treat after the other: smoothies, salads, courgetti with bolognese (the sisters' famous zucchini spaghetti) and a divine raw avocado cheesecake dessert. I sat, listened and savoured!
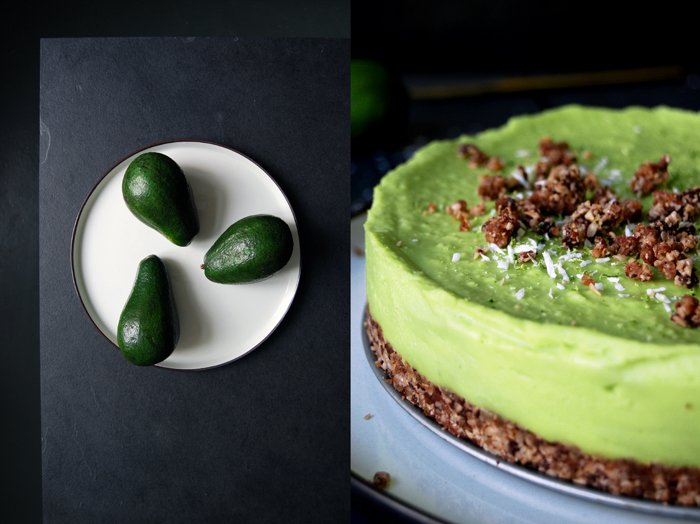
The Hemsley sisters started their careers in different fields before they took over the food world with their concept of no gluten, no grains and no sugar but with lots of taste and pleasure. While Jasmine worked as a model for over 15 years her younger sister Melissa traveled the world as a fashion consultant. Due to their busy lifestyles both women had a strong interest in a diet that would do their bodies good rather than stressing them even more. Their holistic concept convinced many food lovers, it started off with friends who asked for consultancy and cooking classes before the sister's blog and family business Hemsley + Hemsley was born in 2010. As contributors for Vogue UK and The Guardian, the two recipe developers, cooks and food consultants also became responsible for the catering of several celebrities. Nothing could stop them anymore, their popularity grew rapidly. Their first cookbook, The Art of Eating Well published in fall 2014, is a bestseller packed with lots of inspiring recipes and we chose one of them to share with you: the addictive Avocado Lime Cheesecake, raw, vegan and unbelievably delicious!
The pictures of the Hemsley sisters and the avocado dessert in glasses (served at Soho House Berlin) are by Nick Hopper.
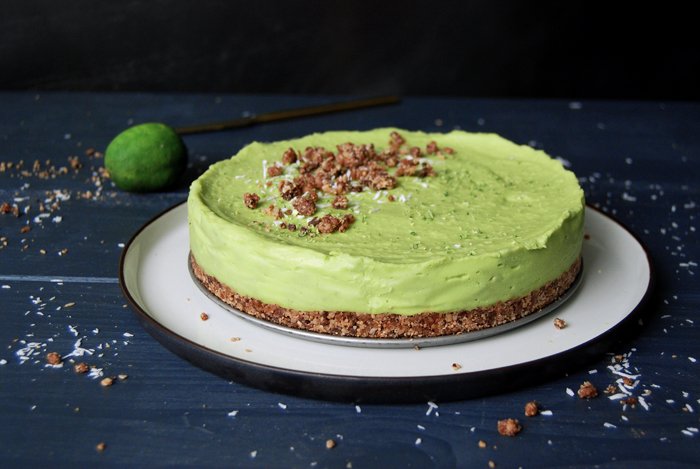
Avocado Lime Cheesecake
Serves 12
For the base
pecans (or sunflower seeds) 125g /4 1/2oz
desiccated coconut 45g / 1 1/2oz
cacao nibs 70g / 2 1/2oz
pitted dates (approx. 32) 185g / 6 1/2oz
coconut oil, melted and at room temperature, 3 tablespoons
For the filling
avocado flesh (from approx. 5 medium-large avocados) 560g / 1 pound 2 1/2oz
lime juice (roughly 8 to 10 limes) 200ml / 7fl oz (I used 100ml / 3 1/2fl oz)
coconut oil, melted and at room temperature, 175ml / 6fl oz
lime zest 1 tsp
honey 190g / 6 3/4oz (I used 100g / 3 1/2oz)
Preheat the oven to 150°C/300°F/gas mark 2.
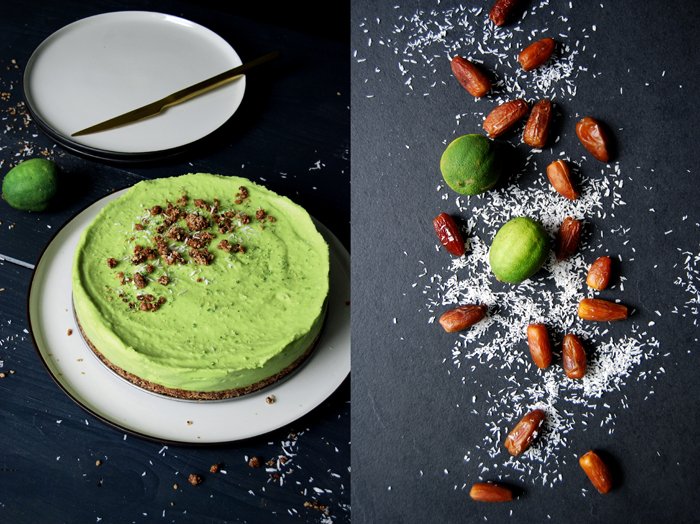
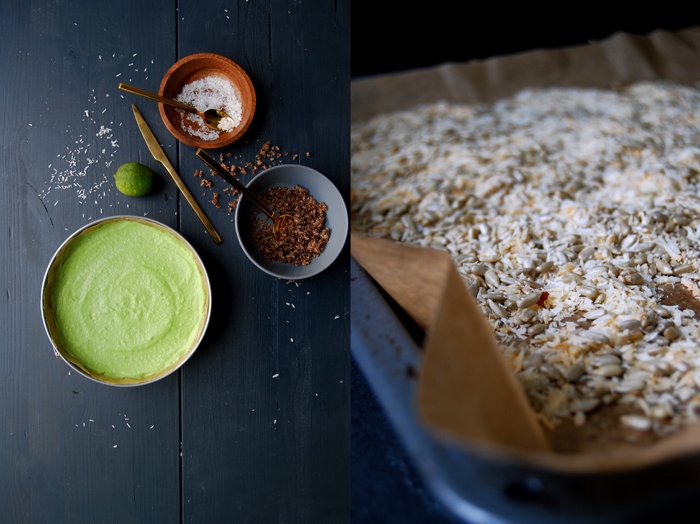
Place the pecans and desiccated coconut on a baking-tray lined with baking-paper. Place in the oven for seven to eight minutes, until toasted. Transfer the pecans to a food processor and add the rest of the base ingredients. Blend until the mixture is crumbly (don't let it go completely smooth) and holds together when pinched.
Line the base and sides of an 18cm (7") ( mine was 20cm / 8") round cake tin with baking-paper and tip in the base mixture. Press this down firmly and evenly with the back of a spoon, ensuring it is neat and flat where it meets the tin. Transfer the tin to the fridge while you prepare the filling.
Place all of the ingredients for the filling into the food processor and blend until the mixture is completely smooth and silky. Check for taste – add more lime juice, zest or honey according to preference, but it's best to keep this deliciously tangy. Remove the cake tin from the fridge and pour the filling over the base. Cover the tin, using a plate or cling film, and return it to the fridge for a few hours or overnight.
To serve, run a knife between the tin and the cake and carefully push the base up from the bottom. Transfer to a plate and serve immediately.
Before you started your family business Hemsley + Hemsley in 2010, you worked as a model and as a fashion/ brand manager. How did this transition into the food business come about? What moved you to make this step?
Jasmine: Yes, I was working full-time as a model from the age of 19. I was fascinated by the many different ideas surrounding health and nutrition, from paleo to low-fat, juice cleansing and many other ideologies, and began to develop and grow the Hemsley + Hemsley way of eating through research, study and self-practice whilst sharing tips and tricks with friends and family. Mel, who worked as a footwear brand manager and later in marketing and promotion for gastropubs and bars, caught the cooking bug and helped spread the word.
Melissa: We didn’t intentionally ‘launch’ the business - it came about organically. As people reached out to us for help with their digestion and relationship with food, we suddenly found ourselves working as wellness coaches and private chefs. Providing a bespoke service for these clients, we’d clear out their cupboards, fill up their fridges and freezers and show them how to cook our recipes. The results where so positive, they felt better - happier, healthier and more energized. Back then we didn’t have a name, so our clients called us their ‘food fairies’ and from the first week we had a waiting list as everybody recommended us to their friends, families and colleagues.
You seem to complement each others strengths perfectly. What are the advantages of working so closely with your sister? What are your roles, how do you deal with disagreements between the two of you when it comes to your business?
Jasmine: We always said it would be great to have a family business, making the food we all want to eat, food that keeps us happy and energised and be able to share it with everybody. The business has evolved naturally and we now work in areas that we love the most. When it comes to recipes, my sweet tooth means I usually mastermind the puddings and desserts, while Mel is the queen of knock-out curries and one pot dishes. My partner Nick is the third wheel to Hemsley + Hemsley - the man behind the scenes taking all the photos and running the back end of the business.
Melissa: As with all small businesses, you have to roll up your sleeves and get involved. Luckily everyday is different at H+H - cooking, meetings, recipe developments, lots of room for creativity and also plenty of time to work alone and remotely from laptops so we aren’t on each others space the whole time. And when it comes back to just being family we find it remarkably easy to switch off!
Who is your biggest inspiration in the kitchen? What are your culinary roots?
Jasmine: We’ve both always loved good home-cooked food from early on thanks to our Filipina mum being wonderful and inspiring in the kitchen. She would make use of everything we had - definitely where our frugal streak comes from - and each meal was made with great care and attention.
Melissa: Growing up, the more we tuned into how our bodies were really feeling, the more we realised the relationship between food and good health. Being the youngest I lucked out as mum and Jasmine used to do all the cooking and all I had to do was lay the table. As I got older I realised that it was so hard to eat nourishing foods without truly taking charge of it yourself. I realised that if I wanted to eat the same good food I’d have to start putting into practise what I’d absorbed over the years of being around mum, Jaz and all our aunties!
You're big fans of bone broth, how did this start and why does it have such an important role in your food concept?
Bone broth will always be at the heart of our philosophy and intrinsic to everything we do. We love it because it’s a champion all rounder, packed with protein, vitamins, minerals, collagen and keratin - all the building blocks for healthy digestion and glowing skin. Easy to make, frugal and tasty, this ‘liquid gold’ is supremely versatile and a must in anyone's recipe repertoire! Wellness begins from within and good digestion is key - bone broth is an easy to digest source of protein for very little money. At home, we always have broth on the go or a batch in the freezer. You can throw any leftovers in like shredded chicken, roast veggies, yesterday’s salad and swirl through some pesto or miso for a quick soup. We also use it to steam up some quinoa, as the base for sauces, soups, stews and to simply drink it warm from a mug.
How did you develop your holistic food concept, did you work together with food/ health consultants or did you follow your own experiences?
We’ve been developing and growing the Hemsley + Hemsley way of eating for almost ten years through research, study and self-practice. We really tuned in and focused on what made us feel good despite whatever was going on in the media about what you should and shouldn’t be eating. Our philosophy and nutritional ideals take you back to basics with a focus on provenance and digestion. People love our style of cooking and are always intrigued as to how food this tasty could possibly be good for you.
How do you develop new recipes?
We are constantly inspired by our travels when experiencing new cuisines as well as by our readers and client’s who often request Hemsley + Hemsley reworked versions of their favourite foods.
What was the first dish you cooked on your own, what is your first cooking memory?
Jasmine: My mum would make a big soup instead of a Sunday roast, using up all the leftovers from the fridge. I started off cooking one-pot dishes and they are still a Hemsley + Hemsley staple now - a lot of our recipes are simple, quick and frugal dishes which begin with a base of homemade bone broth and can be adapted and added to in order to make use of leftovers.
Melissa: I remember making the perfect creamy scrambled eggs with my mum...lots of butter and a slow-cook.
What are your favourite places to buy and enjoy food in London?
Jasmine: We’ve just discovered Sea Containers (Seamus Mullen) on the Southbank which is stunningly beautiful and the food is incredible with views of the Thames. While we’re over that way, we love Borough Market for fresh produce and The Ginger Pig for delicious, organic meat.
Melissa: For eating out I love Brunswick House in Vauxhall, Elliots in Borough Market, Rochelle’s Canteen in Shoreditch (it’s hidden from the street in a converted school) and Paradise in Kensal Rise (where I used to work).
You shared your Avocado Lime Cheesecake recipe on eat in my kitchen, how did you develop this delicious vegan cheesecake?
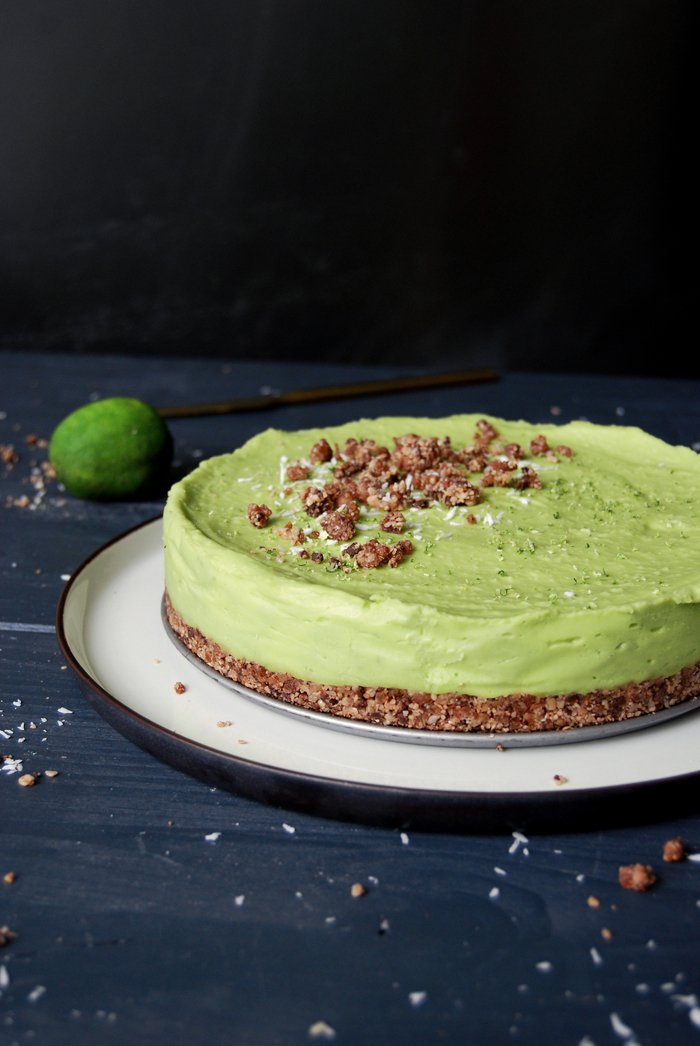
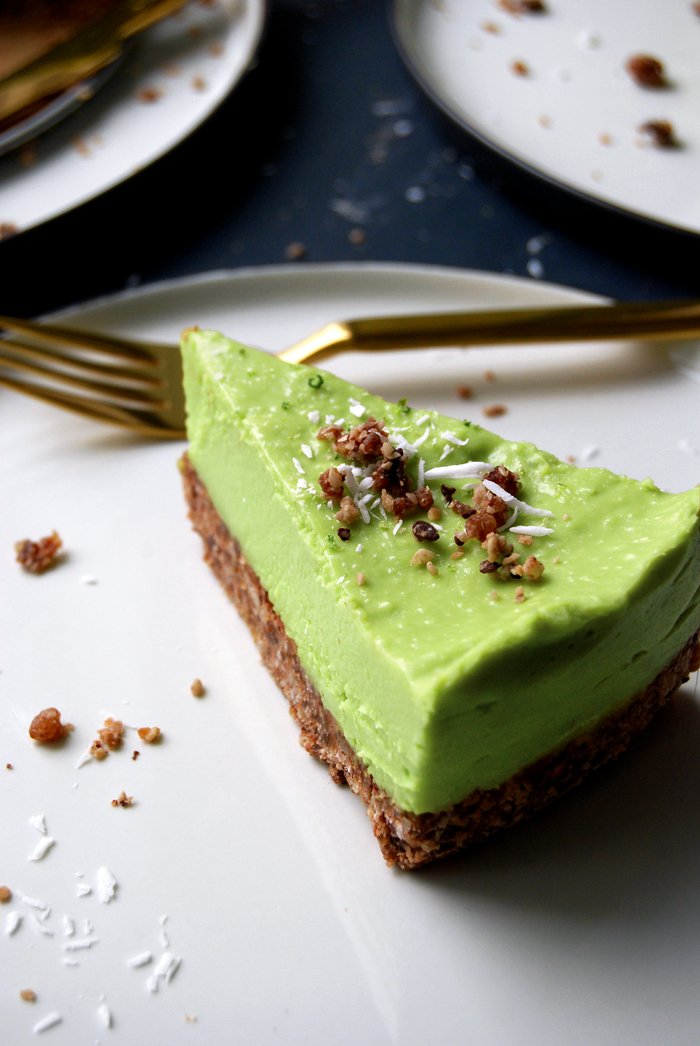
People always tell us that our recipes don’t taste healthy and we pride ourselves on coming up with upgraded versions of takeaways, comfort foods and the nostalgia-inducing dishes that our clients, friends, families and followers love best from their childhoods. Keeping texture and flavour in mind, we made clever use of whole foods such as skin-boosting avocado and zesty lime to reinvent this classic and give it the Hemsley + Hemsley stamp of approval. The Avocado Lime Cheesecake is a raw, New York-style cheesecake packed full of goodness. The smooth creamy lime sits atop a nutty, chocolate base with a hint of coconut. It’s tasty, filling and good for you!
If you could choose one person to cook a meal for you, who and what would it be?
Jasmine: Keith Floyd, cooking up a Bouillabaisse in the South of France and enjoying it with plenty of wine in the sunshine. I bet it’d be an afternoon to remember!
Melissa: Rather than have her cook for me, I’d want to cook for the legendary Madhur Jaffrey, probably something like our Chicken Curry and Cauliflower Rice so that she could critique it!
You're going to have ten friends over for a spontaneous dinner, what will be on the table?
Don’t be fooled, these 3 course menus are so easy! And people always tell us they cant believe that it’s healthy food when it tastes that good:
Jasmine: Starter: Baked Chicken Liver Mousse and Carrot and Flax Crackers Main Course: Fish Pie with Celeriac Mash and a side of Garlic Lemon Green Beans Dessert: Instant Berry and Coconut Ice Cream
Melissa: Starter: Cucumber Maki Crab Rolls Main Course: Courgette and Aubergine Curry and a side of Cauliflower Rice Dessert: Pistachio, Fig and Goat’s Cheese Trifle
What was your childhood's culinary favourite and what is it now?
Jasmine: I’ve always had a sweet tooth so it would have to be chocolate brownies. I almost cried the first day I made our Black Bean Brownies and they came out perfectly - fudgy, rich and delicious. They’re now one of our most popular sweet treats from our book The Art of Eating Well; and best of all, they’re free from any processed nasties!
Melissa: Spaghetti Bolognese was one of my favourites growing up and it still is now, except we call it Beef Ragu with Courgetti. Made with the Hemsley Spiralizer, we enjoy the sauce atop a bed of spiralized courgette which we call courgetti and fill the sauce with extra grated carrot and courgette as well as highly nutritious chicken livers if we have any. It’s hearty, warming comfort food that’s perfect with a glass of red wine.
Do you prefer to cook on your own or together with others?
Jasmine: I love to cook with family and friends, it’s always a great way to catch-up and I love seeing how other people do things in the kitchen.
Melissa: I like to have the music on and cook by myself sometimes, as it’s one of the ways I love to unwind, just in the kitchen at home. Saying that, I also love getting together with friends over a glass of wine and have us all chopping away in the kitchen together.
Which meals do you prefer, improvised or planned?
Jasmine: I’m the queen of leftovers so I love getting experimental - it’s a great way to discover new recipes and more often than not you’ll be pleasantly surprised with what you can rustle up.
Melissa: The spontaneous ones that come out of leftovers in the fridge, they’re always the best!
Which meal would you never cook again?
Jasmine: Lactose fermented herring - yes I tried to make fermented fish myself! It’s not something I will be repeating anytime soon, I think I’ll stick to sauerkraut, kimchi and other fermented veg to get my probiotic fix!
Melissa: I can’t think of any one but have definitely recipe tested recipes before that ended up being really complicated so I wouldn’t bother with those again, no matter how tasty. We spend a lot of time experimenting while recipe developing to come up with meals that are simple, delicious and nutritious, so if it’s complicated, it doesn’t make the cut.
Thank you Jasmine and Melissa!


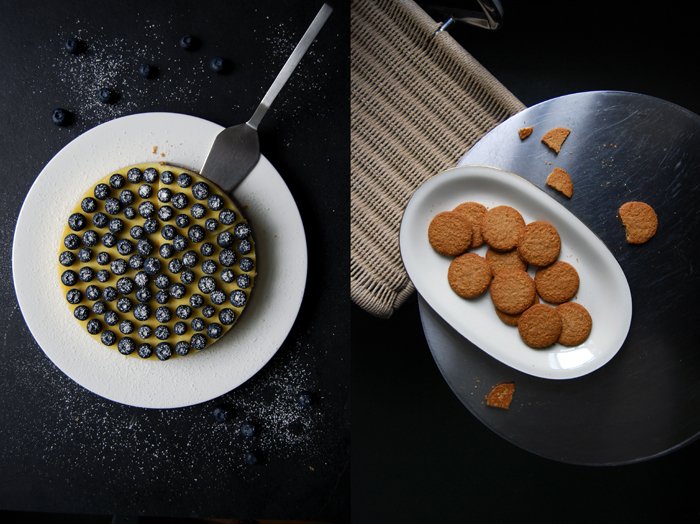
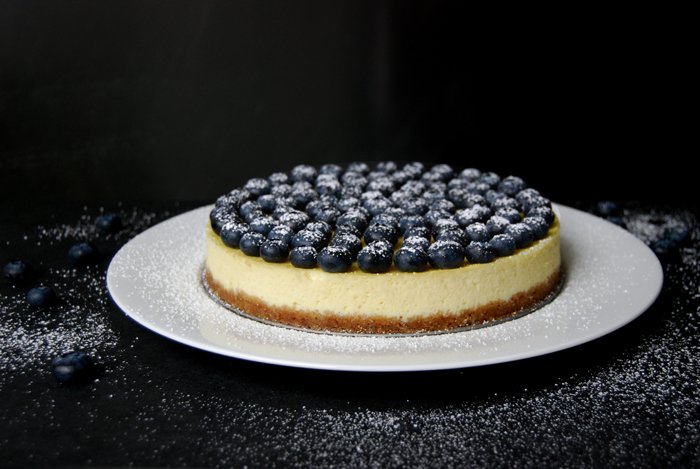
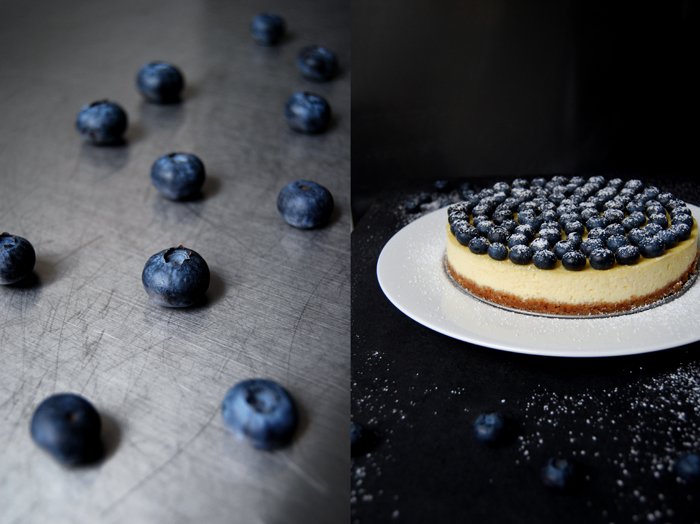
Blueberry Ricotta Cheesecake
My last cheesecake creation is definitely too long ago, it was a dense treat with lots of orange and lemon flavours, rich in cream cheese with a little addition of Mediterranean ricotta. It was more like a classic New York cheesecake and was so good that for more than a year I haven't bothered to come up with a new recipe. I baked it all winter, its citrusy richness is just perfect for a cosy tea time, and then in summer, I moved on to our old family recipe for the German version of this cake. German Käsekuchen is made with quark and stiff egg whites which gives it a lighter, fluffier texture, it's delicious with fresh berries for a Sunday morning brunch on the balcony!
Despite the wintery temperatures, my mood has already moved on to the next season, spring, sunshine and fragrant flowers. This calls for a new cheesecake recipe!
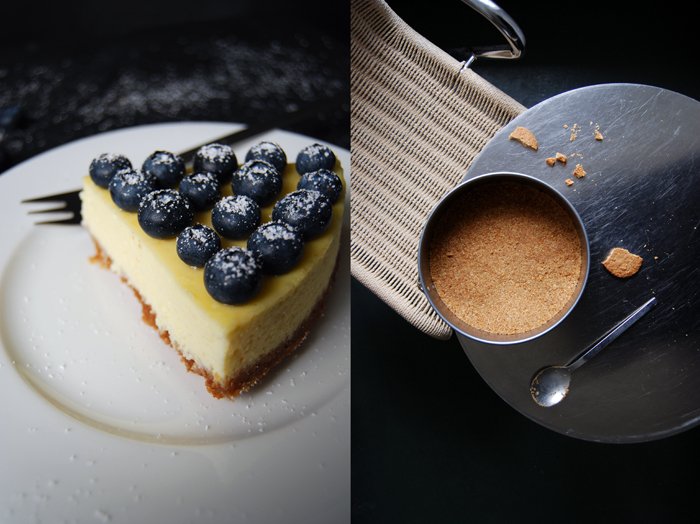
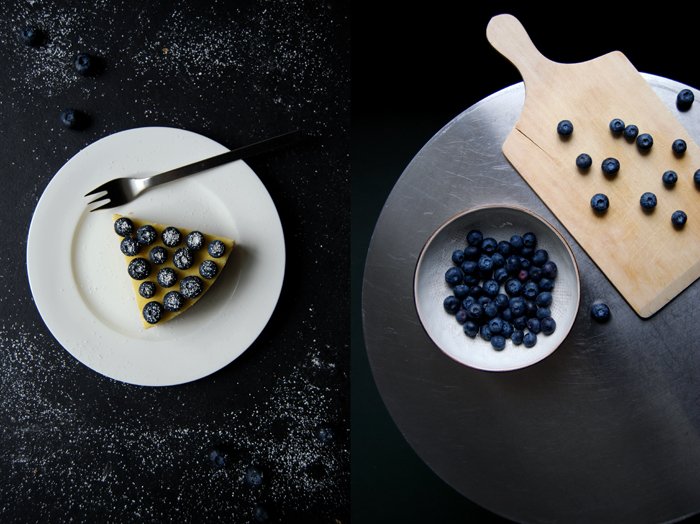
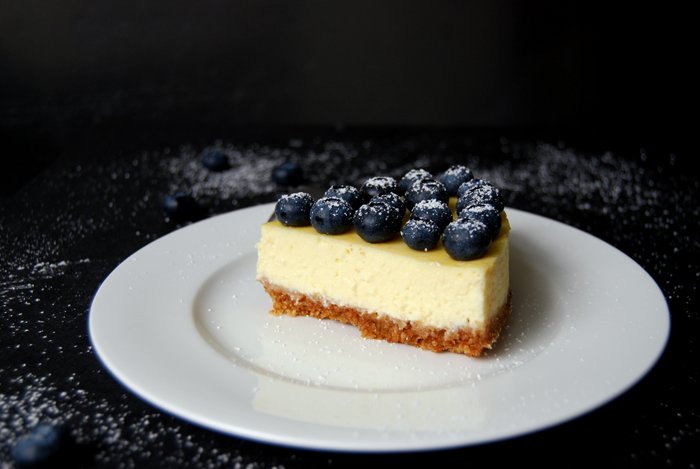
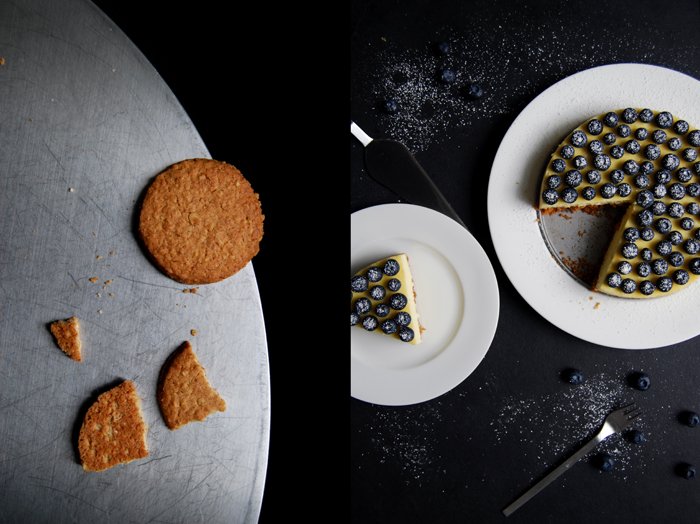
I was after a lighter version so a good amount of the usual cream cheese had to make way for ricotta. For the first time in my life I looked at the amount of fat in both dairy products, something I'm not very interested in most of the time as I want to enjoy my food and not feel guilty. The Italian cheese is definitely the winner (in a good way). It still creates a creamy texture but it's not as filling. I refined the cheesecake mixture with lots of lemon juice and zest and baked it on top of a base of buttery digestive cookies. A fruity topping brought a spring feeling to the recipe, I brushed the cake with a thin layer of apricot jam and spread lots of crisp blueberries on top. It was amazing, one bite after the other was pure bliss!
Blueberry Ricotta Cheesecake
For a 20.5cm / 8″ springform pan you need
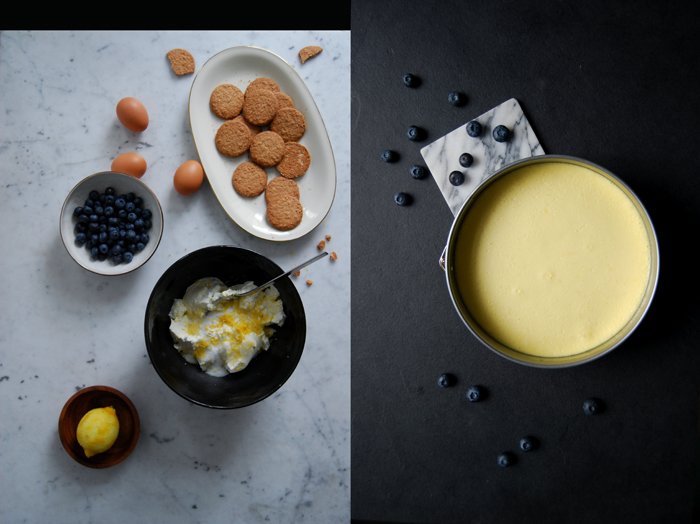
digestive cookies (Graham crackers) 210g / 7.5 ounces
butter, melted, 70g / 2.5 ounces
ricotta, at room temperature, 250g / 9 ounces
cream cheese, at room temperature, 300g / 10.5 ounces
granulated sugar 100g / 3.5 ounces
vanilla pod, scraped, 1/4
organic eggs 3
cornstarch 1 teaspoon
zest of 1 large lemon
juice of 1 lemon (4 tablespoons)
a pinch of salt
fresh blueberries about 200g / 7 ounces, for the topping
apricot jam 2 tablespoons, for the topping
water 2 tablespoons, for the topping
icing sugar, for the topping
Crush the cookies in a blender until very fine, or in a plastic bag, and mix with the melted butter until combined. Press the mixture into the springform pan and put in the freezer for 15 minutes.
Set the oven to 165°C / 330°F and put a deep tray or roasting tin in the oven on the lowest position. Boil water in a kettle.
Mix the ricotta, cream cheese, sugar, vanilla, eggs, cornstarch, lemon juice, zest and salt with an electric mixer until well combined.
Take the springform pan out of the freezer and wrap it in aluminium foil twice so that the bottom and sides are well covered to protect the cheesecake from the water while it's baking. Pour the cheesecake mixture on top of the hardened crumbs and place the tin carefully into the tray in the oven. Fill the tray with the boiling water from your kettle. The water should come half way up the wrapped springform pan. Bake for 50 minutes, switch off the oven, open the door a little bit and leave the cake in the oven for about 15 minutes. Take the cheesecake out of the oven, take off the foil but leave the cake in the springform pan. When the cake is completely cool, chill it in the fridge (or outside in winter) for about an hour.
In a saucepan, bring the jam and water to the boil and cook for about 30 seconds, push through a sieve and brush on the cake. Spread the berries evenly on top of the cake and sprinkle with icing sugar before serving.


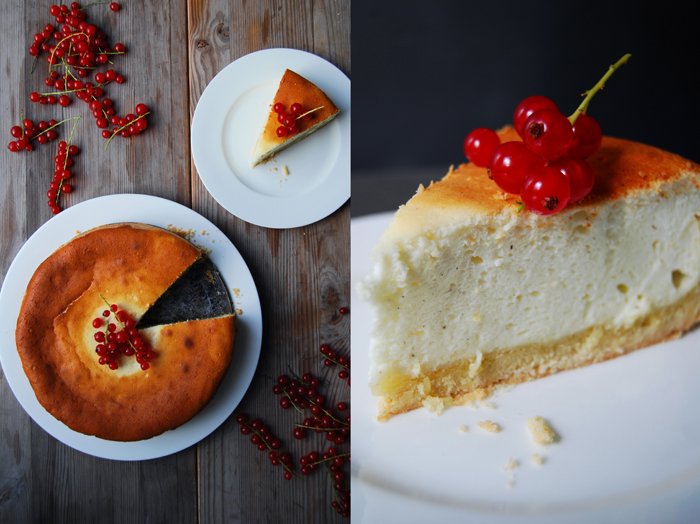
My German Cheesecake with Red Currants
This cheesecake calls for Quark, the famous German cheese which is neither like ricotta, nor cottage cheese or fromage blanc although it's often compared to them. Quark is unique, it's soft, white and fresh with a slightly sour taste, it feels a bit more dry and thicker than yoghurt and although the texture is similar to ricotta it's less heavy. Quark is great for cheesecakes, strudel or Danish pastry or as a savory dip on dark bread, mixed with linseed oil and fresh radish or cucumber. I also use it for my Tzatziki although my Greek-German brother in law doesn't agree on that at all, but he still loves it when I make it for him! I will share that recipe with you next week, then you can judge yourself!
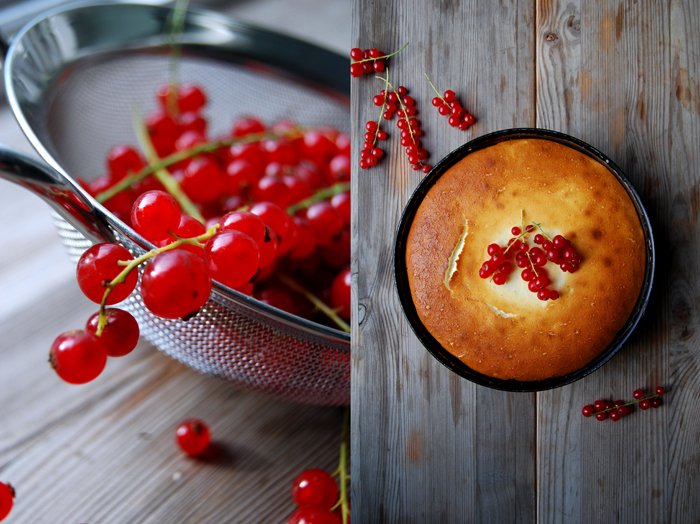
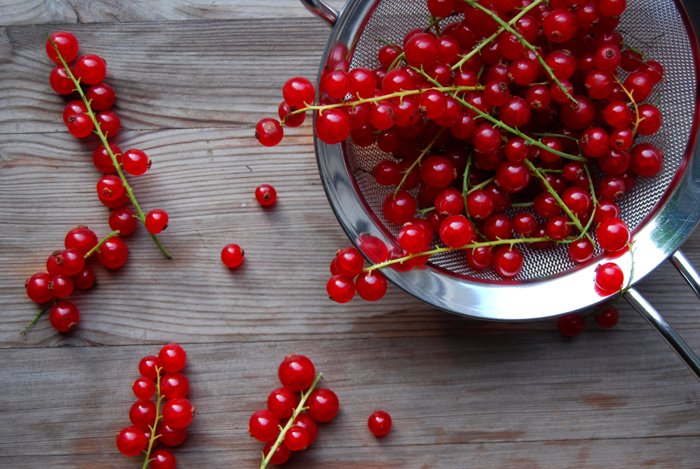
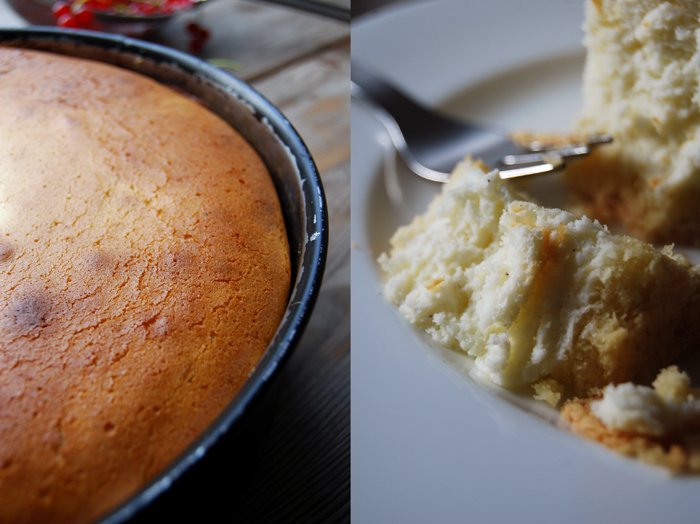
Back to the sweets, this recipe has been with me for as long as I can remember. My mother used to bake it for us, and I still eat it as passionately as I did then. This cake isn't as heavy as a New York cheesecake, the base is made of a crumbly shortcrust and the topping is fluffy, light and lemony. Sometimes I add raisins soaked in brandy but this has to wait for now, it will come later when it gets a bit colder. For now, I keep it fresh and add a few sweet and sour red currants on top.
I know that in some places of the world it's hard or almost impossible to get quark and although I try to write about recipes with ingredients that are easily accessible, there is no alternative for this fresh cheese. You can't use ricotta (at least I've never tried it with this recope) or cream cheese, you just get this fluffy cheesecake result when you use quark.

German Cheesecake with Red Currants
This recipe is measured for a 30cm / 12" springform pan. The one that I use is 26cm / 10", so I bake some of the leftover cheese filling in a small baking dish and scope it out with a spoon when it's still warm and fresh out of the oven, it's delicious!
For the topping
red currants, a big handful
For the short crust base
plain flour 250g / 9 ounces
granulated sugar 50g / 2 ounces
a pinch of salt
cold butter 125g / 4.5 ounces
organic egg 1
Combine the flour with the sugar and salt. Cut the butter into the flour with a knife until there are just little pieces of butter left. Continue with your fingers and work the butter into the flour until combined (there shouldn’t be any lumps of butter left). Add the egg and continue mixing with the hooks of your mixer until you have a crumbly mixture. Form a ball, wrap in cling film and put in the freezer for 10 minutes.
Set the oven to 200°C / 390°F top/ bottom heat.
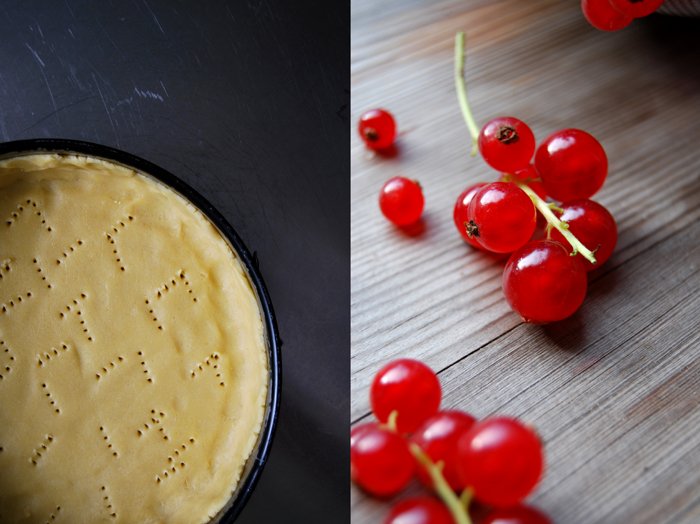
Roll out the dough between cling film, big enough to come up 2/3 of the rim of the springform pan. Line the pan with the flat pastry, prick it with a fork and blind-bake in the hot oven for 10-12 minutes or until golden.
For the cheese topping
Quark (low fat) 750g / 26.5 ounces
organic eggs 5
cornstarch 80g / 3 ounces
baking powder 1 teaspoon
granulated sugar 150g / 5.5 ounces
milk 125ml / 4.5 ounces
zest of 1 lemon
a pinch of fresh vanilla
Turn the oven down to 175°C / 350°F.
Beat the egg whites with a pinch of salt for a few seconds, add 50g of sugar and continue beating until stiff.
Mix the Quark, egg yolks, cornstarch, baking powder, 100g / 3.5 ounces of sugar, the vanilla and lemon zest until well combined and creamy. Mix in the milk and gently fold in the stiff egg whites with a wooden spoon.
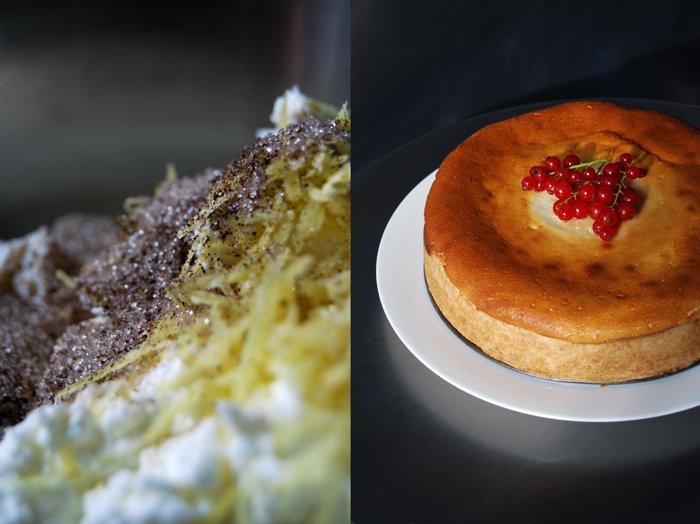
Fill the cheese mixture in the springform pan on top of the baked short crust, if there's too much of it fill the remaining mixture into a separate baking dish. Bake for 60 minutes or until the top is golden brown. Let it cool in the springform for 10 minutes before you take it out. Serve warm or cold with red currants.

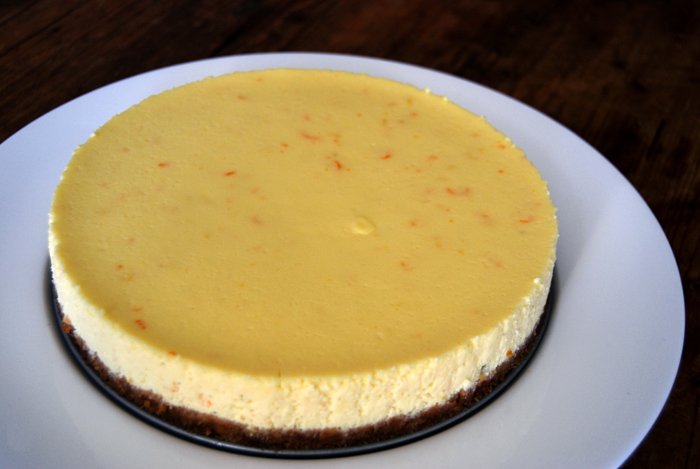
Orange Cheesecake

The first time I had New York cheesecake is quite a while ago - it was love at first sight! When I was fourteen I traveled to New York and Canada with a friend of mine and her family. As soon as I took my first bite I was hooked and during the following three weeks of our holiday I don't believe I left out a single chance to get a piece of cheesecake, every day, at every restaurant we went to. I became a true cheesecake specialist!
Now, when I bake my own, I'm always reminded of that trip and the excitements of being a traveling teenager. Over the years I tried out many cheesecake recipes and developed my own favourite with orange zest and juice and cream cheese mixed with ricotta. It is still as rich and moist as the traditional version, the citrus flavour just adds a fresh, fruity specialness and gives it a lighter feeling.
Orange Cheesecake
For a 20.5cm / 8" springform pan you need
digestive cookies, crushed very finely, 210g / 7.5 ounces
butter, melted, 70g / 2.5 ounces
cream cheese, at room temperature, 450g / 16 ounces
ricotta, at room temperature, 100g / 3.5 ounces
granulated sugar 100g / 3.5 ounces
vanilla sugar 1 teaspoon
organic eggs 3
cornstarch 1 teaspoon
zest of 1 orange
orange juice 1 tablespoon
zest of 1 large lemon
juice of 1 lemon (4 tablespoons)
a pinch of salt
Mix the crushed cookies with the melted butter until crumbly and combined and press into your springform pan. Put in the freezer for 15 minutes.
Set the oven to 165°C / 330°F and put a deep roasting tin in the oven on the lowest position. Boil water in a kettle.
Mix the cream cheese, ricotta, sugar, vanilla sugar, salt and eggs and beat until smooth. Add the cornstarch, lemon and orange zest and juice and continue mixing.
Take the baking pan out of the freezer and wrap in aluminium foil twice so that the bottom and sides are well covered to protect the cheesecake from the water. Pour the cheesecake mixture on top of the hardened crumbs and place carefully into the tin in the oven. Fill the roasting tin with the boiling water from your kettle. The water should come half way up the wrapped springform pan. Bake for 50 minutes, switch off the oven and leave the cake in the oven to cool. After around an hour you can take your cheesecake out and chill in the fridge for a couple hours.