ISCHIA / ISOLA VERDE

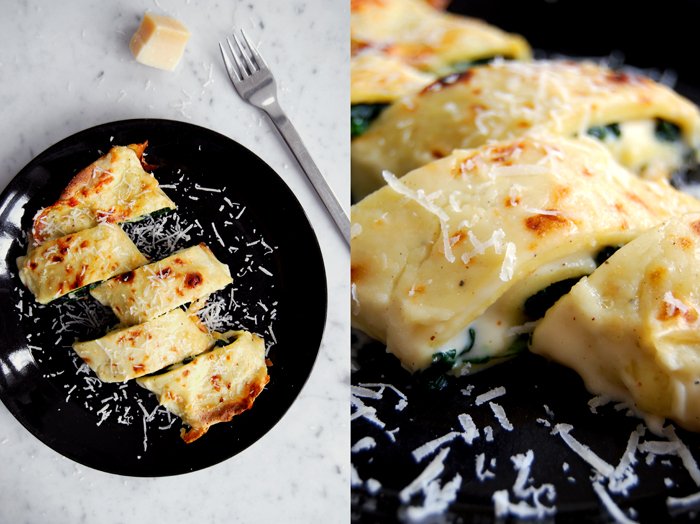
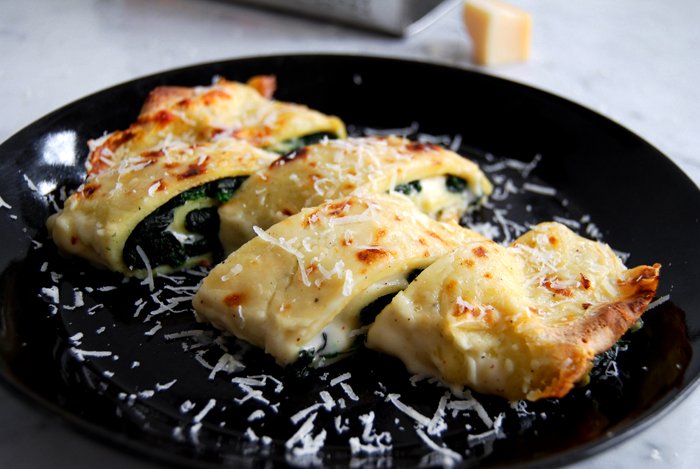
Baked Crespelle with Spinach, Béchamel and Parmesan
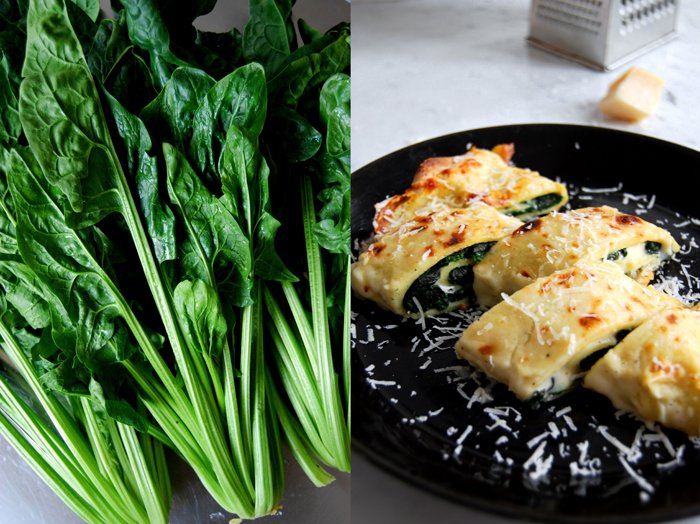
Spinach combined with a creamy sauce, be it Béchamel, ricotta or a blue cheese sauce is a delicious filling for any kind of pasta. This combination doesn't need a lot of additional spices besides salt, pepper and nutmeg. It's one of those things that's best kept simple. I love it in cannelloni or lasagna but I'm extremely fond of it in crespelle, thin Italian pancakes, wrapped around a tasty filling. You could also use a sauce Bolognese but that wouldn't give the crespelle much space. Keep it pure and you can enjoy the eggy wrap complemented with a mild filling.
When I'm in Italy I have this meal with tomato sauce poured on top, it looks like the Italian flag, green, white and red. The man of the house asked for the green and white version, just some parmesan grated on top of the rolled crespelle before they bake in the oven for 15 minutes. They turn golden, partially crisp but the spinach and Béchamel mixture keeps it moist and juicy inside. You could also replace the spinach with chard, I do that sometimes, it's similar to my Chard and Ricotta Lasagna.
Baked Crespelle with Spinach, Béchamel and Parmesan
For 4 filled crespelle you need
spinach, rinsed, without stems, 350g / 12.5 ounces
fresh Parmesan, grated, 80g / 3 ounces
Cook the spinach in salted water for 1-2 minutes (the thick leaved spinach needs 2 minutes), rinse with cold water for a couple seconds and drain. Chopped roughly, season it with salt, pepper and nutmeg and set aside.
For the Sauce Béchamel
milk 600ml
butter, melted, 30g / 1 ounce
plain flour 30g / 1 ounce
bay leaf 1
a pinch of nutmeg, grated
salt and pepper
Mix the milk with the nutmeg, salt and pepper. Whisk the flour into the hot butter. Bring the milk to the boil and whisk into the roux. Continue mixing until smooth. Add the bay leaf and cook for around 5 minutes on low heat until the texture is thick and smooth. Take the bay leaf out and season with salt and pepper.
For the crespelle
milk 160ml
organic eggs 2
plain flour 130g / 4.5 ounces
salt 1/4 teaspoon
butter for frying
Mix the ingredients well and let the dough rest for 5 minutes. Heat some butter in a large pan and fry 4 thin crespelle one at a time, golden on both sides.
The filled crespelle
Set the oven to 200°C.
Lay a crespelle flat on a plate, spread with 1/4 of the spinach and 3 tablespoons of the Béchamel on top, roll into a wrap. Continue with the rest and put them next to each other in a baking dish. Pour the rest of the sauce on top and sprinkle with parmesan (keep some cheese for the baked crespelle, I like to put some fresh cheese on when they come out of the oven). Bake for 12 minutes or until golden brown. You can also switch on the grill for 1-2 minutes, that makes it partially crisp.

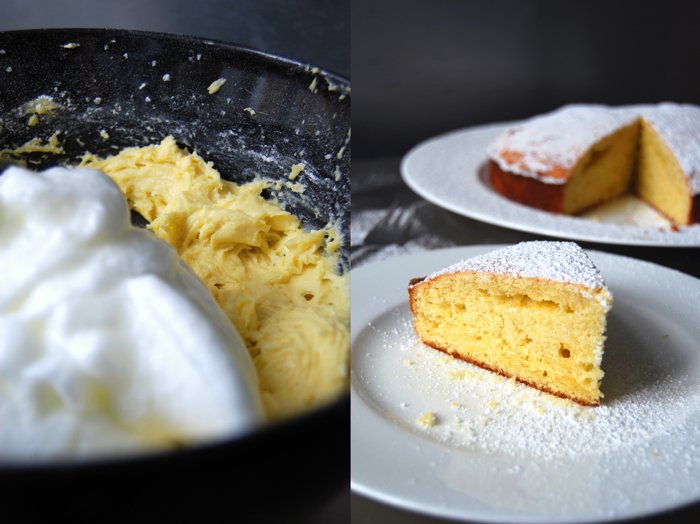
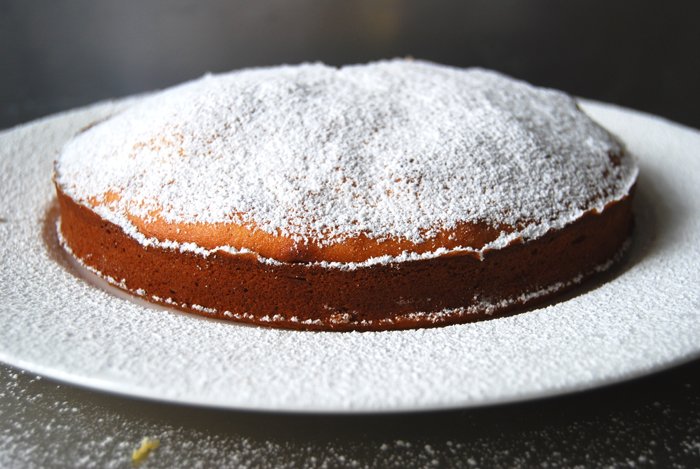
Lemon Ricotta Cake for Afternoon Tea
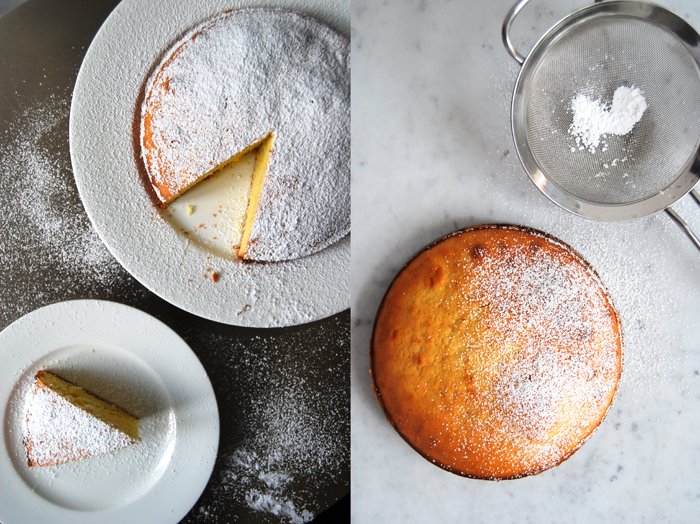
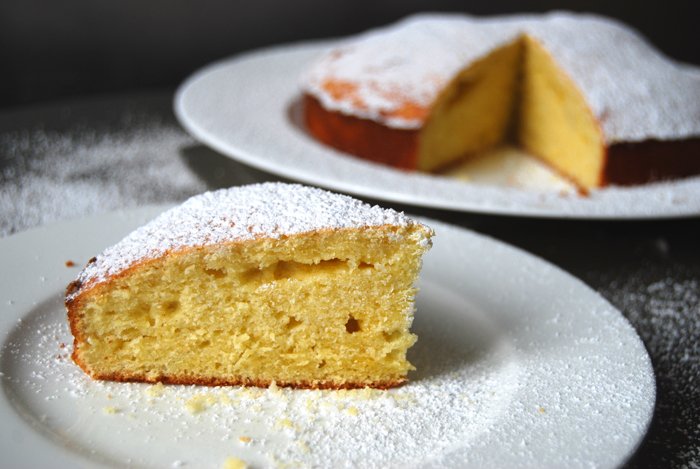
I open the door to my fridge and find a package of ricotta that needs to be used soon. Dinner is already planned so I'm thinking about a sweet solution. My eyes pass the big pile of lemons on my window sill and my decision is made. A cake, spongy, simple and aromatic, with lots of lemon juice and zest and creamy ricotta! Some icing sugar on top and it looks as pretty as a Sunday tea time cake should look.
Sometimes, especially on a Sunday, I need something sweet to go with my tea but I'm too lazy to leave my cosy sofa and my books and magazines for too long. In these moments a quick and spongy cake can satisfy all you need, half an hour in the oven and it's done. The air is filled with the sweetest smell and a golden piece of cake is waiting on my plate.
The ricotta lemon combination is one I use (and like) a lot, mixed with spaghetti and crushed black pepper, it makes one of the pasta dishes I cook the most, all year round. Tangy and smooth, it's a balance the two manage to keep, on the sweet and on the savory side!
Lemon Ricotta Cake
For a 20cm / 8" cake pan you need
butter, soft, 80g / 3 ounces
granulated sugar 150g / 5.5 ounces
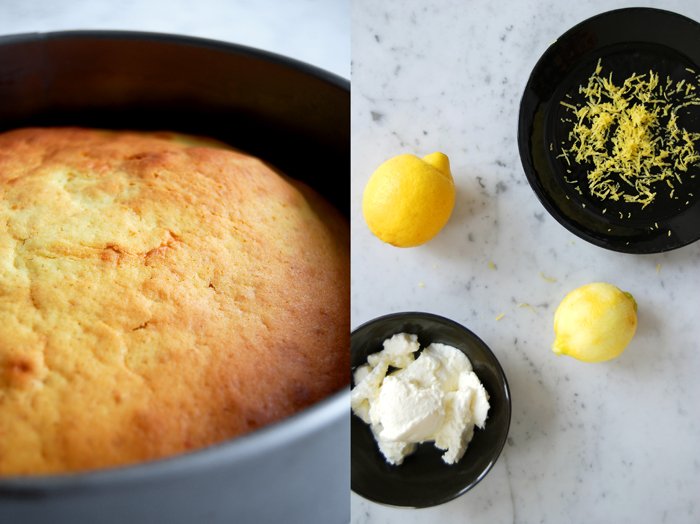
ricotta, 80g / 3 ounces
organic eggs, separated, 3
freshly squeezed lemon juice 4 tablespoons
zest of 1 lemon
plain flour 200g / 7 ounces
baking powder 3/4 teaspoon
a pinch of salt
icing sugar to dust the cake
Set the oven to 180°C / 355°F (fan-assisted oven) and butter the cake pan.
Beat the egg whites with a pinch of salt till stiff. Combine the flour and baking powder.
Beat the butter and sugar till fluffy, add the ricotta and mix for a couple minutes. Add the egg yolks and continue mixing for 2 minutes. While still mixing, add the lemon juice and zest followed by the dry ingredients, mixing well for another minute. Stir 2 tablespoons of the stiff egg whites into the dough before you carefully fold in all of the egg whites. The dough is a bit firm so it may take some time to combine everything.
Scrape the dough into the prepared pan and bake for 30 minutes or until golden brown. Check with a skewer, it should come out clean. Let the cake cool and dust with icing sugar.

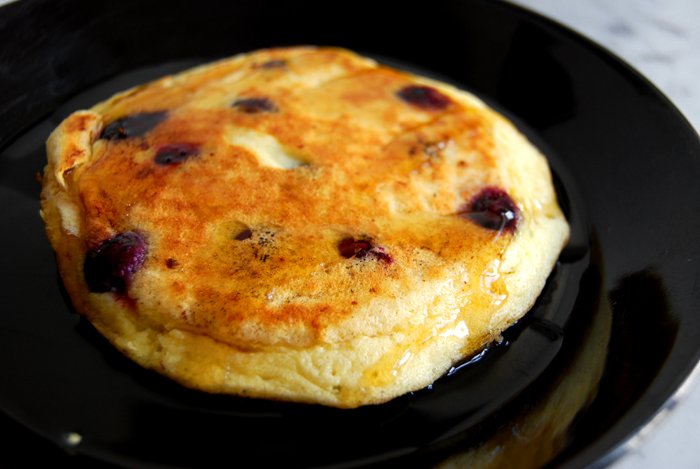
Fluffy Blueberry Pancakes with Maple Syrup and Cinnamon
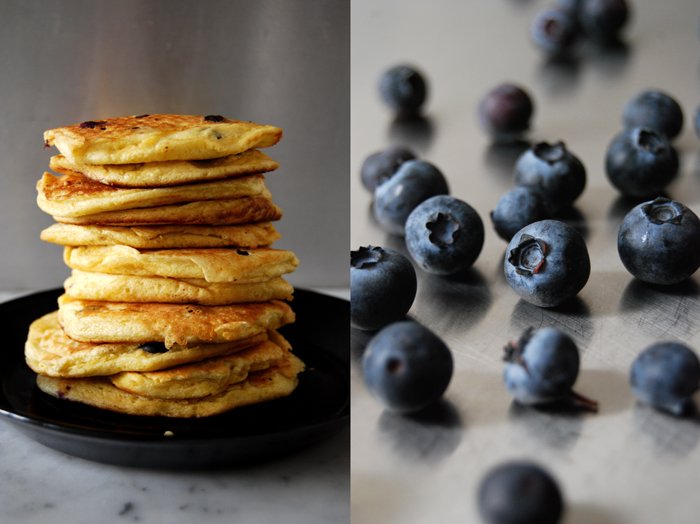
A couple weeks ago I wrote about French toast, my ultimate cosy weekend breakfast! I mentioned that there is one sweet treat I enjoy as much, fluffy morning pancakes! Even better, blueberry pancakes with maple syrup! The sweet berries taste divine with or without any kind of syrup but if I can choose maple is my favourite in this combination. Sometimes I replace the berries with thick slices of apple and sprinkle cinnamon sugar on top. That's how my mother used to make them for me, or I add some chocolate spread or my blood orange marmalade, but when I saw the thick and juicy blueberries from Chile at the market my breakfast choice for this weekend was made!
When I make pancakes, I make lots of them because I can eat lots of them. I enjoy them straight out of the pan, warm and fluffy as well as in the afternoon with a cup of tea when they are already soft and cold. For my dough, I start off with 4 organic eggs, separated, the egg whites beaten till stiff with a pinch of salt. I combine 180g / 6.5 ounces of flour (I use spelt flour type 630 but you can use any other plain flour) with 2 scant teaspoons of baking powder and 1 teaspoon of sugar. I add 200 ml of milk, the egg yolks and mix everything well before I gently fold in the egg whites.
I fry the pancakes in batches, 3 at a time always adding a teaspoon of butter before I pour a ladle of my thick dough into the pan. I sprinkle the soft dough with the blueberries, pushing them in a bit so that they won't burn when I turn the pancakes. When they are golden brown on each side, I pile them up on a plate, pour the maple syrup on top and sprinkle with cinnamon. Sometimes I even let some butter melt on their golden tops, it's the weekend after all!


Yu-Kyong's Bibimbap, a traditional Korean treat
A few weeks ago I met a very sweet couple from Norway, Lena and Knut, we sat opposite each other at a supper club and started talking. Days later I found out about their wonderful blog Teak Tray Weekdays where they share little treasures of their daily life in Trondheim and their traveling trips, I got peacefully lost in their stories. When Lena asked me if I would like to cook something together with them I was very happy. I liked the idea of the three of us cooking the same meal in different kitchens in different countries and with different recipes. I let them choose what we would cook and they suggested Bibimbap. They had just been to Berlin and enjoyed this Korean speciality at a restaurant so much that they wanted to cook it at home.
At first, I wasn't sure about my approach to this meal. I had never cooked Korean before and I usually need an experience, a memory, a story, taste, something that opens the door to a new culinary experience. I asked my oldest friend Yu-Kyong for help, we lived next to each other through our whole childhood, she has Korean roots, her father grew up in North Korea and her mother in the South. She lived in Germany all her life but her mother cooks Korean for the family and introduced her daughter to the traditional recipes, like Bibimbap.
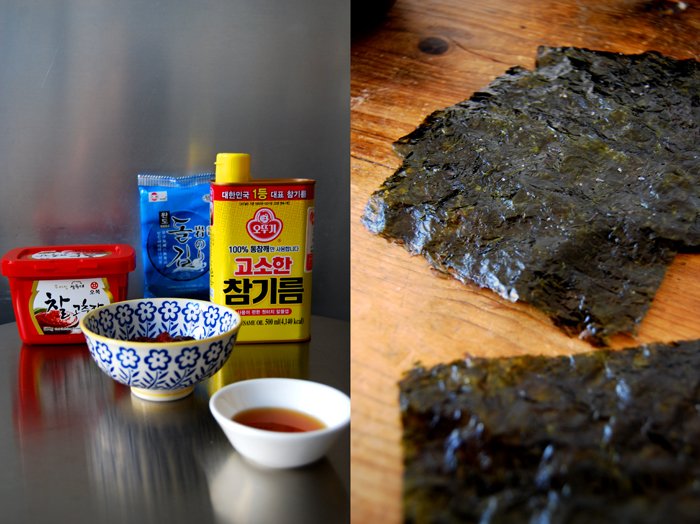
When I asked Yu-Kyong to write down the recipe so that I could buy all the ingredients she told me that this wouldn't work, we would have to go shopping together. We met at an Asian market and she gave me an introduction to Korean cooking. She explained the necessary spices, mixtures, spice pastes and preparations to me, all in between hundreds of boxes, tins and bottles of food, freezers stuffed with tiny crabs, octopus and fish. The scent of a different world in my nose, visually overwhelmed, I tried to keep up with her. She told me about the different flavours and qualities of sesame oil, I learnt how to cook sticky rice properly, which cutlery I have to use (a metal spoon and metal chopsticks, not wooden!) and so much more. Basically, a one hour crash course on Korean cooking, in the middle of an Asian market, typing everything more or less precisely into my phone, not to forget a single detail.
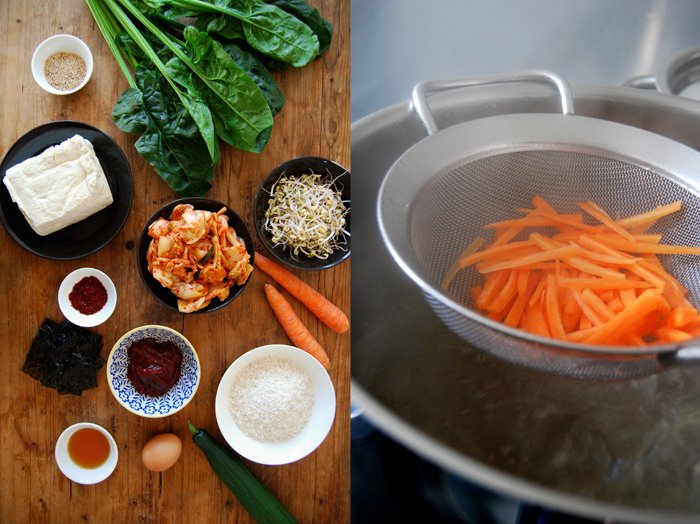
I got home with bags of vegetables, Kimchi, roasted seaweed, Obok Gochujang hot pepper paste, many colourful tins and boxes. I bought the first tofu of my life and I felt happy and finally prepared for this new cooking experience.
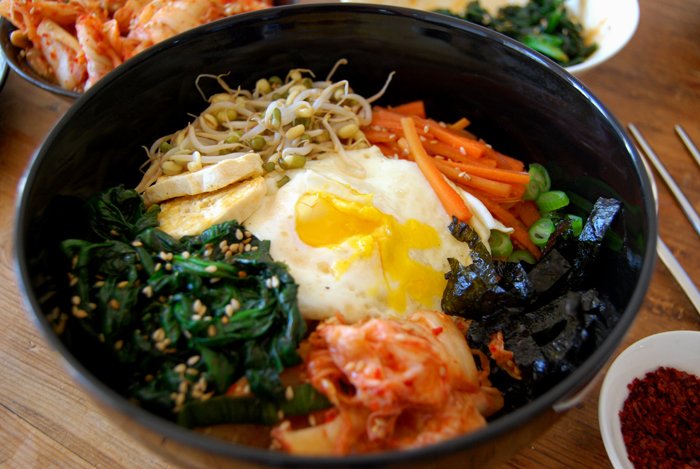
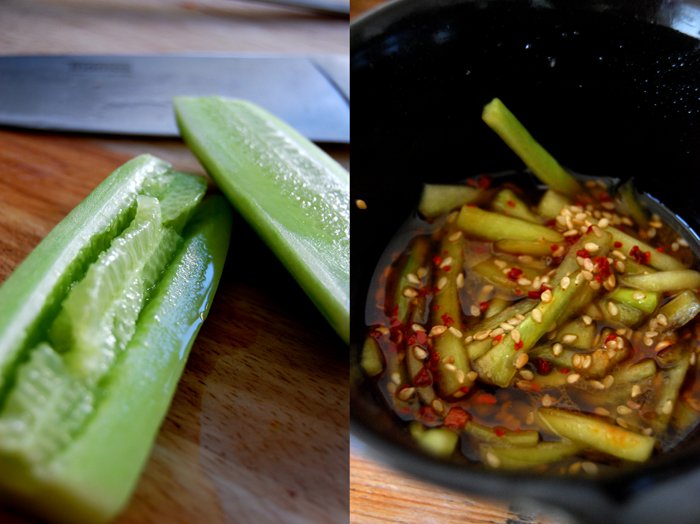
Here's a quick description of Bibimbap, it's a one pot meal, rice at the bottom and steamed vegetables mixed with a sesame oil and soy sauce dressing on top. I steamed spinach, sprouts and carrots and added strips of seaweed, Kimchi (spicy fermented cabbage), fried tofu and eggs. The spinach is glazed with the special Bibimbap Gochujang sauce which is mixed into the rice as well. I made a traditional cucumber salad on the side, mixed with sesame oil and soy sauce, sprinkled with chili powder and toasted sesame seeds.
This meal needs good preparation before you mix everything together, it's a ceremony of pure tastes mixed with the strong flavour of good quality sesame oil and the spiciness of Gochujang. When you make your own Bibimbap you should allow some extra time to enjoy the cutting, steaming and mixing, it's meditative. I learnt that this is not a warm meal, the rice and egg (which I fried in the end) have to be warm but the steamed vegetables can be cold.
Vegetable Bibimbap and Cucumber Salad
For 3-4 people you need
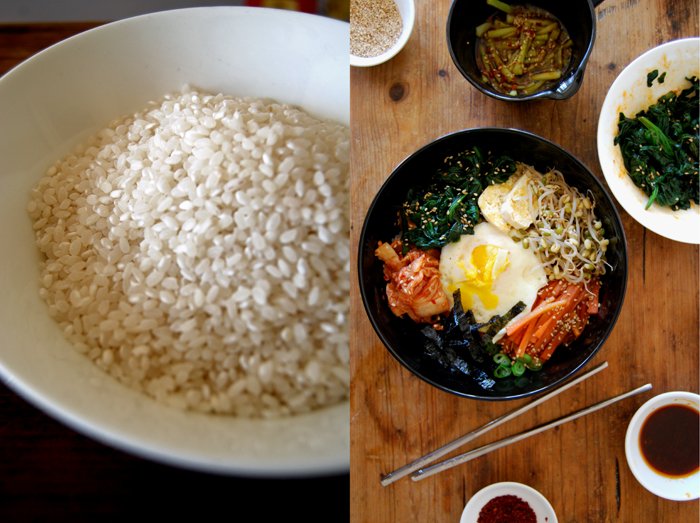
sticky rice, rinsed, 170g / 6 ounces
soybean sprouts, steamed for 1-2 minutes, a handful
spinach, steamed for 1-2 minutes, 250g / 9 ounces
carrot, cut into julienne, steamed for 1 minute, 1-2
tofu, cut into 0.5cm / 1/4" slices, 200g / 7 ounces
Kimchi 6 tablespoons
spring onions, cut into thin slices, a small handful
Korean roasted seaweed, cut into strips, 5 sheets
organic eggs 3-4
sesame seeds, toasted in a pan for a couple minutes on medium heat, 2 tablespoons
cucumber, peeled, cut in half, without the seeds and soft parts, a 15cm / 6" piece for the cucumber salad
dried chili spice for the cucumber salad, 1/8 teaspoon
Gochujang hot pepper paste 1 tablespoon
sesame oil 6 tablespoons
soy sauce 5 tablespoons
sugar
garlic, crushed, 4 cloves
Whisk the following ingredients for the sauce used for the steamed soybean sprouts, carrots and cucumber salad
4 1/2 tablespoons of the sesame oil
3 tablespoons of the soy sauce
1 1/2 tablespoons of sugar
3 small crushed cloves of garlic
Whisk the following ingredients for the Bibimbap sauce (used for the steamed spinach and the rice)
1 tablespoon of the Obok Gochujang hot pepper paste
1 1/2 tablespoons of the sesame oil
2 tablespoons of the soy sauce
3/4 tablespoon of sugar
1 small crushed clove of garlic
Cook the rice in a pot filled with water and a pinch of salt (the water should be 2cm / 1" above the rice) for 12 minutes, on medium heat, keeping the lid closed. If the rice is still hard and didn't soak all the water, keep it on the heat for a couple more minutes. When it's done, keep the rice covered and set aside.
For the salad, cut the cucumber into strips, mix with 1/3 of the dressing (not the Bibimbap sauce) and sprinkle with some sesame seeds and the dried chili spice. The cucumber salad is served as a side dish, not on top of the Bibimbap like the rest of the vegetables.
Glaze the steamed soybean sprouts with 1/3 of the dressing (not the Bibimbap sauce) and the steamed carrots with the rest of the sauce, sprinkle both with sesame seeds.
Mix the steamed spinach with 4 teaspoons of the special Bibimbap sauce (keep the rest of the sauce to mix with the rice).
Fry the tofu in a little sesame oil for 2 minutes until golden, turn gently and fry on the other side. When it's done, set it aside.
Fry the eggs, leaving the egg yolk soft.
Put the rice in a large bowl and the spinach, carrots, sprouts, Kimchi, spring onions, tofu and seaweed on top, arrange them in a circle next to each other. Place the fried eggs in the middle and sprinkle everything with sesame seeds.
When you serve the Bibimbap at the table, you can either mix everything in the bowl together with the rest of the Bibimbap sauce or divide it between the plates and add some sauce to it (that's how I did it).


Broccoli Pesto with Spaghetti and Sun-dried Tomatoes
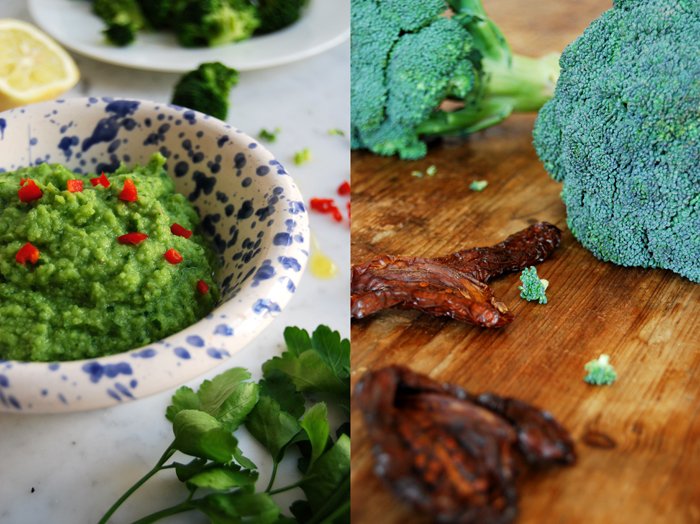
Finally pesto! I love it, bunches of basil, parsley, chopped green or black olives, sun-dried tomatoes, capers, garlic, anchovies mixed with olive oil, nuts or cheese. There are endless possibilities to bring one of the most satisfying meals onto the table, pasta with pesto. It's so simple yet so special! When I make pesto I just follow my mood and appetite, picking what the kitchen herbs on my window sill offer and mixing it together with the Mediterranean fruits and vegetables preserved in salt or oil I keep in jars in my fridge. Sometimes I mix fresh vegetables in as well, like green asparagus or broccoli.
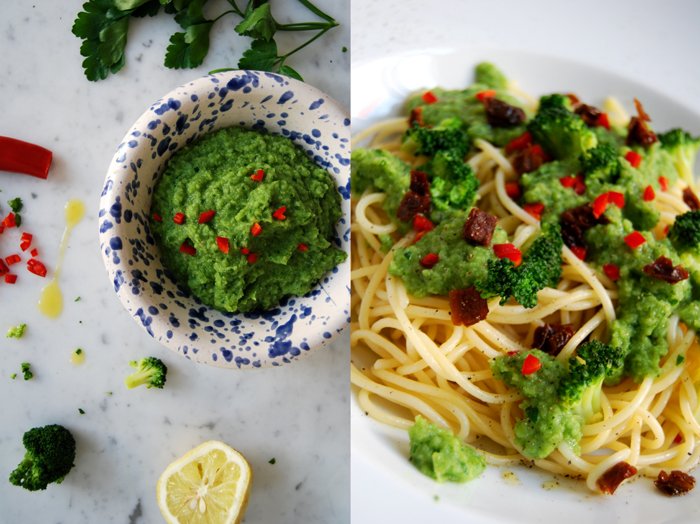
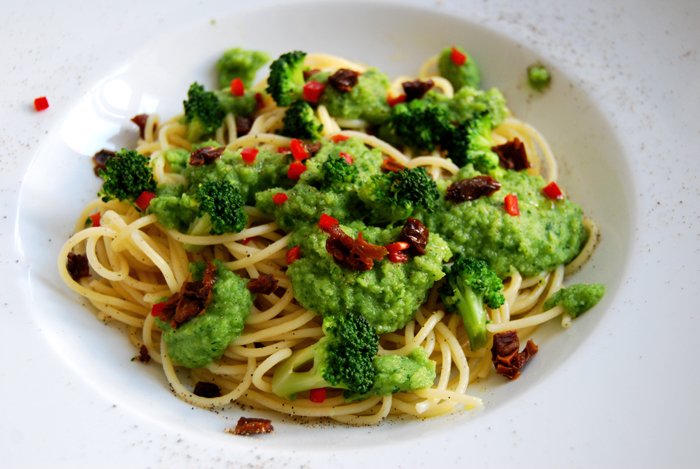
Today is a broccoli day! I cook it al dente, put some of it in a blender and mix it with parsley, ginger, garlic, anchovy, lemon juice and olive oil. Some of the water used to cook the broccoli stirred in makes the pesto nice and smooth, it's lighter than using just olive oil. When the warm spaghetti has been mixed with the broccoli pesto, I sprinkle some broccoli, sun-dried tomatoes and red chili on top. There are lots of different flavours in this pesto but they blend in perfectly and allow the broccoli to show its fresh side.
Broccoli Pesto with Spaghetti and Sun-dried Tomatoes
For this meal it's best to warm the plates in a 75°C / 165°F warm oven for a few minutes. I prepare them while the pasta is cooking.
For 4 people you need
spaghetti 400g / 14 ounces
broccoli, florets and the soft part of the stem, 450g / 16 ounces
water used to cook the broccoli 50ml
sun-dried tomatoes, cooked in a little water for 2 minutes to wash off the salt, dried and chopped, 1 1/2, for the topping
water used to cook the sun-dried tomatoes, 3 tablespoons
fresh parsley, chopped, 3 heaping tablespoons
garlic, crushed, 1 big clove
ginger, grated, 1/2 teaspoon
anchovy preserved in salt (optionally), rinsed and dried, 1
lemon juice 2 teaspoons
olive oil 3 tablespoons
salt and pepper
fresh red chili, chopped, 1, for the topping
In a large pot, bring water to the boil, add some salt and cook the broccoli al dente. Keep 1/3 of the cooked florets, cut into bite sized pieces and set aside.
Cook the spaghetti al dente.
Put the rest of the broccoli (florets and stem cut into pieces) in a blender and mix together with some of the water used to cook the broccoli and sun-dried tomatoes. Add the parsley, garlic, ginger, anchovy, lemon juice, olive oil and mix well. Season the pesto with salt and pepper but keep in mind that the tomatoes used for the topping will add some saltiness as well.
Arrange the spaghetti and the pesto on big plates and sprinkle with the chopped tomatoes, pieces of broccoli, chili and some more black pepper.

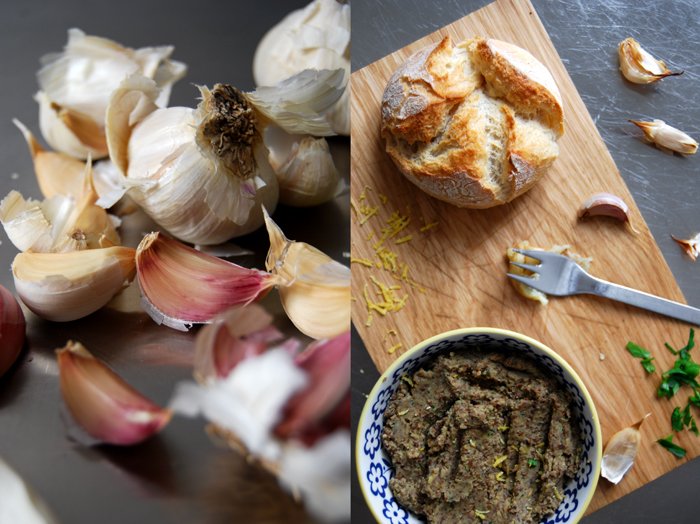
A Sandwich with Lemon Lentil Mousse and Roast Garlic

The legume section in my pantry is overflowing, it's time to empty some lentil boxes! My plan is to make a smooth lentil mousse enhanced with parsley, lemon and garlic, to spread on sandwiches and to eat together with raw vegetable sticks. I prepare a big bowl as we'll have my brother in law over for the next couple of days. When guests stay with us, I like to have some food ready in the fridge, easy nibbles and snacks that everyone can enjoy whenever they feel like, but first I'll need the mousse for my Sandwich Wednesday.
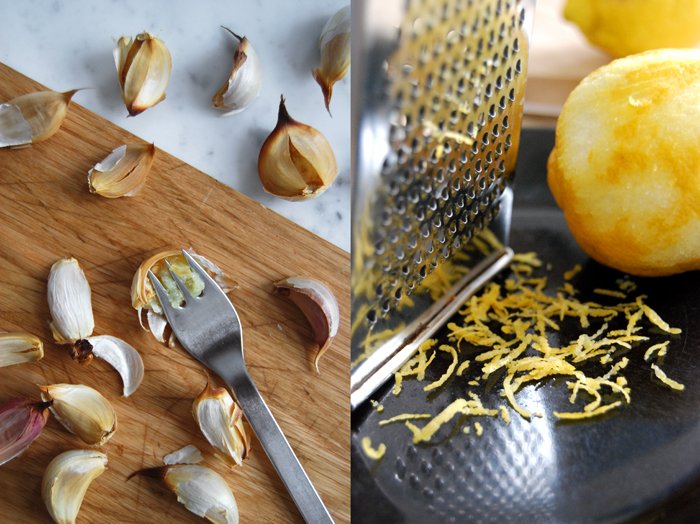
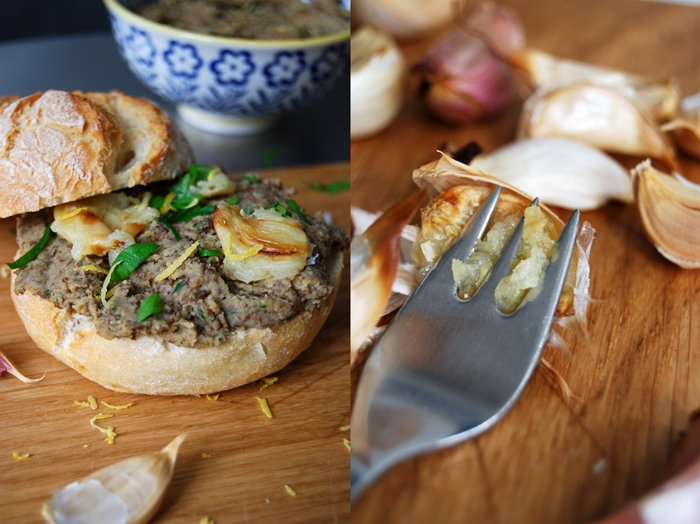
Besides the lemon and parsley aromas, the garlic plays an important role. I don't leave it plain and raw, I roast it, golden and sticky, almost sweet. I bake big, fleshy cloves in their skin and after 10 minutes in the oven they turn into a delicious paste. They taste so good that I throw a couple more into the oven, as an extra topping. Squeezed with a fork I lay the warm and juicy garlic on top of the lentil spread. This is such a great combination, the nuttiness of legumes together with the sourness of the lemon juice and zest, the aromatic parsley and the sweet and spicy garlic. I've made a few variations on this lentil mousse already, but this one is the freshest!

Lemony Parsley Lentil Mousse and Roast Garlic on a Sandwich
For the sandwiches you need white buns with a nice crust, crisp and crunchy. I made lots of mousse, it stays fresh for a few days. It's also great as finger food for parties, on slices of bread or served together with vegetable sticks!
lentils 350g / 12.5 ounces (I use a small type which doesn’t need to soak overnight)
bay leaf 1
fresh parsley, chopped, the leaves of a medium bunch plus more for the topping
freshly squeezed lemon juice 5 tablespoons
lemon zest 3 teaspoons plus more for the topping
olive oil 50ml
salt 2 1/2 teaspoons
black pepper
garlic, 12 big cloves in their skin (6 for the mousse, 6 for the topping)
Cook the lentils in 1 liter of water together with the bay leaf for 20 minutes or until they are done. Don’t season with salt yet or the lentils will stay hard. Take out the bay leaf and drain the lentils.
Set the oven to 220°C / 430°F (I used the Rotitherm roasting setting) and roast the cloves of garlic in their skin for 12 minutes or until they are soft. Peel the garlic and squeeze with a fork.
Mix the lentils in a blender to a smooth paste together with the parsley, lemon juice and zest, olive oil and half of the garlic. Season with salt and pepper to taste.
For the sandwiches, cut the buns in half, spread the lentil mousse on one side and lay 1 or 2 squeezed, roast garlic on top. Sprinkle with some parsley and lemon zest and close the bun.

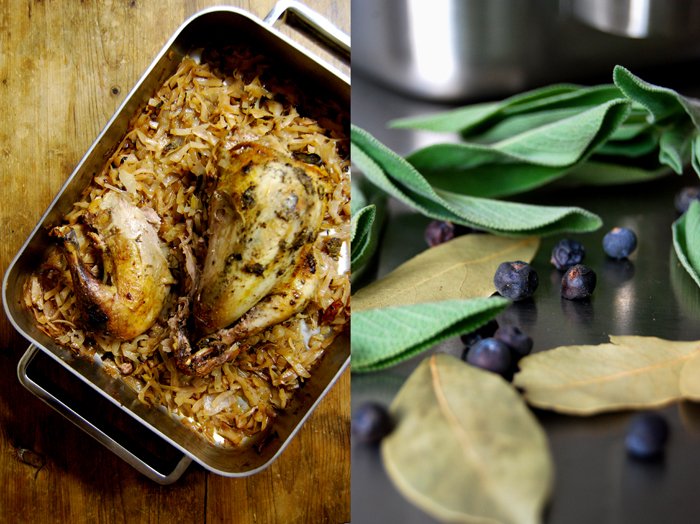
Roast Pheasant with Coppa di Parma, Juniper Berries, Sage and Cabbage

I really enjoy oven dishes that combine meat and vegetables, be it roast, stewed or grilled. It's very convenient, you pack everything in a baking dish, add your spices, herbs and flavours of choice, set the right time and then relax or watch your dinner getting done. I do that sometimes, I sit in front of my oven watching the meat and vegetables bubbling and turning golden brown, it's better than television! In the meantime you could also cook some potatoes, polenta or spaetzle to soak the juices of your roast meat but sometimes a loaf of white bread cut into thick slices is just as good.
For this roast, my bird of choice is pheasant, strong in taste but difficult to cook evenly as the legs need longer than the breast. So, to avoid the meat becoming too dry, you can either carve it into pieces before you put it into the oven or you can cover (and protect) the breast with a layer of Coppa di Parma, which is how I did it here. This allows you to put a paste of spices and herbs under the prosciutto to infuse the meat. I went for sage leaves and a mixture of juniper berries, allspice, cloves and garlic. The pheasant roasted on a thick layer of chopped cabbage cooking in some white wine and the juices of the meat. It soaked the flavours and tasted wonderful, great together with the strong meat.
Roast Pheasant with Coppa di Parma, Juniper Berries, Sage and Cabbage
For 3-4 people you need
one pheasant of 1.3kg/ 3 pounds
Coppa di Parma 4 slices
fresh sage 4 big leaves
juniper berries, ground in a mortar, 2 plus 4 whole berries for the cabbage
allspice, ground in a mortar, 1
clove, ground in a mortar, 1 plus 4 whole cloves for the cabbage
garlic, crushed, 3 cloves
cabbage, cut into thin strips, 400g / 14 ounces
onion, chopped, 1
white wine 150ml plus more for the roast
salt and pepper
olive oil
Set the oven to 175°C / 350°F.
For the spice paste, mix the juniper berries, allspice, clove and garlic.
Fry the the onion in some oil until golden and soft, mix it with the cabbage, the 4 juniper berries and the 4 cloves and put in a large roasting tin (big enough for the pheasant). Add the wine and put the bird on top, glazed with olive oil and seasoned with salt and pepper. Spread the spice mixture on the breast, lay the sage leaves over it and cover with the Coppa di Parma.
Roast the pheasant for 1 hour, pouring some wine on top once in a while and turning the cabbage. When it's done, check with a skewer to see that only clear juices come out. I kept it simple and had some slices of white bread on the side.

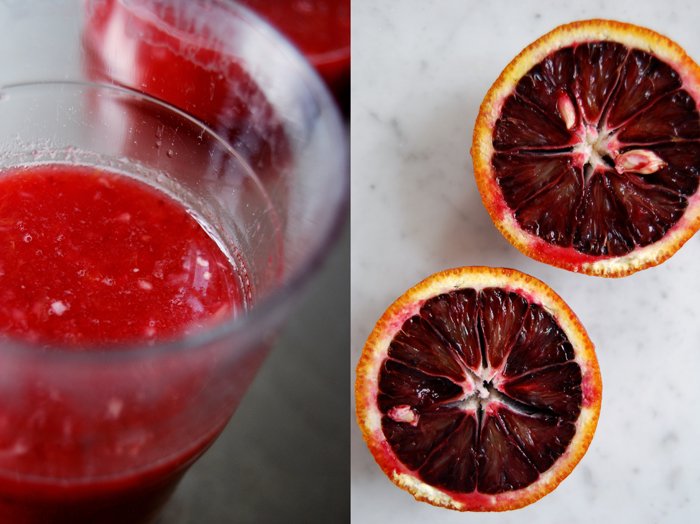
A Monday Morning Juice with Grapefruit, Banana, Orange and Ginger

I have the tendency to become overly excited as soon as the temperature rises above 10°C and the sun comes through for more than a couple hours. I know it's only the beginning of March but I already feel like spring. I want to get out my summer clothes and jump around in the springy, fresh air. I want to sit outside a café with a glass of chilled white wine, enjoying the warm sun. Unfortunately, there's still a gap in temperature between my dreams and reality which I don't want to accept (sometimes) and that's exactly the problem! I'm prepared for the coldest winter and arctic temperatures, I never get a cold, but at this time of the year, a stone's throw away from the end of the cold season, I tend to be too carefree and strain my immune system.
To avoid any deficit in vitamins, I start the week off with a powerful juice made of grapefruit, banana, blood orange and ginger. For two glasses of juice (400ml in all), I squeeze 1 pink grapefruit and 3 oranges. I add 1/8 teaspoon of grated ginger and half a banana, mashed smoothly with a fork. You can use a whole one but I didn't want its taste and sweetness to be too overpowering.
It's a true energy boost, like my January's Turmeric and Ginger Blood Orange Juice!


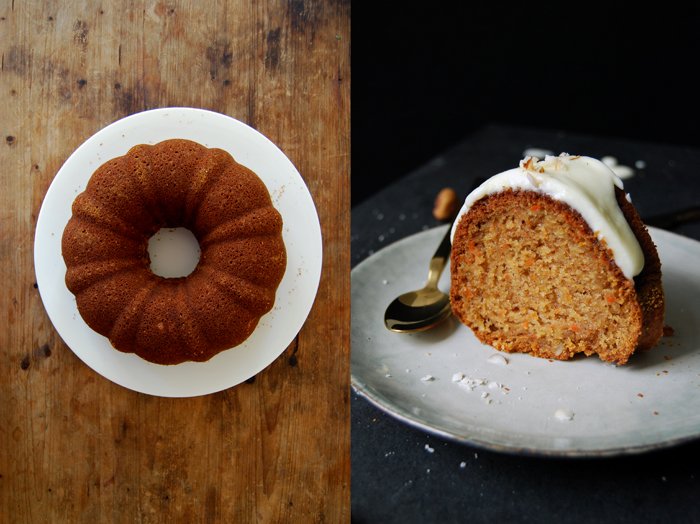
My favourite Carrot Cake from the Sunshine State
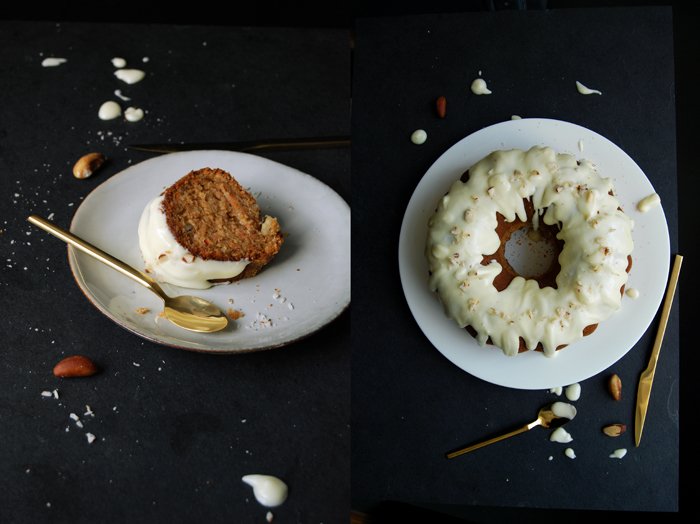
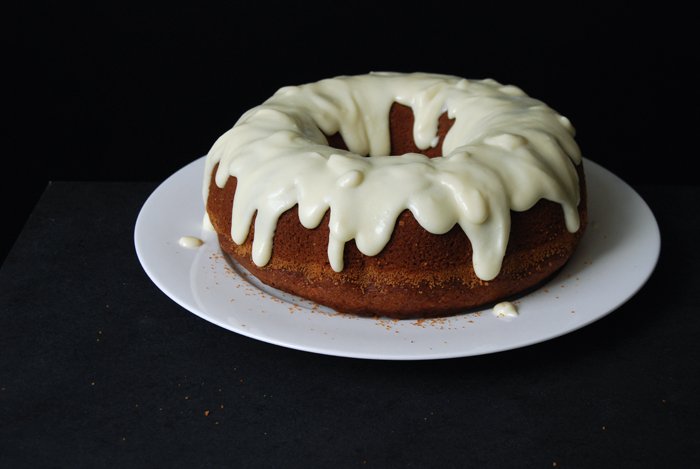
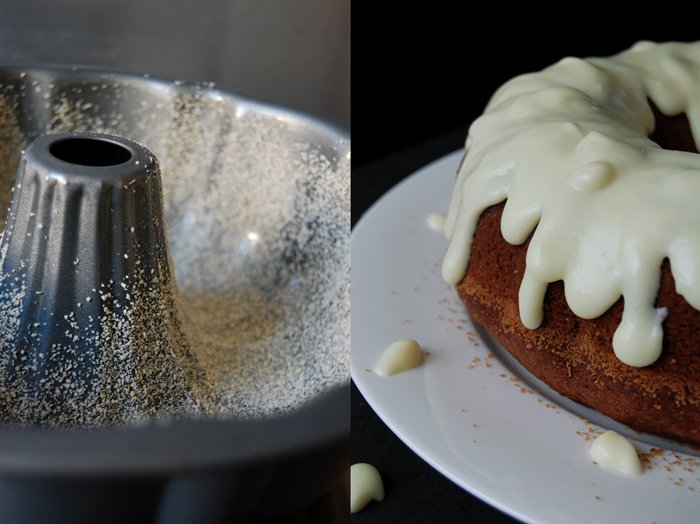
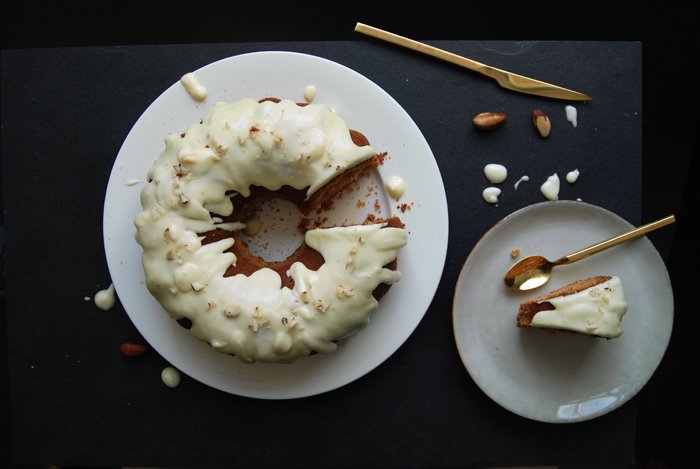
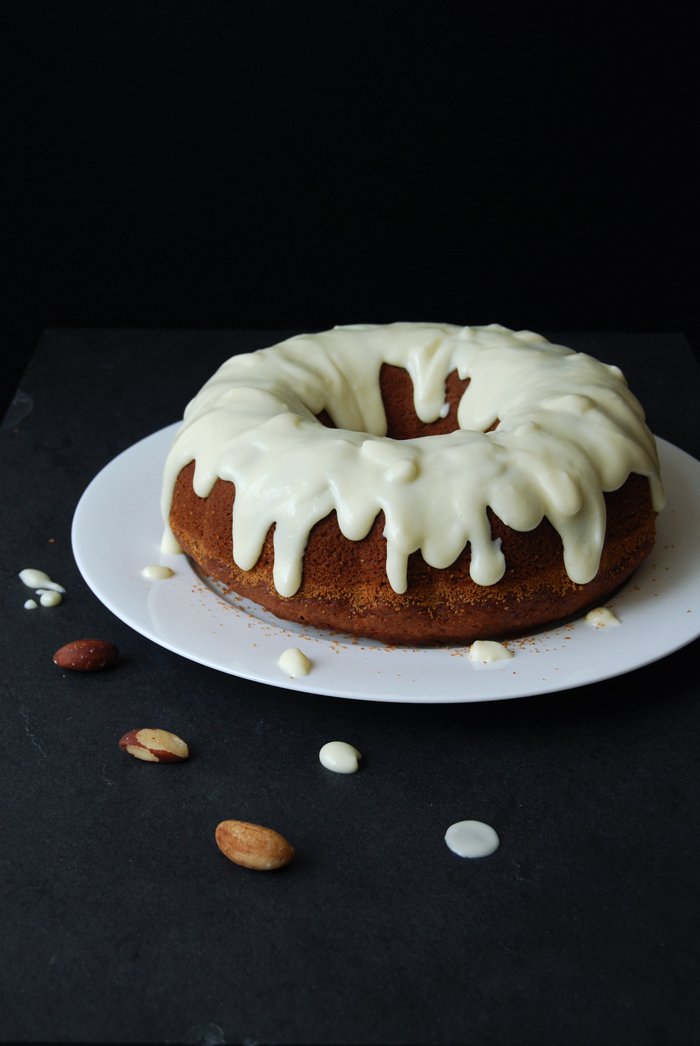
The recipe for this amazing carrot cake comes from the Sunshine State, more precisely from our Granny Doris in Florida who is also responsible for the best Peanut Butter Cookies. It's unbelievably spongy and juicy, with lots of carrots, pineapples and Brazil nuts. This is the kind of cake you eat within a day without knowing where it went! It's glazed with a deliciously creamy icing made of cream cheese and lemon, it combines everything a great carrot cake needs.
When I visited Doris for the first time in Florida, my partner's grandmother knew exactly how to make me feel at home: she welcomed us with a table full of cakes, brownies and muffins. We started every day with a luscious breakfast, with pancakes, bacon and all kinds of sweet treats, so, unfortunately, the holiday ended with 10 pounds more on the scales (although I went jogging almost every morning!). I felt no regrets, our daily feasting was worth it, I have a sweet tooth so I was in heaven. Of all the nice food we enjoyed, Doris' carrot cake impressed me the most. I asked for the recipe which she happily handed over and I knew this would be a keeper. Since our visit to the Sunshine State, I bake it every couple months and it never lasts long.
Carrot Cake
Note from 27th March 2015: I changed the recipe for the icing a little, you can find the old recipe at the end, the pictures show the new icing which is thicker and more creamy.
For a 23cm / 9" bundt pan you need
For the cake
plain flour 300g / 10.5 ounces
granulated sugar 200g / 7 ounces
baking powder 3 teaspoons
baking soda 1 1/2 teaspoons
salt 3/4 teaspoon
ground cinnamon 3 teaspoons
sunflower oil 250ml
organic eggs 4
carrots, grated 150g / 5.5 ounces
canned pineapple, drained and crushed, 250ml
Brazil nuts, chopped, 50g / 2 ounces
butter, for the bundt pan
dry breadcrumbs, for the bundt pan
For the icing
butter, soft, 3 tablespoons
cream cheese 100g / 3.5 ounces
heavy cream 1-2 tablespoons
icing sugar 125g / 4.5 ounces
lemon juice 1 tablespoon
a pinch of salt
Set the oven to 180°C / 355°F (fan-assisted oven), butter the bundt pan and sprinkle with breadcrumbs.
Combine the dry ingredients in a large bowl. Add the oil and eggs and mix for a couple minutes. Stir in the carrots, pineapple and nuts and continue mixing until combined. Scrape the dough into the prepared pan and bake for 45 minutes or until golden. Check with a skewer, it should come out clean. Let the cake cool for 10 minutes before you flip it around (I put the pan in a kitchen sink of cold water for a few minutes, that makes it easier to take the cake out).
For the icing, beat the butter for 1-2 minutes until light and fluffy, add the cream cheese and a splash of heavy cream and continue mixing. Add more heavy cream until the mixture resembles a creamy yoghurt. Add the lemon juice, icing sugar and salt and continue mixing until well combined, the frosting should be thick and slightly runny. Pour the icing over the cake.
The old icing recipe
icing sugar 125g / 4.5 ounces
sour cream 100g / 3.5 ounces
cream cheese 1 tablespoon
butter, soft, 3 tablespoons plus more if you want the icing to be more stiff
lemon juice 1 tablespoon
a pinch of salt


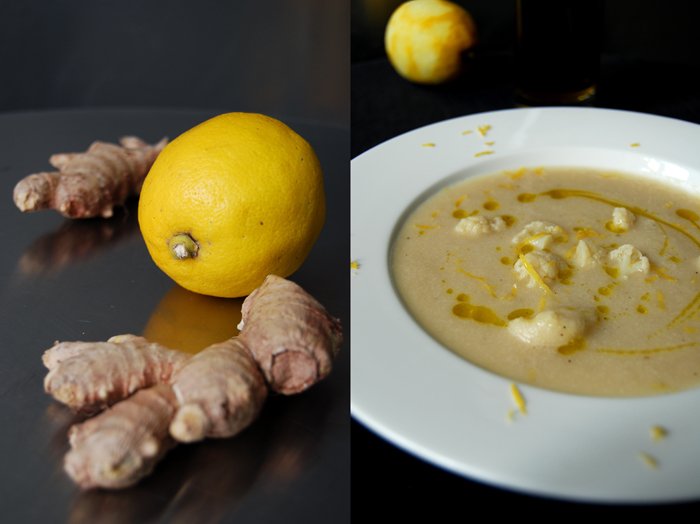
Carnival and a Cauliflower Soup with Ginger and Lemon
A couple weeks ago I wrote about our traditional family feast, a time when we all meet at my mother's house in the countryside to celebrate carnival. It's always silly, loud and involves lots of good food. The festive highlight is the making of our Berliner which involves each family member. A Berliner is a sweet speciality which looks a bit like a doughnut without a hole. It’s made of yeast dough, filled with jam, deep fried in vegetable shortening and sprinkled with cinnamon icing sugar. The jam filling changes with the years, a few weeks ago I filled mine with blueberry jam which became my favourite (for now), they tasted divine! The reason I made them at my home without my family before carnival, was a blog tour I was asked to joined. I decided to share our "Berliner" family tradition. I made them on my own for the first time in my life, they were as good as at my mother's but it's more fun with family and friends.
In the end it turned out to be (subconsciously) a wise choice as this carnival will be different. This year there is neither a family feast nor a Berliner to enjoy, for us it's soup instead. A wisdom tooth got in our way and needed to come out quick. Needless to say, a jam filled Berliner isn't the appropriate food in a situation like this, porridge and soup is more like it!
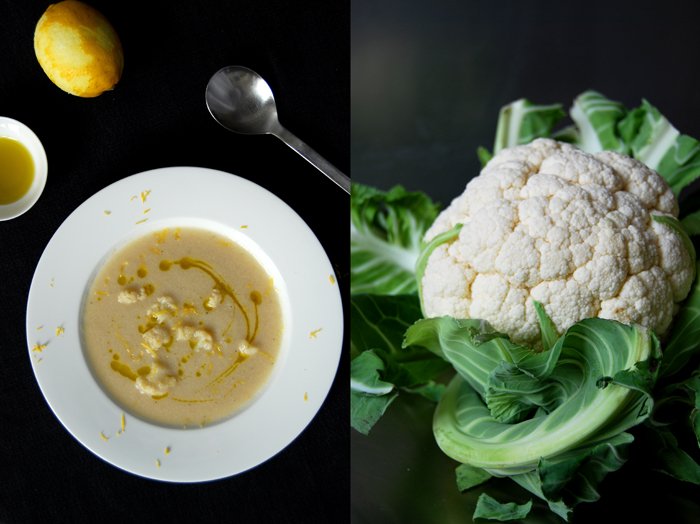
I have a big, beautiful cauliflower in the kitchen, a cabbage I don't use so often but in a velvety soup it shows its finer qualities. The sweet taste and smooth texture is great for puréed soups. I don't add any cream, just broth, onion, garlic and some tangy flavours, lemon and ginger. A piece of ginger simmers together with the cauliflower in the broth before I season it with grated ginger to taste. I add the lemon's juice and zest when the soup is done, arrange it in plates drizzled with some good olive oil and sprinkle some more lemon zest on top. I'm impressed, it's still smooth but fresh!
Last week I told you that eat in my kitchen was nominated for The Kitchn's Best Daily Read Cooking Blog Award 2014. Food52 won the award but I want to thank you all for your support and all your votes, with your help eat in my kitchen reached the final!

Ginger Lemon Cauliflower Soup
For 4 people you need
a big cauliflower, rinsed and cut into 5cm / 2" pieces, around 750g / 1.5 pounds (weight without stem)
vegetable broth 1500ml
onion, chopped, 1
garlic, cut in half, 1
bay leaf 1ginger, thumbnail sized piece plus 1 teaspoon grated
lemon juice 1 tablespoon
lemon zest 1 teaspoon
salt and black pepper
olive oil for frying and topping
In a large pot, fry the onion and garlic in a little oil until golden and soft. Add the cauliflower, bay leaf, the piece of ginger and broth and bring to the boil. Cook for 10 minutes or until the cauliflower is al dente. When it's done take out the bay leaf and ginger and put a few smaller pieces of cauliflower (a small plate full) aside before you mix the soup in a blender. Season with salt, pepper, the grated ginger, lemon juice and zest and put the cauliflower pieces back into the smooth soup. When you arrange the plates, drizzle some good olive oil on top and sprinkle with some lemon zest.

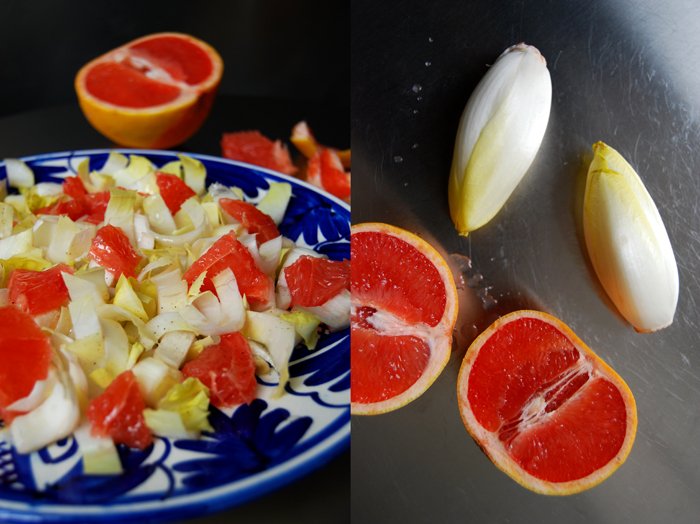
A Bittersweet Chicory Grapefruit Salad

My lunch looks like summer, bright pink and yellow, a glowing sunset on the table! I got my Mediterranean plates out to make the holiday feeling complete. This is a quick salad, it doesn't require many ingredients or much time. It's a variation on my Chicory Pear and Walnut Salad, but this time I combine the crunchy chicory with the bitter sweetness of pink grapefruit. It's lighter, more like spring. Full of vitamins, this mix refreshes the body and mind within seconds!
For a salad for 2 (as a side dish) I cut 2 chicories in half and then into thick slices. I mixed them with the juicy bite sized pieces of half a pink grapefruit, you can use more but I wanted more leaves than fruit on the plates. My dressing is also simple and quick to prepare, 3 small tablespoons of olive oil mixed with 2 small tablespoons of white Basamico vinegar, seasoned with salt and pepper. I drizzled it carefully over my salad, just enough to glaze the leaves and fruit. Too much of the dressing would cover the salad's sweet bitterness with sourness, they have to keep a balance.

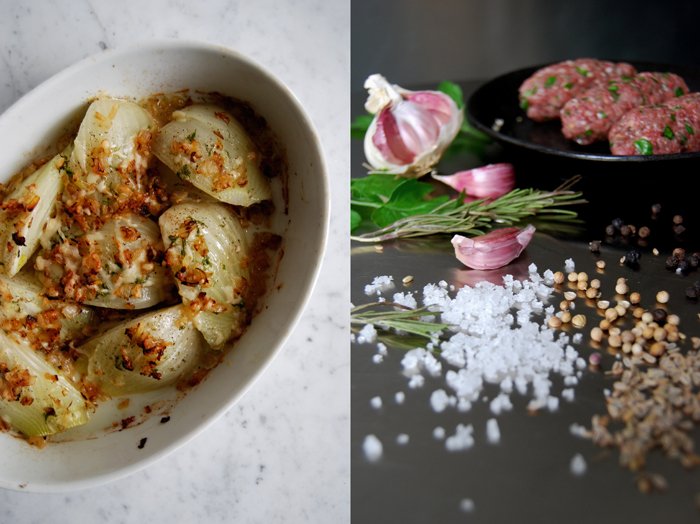
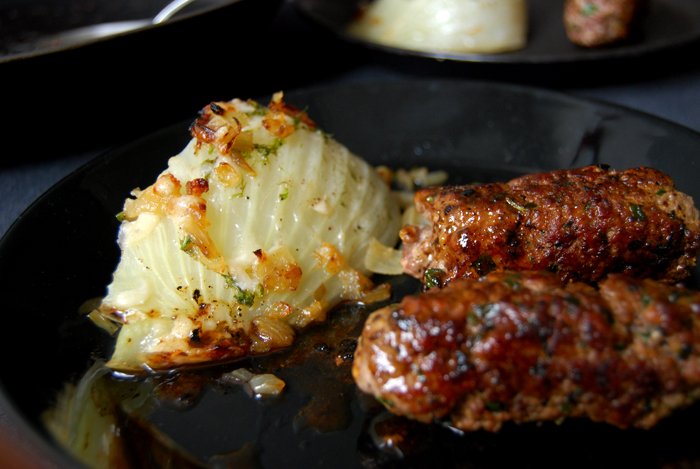
Homemade Sausage with Herbs and Spices and Baked Fennel with Parmesan

Our last visitors from Malta brought some of my favourite sausages along, coarse Maltese pork sausage stuffed with lots of spices and garlic. The kind that you can use to spice up a whole pot of soup. When it comes to sausage that's exactly what I like! When I'm in Malta I fry them for breakfast without their skin and cut in half, like a burger, some fried zucchini (qarabaghli in Maltese) on the side and and I'm prepared for a day on the beach.
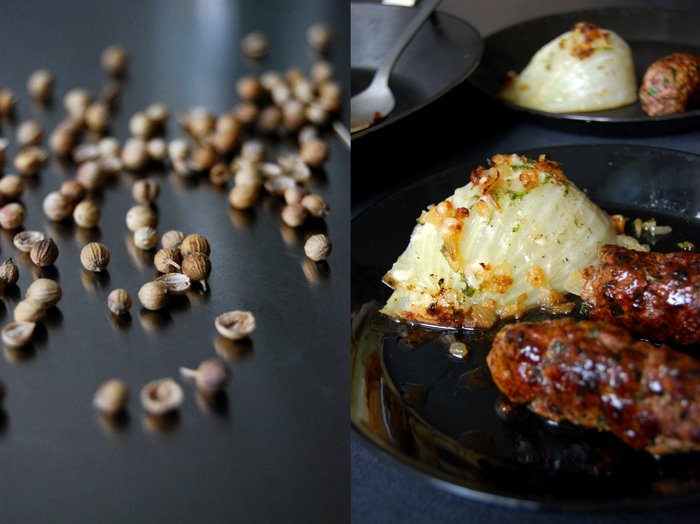
The gift from Malta inspired me to make my own sausages, but without skin from the start. I make mine like burgers without egg and bread (apart from a tablespoon of breadcrumbs) and with pork and beef unlike the original. Most importantly they are enhanced with plenty of rosemary, parsley, coriander and fennel seeds (luckily I still have some left from Malta to keep it even more authentic) and my coarse sea salt from Mr. Cini's salt pans in Gozo, Malta's sister island. Spices and salt from other parts of the world will work as well, I just like to add the nice memories and to me, they taste best. As fennel already has such an importance in this meal I add the bulbs as well, baked in the oven with onions, garlic and parmesan. It's the right addition to my Mediterranean sausages which I fry first before I deglaze them with a splash of white wine. This makes a thick sauce of juices, delicious together with the meat and the vegetable.
Homemade Sausage with Herbs and Spices and Baked Fennel with Parmesan
This makes a dinner for 3-4.
For the sausage
minced beef 300g / 10.5 ounces
minced pork 300g / 10.5 ounces
dry breadcrumbs 1 tablespoon
fresh parsley, chopped, a medium bunch
fresh rosemary, chopped roughly, 1 teaspoon
coriander seeds, ground in a mortar, 1 tablespoon
fennel seeds, ground in a mortar, 3/4 tablespoon
black peppercorns, ground in a mortar (coarsely), 1 tablespoon
garlic, crushed, 2 large cloves
coarse sea salt 1 1/2 teaspoons
white wine for deglazing
olive oil for frying
Mix the ingredients well and shape thick sausages. Heat some olive oil in a large cast iron (or heavy) pan and fry the sausages on medium heat until all sides are golden brown. Deglaze the sausages with a splash of wine so that the bottom of your pan is covered, the liquid shouldn't evaporate completely. Turn down the heat, scrape the juices off and close the pan with a lid for 1-2 minutes until the sausages are done inside.
For the baked fennel
large bulbs of fennel, quartered and blanched together with 1/2 lemon for 8 minutes, 2 bulbs (keep the green of the fennel bulbs uncooked and chopped for the topping)
medium onions, chopped, 2
garlic, crushed, 2 cloves
olive oil
Parmesan, grated, 3 tablespoons (you can add more if you like)
salt and black pepper
Set the oven to 200°C / 390°F (I used the Rotitherm roasting setting) and brush a medium sized baking dish with olive oil.
Fry the onion and garlic in a little oil on medium heat until golden brown.
Put the fennel in the baking dish and sprinkle with olive oil and the green of the fennel. Season with salt and pepper, add the fried onions and garlic and cover with parmesan. Bake for 10 minutes until the cheese is golden brown and crisp.


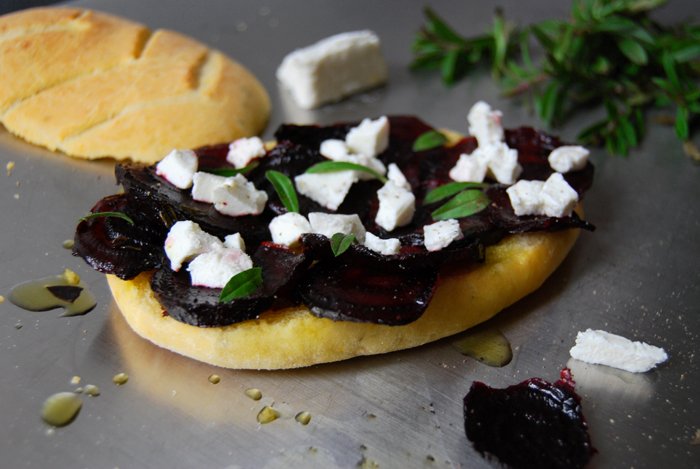
Fougasse Sandwich with Baked Beetroot, Goat Cheese and Thyme

I got really hooked on the roots and syrup combination in the past week. It all started with my ginger honey glazed Navet, yellow turnip fried as vegetarian steaks followed by caramelised maple parsnip with goat cheese combined in a warm salad and I'm still in the mood for sweet and earthy duos, at least one more.
It's Sandwich Wednesday and the first thing that came into my mind when I looked at the beautiful Fougasse bread I baked yesterday, was a baked beetroot sandwich. My flatbread has strong aromas of orange and sage, perfect to add some more earthy and sweet flavours. There are some beetroots lying on my kitchen window sill, just waiting to be baked in maple syrup and olive oil sprinkled with thyme. I found a kind of thyme at the organic store that I have never seen before, with thick, long leaves. They are stronger in taste compared to the small leaved one, a bit woody. The thin slices of the roots are done after 10 minutes in the oven, soft, syrupy and partly crisp. I let them soak into the oily bread and finish my sandwich with some mild goat cheese crumbled on top to add some fresh milkiness.
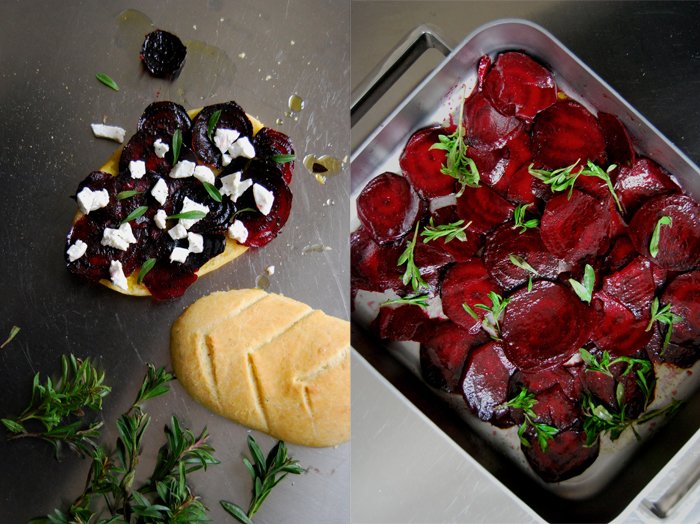
I made 3 flatbread sandwiches with 3 small beetroots peeled and cut into very thin slices and mixed with 3 tablespoons of olive oil and 2 tablespoons of maple syrup. I seasoned the roots with salt and pepper, mixed them with a few sprigs of thyme and roasted them spread in a roasting tin for 12 minutes in the hot oven set to 220°C / 430°F (Rotitherm roasting setting) until they were soft.
If you don't want to make your own Orange Sage Fougasse bread (I can just recommend it as it's fantastic), you can also use focaccia or soft buns (I made some very soft and juicy Mountain Buns with spices a couple months ago). I cut the flatbread in half, drizzled some olive oil (generously) on one side and spread the roast beetroot slices on top. After I sprinkled them with goat cheese (for 3 sandwiches I used 100g / 3.5 ounces of cheese), some fresh thyme leaves, salt and pepper, I closed my Fougasse sandwich, pleased about another great sweet root variation!


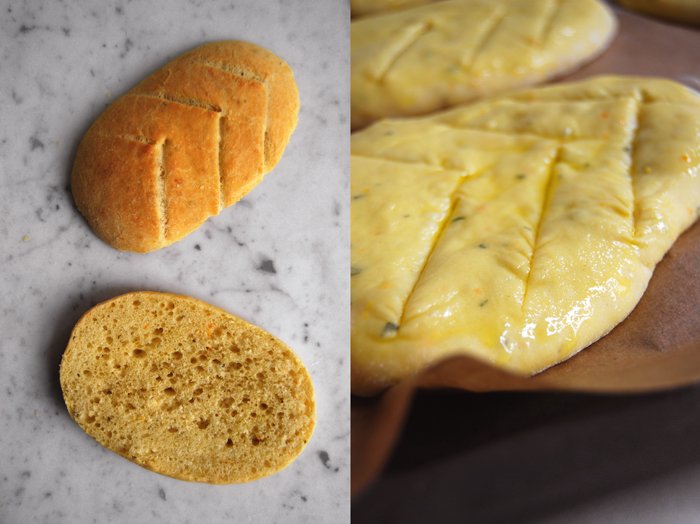
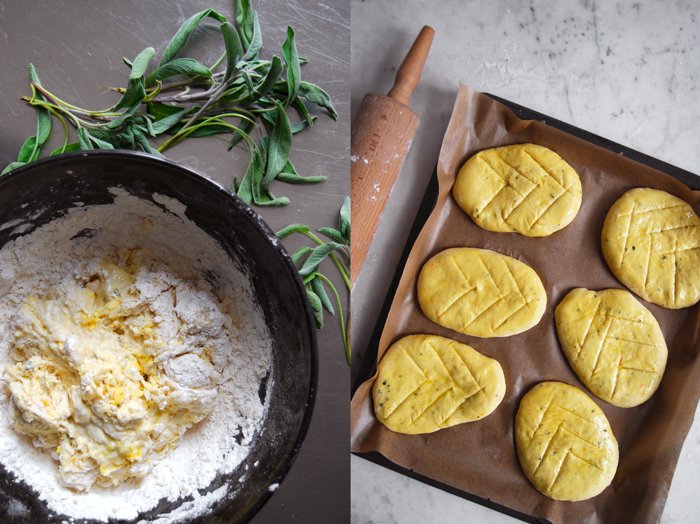
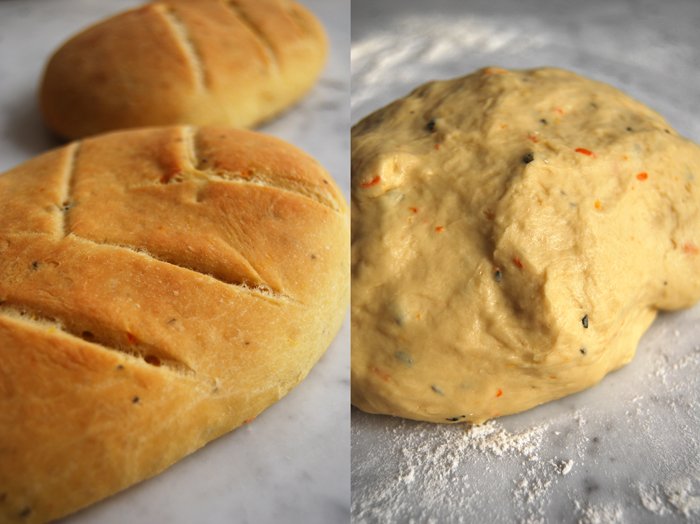
Fougasse Bread with Orange, Sage and Olive Oil
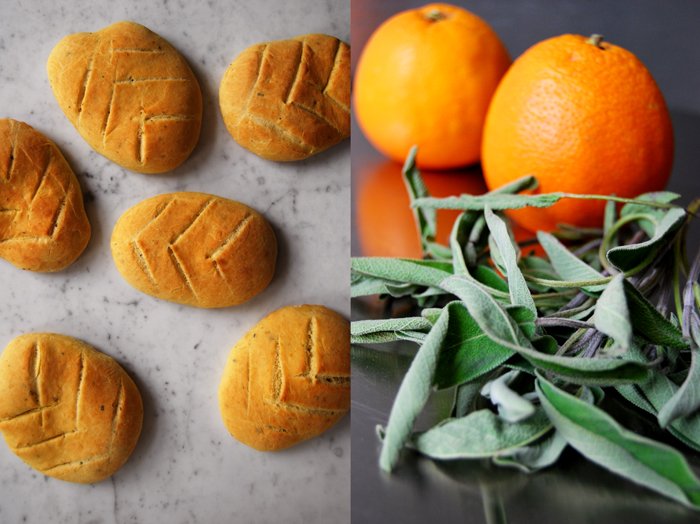
It's time to bake bread again! I use a recipe which involves sage and my beloved blood oranges, they'll be out of season soon, so I'm using every possible occasion that allows me to cook or bake with my sweet citrus fruits. I mix generous amounts of their zest and juice into the dough and the result is impressive!
My bread is a light and aromatic Fougasse, a French flatbread very popular in Provence where it's often made with olives, herbs and cheese. It's similar to the Italian Focaccia but with a leaf pattern of cuts in the dough. In some recipes, the cut goes all the way through creating holes in the bread while it's baking which makes the bread harder. I prefer to leave mine juicy with shallow cuts on the surface. Besides the orange and sage I add good olive oil in and on the bread. I use the wonderful extra virgin olive oil from the Molise region which I got from Marilena. Its strong and fruity taste is just what my Mediterranean flatbread needs!
I already have a great idea for a sandwich I can make with this bread for tomorrow's Sandwich Wednesday!
Fougasse with Orange, Sage and Olive Oil
For 6 flatbreads you need
plain flour 400g / 14 ounces (I use spelt flour type 630 but you can use any other plain flour)
dry yeast 1 package (for 500g / 1 pound flour)
salt 1 teaspoon
fresh sage, chopped, 8-10 leaves
zest of 1 medium sized orange
freshly squeezed blood orange or orange juice 100ml
water, lukewarm, 100ml
olive oil 5 tablespoons plus more for brushing the bread
organic egg 1
Combine the flour, yeast, salt, orange zest and sage in a large bowl. Add the water, orange juice and egg and mix with your dough hooks for 5 minutes. On a floured surface, continue kneading with your hands for a few minutes until you have an elastic dough ball. Put the dough back into the bowl and cover with a tea towel. Let the dough rise in a 35°C / 95°F warm oven for 45 minutes. This works really well but make sure that your oven is set to top/ bottom heat and not to fan.
Take the dough out and punch it down. Divide it into 6 pieces and roll them out into egg shaped discs (on a floured working surface, around 1 1/2 cm / 1/2″ thick). Put them on a baking sheet lined with parchment paper, cover with a tea towel and let them rise for 20 minutes.
Set your oven to 210°C / 410°F.
Brush the flatbread with olive oil and cut a pattern of 6-8 diagonal slashes into the dough to make a leaf pattern. Bake the flatbread on the lowest level for 12-15 minutes or until golden brown. Take them out and let them cool for 2 minutes.
I cut the warm flatbread in half and drizzled some more olive oil over it, it merged perfectly with the orange and sage aromas!

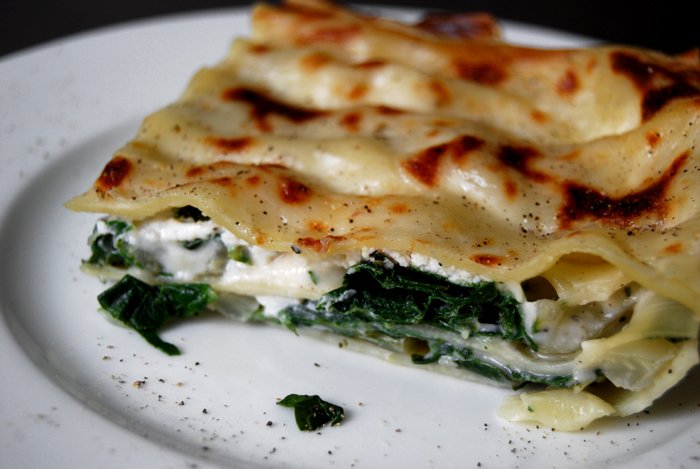
An earthy Chard and Ricotta Lasagna
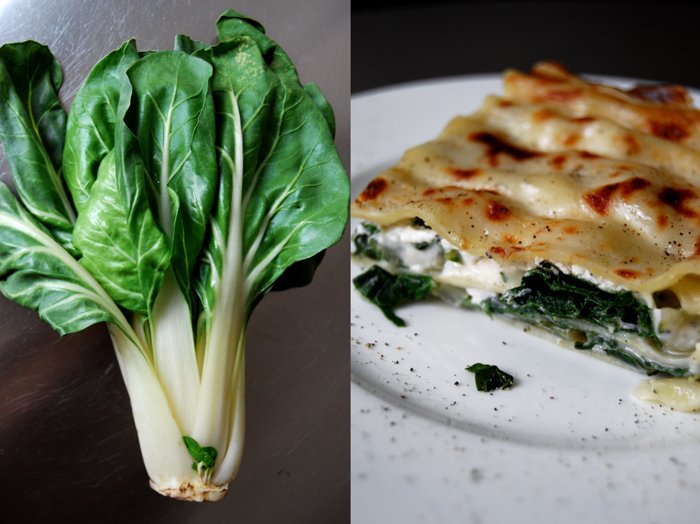
One of the qualities of chard, besides its wonderful taste, is that it gives me a spring feeling even in the coldest and darkest February evening. The thick green leaves are a promising hint of all the fresh green which will be on my plate in the next months, but for now I gladly enjoy this versatile vegetable. Chard tastes similar to spinach, but stronger with earthy flavours. I like it in combination with pasta and milky cheese. For a quick and easy dinner I chop the leaves roughly, cut the thicker stems into very thin slices, fry them in oil and deglaze everything with a glass of white wine. Mixed with spaghetti, some heavy cream and parmesan it's a wonderful pasta dish.
With a bit more time, chard makes a delicious lasagna together with ricotta, Béchamel and some parmesan. For a cold night, I recommend this comfortable dish. It's done after less than half an hour in the oven, you just need to blanch the chard beforehand and prepare the Béchamel.
Chard and Ricotta Lasagna
I use a 27cm x 20cm / 10.5″ x 8″ baking dish, definitely big enough for 4 people.
For the chard
chard, rinsed, 500g / 18 ounces
nutmeg, ground
salt and black pepper
Bring a large pot with water to the boil. Cut the soft green of the chard into 1 cm / 1/2" strips and the hard white parts into very thin slices. Salt the water, first boil the white slices of chard for a couple minutes until al dente, then throw in the the green as well and cook for 1 minute. Take the chard out of the water and rinse in a sieve with cold water for 1-2 seconds. Season with salt, pepper and nutmeg to taste and set aside.
For the Sauce Béchamel
milk 600ml
butter, 30g / 1 ounce
plain flour 30g / 1 ounce
bay leaf 1
a pinch of nutmeg, grated
salt and black pepper
Mix the milk with the nutmeg, salt and pepper and bring to the boil. In a sauce pan, melt the butter and whisk in the flour. Pour the hot milk into the roux and continue mixing till smooth. Add the bay leaf and simmer for around 5 minutes on low heat until the texture is thick and smooth. Take the bay leaf out and season with salt and pepper.
For the Lasagna
lasagna pasta sheets around 250g / 9 ounces
ricotta 250g / 9 ounces
Parmesan, grated, 4-6 tablespoons
Set the oven to 180°C / 355°F and butter the baking dish.
Put down a layer of pasta in the baking dish, spread with 1/2 the chard, pour 1/3 of the Béchamel over it and sprinkle with 1/2 of the ricotta (in big lumps). Repeat with another layer of pasta, the rest of the chard and ricotta and 1/3 of the Béchamel, cover with the final layer of pasta and the remaining Béchamel. Sprinkle with parmesan. Bake for 25 minutes or until the pasta is done, switch on the grill for 2 minutes or until the pasta becomes golden brown and partially crisp.

Marilena's Milk Pan di Campobasso, a traditional Dolci del Molise
I have wonderful news, eat in my kitchen is in the final of the Kitchn's "Best Daily Read Cooking Blog" together with nine other blogs! Thank you for your support and help to come so far!
It would be great if you could vote (one last time, I promise) for the final vote of the "Best Daily Read Cooking Blog" here.
A few weeks ago a very sweet lady, Marilena, got in touch with me. It was the day I wrote about Mussel with Ginger, Lemon Grass and Coriander and we got to talking about seafood recipes, cakes and olive oil. At one point she asked me if I would like to try one of her cake recipes, the Milk Pan di Campobasso.
Marilena lives in Italy in the Molise region (in the Campobasso province) which is north-east of Napoli. She loves to bake, beautifully decorated cakes for weddings and special events and she produces her own olive oil, Marilena has 300 olive trees! She already sent me some of her wonderful extra virgin olive oil which is divine, a few drops on fresh bread and some salt, delicious!
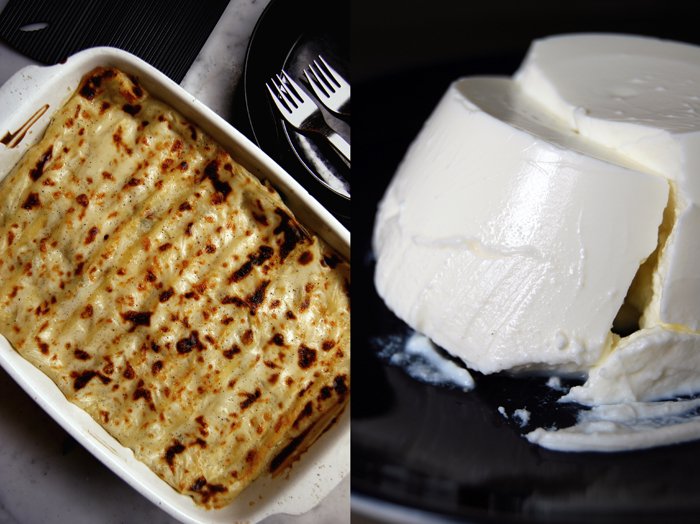
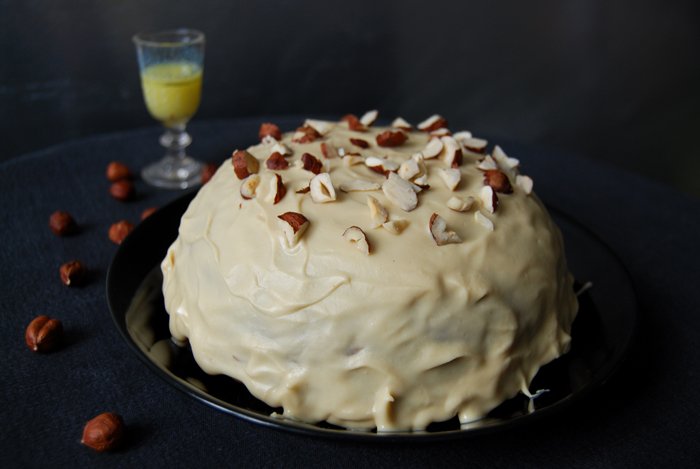
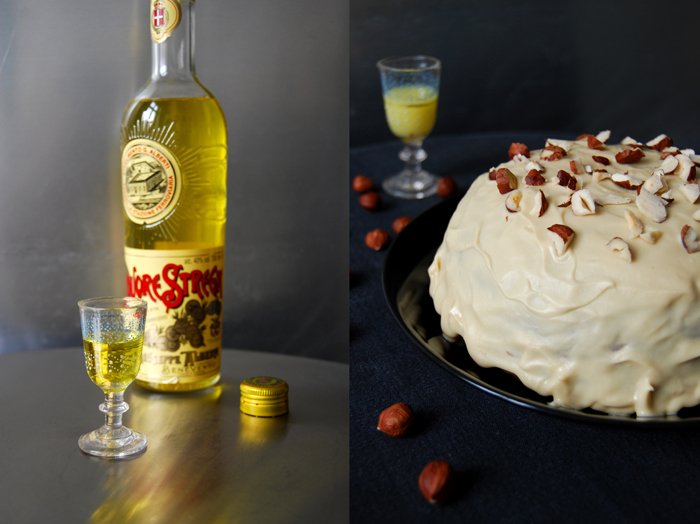
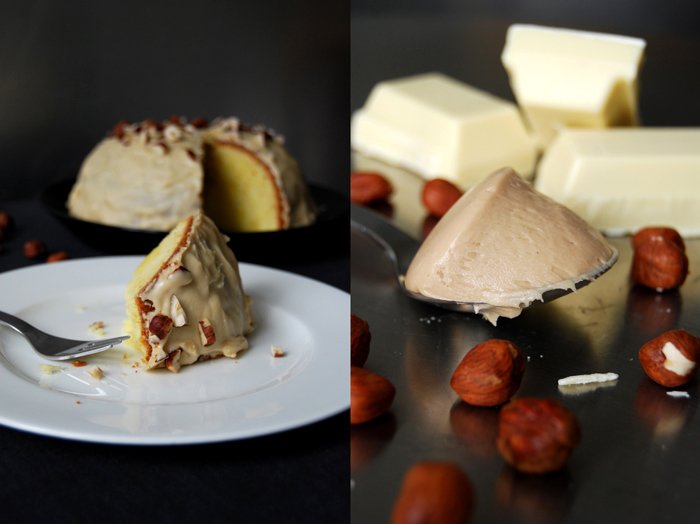
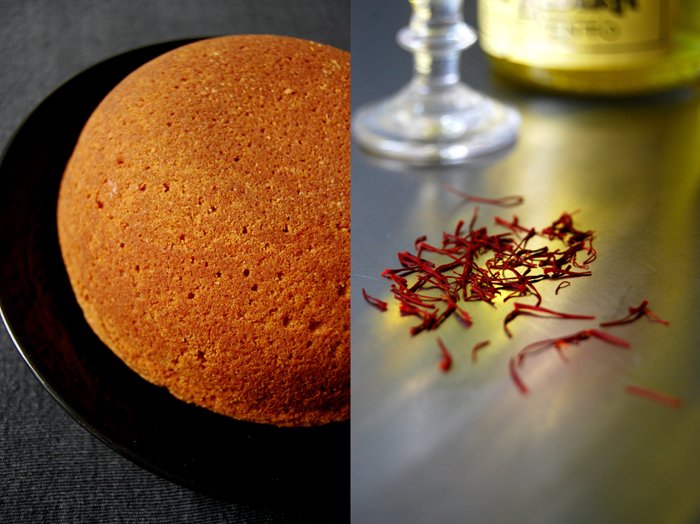
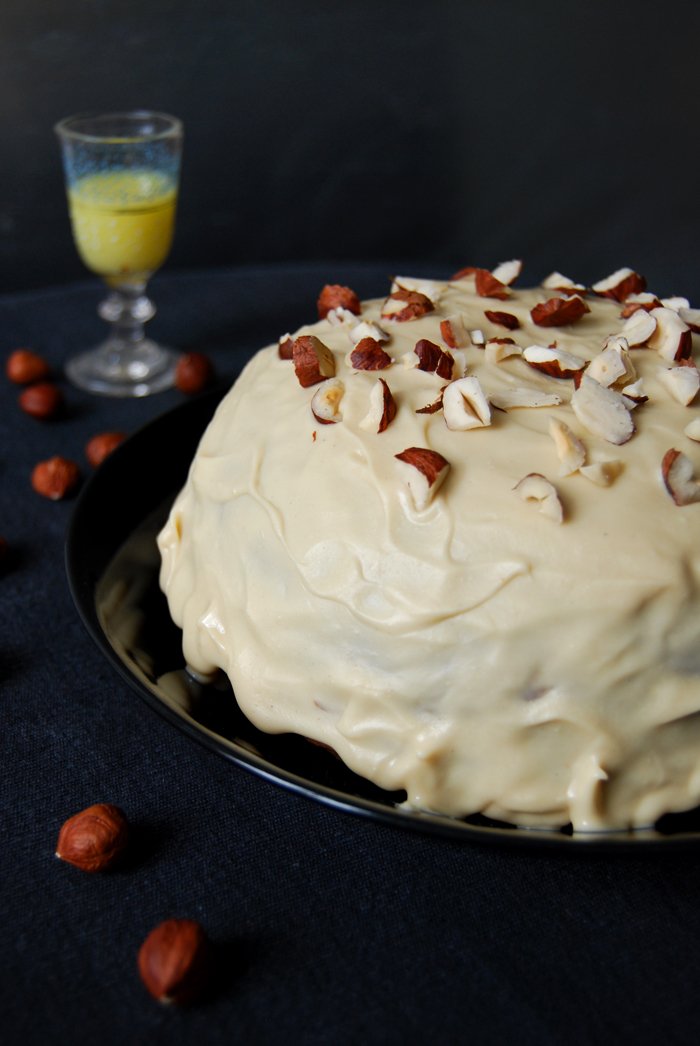
So finally I baked her cake, Marilena's Milk Pan di Campobasso. I was excited, it's a special recipe, a traditional Dolci del Molise and it required a few preparations. First I had to get a special liqueur, the Italian Strega (meaning "witch") which is a herbal liqueur produced since 1860, bright yellow made with saffron, mint and fennel. I ordered it and when it arrived I prepared the "liqueur milk". A mixture made of milk, Strega liqueur, sugar, saffron, vanilla and lemon peel which has to sit overnight, it gives the Milk Pan its typical taste and yellow colour. The cake is baked in a dome cake tin, it's very juicy, a bit moist but still light. It is covered with a glaze of nocciola cream, a hazelnut spread, mixed with white chocolate and sprinkled with hazelnuts. It's hard to describe the taste, it's the taste of Italy, wonderfully sweet and aromatic, with a slight hint of saffron which is a great match to the hazelnuts. I love it, thank you Marilena!
Milk Pan di Campobasso
For this cake you need a 1 liter dome cake tin (mine is ceramic, you can also use a metal one).
For the liqueur milk
I made more liqueur milk than I needed for the cake as I want to use it for other dessert recipes as well. You will need around 50ml (one espresso cup) of this mixture for the cake.
milk 50ml
granulated sugar 50g / 2 ounces
Strega liqueur 50ml (you can also use another herbal liqueur with fennel and saffron)
a tiny pinch of saffron
the seeds of 1cm / 1/2" vanilla bean
a long strip of lemon peel
Mix all the ingredients in a bowl, cover and let them infuse overnight.
For the hazelnut chocolate icing and topping
white chocolate 150g / 5 ounces
nocciola cream (hazelnut spread) 2 big tablespoons
sunflower oil 2 tablespoons plus more for mixing
hazelnuts, chopped, 3 tablespoons, or more if you like for the topping
In a sauce pan, melt the chocolate on low temperature and stir in the hazelnut spread and oil. It should be smooth and liquid, if it's not liquid enough you will have to add a little more oil.
For the cake
butter, soft, 150g / 5.5 ounces
granulated sugar 150g / 5.5 ounces
organic eggs 3
pinch of salt
plain flour 80g / 3 ounces
potato starch 80g / 3 ounces
baking powder 1/2 teaspoon
liqueur milk, 1 espresso cup (around 50ml)
Set the oven to 180°C / 355°F ( (fan-assisted oven), butter the dome cake tin and sprinkle with breadcrumbs.
Beat the egg whites with a pinch of salt till stiff. Combine the flour, potato starch and baking powder. In a large bowl, beat the butter and sugar till fluffy, add the egg yolks, one at a time. Stir in the dry ingredients and the liqueur milk and continue mixing until well combined. Gently fold in the egg whites.
Scrape the dough carefully into the prepared tin and bake until golden. Check with a skewer, it should come out clean. Marilena told me to check it after 30 minutes, mine needed 55 minutes. The baking time depends on the shape, size and material of your tin.
Let the cake cool (I put the tin in cold water which makes it easier to take the cake out), carefully flip it over on a big plate and ice it with the hazelnut chocolate icing. Sprinkle with hazelnuts and enjoy its beauty (and taste)!

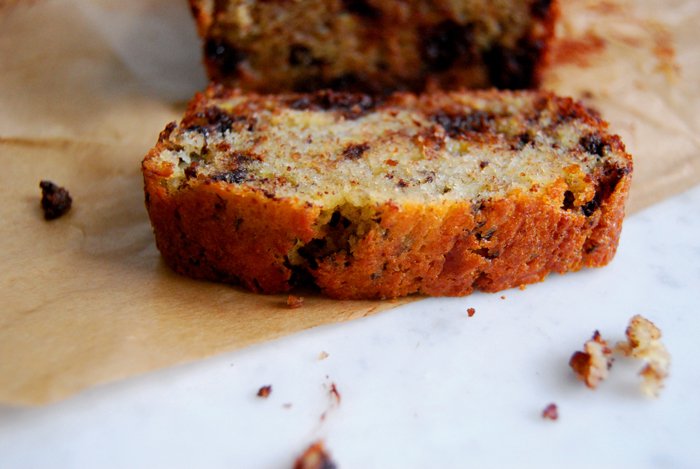
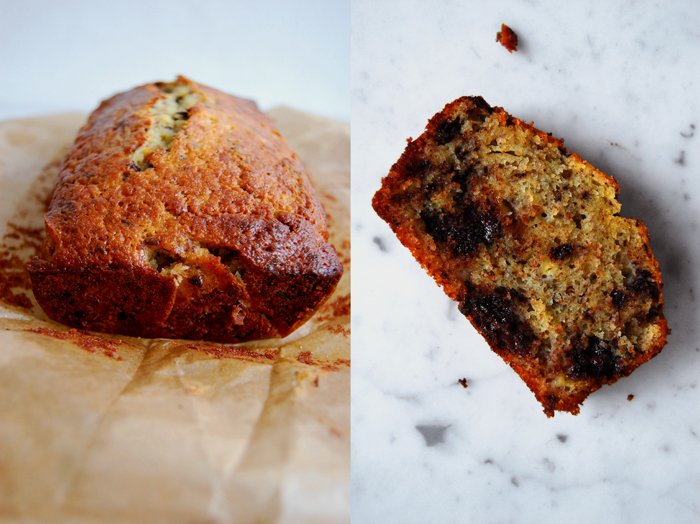
Sweet and Spongy Banana Chocolate Bread

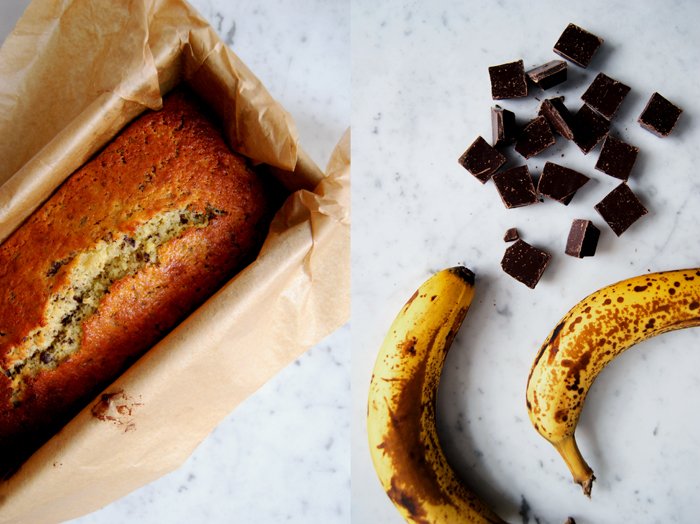
This is another perfect weekend breakfast treat, Banana Chocolate Bread. I like mine juicy, almost moist, with lots of big pieces of banana and bittersweet chocolate chunks. When you take the bread out of the oven, golden and warm and you cut the first thick slice off the loaf, pushing the knife through sweet banana chunks and melted chocolate, you'll understand why there's no better start to the weekend. It feels, smells and tastes just right! I never wait for the bread and chocolate to cool, I have to eat a slice immediately as soon as it's done, the chocolate still warm and liquid.
The combination of banana and bittersweet chocolate is a special one as the sweetness and the bitterness balance each other out perfectly. I love it in ice cream, cookies and cakes, but to me nothing beats this duo when their big chunks merge into a warm cake, or morning bread. For one loaf I use three big bananas and 100g / 3.5 ounces of bittersweet chocolate, I don't want a hint of their flavours, I want an explosion on the taste buds.
Banana Chocolate Bread
For a 24cm x 10,5cm / 9.5″ x 4″ loaf tin you need
butter 120g / 4.5 ounces
granulated sugar 100g / 3.5 ounces
vanilla sugar 1 package (you can also use vanilla extract)
organic eggs 2
large and ripe bananas, quartered, 3
plain flour 120g / 4.5 ounces
baking powder 2 teaspoons
salt 1/2 teaspoon
bittersweet chocolate, chopped roughly (leave a few bigger chunks), 100g / 3.5 ounces
Set the oven to 160°C / 320°F (fan-assisted oven) and line the loaf tin with parchment paper.
Combine the flour, baking powder and salt. Mix the butter together with the sugar and vanilla sugar till fluffy. Add the eggs, one at a time, and continue beating for a couple minutes. Add the bananas, beating for 10-20 seconds and stop before they get too smooth, they should be a bit chunky. Gently fold in the flour mixture with a spoon, add the chocolate chunks and fold them in, carefully as well. Scoop the dough into your prepared tin and bake for 55 minutes or until golden brown. Check with a skewer, it should come out clean.

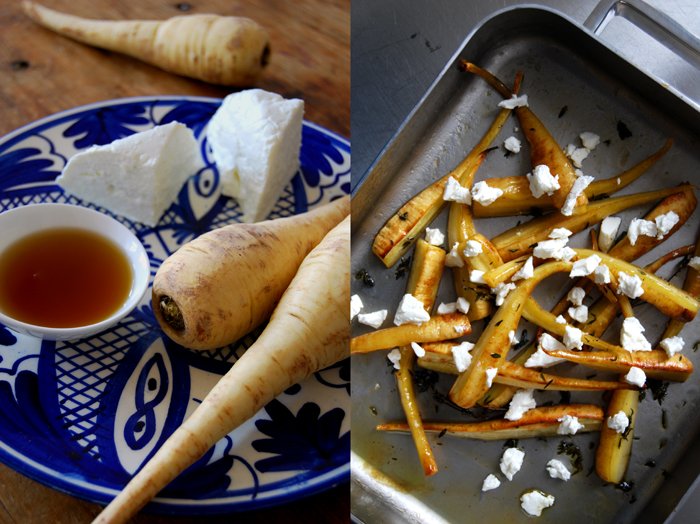
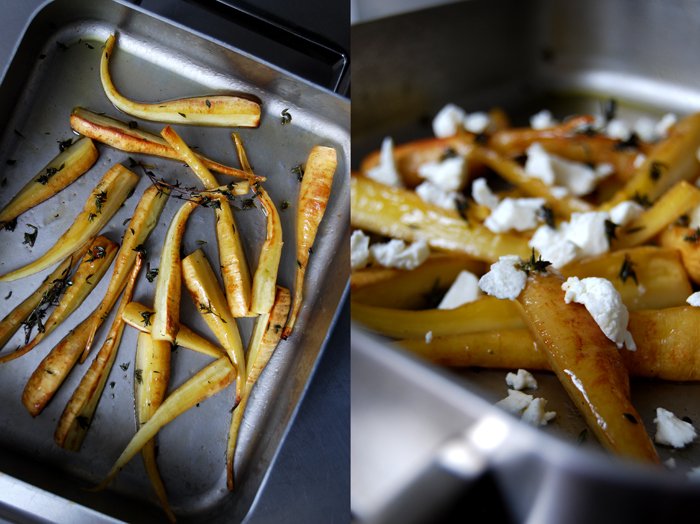
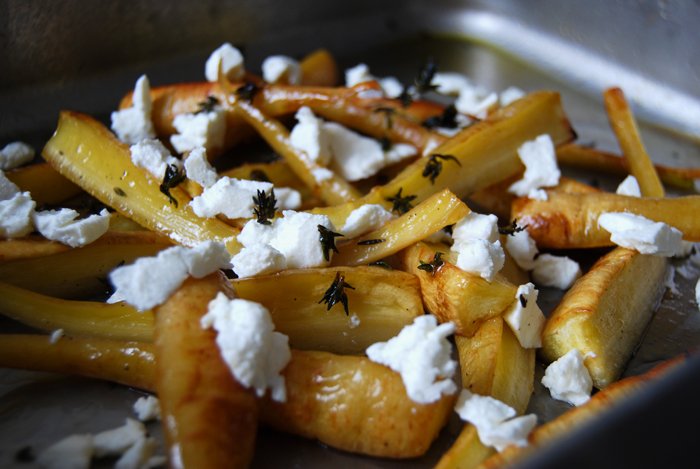
A Salad of Caramelised Parsnip with Maple Syrup, Goat Cheese and Thyme
At the moment I could eat roots and turnips all the time luckily, as tasty spring vegetables are still a few months away. It's always the same, around March I start to miss ripe tomatoes, juicy cucumber, crunchy lettuce, zucchini, the ripe tastes of summer. Greenhouse vegetables reach their watery peak at this time of the year so they are not really an alternative. The cherry tomatoes I bought the other day had thick skin and when I ate them I had to image tomatoes rather than tasting them. I don't really feel like cabbage anymore, so I stick to everything that grows in the ground.
I enjoyed my Monday's Ginger Honey Navet Steaks so much, their sweet, syrupy juices were delicious, that I thought about other combinations of roots and syrup. My choice was caramelized parsnip roasted with maple syrup and thyme leaves, combined with fresh goat cheese in a warm salad. The juices make a great thick syrup, glazed around the roots they are a perfect match for the milky cheese crumbs and strong wintery herb. You could make it as a side dish, still hot, we ate it as a warm salad, I didn't want the cheese to melt.
I cut three parsnips into long strips and glazed them with 3 tablespoons of olive oil and 2 tablespoons of maple syrup mixed with salt and pepper. A dash of white wine and the leaves of 4 sprigs of time on top, everything well spread in a roasting tin, I baked it for 15 minutes in the hot oven set to 200°C / 390°F, Rotitherm roasting setting. When the parsnip was done, golden on the outside and soft inside, I let them cool for a couple minutes before I crumbled 80g / 3 ounces of fresh, soft goat cheese over the roots. The two us cleaned the tin with our fingers, not to waste a drop of the sweet syrup.

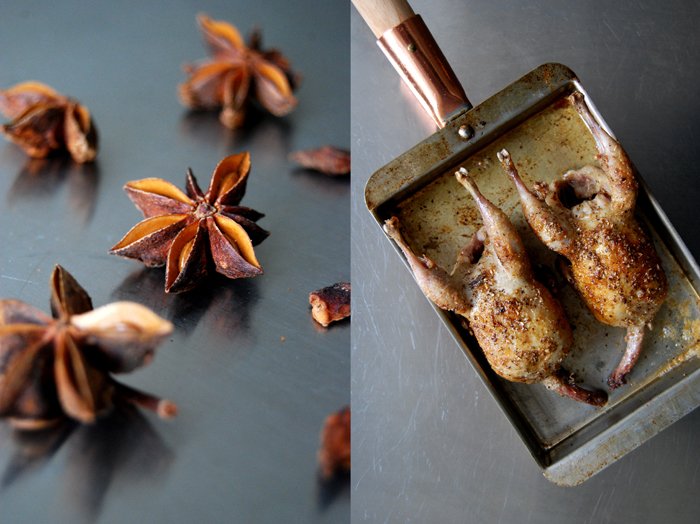
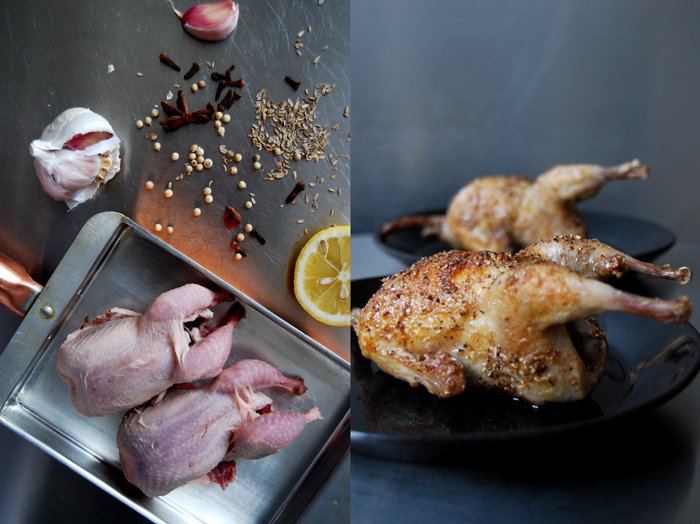
Roast Quail with Spice Crust
I remember when I was a child I refused to eat quail, I didn't like the idea of cooking a bird of that size. I got older, learnt that there is no difference between eating chicken, quail or any other fully grown bird and then one day, I tried a piece of its juicy meat. I was convinced within seconds! I have since tried out many recipes, fruity with roast grapes, quail with different herb variations, pure and buttery, exotic quail with various spice mixtures, so many possibilities that change with the seasons. There's one thing these recipes have in common, I always fry the quail in fat with a piece of garlic and then I roast it in the oven for 8-10 minutes. It makes the skin crisp and the meat doesn't loose its juices.
You can play around with quite a few aromas because it tastes so strong, it allows you to be more experimental than with chicken. I love to look through my big box of spices and follow my nose to choose the right mixture. It makes me feel like a child in a sweet shop! This time I go for 1 small star-anis, 2 cloves, 12 black pepper corns, 1 teaspoon of coriander seeds and 1/4 teaspoon of aniseed, everything ground coarsely in my mortar. This spice mixture makes the crust for 2 quails. I had some goose fat in the fridge, perfect for frying poultry but you can use butter instead. I fried the birds together with 1 clove of garlic cut in half until their skin was golden brown on all sides and put them into a baking dish. The buttery juices mixed with a dash of lemon juice go over the quails, followed by the spices rubbed into their skin and some salt. Now they just need to go into the oven, set to 200°C / 390°F, I used the Rotitherm roasting setting which works perfectly for poultry. Mine were done in 8 minutes, I had bigger quails which needed up to 15 minutes depending on their size.
We focused on the quail and enjoyed this meal with slices of white bread to dip into the spiced juices and a salad on the side.


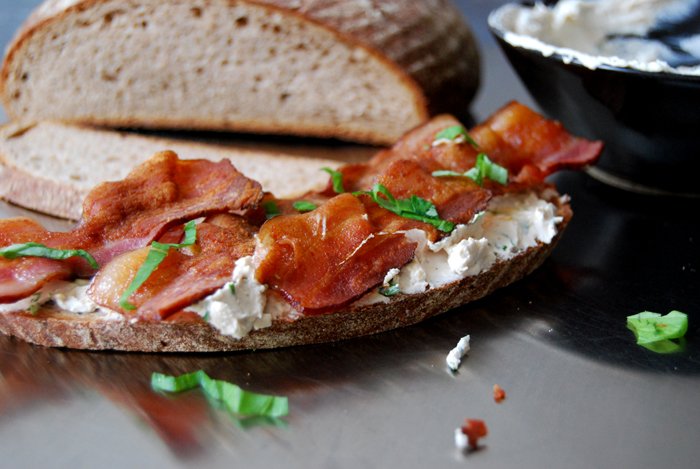
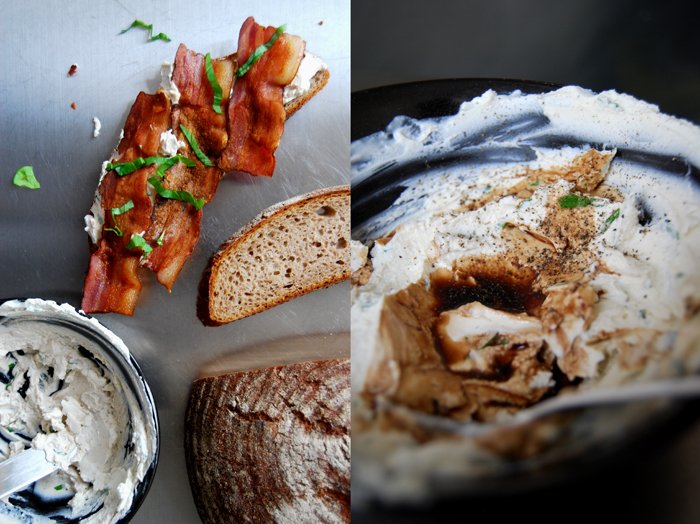
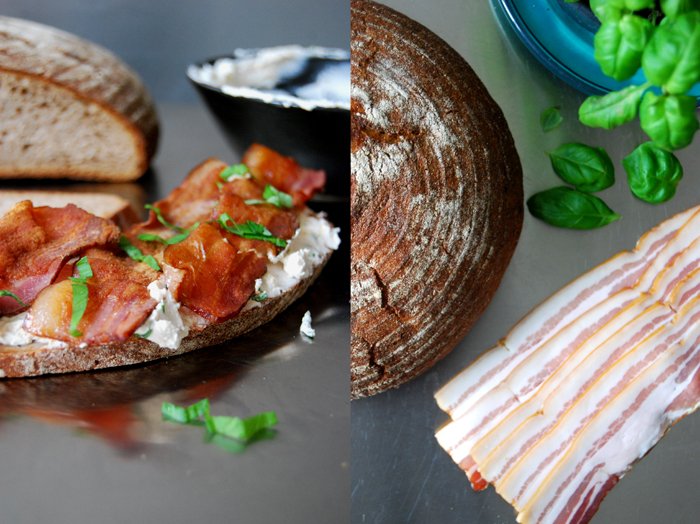
Bacon Sandwich with Balsamico Basil Cream Cheese
Before I tell you about my idea for this week's Sandwich Wednesday I would like to share some great news! Eat in my kitchen has been nominated for TheKitchn's "Best Daily Read Cooking Blog" which makes me very happy and proud. It would be great if you could take a minute to vote for eat in my kitchen (voting ends this Saturday the 22nd February) at this link: http://thekitc.hn/1gBlL11
Thank you for your support, Meike xx
Back to my sandwich, this week I was in the mood for hearty, dark bread, topped with Balsamico cream cheese and crisp bacon. One of my favourites from my local bakery is an organic spelt potato bread, juicy but with a nice crust. It's similar to rye bread, just a bit lighter with the advantage that the loaf stays fresh longer because of the starch from the potatoes. Cut into thick slices, it's perfect for a late winter sandwich. I also bought some very strong bacon, a bit on the salty side. To balance this out I combine it with a smooth, milky cream cheese enhanced with Balsamico and basil. This is a great spread, I also use it on slices of grilled aubergine rolled up into little antipasti. Delicious, but I'll write about that another time!
For this week's sandwiches - for 2 as always - you need 4 slices of dark bread (spelt or rye), one side spread with my Balsamico basil cream cheese mixture. For the spread you mix 70g / 2.5 ounces of cream cheese with 2 tablespoons of heavy cream, 1 1/2 teaspoons of Balsamico, 8 basil leaves sliced thinly and salt and pepper to taste. When this is done you just need to fry 6 slices of bacon until golden brown and crisp and lay them on the cream cheese. Sprinkle with some more Basil, close with another slice of bread if you like and enjoy!