ISCHIA / ISOLA VERDE
Meet In Your Kitchen | Daniel Schreiber's Sourdough Waffles with Plum-Apple Jam

This post is part of my Meet in My Kitchen podcast: How did we get to where we are in life & what does food have to do with it
"Through food we connect with the world’s gift and also with the gift of the knowledge of other generations." - Daniel Schreiber
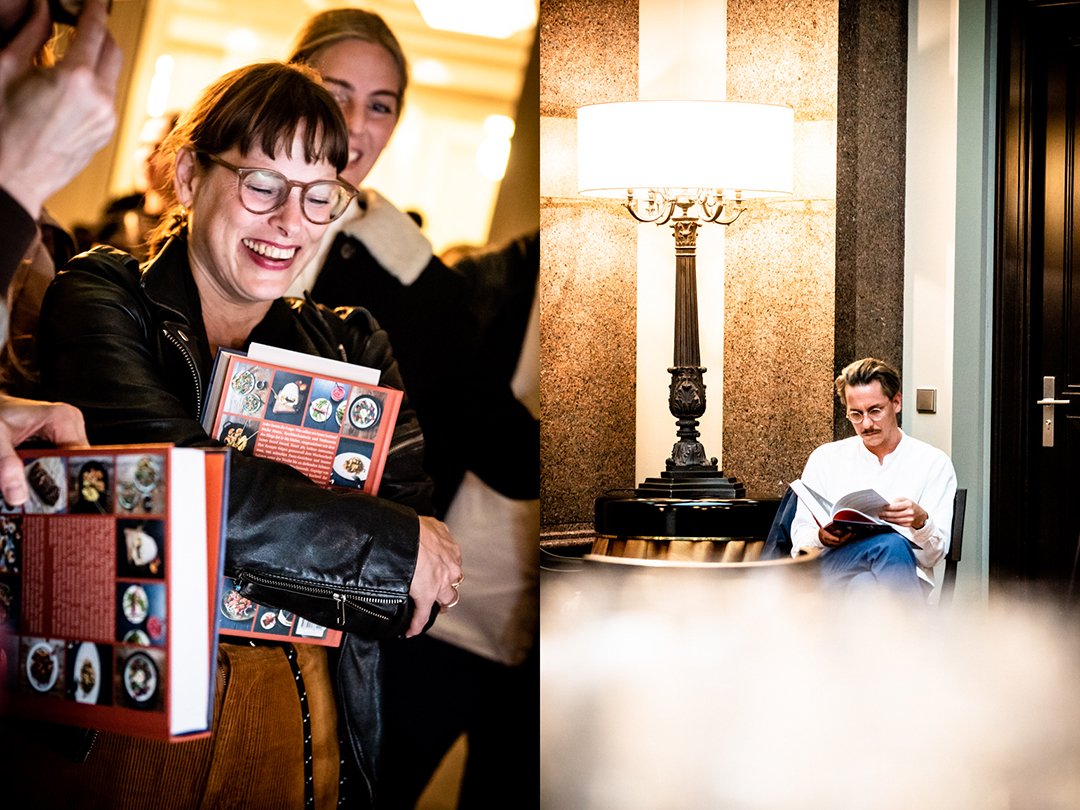
Daniel Schreiber writes books that touch a sensitive spot. He writes about his own experiences yet these are experiences that we all share in one way or the other. In his last three books - 'Nüchtern' (Sober), 'Zuhause' (Home), and 'Allein' (Alone) - he touches the fears we know but learned to sail around, he writes about his own life but reminds us of our own.
Every word he chooses says the truth, very direct, very blunt, you can feel that, and by this, in a way that is hard to describe, he creates a fragile beauty. It's the beauty of togetherness, that we are all in this together, that we're not alone, we're not the only one struggling, and that we can share our struggles and be open about them. It sounds almost too sweet but despite the pain that is present in his books, there is so much warmth. Like in real life.
It's like your favorite tea cup, it's cracked, it's chipped, you glued it back together, but when you feel its uneven surface drinking your tea in the morning, you don't think of the pain you felt when it broke. Each crack makes it even more familiar, makes it even more a part of yourself, your story, and who you are. You learn to love these cracks. Daniel manages to transport this feeling in his books. Each crack we have makes us the person who we are. It's a long and beautiful story of life, love, and learning, and yes, sometimes it also hurts.

"When I came to New York it was quite a depressive period for me but something happened at that time in connection with food that helped me a lot. I started cooking through the Larousse Gastronomique and practically cooked every evening. I went shopping to the market or supermarket every day to try out new recipes. That gave me a lot of strength." - Daniel Schreiber
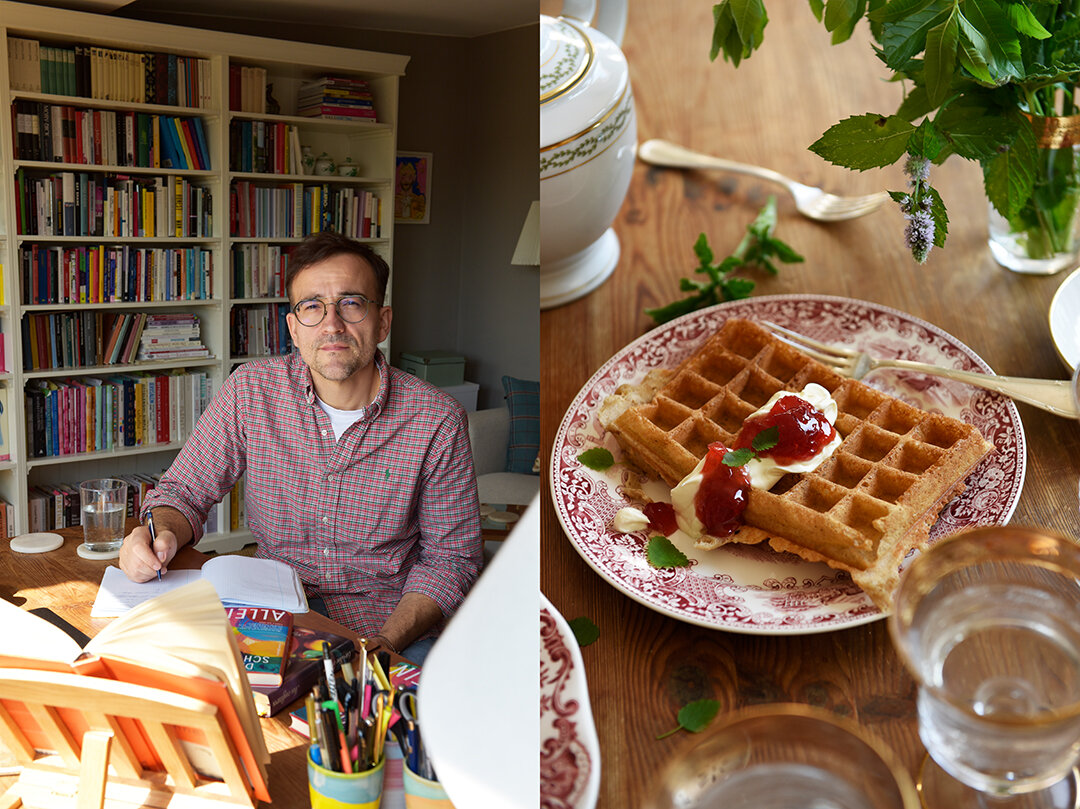
And what does food have to do with it? Daniel's eyes start sparkling when he's talking about his mother's garden in a tiny village in Mecklenburg-Vorpommern (Mecklenburg-Western Pomerania) where he grew up. When he talks about picking fruit and vegetables and filling a bucket up to the rim with the harvest to take home to his kitchen in Berlin every time he visits his parents. His mother's cooking and recipes - some of which she keeps secret until today - laid the foundation for Daniel's love for cooking. A love that taught him that there's light even in the darkest of times - and he can choose to switch it on.
Food and literature were held up high in his family's house and became his companions on his own journey. Studying literature in Berlin and New York City put the young man in touch with buzzing metropolitan life and helped him shape his identity as a young man. His original academic dreams faded and instead he worked for newspapers and magazines. He wrote a celebrated Susan Sontag biography followed by three books, weaving his own experiences into a scientific, psychological, and philosophical context.

"Most of us have problems to say what we really want to say. Society and our families don’t educate us to really find an authentic relationship with ourselves. We have to fulfill certain roles, certain expectations, that we ourselves and society force upon us, economical and social expectations. And these internalized expectations and roles are in our way most of the time." - Daniel Schreiber
No matter how rocky his life got at times, no matter how far he drifted away, Daniel always searched for and found the way to the kitchen and with this, a way back to himself. Working as a private chef, cooking and catering for families and events in Manhattan and the Hamptons, strengthened his confidence as a cook and sparked his curiosity. Cooking through a vast collection of books, experimenting with recipes, turned Daniel into a person who knows the tastiest recipes for almost every dish you can think of.
His sourdough bread and waffles reach perfection in taste and texture, the homemade jam collection on his kitchen shelves can easily compete with a professional jam manufactory. Whatever he sets his mind on becomes his passion. His terrace looks like a dense green jungle speckled with colorful blossoms in all shapes and sizes - and he can tell you the name of every single plant there is in his green kingdom. He turns piles of wool into the favorite scarves, quilts, and sweaters of family and friends. And he puts words and letters together in ways that I want to read his books even when they force me to face my own fears.
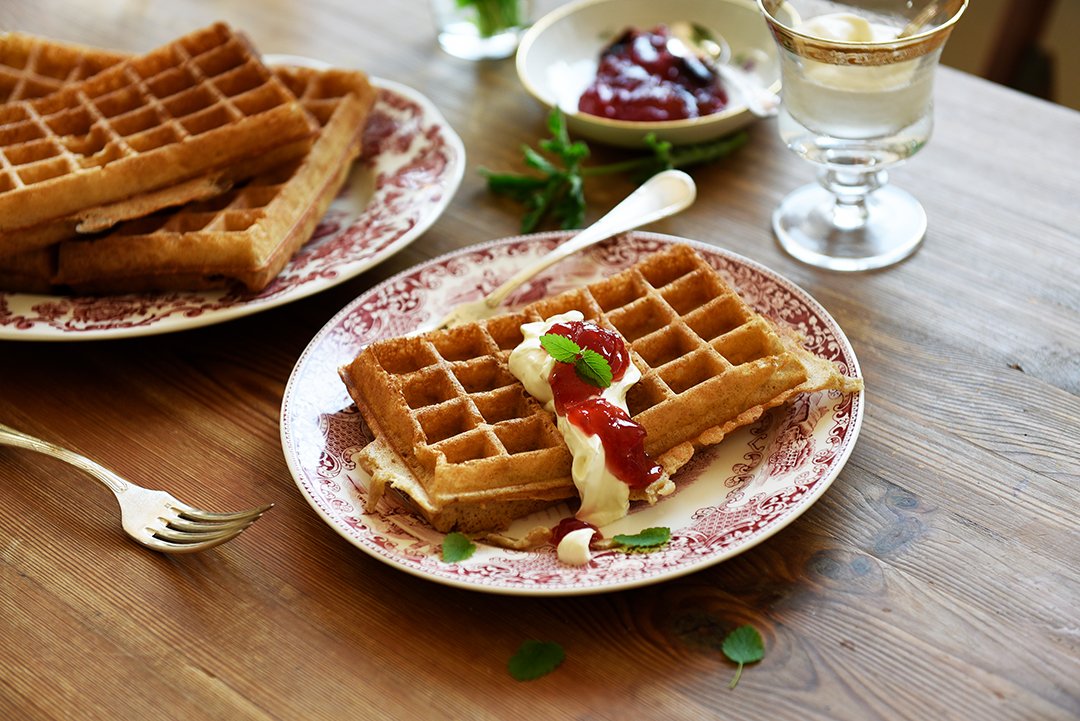
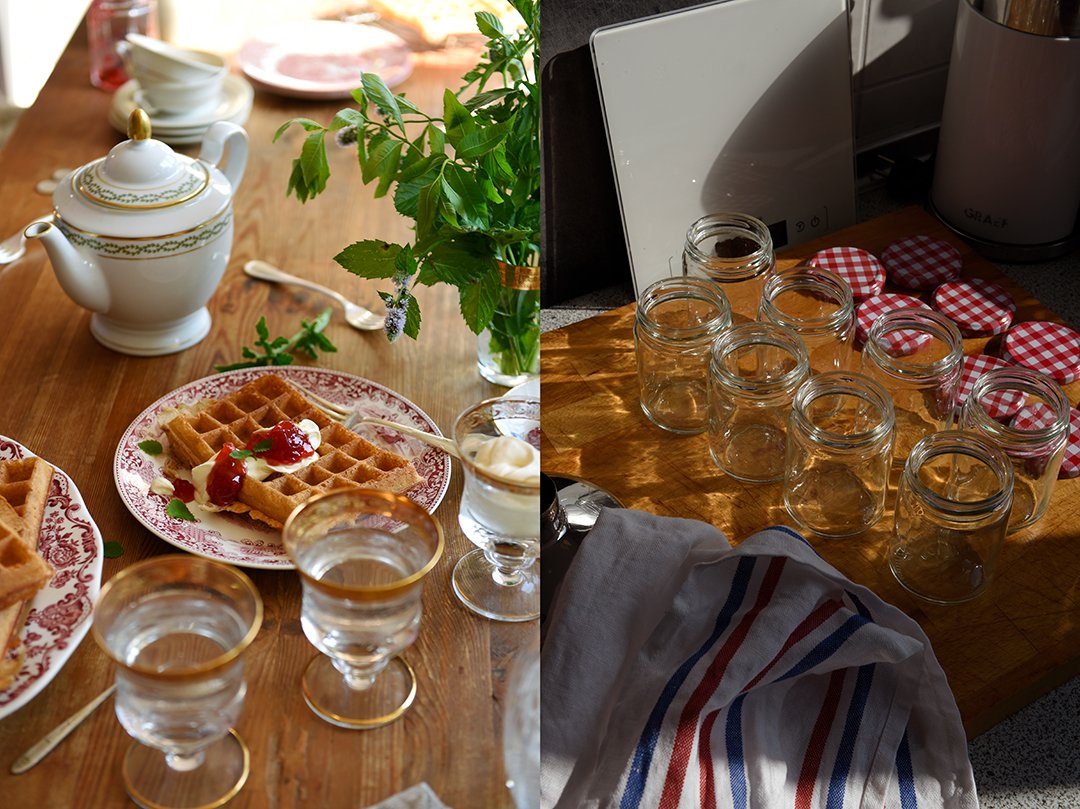
Daniel shared two recipes with me that are perfect for an autumn brunch or cozy teatime: Sourdough waffles, crisp on the outside and spongy inside, crowned by dollops of crème fraîche and crimson colored jam made of dark plums and firm apples infused with star-anise and vanilla.
The podcast episode with Daniel Schreiber is in German. You can listen to the Meet in My Kitchen podcast on all common podcast platforms; there are English and German episodes. You can find all the blog posts about these podcast episodes including my guests’ recipes here on the blog under Meet in Your Kitchen.
Listen to the podcast episode with Daniel on:
Spotify / Apple / Deezer / Google / Amazon / Podimo
On Instagram you can follow the podcast @meetinmykitchenpodcast!

Sourdough Waffles with Plum-Apple Jamand Crème Fraîche
by Daniel Schreiber *
* The waffle recipe is adapted from a New York Times recipe and the jam recipe is adapted from a recipe by Christine Ferber.
For the plum-apple jam
Mind that the jam needs to sit overnight before you finish cooking it the next day.
Makes 6-7 small jars
680g / 1 1/2 pounds dark plums (Zwetschgen, Italian Prune Plums), cut in half and pitted (weight without pits: 500g / 18 ounces)
750g / 1 2/3 pounds firm, sour apples (Granny Smith, Golden Delicious, Idared), peeled, quartered, cored, cut crosswise into very thin slices (final weight: 500g / 18 ounces)
800g / 1 3/4 pounds granulated sugar
2 star-anise
1 vanilla pod, split in half
2 medium lemons, juice only
7 small jars with their lids, sterilized
The day before you want to cook the jam, combine all the ingredients in a tall, large pot and let it sit for 1 hour. Over high heat, stirring gently, bring the jam to a boil. When the jam starts bubbling and rising, immediately remove the pot from the heat, cover with a lid, and let it sit overnight.
The next day, place a saucer in the freezer. Remove the lid from the pot and bring the jam to a boil over high heat, stirring gently. Cook the jam for 10-15 minutes or until it thickens and reaches its setting point. To see if the jam reached its setting point either use a sugar thermometer, the temperature should be 105°C / 220°F, or place a small spoonful of jam on the chilled saucer that you kept in the freezer, wait 20-30 seconds then push the jam with your finger. The jam should wrinkle up. Remove and discard the vanilla pod and star-anise. Using a ladle, fill the jam into the sterilized jars, close them tightly with their lids, and store in a dark place.
For the sourdough waffles
For this waffle recipes, you make use of the sourdough starter that you usually discard every day when you refresh your sourdough starter. Just make sure that you take 240g / 1 cup sourdough starter aside before (!) you refresh your starter. Mind that you need to prepare the batter the night before you want to bake your waffles and finish it the next day.
Serves 2-4
240g / 1 cup sourdough starter that hasn't been refreshed (fed)
220g / 1 cup buttermilk
120g / 1 cup all-purpose flour (German flour type 550)
1 tablespoon light brown sugar or granulated sugar
1 vanilla pod, split and scraped, or 1/2 teaspoon vanilla extract
1 large egg
60ml / 1/4 cup olive oil
1/2 teaspoon fine salt
1 teaspoon baking soda
The night before you want to bake the waffles, whisk together the sourdough starter, buttermilk, flour, sugar, and vanilla seeds in a large bowl until smooth. Cover with plastic wrap and let it sit at room temperature overnight.
The next day, when you're ready to bake the waffles, preheat a waffle iron (ideally a square Belgian waffle iron). Add the egg, olive oil, salt, and baking soda to the sourdough mixture and whisk to combine.
Pour a ladle of the batter into the hot waffle iron and bake until golden brown and crisp. Transfer the waffle to a cooling rack and let cool for a few minutes. Continue baking more waffles with the remaining batter.
For serving
Crème fraîche
Place a dollop of crème fraîche and a dollop of jam on a warm waffle and serve immediately.


Meet In Your Kitchen | Cookies & Co's Ricotta Lemon Cake with Yuzu Cream

This post is part of my Meet in My Kitchen podcast: How did we get to where we are in life & what does food have to do with it
“Food is existence. It’s therapy. In our case, food is a way of expression. It’s a reflection of our personalities and our believes. Food in general is pure pleasure.” – Mira and Ori
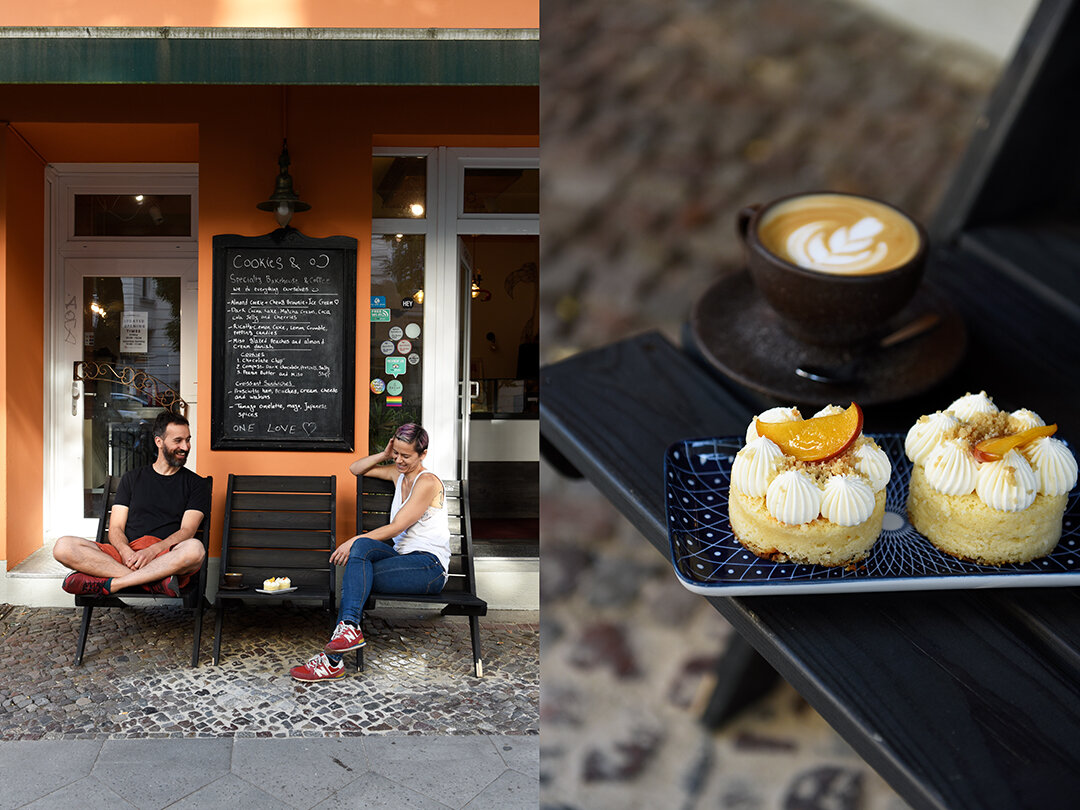
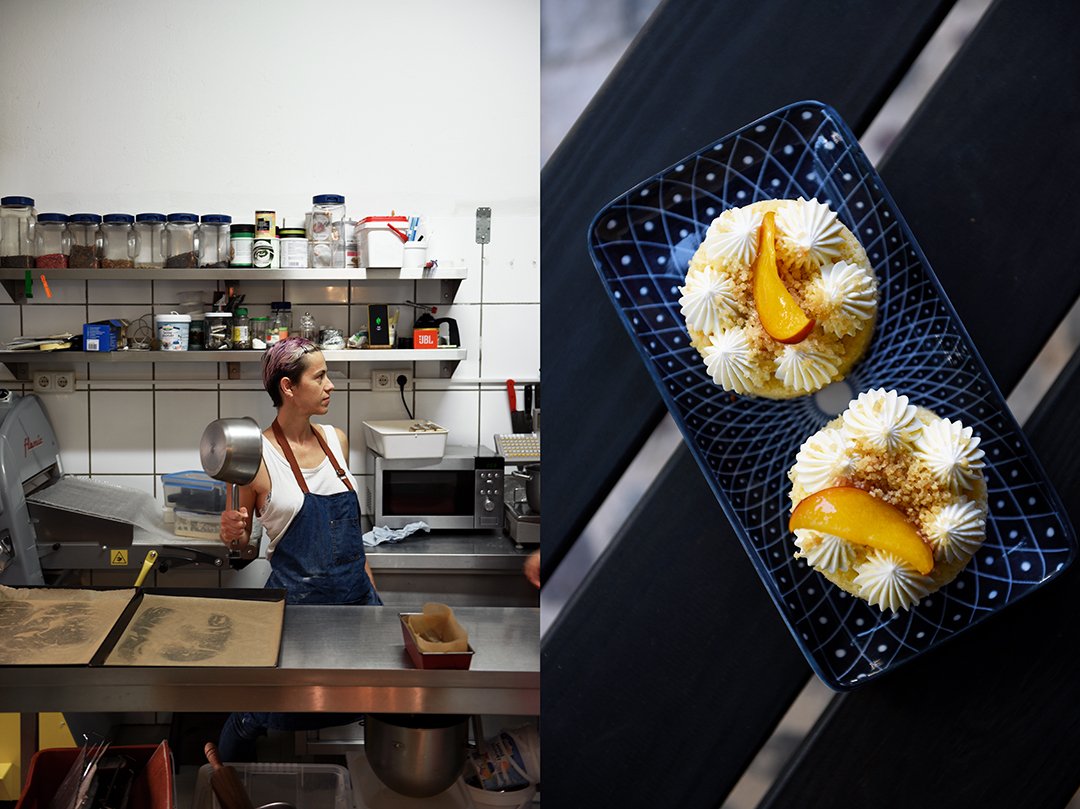
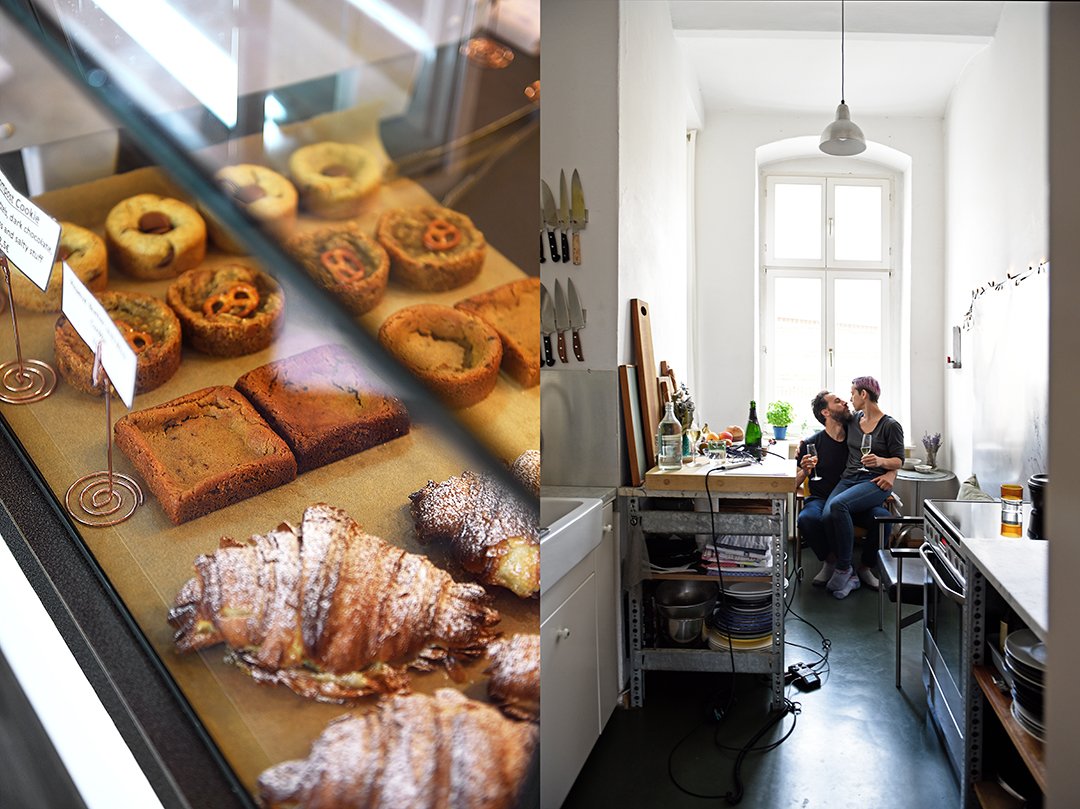
She loves baking, he loves coffee. She grew up in the Soviet Union before it became Russia, he grew up under the hot sun of Israel. She calls herself a lazy perfectionist - she's anything but lazy - and dances around with her two little kids while preparing filigree cakes for the bakery, tired but happy. He tells you about the most painful moment in his life and how it became one of the most beautiful moments of his life. Mira Koretsky and Ori Kidron of Cookies & Co are two opposite poles, two planets orbiting and dancing around each other. There's so much energy, so much trust. They are one of the most positive couples I've ever met and together they are riding life's turbulent waves as they come.
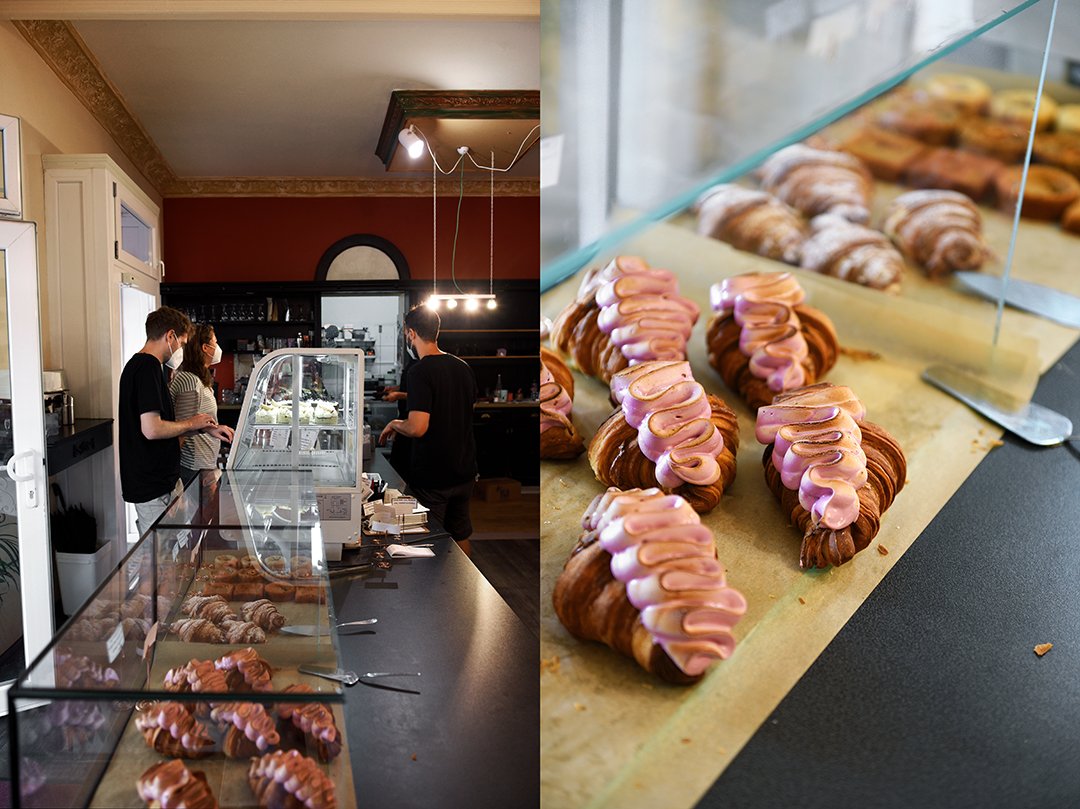
Cookies & Co is one of Berlin's highly praised cafés / bakeries. The two owners never compromise to please everybody. Instead, they attentively take care that their place keeps its unique soul. A lot comes from Mira's style of baking, which - despite its perfect look and taste - never loses its charm. She's a professional baker with the soul of a flexibel home baker. Unpredictable influences cause that not every pastry looks the same. Taste and texture vary slightly according to the seasons or changing weather conditions, which means that every cookie, every cake, and croissant is unique. This is not a baking factory, it's the opposite. All pastries are made by Mira and her assisting pastry chef, Lior - who is at least as passionate about baking as he is about Beyoncé. The two bakers share the same quality standards and values and also curiosity to dive into unexplored baking adventures.

"Once you move your body, you’re moving forward. That’s the circle of life. As long as there is movement something is happening." - Mira
Maybe it's because Mira grew up in a political system that didn't allow culinary abundance but had a strong baking tradition, her recipes simply work and impress even if she left out the firework. However, let her start her firework and you will see the most colorful sweet feast. Fascinated by Japan's modern baking culture, she tops her perfectly moist Ricotta Lemon Pound Cake with a flowery-sour Yuzu Cream (recipe below). Her Black Forest Cake is refined with miso and the bakery's popular Compost Cookies stay true to their name: take a thick and chewy cookie and add chunky pretzels, chocolate, and potato chips to it. It sounds funky but it's so good!
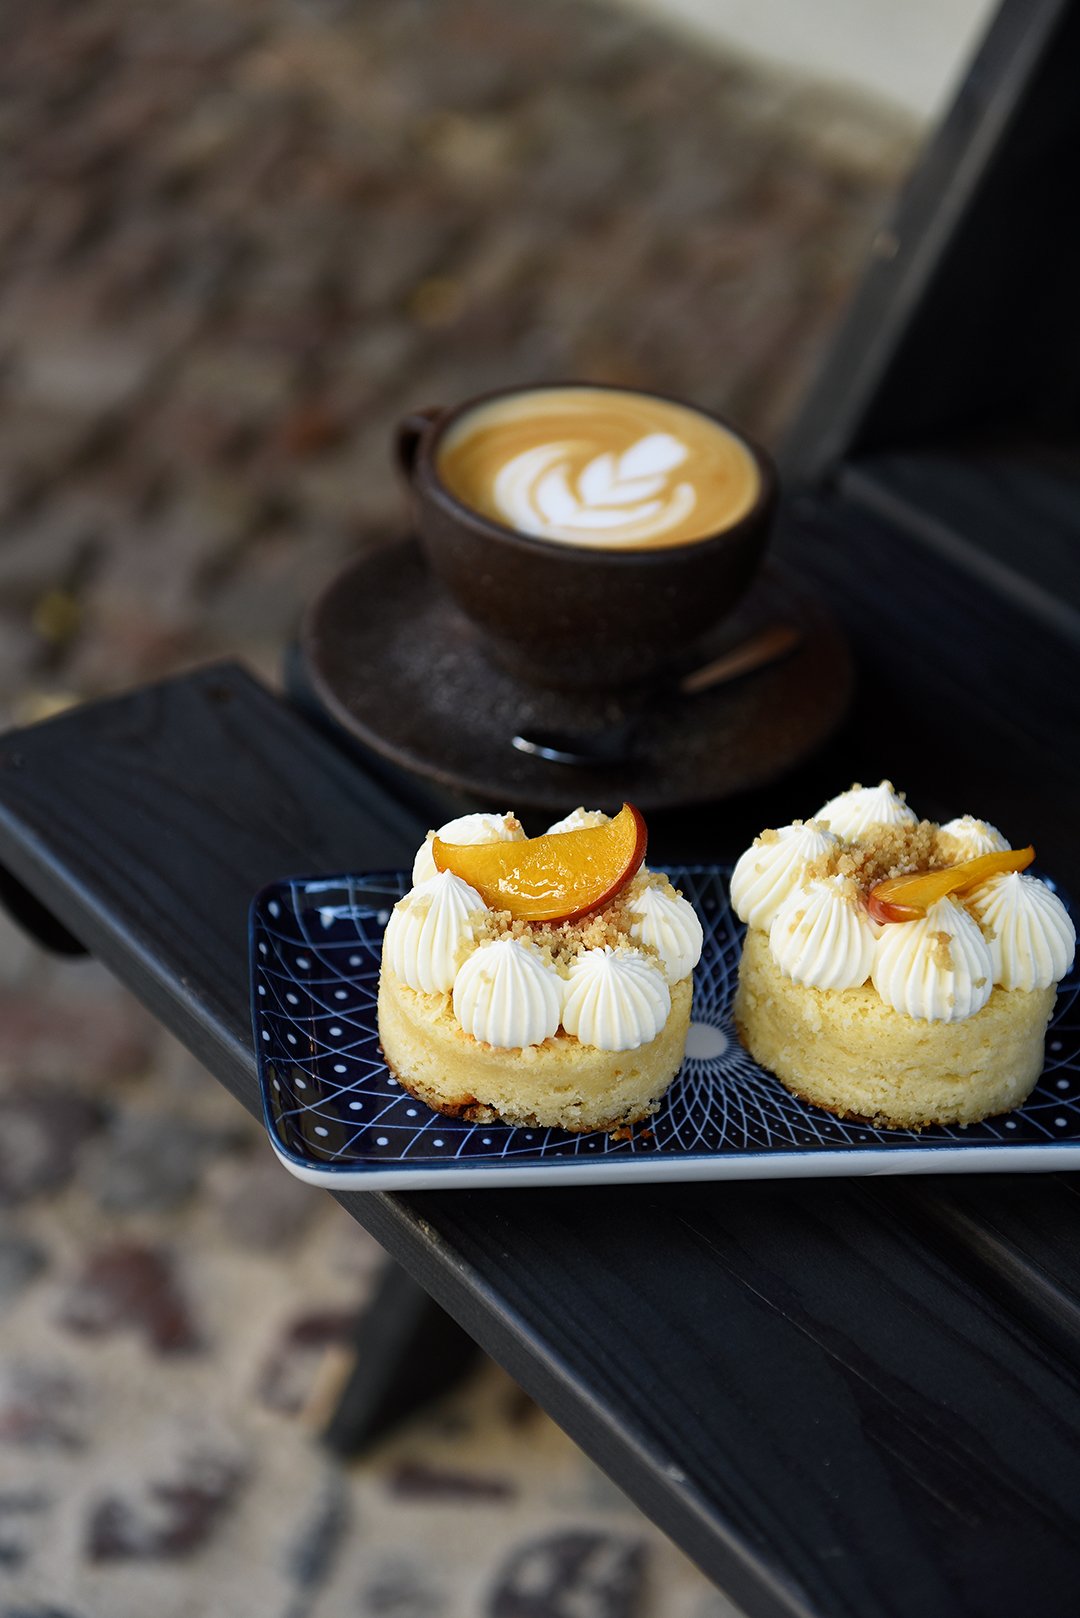
One of the masterpieces from the Cookies & Co bakery, it's like the movie star that everybody wants to take a picture of, is their glorious, beautifully laminated Croissant with Yuzu Filling and flamboyant purple Italian Meringue. It's a diva, you're almost too shy to cut it. It's dramatic, it's loud but it keeps its promise: it looks like something that will excite you and it definitely does. And then the husband comes in, serving you a cappuccino or espresso that is just right. Ori is the barista in the family, obsessed with good coffee, and also taking care of the guests while his wife is getting creative in the kitchen. Sometimes Ori has to slow Mira down otherwise the guests would never see their beloved Cookies & Co classics on the menu again. If she could, Mira would change the menu every day. Luckily, he stops her so that we can enjoy her creations more than once.

"And you’re thinking to yourself, how do I deal with this now, how do I go on, how do I make the most out of this, how do I optimize myself 'cause this requires so much more out of me, out of us as people, as parents, actually being there for someone who needs you so desperately. And you don’t even know in what sense, what is going to be required of you. Then all of a sudden came a song by Sade. It’s called Long Hard Road and the chorus says There’s a long hard road ahead but a voice inside me said it's gonna be alright. It was just exactly what I needed at that point. And I just started crying right there in the street and as emotional as all of this was, I remember telling myself this is one of the most beautiful moments I have ever had in my life." - Ori
There are many bakeries offering perfect pastries all over the world but the ones we stick to, we keep going back to, are the ones that touch us, the ones that have a soul. Mira and Ori do almost everything on their own, keeping the quality level they once defined for themselves without compromises. Even if their energy is running low, they keep the motor running constantly. They are young parents, their youngest daughter was born with trisomy 21. The situation challenged them but they decided to face it with the same stubborn energy and positivity that they, individually and as a couple, activate every day to deal with all facets of life. They are honest, they know the gifts they got. They don't look for the easiest way but they always find a beautiful way to enjoy life as it is: an endless circle of ups and downs. And in Mira's and Ori's case it's a dance.
Mira shared the recipe for her Ricotta Lemon Pound Cake with Yuzu Cream with me. You can either bake the cake in a loaf tin and serve it with dollops of the fruity cream or go for the pâtissier-style serving and bake the cake in a deep baking dish, cut out circles, and pipe the cream delicately on top. Just like they do at the Cookies & Co bakery.
The podcast episode with Mira and Ori is in English. You can listen to the Meet in My Kitchen podcast on all common podcast platforms; there are English and German episodes. You can find all the blog posts about these podcast episodes including my guests’ recipes here on the blog under Meet in Your Kitchen.
Listen to the podcast episode with Mira and Ori on:
Spotify / Apple / Deezer / Google / Amazon / Podimo
On Instagram you can follow the podcast @meetinmykitchenpodcast!

Ricotta Lemon Pound Cake with Yuzu Cream
by Mira Koretsky / Cookies & Co
It's best to prepare the yuzu cream the night before you serve the cake.
For the yuzu cream
2g / 2/3 teaspoon powdered gelatin
1 tablespoon cold water
80g / 3 ounces white chocolate
120ml / 1/2 cup heavy cream (divided into 2 x 60ml / 1/4 cup)
70ml / 1/4 cup plus 1 teaspoon yuzu juice
For the pound cake
You can either bake the cake in a 26 x 12cm / 10 x 5" loaf tin or for the pâtissier-style serving, cutting the cake into circles or squares, use a baking dish of roughly double the size.
170g / 3/4 cup unsalted butter, at room temperature
350g / 1 3/4 cups granulated sugar (or 300g / 1 1/2 cups sugar if you prefer it less sweet)
3 large eggs, at room temperature
360g / 13 ounces ricotta, at room temperature
1 tablespoon freshly squeezed lemon juice
200g / 1 2/3 cups all-purpose flour
2 teaspoons baking powder
1 teaspoon salt
For the yuzu cream, stir the gelatin into the water in a small bowl and let sit for 5 minutes. In a small saucepan, melt the white chocolate in 60ml / 1/4 cup of heavy cream over medium heat, whisking constantly; remove the pan from the heat. Add the cream mixture to a blender (or leave it in the saucepan and use a whisk), add the remaining 60ml / 1/4 cup of heavy cream, the yuzu juice, and the gelatin-water mixture and blend, or whisk, until smooth; cover and let sit overnight.
The next day, preheat the oven to 160°C / 325°F. Butter and line a 26 x 12cm / 10 x 5" loaf tin with parchment paper, or a baking dish of roughly double the size.
In the bowl of a stand mixer, fitted with the paddle attachment, beat the butter and sugar until light and fluffy. Add the eggs, one at a time, incorporating each egg before adding the next one, and continue beating for a few minutes until creamy and light yellow. Mix in the ricotta and lemon juice then add the flour, baking powder, and salt and mix until smooth and shiny. Transfer the dough to the prepared loaf tin or baking dish and bake for around 40-50 minutes, checking after 30 minutes, or until the cake is golden; if you insert a skewer in the middle of the cake it should come out clean. Let the cake cool completely.
For serving, whisk the yuzu cream to fluff it up. You can either cut the cake into slices and serve the yuzu cream separately or cut the cake baked in a baking dish into circles (using a round cookie cutter) or squares and, using a piping bag, pipe the yuzu cream on top.
Enjoy!


Meet In Your Kitchen | Sebastian Frank's Horváth - Austrian Roots in Berlin

This post is part of my Meet in My Kitchen podcast: How did we get to where we are in life & what does food have to do with it
"When there’s a feeling coming up like Can this dish compete with the one before, did I go a step further? then I try to push it away. It does come up, there’s nothing I can do to avoid it, especially when I remove a dish from the menu that was the bomb. That’s just the way it is, the quality in developing new dishes can’t always be the same. If I were a machine and I could only create dishes that are the bomb, I’d do it, but I can’t." - Sebastian Frank
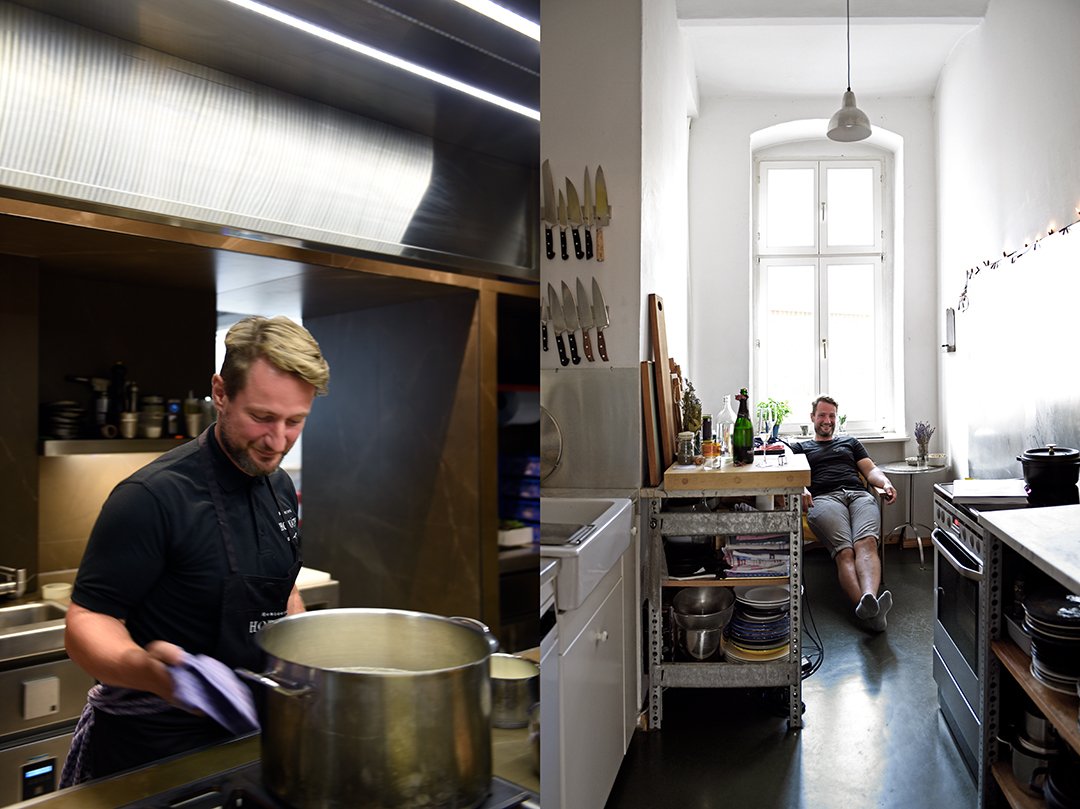
Two worlds fruitfully combined in the midst of Kreuzberg: Austria and Berlin. His home country, Austria, feeds the chef Sebastian Frank with the knowledge, passion, and inspiration he needs to create unique dishes of rare honesty. He built up one of the capital's most praised restaurants, he has been rewarded with 2 Michelin Stars but when you talk to him, he makes it sound so easy. And somehow it is. Some people have a genius mind and still manage to keep their feet on the ground.
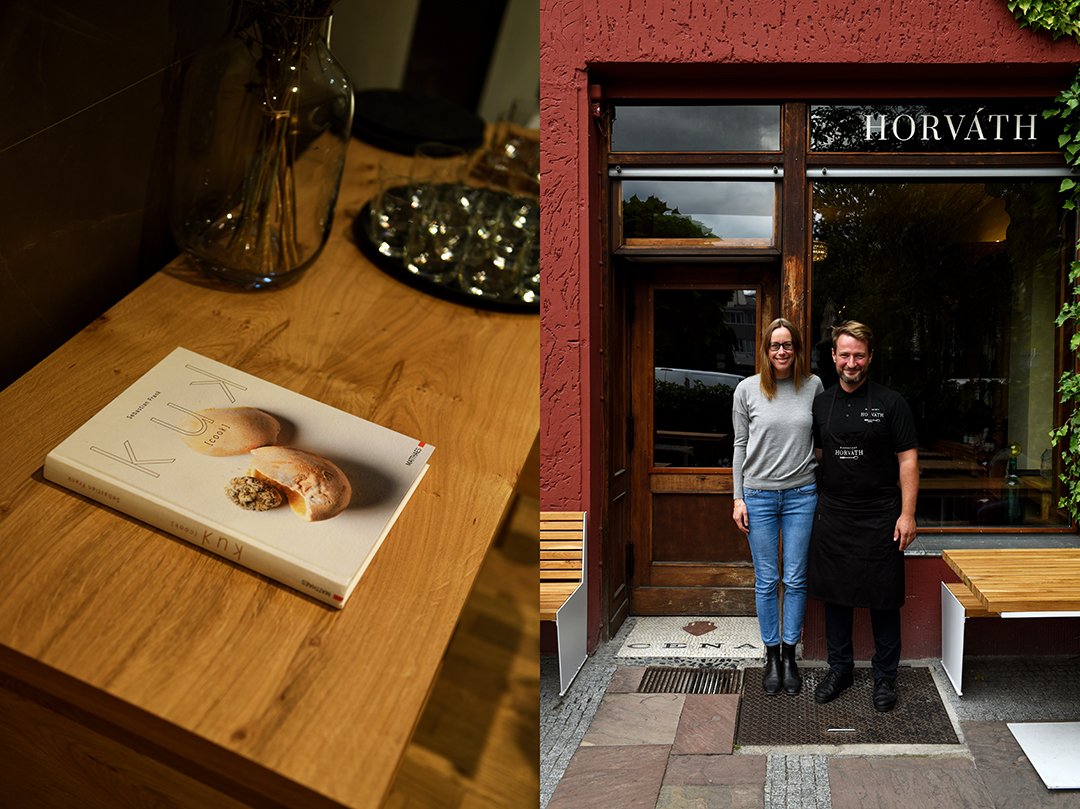
Together with his partner, Jeannine Kessler, Sebastian moved to her home city, Berlin, 10 years ago and thanks to fortunate circumstances they both took over the Horváth restaurant and turned into the gem it is today.

"Women are just better chefs and I’m convinced that every man who is a good chef has a strong feminine side."- Sebastian Frank
For a long time, the Austrian chef thought he missed out on international experiences, that he couldn't compete with other chefs who did work abroad, particularly the chefs who worked in French kitchens celebrating haute cuisine. Little did he know that exactly this would become his greatest asset.
Although Sebastian started to learn in kitchens at a young age, at 14, it was only in his late teens and twenties that he learned about all those praised culinary luxury products, about a way of cooking that could possibly be rewarded with Michelin Stars and Gault Millau rankings. He was hooked but he still needed time to find himself in the vast culinary universe and all its possibilities. Yet when he stopped looking outside but opened up towards what he already had inside himself, he found the answer he was looking for. He says that he only discovered the confidence to trust himself and work with what he had found inside himself when he was 30, when he started working at Horváth.

Growing up in eastern Austria, close to the border to Hungary, only experiencing the local cuisine until he reached his twenties, smelling, tasting, and working with just local produce and products of exceptional quality, left a mark deeper than he expected at that time. Sebastian noticed that when it comes to the cuisine and the products that he up grew with, no one can fool him.
Being limited opened up his mind - and the flood gates - to a more profound knowledge and understanding of the food that he had had on his plate all his life. He experienced a much deeper level of tastes and textures by working with just a small range of vegetables. He wasn't distracted anymore. He could study a celery root, carrots, beets, potatoes until he totally understood their flavor profile. He could dive into the regional recipes until he totally understood what makes or breaks them. And at that point, he could start playing. Sebastian also had another great advantage, he already had the emotional connection that you need for true inspiration. And this emotional connection took him right back to his childhood, to his own roots and memories.
Today, Sebastian Frank plays with an imperturbable down-to-earth confidence that is impressive. He only needs to visit his culinary archive in his head to find an endless source of old knowledge and new ideas to feed his kitchen repertoire. It's not arrogance, he is open to other opinions and criticism, but he himself knows best when something is right - and then he makes his decision within seconds.
Usually I'm a rather chatty person when I go to restaurants but when I indulged into a 9-course dinner at Horváth, accompanied by non-alcoholic drinks based on vegetables, fruit, and broth that were just as refined as the compositions on the plates, even I had to keep my mouth shut and just enjoy the full range of tones that Sebastian plays with; sometimes they are harmonic or a harsh contrast, familiar or a surprise, quiet or loud, sometimes they build up slowly but then explode so vibrantly that it makes you smile.

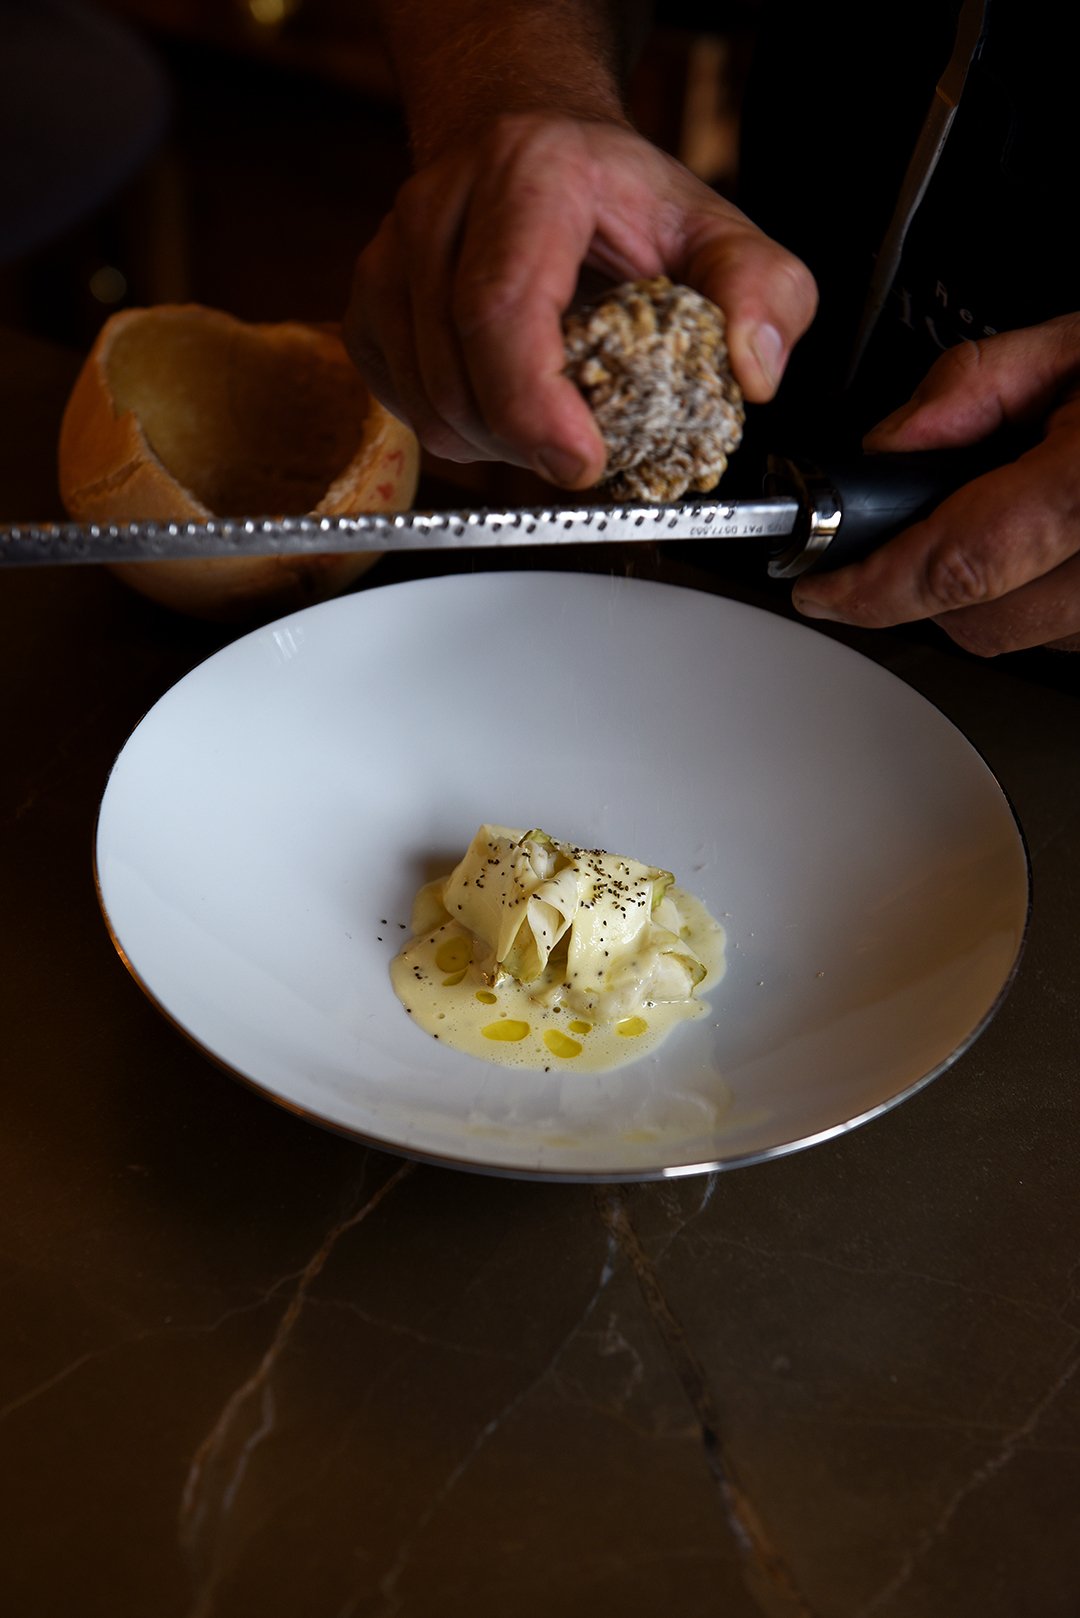
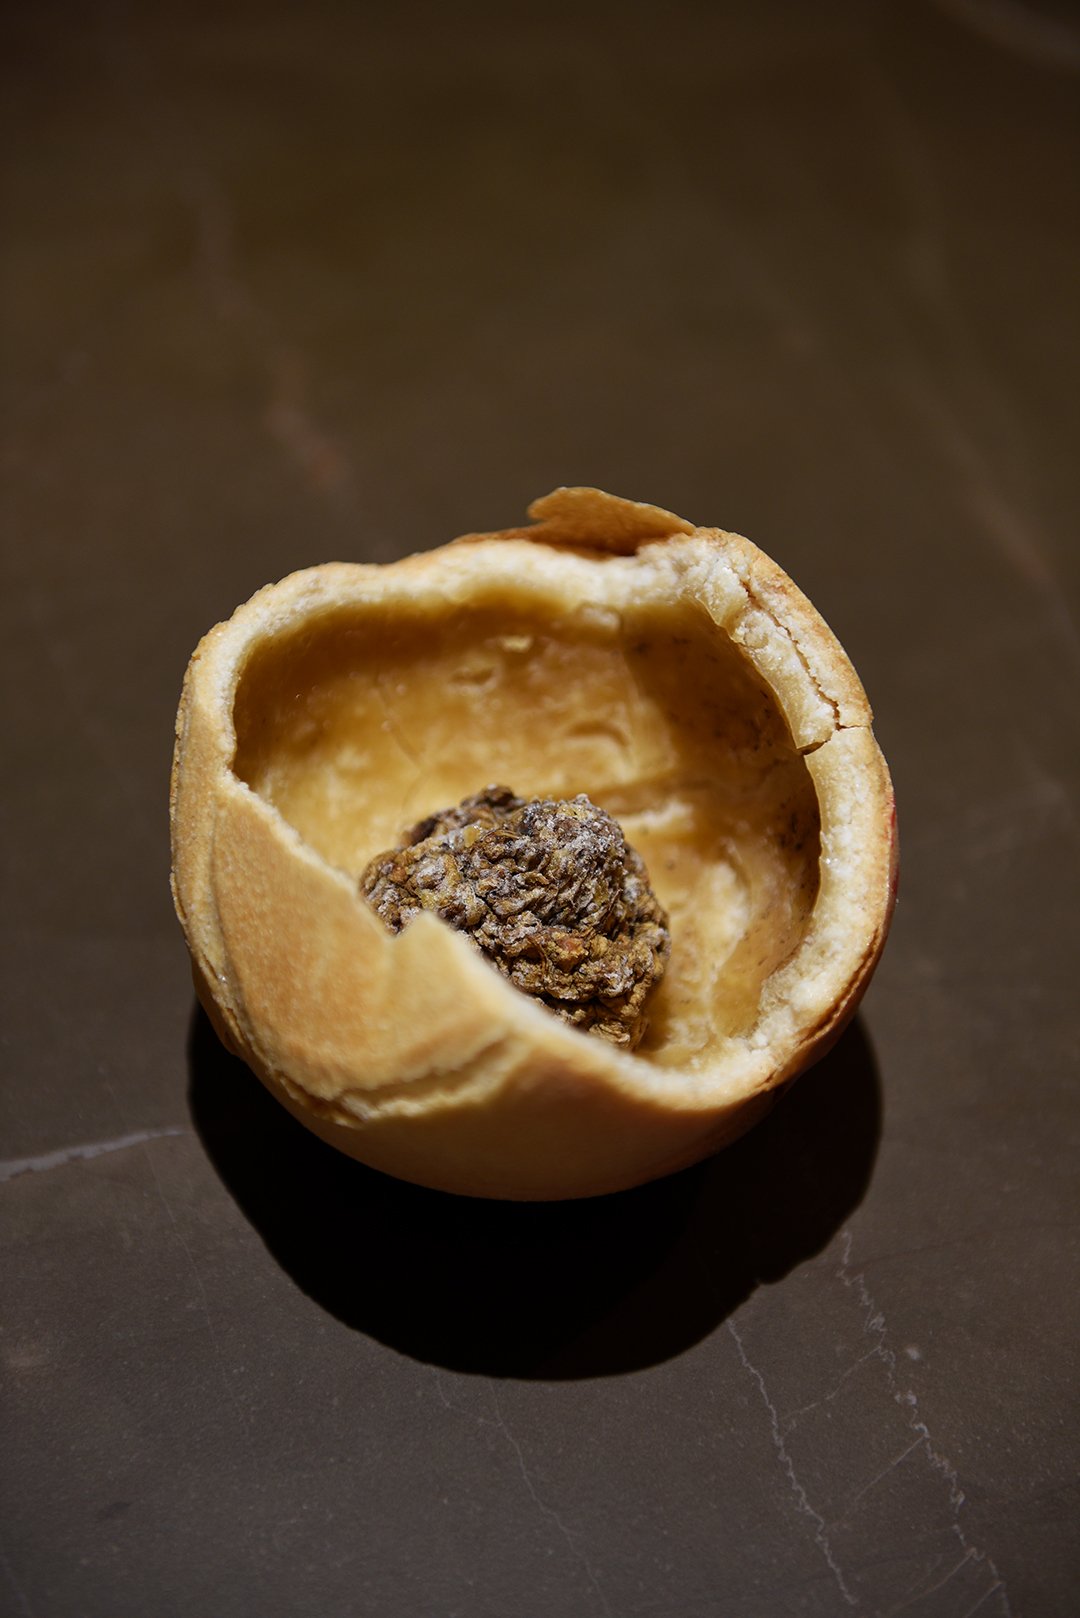
The recipe Sebastian shared with me is called Celery, Young and Aged. One part of this recipe is a celery root that has aged in salt dough for a year and that's being grated over the dish. It looks like white truffle, is packed with umami, tastes like concentrated salted celery, and looks absolutely stunning. The crusty salt dough shell, when it's cracked open, looks a bit like Parmesan rind. You automatically feel a lot of respect for this product that needed so much time to age and that people have been taking care of for a whole year. You can't really detach this feeling from this dish. However, if you don't feel like waiting a year to try out Sebastian's recipe you can either make the alternative celery salt (which I bagged him to come up with) or order an aged celery from the Horváth shop (which I highly recommend).
The podcast episode with Sebastian Frank is in German. You can listen to the Meet in My Kitchen podcast on all common podcast platforms; there are English and German episodes. You can find all the blog posts about these podcast episodes including my guests’ recipes here on the blog under Meet in Your Kitchen.
Listen to the podcast episode with Sebastian on:
Spotify / Apple / Deezer / Google / Amazon / Podimo
On Instagram you can follow the podcast @meetinmykitchenpodcast!

Celery, Aged and Young
by Sebastian Frank / Horváth
(from his book KuK - cook, published by Matthaes Verlag, 2019, in German, you can order the book here)
The aged celery in this recipe ripens in salt dough for 1 year*. Alternatively, you can order an aged celery from the Horváth online shop or use celery salt instead - you can find both recipes for the aged celery and celery salt below! You can buy the celery seeds used in this recipe in spice shops or online.
Serves 2
* For the aged celery in salt dough
You'll only need some of the aged celery for this recipe. Please weigh the ingredients for accuracy and don't use cups.
250g / 9 ounces instant flour (doppelgriffiges Mehl)
165g / 6 ounces fine salt
160ml / 2/3 cup water, at room temperature
1 whole knob celery, roughly as large as a fist, with skin but without the green
In a medium bowl, combine the flour, salt, and water until smooth. Form into a ball, cover with a kitchen towel, and let rest, at room temperature, over night.
Preheat the oven to 220°C / 425°F.
Rinse the celery, pat dry, and cover evenly with the salt dough then transfer the celery to a baking sheet and bake for 20 minutes. Reduce the heat to 180°C / 350°F and bake for another 40 minutes. Transfer to a cooling rack and let cool completely (don't remove the salt dough crust!).
Store the celery in the salt dough crust in a place with a constant temperature of about 15-20°C / 60-70°F. In the first 2 months, flip the celery every second day so that the moist bottom side is at the top. In the following 6 months, turn the celery once a week. In the last 4 months, you don't need to turn the celery at all.
For the celery salt
2 tablespoon celery seeds
5 tablespoons Maldon sea salt flakes (or another flaky sea salt)
In a medium, heavy pan, toast the celery seeds for a few seconds; they shouldn't get dark. Transfer to a mortar and crush lightly with a pestle, add the salt, and mix to combine. Store the celery salt in an airtight container.
For the chicken soup
You'll only need 200ml / about 3/4 cup of the soup; you can use the remaining soup for other recipes.
500g / 18 ounces chicken carcass
300g / 11 ounces chicken skin
1 medium onion, peeled and cut in half
1 garlic bulb, with skin, cut in half
100g / 4 ounces carrots, peeled and diced
150g / 5 ounces celery, peeled and diced
100g / 4 ounces leek, cut in half
30g / 1 ounce parsley stalks
5 allspice berries
3 star-anise
10 cloves
5 juniper berries
2 bay leaves
In a large pot, bring the chicken carcass, chicken skin, and 2.5 liters / 10 1/2 cups of cold water to a boil.
In a small pot or pan, sear the onion and garlic, cut side down, until very dark then transfer to the pot with the chicken carcass, along with the carrots, celery, leek, parsley, and spices, and gently simmer for 90 minutes.
With a large spoon, remove the chicken fat on top of the soup, transfer to a bowl, and set aside (you'll need the chicken fat warm and liquid for serving). Strain the soup through a very fine sieve and muslin towel and set aside.
Young celery
1 knob celery, roughly as large as a fist, with skin but without the green
Rinse the celery and, using a mandoline slicer, carefully cut into paper thin slices. Steam the celery slices for 2 minutes at 90°C / 190°F or until tender but al dente. Let them cool.
Toasted celery seeds (for serving)
20g / 3/4 ounce celery seeds
In a hot, dry pan, toast the celery seeds briefly until dark.
For finishing the chicken soup
200ml / 3/4 cup plus 2 tablespoons of the chicken soup
30g / 2 tablespoons unsalted butter
3 large egg yolks
Salt
In a small saucepan, warm up the chicken soup and butter until hot, it shouldn't start boiling (it should be 80°C / 175°F). Remove the pan from the heat, whisk in the egg yolks to bind the soup, and season to taste with salt.
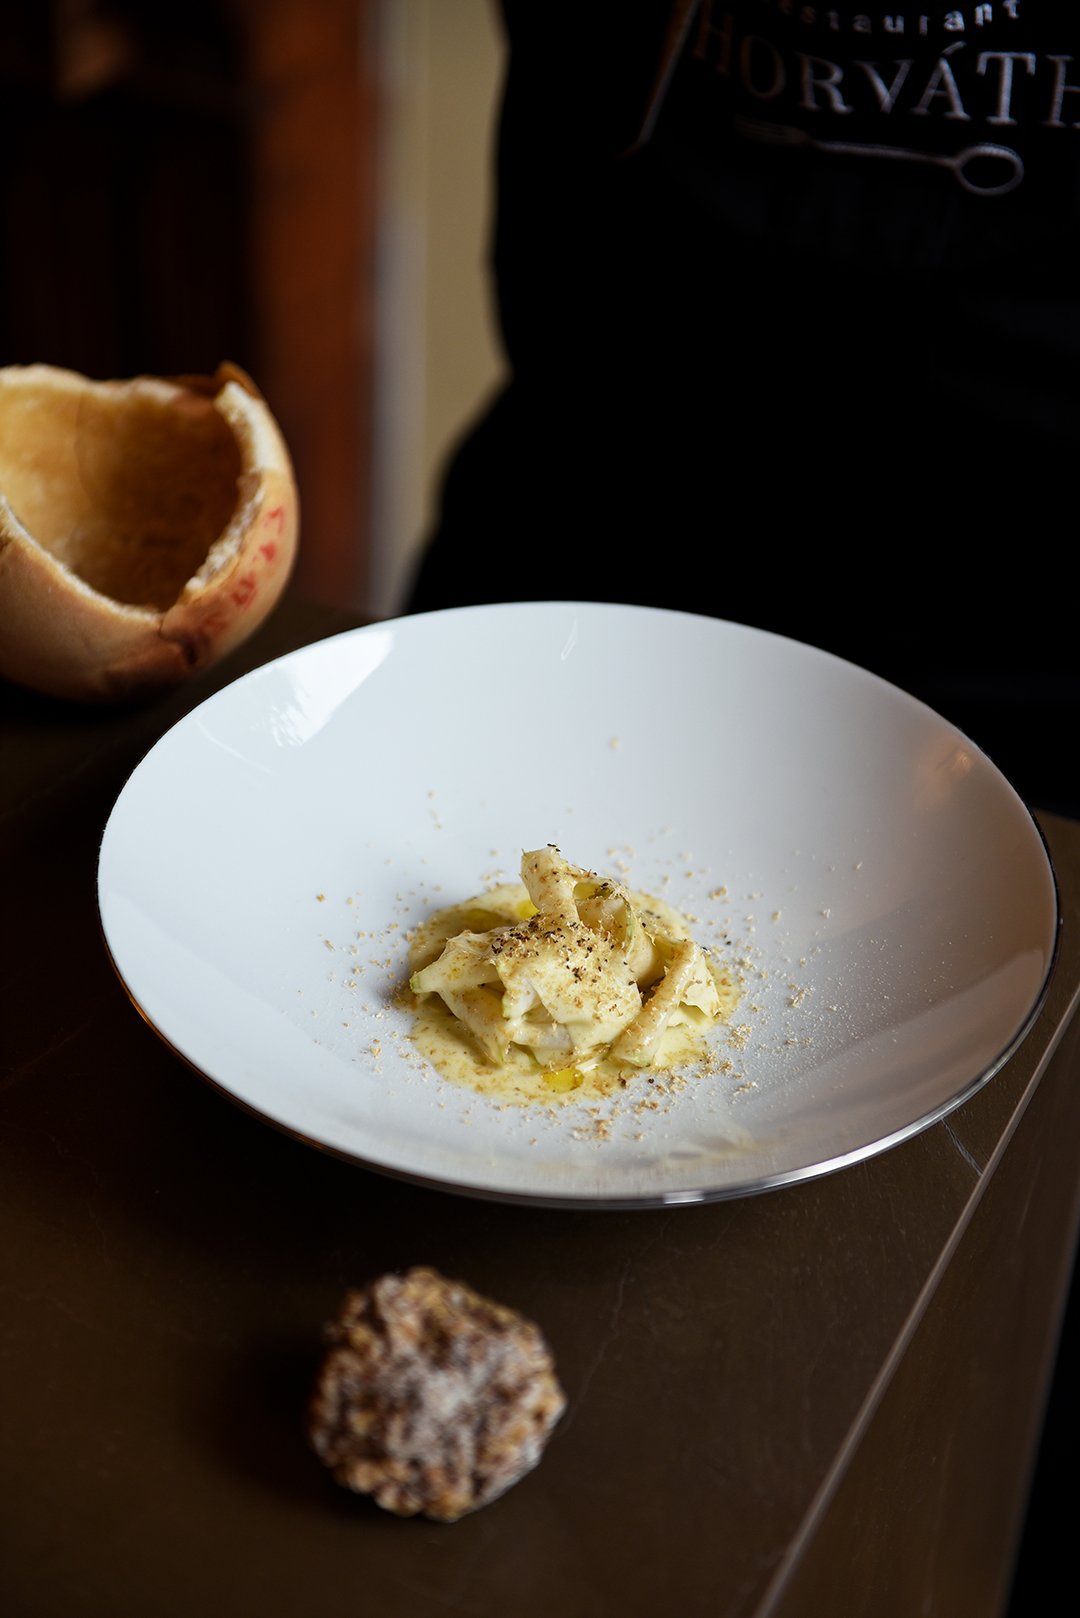
For serving, arrange the steamed celery slices on a large, deep plate. Pour a little bit of the whipped chicken soup around the celery slices. Sprinkle with the toasted celery seeds, and drizzle some of the chicken fat on top. Break open the salt dough crust of the aged celery, remove and discard the salt shell, and grate some of the aged celery all over the plates. Alternatively, sprinkle with a little celery salt. Enjoy immediately.


Meet In Your Kitchen | Marta Greber's Chocolate Chickpea Cookies for Breakfast

This post is part of my Meet in My Kitchen podcast: How did we get to where we are in life & what does food have to do with it
"Food is comfort. Food makes me happy." - Marta Greber
Marta is an adventurer - driven by curiosity and trust. She explored New Zealand in a camper van with her 2-year old daughter and even when the van broke in the middle of nowhere she felt they were safe. She travelled around South America on her own, taking precautions and cutting her hair short as matches and adorning her face with not the cutest glasses to cause anything but attraction. Marta avoids risks but she doesn't miss a chance when she sees it. Australia, South East Asia, Europe, there isn't really a dirt road she hasn't been on yet.
When it comes to very spontaneous, very intuitive decisions that always lead to a good ending, no one beats the Grebers: be it on her own or together with her husband, Tomasz, and their daughter, Mia, living in their camper van called Thelma - Marta says she's Louise but hopes for a better ending than in the movie; be it backpacking, or moving to a new country for good.
I first heard of Marta when I started my own blog and found endless inspiration in hers, on What Should I Eat for Breakfast Today?. Her photography drew me into her digital wonderland of breakfasts and traveling. Her pictures are full of joy, depth, and color. Marta has a great talent, she can tell a story in a single picture. Once, many years ago, she shared a picture of a dish that was shoot on an old Yves Klein-blue door. The contrast of the blue surface and the spring green food made the dish almost pop out of the screen. Marta is the reason why both of my books have blue covers.
Always drawn to breakfasts - years ago she told me it's the only time of the day that you can really plan - it was in Australia when she felt overwhelmed by the variety and excitement that this meal of the day can bring to your life and table. Banana bread and pancakes, Dutch baby and chunky cookies, Finish pannukakku, shakshuka, Portuguese pastel de nata - her insatiable Wanderlust and appetite became the endless source of inspiration for her food blog, one of the most popular blogs in the last 10 years.

"It’s about living in a van. Imagine when it’s raining, you sit in your apartment, you have this awesome window, you look through the window, you look at people running on the street and hurry somewhere and I am always in a different place. So when it’s raining I’m looking, for instance, at the sea, and at the storm over the sea. There’s the wind, the beach is empty, a bird is fighting with the wind. For me it’s amazing and whenever things like this happen, it’s like each second day, I tell Tomasz: This is the reason why we’re here!" - Marta Greber
Her life wasn't meant to be so adventures from the beginning. Marta grew up in Poland, still experiencing the communist system in her childhood years. She studied law, married early, and for a long time she didn't even question that she would live a settled life in Poland. However, her first long trips to the US, staying in Las Vegas as part of a work and travel program for Polish students - there couldn't have been a bigger contrast between her country's communist past and this flashing capital of capitalism - living in and exploring Australia together with her husband followed by various adventures in South East Asia, they all changed her.
So as she went back to Poland, reflecting about where she sees herself at that point in her life, after all those impressions and experiences, she decided to take the time to figure exactly that out. She didn't want to be a lawyer but she had no idea what the next steps should be, she couldn't see her future yet as a successful blogger, photographer, and journalist but she grabbed the chance to find that out.
When you hear her talk about her beloved mornings when the family is on the road, stepping out of her camper van welcomed by silence and the sun rising over a lonely beach, or misty hilltops, her cup of coffee in one hand, she's the happiest person in the world. And I totally understand why. To see someone being so brave to actually make all those radical changes in her life and to do what many just talk about, to see the peace she found, this is very touching. There's so much I learn from this woman and I'm sure this will never change.

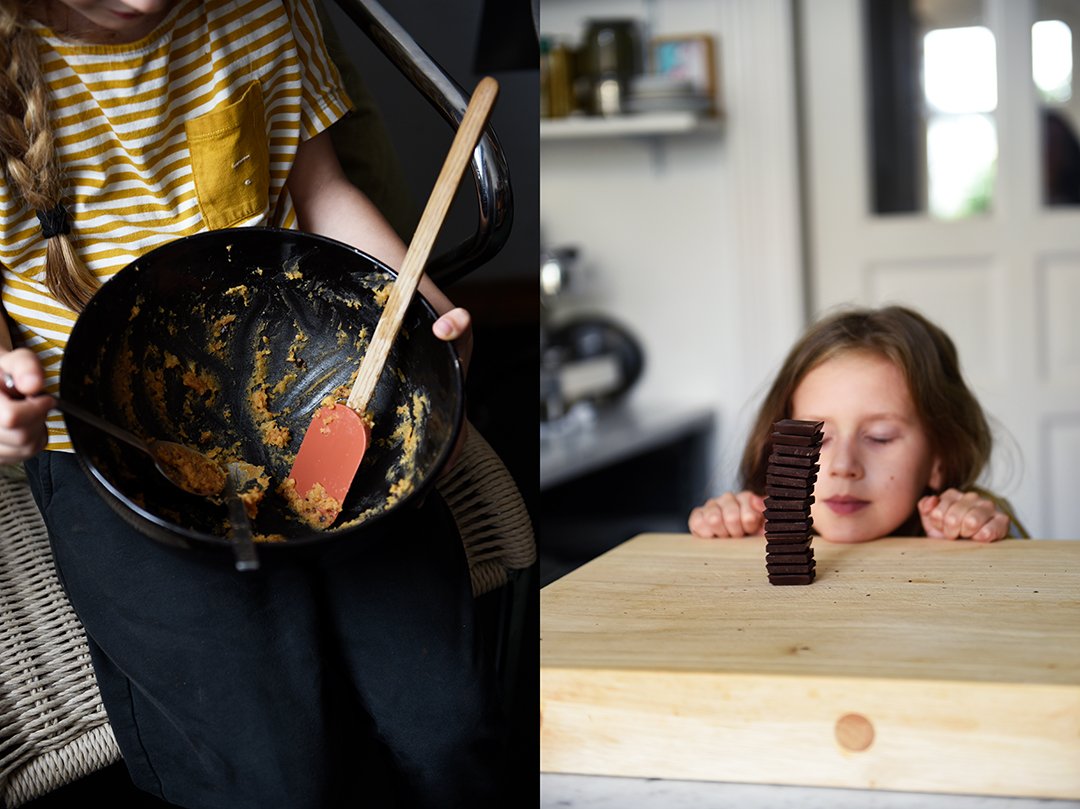
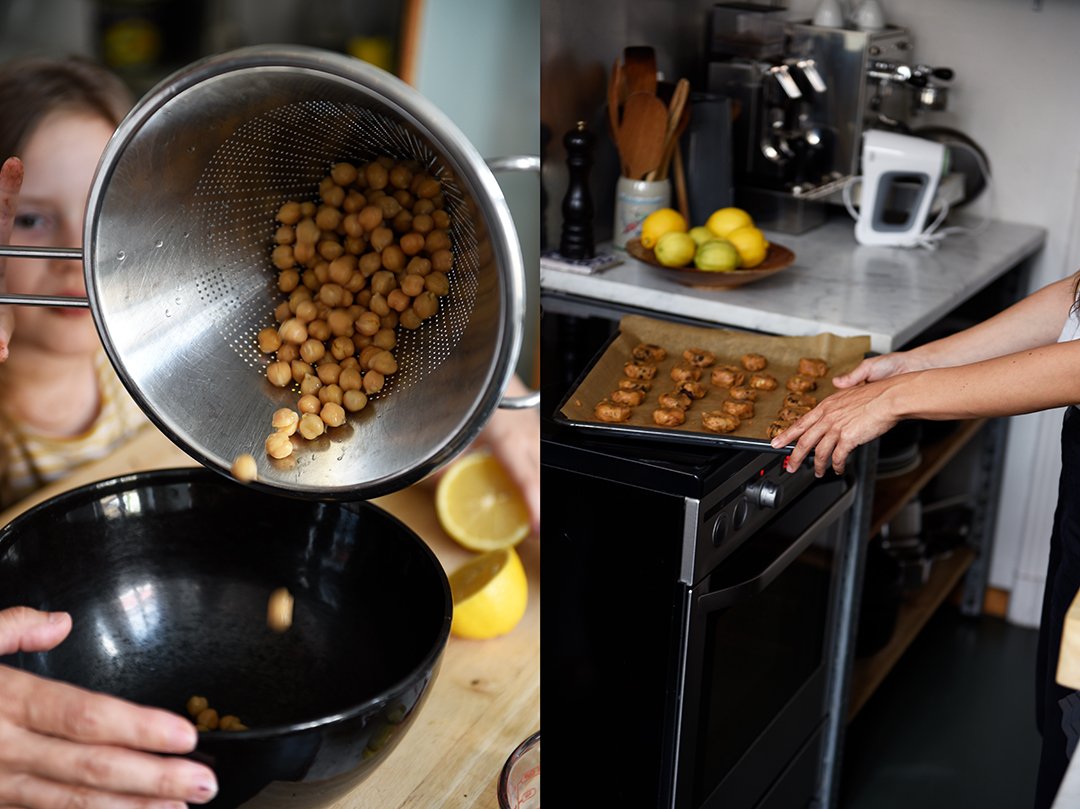
Recently Marta had to change her diet and she reduced her consumption of flour but she didn't want to spoil the fun so she got experimental. For the Meet in My Kitchen podcast, she shared a flourless cookie recipe with me, made of chickpeas, peanut butter, bittersweet chocolate, and a squeeze of lemon. The cookies taste so good and have such a moist texture that we emptied the tray before the cookies had a chance to cool. The recipe is adapted from one of Marta's blogger friends, Texanerin.
Giving up their apartment in Berlin - actually while we recorded the podcast - and now moving to Lisbon, the Grebers are ready for a new chapter in their life. This is the reason why we shot the recipe in my kitchen and not in Marta's. Thank you, Mia, for being an awesome kitchen assistant, reliable cookie tester, and for patiently waiting behind the closed kitchen door until Marta and I finished the podcast recording before we could start baking together.
The podcast episode with Marta Greber is in English. You can listen to the Meet in My Kitchen podcast on all common podcast platforms; there are English and German episodes. You can find all the blog posts about these podcast episodes including my guests’ recipes here on the blog under Meet in Your Kitchen.
Listen to the podcast episode with Marta on:
Spotify / Apple / Deezer / Google / Amazon / Podimo
On Instagram you can follow the podcast @meetinmykitchenpodcast!

Chocolate Chickpea Cookies
by Marta Greber
Makes about 22 small cookies
240g / 1 1/3 cup drained and rinsed canned chickpeas
175g / 2/3 cup smooth peanut butter, at room temperature
60ml / 1/4 cup agave syrup, or maple syrup
1 teaspoon baking powder
A pinch of salt
A squeeze of lemon
100g / 3,5 ounces bittersweet chocolate, roughly chopped
Preheat the oven to 175°C / 350°F (preferably convection setting) and line a baking sheet with parchment paper.
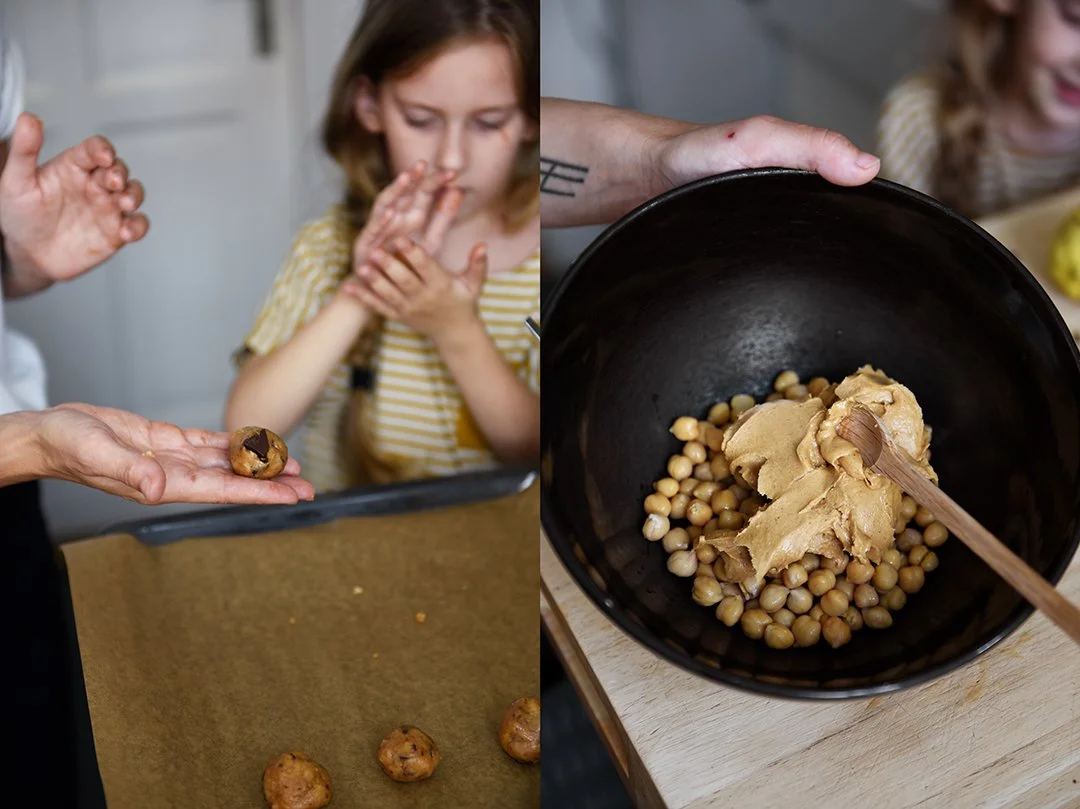
Combine the chickpeas, peanut butter, agave syrup, baking powder, salt, and lemon juice and, using a food processor or blender stick, briefly puree but keep the mixture a little chunky. Using a large spoon, fold in the chocolate.
Shovel a spoonful of dough into your hand, form into a ball, and transfer to the prepared baking sheet. Slightly flatten the dough with a teaspoon. Repeat to make around 21 more cookies, leaving a little space between them.
Bake for around 10 minutes or until golden; they will still be very soft and moist in the center. Let them cool for at least 10 minutes before you transfer them to a cooling rack; they will stay quite soft. Enjoy!


Meet In Your Kitchen | Moritz, Switzerland & the Grill Royal Family

This post is part of my Meet in My Kitchen podcast: How did we get to where we are in life & what does food have to do with it
"Food is probably the most important thing for me besides breathing. But I guess sex is also pretty important." - Moritz Estermann
When you grow up in the Swiss Prealps and you find your peace with the fact that you live in a tiny village only surrounded by nature, then Switzerland is the best place to live in. However, if at one point you want to know what there is on the other side of the mountains, you have a problem. Then you have to leave.
Moritz Estermann liked his life, tightly woven into a safe net of family, friends, and Swiss food. During the week he would play in the neighbors' fields and barns, the weekends would be all about walks in the mountains together with his parents and brother. And when he could tell his father the names of 20 flowers he would get French Fries in one of the mountain huts. Moritz doesn't want to make it sound like Sound of Music - but it does.
But one day, the Swiss fairy tale ended and Moritz left the mountains behind to move to Berlin. And as he arrived, walking down Strasse der Pariser Kommune lined with its very vertical, very unadorned socialist buildings, he felt home and ready for a new chapter.

"We started at Pauly Bar, moved on to the Grill (Royal) then we went to King Size Bar at 1 at night and left at 6 in the morning, staggering. But I had to be back in the office at 9:30, often working on bookkeeping. It was an absolutely amazing time, I learnt everything this business is about, but you shouldn’t do this. You get bogged down. It’s too much. Your own life falls by the wayside. Completely." - Moritz Estermann
Grill Royal, Kin Dee, Bar Freundschaft, Dottir - Moritz Estermann's name appears behind many raisins in Berlin's gastronomic cake but the man himself stayed a mystery for me for a long time. I had been wanting to meet him for years and it had to happen during a long and tipsy night out at Bar Freundschaft. Introduced by Susan Choi, and soon rebuked by Moritz as I told the sommelier "I'm sure you don't have pastis," the first sentence Moritz ever said to me was: "Don't be so negative!." I felt like a little girl, but he was right, and I got my drink in the end.
So how does a Swiss boy end up in the 'Grill Royal family' at quite a young age? He's not only supervising some of the 'family's' places, but he's also Stephan Landwehr's and Boris Radczun's - the founding fathers - copartner in a few endeavors. How does he start new projects and each and every single one is a success? The answer is very Swiss: Moritz says he understands restaurants and he understands Berlin.
But there's more behind this humble Swiss mind. Moritz has a great connection to his instinct and he completely trusts this instinct. I've seen this talent in the characters of all the people I'm talking to for the Meet in My Kitchen podcast. They can all hear their inner voice and learnt to always listen to it. Moritz instinctively goes to the right places, connects with the right people, feels the inspiration, and then picks up the right projects. It's not luck, his success rate is too good for that. It's a very clear focus on what makes sense and then hard work and discipline to get there.
What I love about people in the gastronomic world is that despite this discipline, they never miss the party. What I love about Moritz on top of this is that he wants to create places that make his customers happy but he also wants to create places where his employees are just as happy to work at. He is part of a new movement of restaurateurs who break with the old system. Yes, he wants to and he has to create profitable places, but that doesn't mean you have to exploit the ones who work for you. It's a new feeling of responsibility, and also awareness, that no matter what your job is, you can always make a difference within your everyday operating range.

"I’m not sure if I really trust the universe or if I am, and was, simply naive, but I was never scared of the world outside. I believe it’s a great privilege, growing up in an environment where fear doesn’t exist, simply not being forced to confront it and learning to live with it." - Moritz Estermann
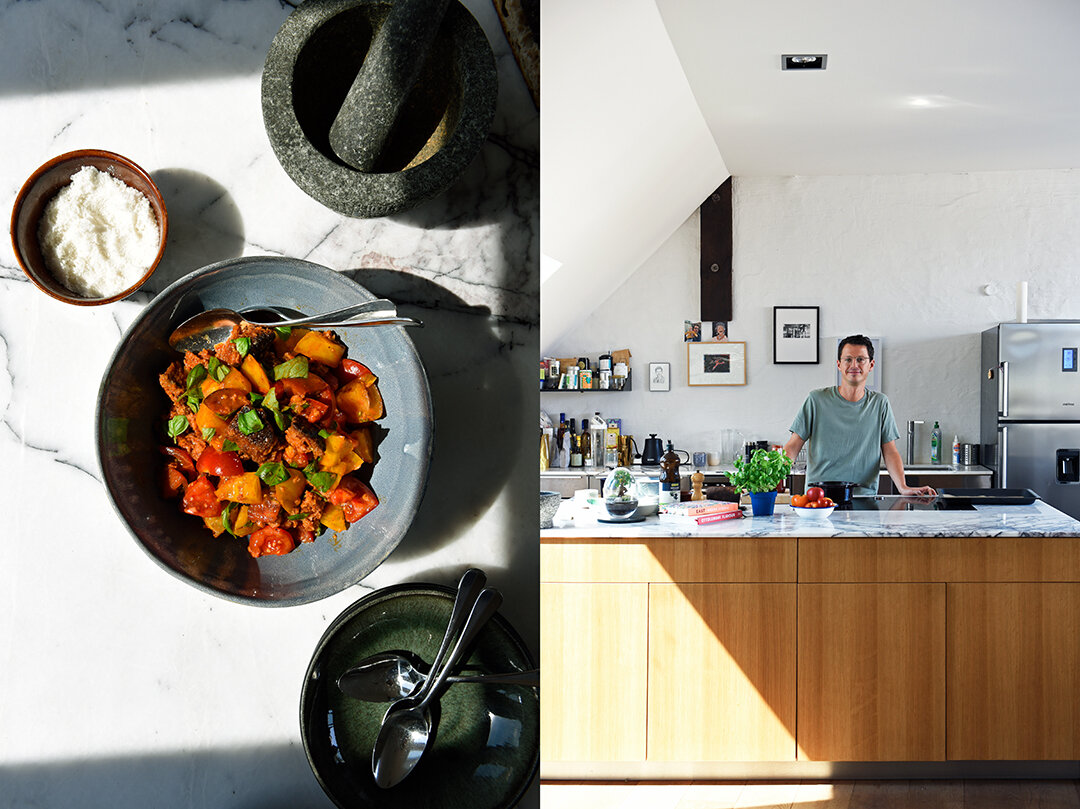
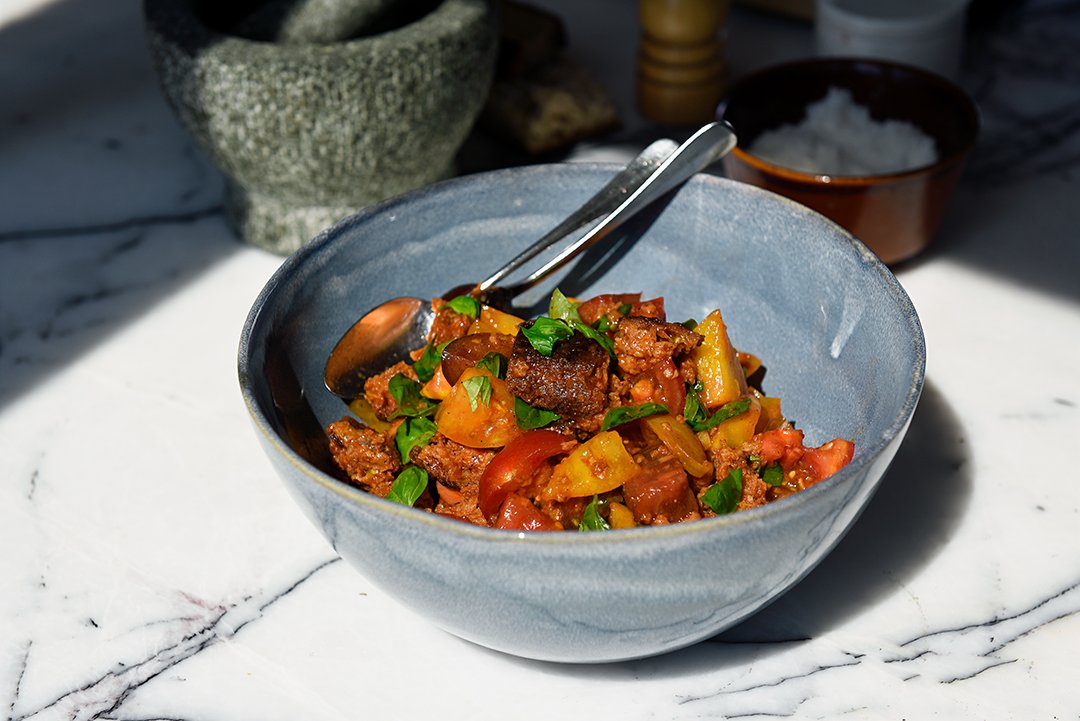
Moritz pays a lot of attention to the people around him. And he pays the same attention when it comes to his food and cooking at home. He shared his current favorite recipe with me, Pappa al Pomodoro. This frugal Italian dish is made with just a few ingredients and that's the reason why each of them should be of exceptional quality. It reminded me a lot of Panzanella - a Tuscan bread salad - yet the stale bread is soaked in tomato sauce and not in vinaigrette and water. Officially it's a thick soup, eaten warm or cold. Roughly chopped sun-kissed heirloom tomatoes, fantastic sourdough bread with a dark crust, the finest olive oil, and a very simple yet very tasty tomato sauce make you forget about frugality and simply indulge in a very fruity, surprisingly light, summery lunch that takes you right to the soft hilltops of Tuscany.
The podcast episode with Moritz Estermann is in German. You can listen to the Meet in My Kitchen podcast on all common podcast platforms; there are English and German episodes. You can find all the blog posts about these podcast episodes including my guests’ recipes here on the blog under Meet in Your Kitchen.
Listen to the podcast episode with Moritz on:
Spotify / Apple / Deezer / Google / Amazon / Podimo
On Instagram you can follow the podcast @meetinmykitchenpodcast!

Pappa al Pomodoro
by Moritz Estermann
Serves 2
For the tomato sauce
350ml / 1 1/2 cups tomato passata
3 large cloves of garlic, finely chopped
Olive oil
Fine sea salt
Black pepper, freshly ground
For the Pappa al Pomodoro
Around 1/3 of a 750g / 1 2/3 pound loaf of stale white sourdough bread (with crust, the weight of the stale bread is roughly 225g / 1/2 pound)*
Olive oil (the best you can afford)
Around 450g / 1 pound ripe tomatoes (organic, heirloom, ideally various types)*
1 large handful fresh basil leaves, torn
Freshly squeezed lemon juice, to taste (optionally)
* The ratio of fresh tomatoes to bread should be roughly 2:1
Preheat the oven to 160°C / 325°F (preferably convection setting).
For the tomato sauce, add the passata, garlic, and a dash of olive oil to a medium saucepan, season to taste with salt and pepper then bring to a boil, reduce the heat, and simmer for about 20 minutes. The sauce should be light red and runny, not thick, and taste fruity; season to taste with salt and pepper.
Tear the bread into bite-sized pieces, spread on a large baking sheet, and drizzle with a little olive oil. Toast the bread in the oven until crispy but not dark. Transfer the warm bread to a large bowl and add the tomato sauce. The bread should be well covered in sauce and soak it all up but it shouldn’t swim in the sauce; let it sit for at least 5 minutes, the bread should have soft parts and parts that are still a little firm.
Cut the tomatoes into bite-sized pieces. Add the fresh tomatoes and basil to the bowl with the soaked bread, season to taste with salt, pepper, and a squeeze of lemon then gently and briefly mix with your hands; it should be chunky, not mushy.
Enjoy immediately!


Meet In Your Kitchen | Mr. Susan's Kimchi Michelada

This post is part of my Meet in My Kitchen podcast: How did we get to where we are in life & what does food have to do with it
“Food really helped carve out my identity, it made me realize who I am, but it was also entrée into other cultures.”- Susan Choi
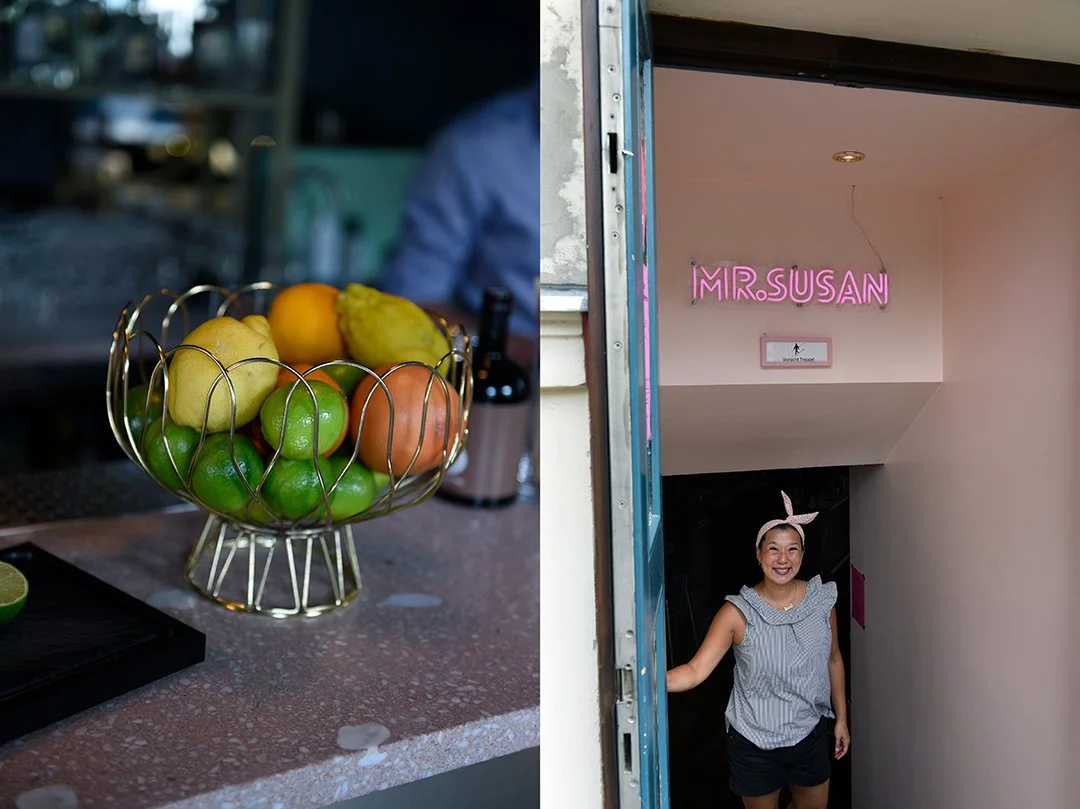
What happens when you grow up in Germany, move to LA to a Mexican neighborhood at the age of six together with your Korean parents then replace California with NYC and finally end up in Berlin with a Dutch husband? You love schnitzel, traditional German food and traditions like Sunday afternoon Kaffee und Kuchen (coffee and cake); your mother’s Korean cooking becomes a safe home inside yourself, a culinary bond to your roots; you develop a weak spot for Mexican ice cream, and adapt to the culinary playfulness that Americans master to perfection so easily.
This is the culinary map of Susan Choi, the owner of Berlin’s acclaimed Mr. Susan bar. Why Mr. Susan? - Susan says "Why not!" Susan embraces, no she celebrates all the colors and shapes, the flavors and textures, the stories and people that this map keeps bringing into her life. She dove deep into each of these cultures, they became a part of who she is today. She welcomes them with respect, curiosity, and infinite excitement and she finds in them endless inspiration to feed her mantra: Life’s a feast!

"My parents worked so hard for us. It is the classic kind of immigrant story where your parents work like a bajillion jobs, bajillion hours to make sure that you have everything that you could want in the world. Every single opportunity I have is because of my parents.“ - Susan Choi
Susan is one of the most positive and energetic people I know - I can’t really imagine her having a bad day. The obstacles in her life were tough, from brutal racism to having to learn to assimilate to a new culture over and over again yet she never let go of staying true to herself. She always knew, even at a very young age, that she either learns to stand her ground or lose the battle and drown. The headwind made her stronger, she’s a tough woman but she managed to keep her soft side. And this combination makes her so lovable, so irresistible, and charming, and also - especially when she stands, smiling, at the counter of her bar sipping an iced coffee - it makes her the cutest. I could just squeeze her.
Her New York life was quite glamorous. Working as a consultant, being a regular in the city’s spectacular restaurants, she developed an even deeper fascination for food in general but also for the people who create it. She learned about the magic of a place, thriving from the dishes, the guests, the location, the interior, and first and foremost, she learned that you lose everything without keeping quality on a constant high level. When you visit Mr. Susan bar today, you can see that she soaked up every detail during her journey. Susan truly understands what makes or breaks a bar, or a restaurant.

Germany’s culinary traditions left a deep mark in her memory. The food, the rituals, the smells, and taste, she finds home in them and they paved her move to Berlin. During one of her first nights in the city, she sat on a swing over the Spree river sipping an Aperol Spritz on a warm summer’s eve and she knew, this is my home. Catering pop-ups and events quickly opened the door to another new city. Berlin welcomed this vivid woman with open arms, thankful for the excitement she brought to the Berliners’ palates.
Be it her food or her drinks, there’s always something unique and thrilling in Susan’s compositions. Visually and in taste. Maybe because she learned to go through life with open eyes, she never misses a detail. The first drink I had at her bar was served with a paper straw with pink flamingos on it. The straw - and the flamingos - were upside down. It bugged her so much that she had to flip it. Together with her husband Robbert - the two are one of the most complementary couples I've ever met - she created a bar that excites, that is fun, and invites you to have a chat at the bar just like you were at home in your kitchen throwing a house party with only fabulous drinks and people (of course).
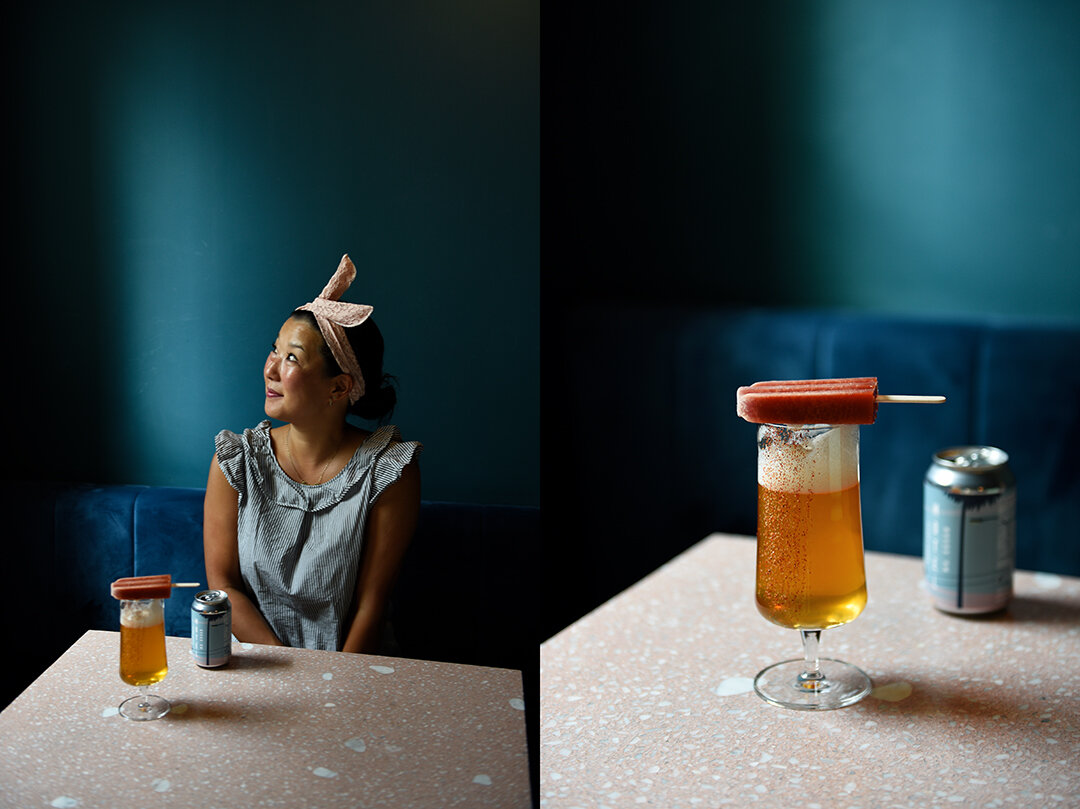
The recipe Susan shared with me for the Meet in My Kitchen podcast is her playful version of a Korean inspired Mexican drink: Kimchi Michelada! She makes a popsicle of tomato juice refined with kimchi juice and lime juice, Worcestershire sauce and soy sauce then she puts the bright red frozen juices into a glass and pours ice-cold beer over it. Despite the fact that I’m German, I’m not the most passionate about beer, but this drink got me hooked. There’s nothing better to have in your glass on a hot summer’s night! If you don’t have popsicle molds, you can use ice cube molds, that’s totally fine. Susan shows how to make the drink in a tutorial in the Highlights of the podcast's Instagram Stories, click here and go to the Highlight #5 Mr. Susan.
The podcast episode with Susan Choi is in English. You can listen to the Meet in My Kitchen podcast on all common podcast platforms; there are English and German episodes. You can find all the blog posts about these podcast episodes including my guests’ recipes here on the blog under Meet in Your Kitchen.
Listen to the podcast episode with Susan on:
Spotify / Apple / Deezer / Google / Amazon / Podimo
On Instagram you can follow the podcast @meetinmykitchenpodcast!

Kimchi Michelada
by Susan Choi/ Mr. Susan
No popsicle molds? No problem, try using ice trays for ice cubes!
Makes 6-8 popsicles
For the Kimchi Michelada Popsicles
0.5 Liter / 2 cups plus 1 tablespoon of unsalted organic tomato juice
250 ml / 1 cup plus 2 teaspoons freshly squeezed lime juice
100 ml / 1/3 cup plus 1 tablespoon kimchi juice*, or to taste, you can buy the kimchi directly from Susan (click here) or at any Asian shop and many organic shops
100 ml / 1/3 cup plus 1 tablespoon soy sauce
8-10 dashes of Worcestershire sauce (Susan uses L&P)
* Kimchi is a live product, it will continue to ferment over time thus have different flavor profiles so adjust to taste! You'll need to buy roughly 500g / 17 1/2 ounces of kimchi and then drain it for the right amount of kimchi juice. You only use the liquid for the popsicles, you can use the drained kimchi for other recipes or snacks.The more fermented the kimchi, the juicier it'll be.
For serving
About 2-4 tablespoons lime juice, to brush the outside of the glasses
Tajin (chili-lime sea salt), to sprinkle the outside of the glasses
Your favorite beer. We suggest a crisp lager. It can also be enjoyed with alcohol free beer!
For the popsicles, mix the ingredients together and pour into your favorite popsicle molds (or ice trays for ice cubes). Freeze for minimum 12 hours.
For serving, brush some lime juice on the outside of a tall glass (just a wide strip) and sprinkle with chili salt. Place a popsicle in the glass and pour in your favorite beer. Or pour the beer into the glass and lay the popsicle on top of the glass (looks prettier and more dramatic).


Meet In Your Kitchen | Domberger Brot-Werk's Secret to German Bread

This post is part of my Meet in My Kitchen podcast: How did we get to where we are in life & what does food have to do with it
“Food is kind of everything. It’s a source of conflicts, of love. It connects, it’s sharing, it differentiates. It’s absolutely underrated in Germany.” - Florian Domberger
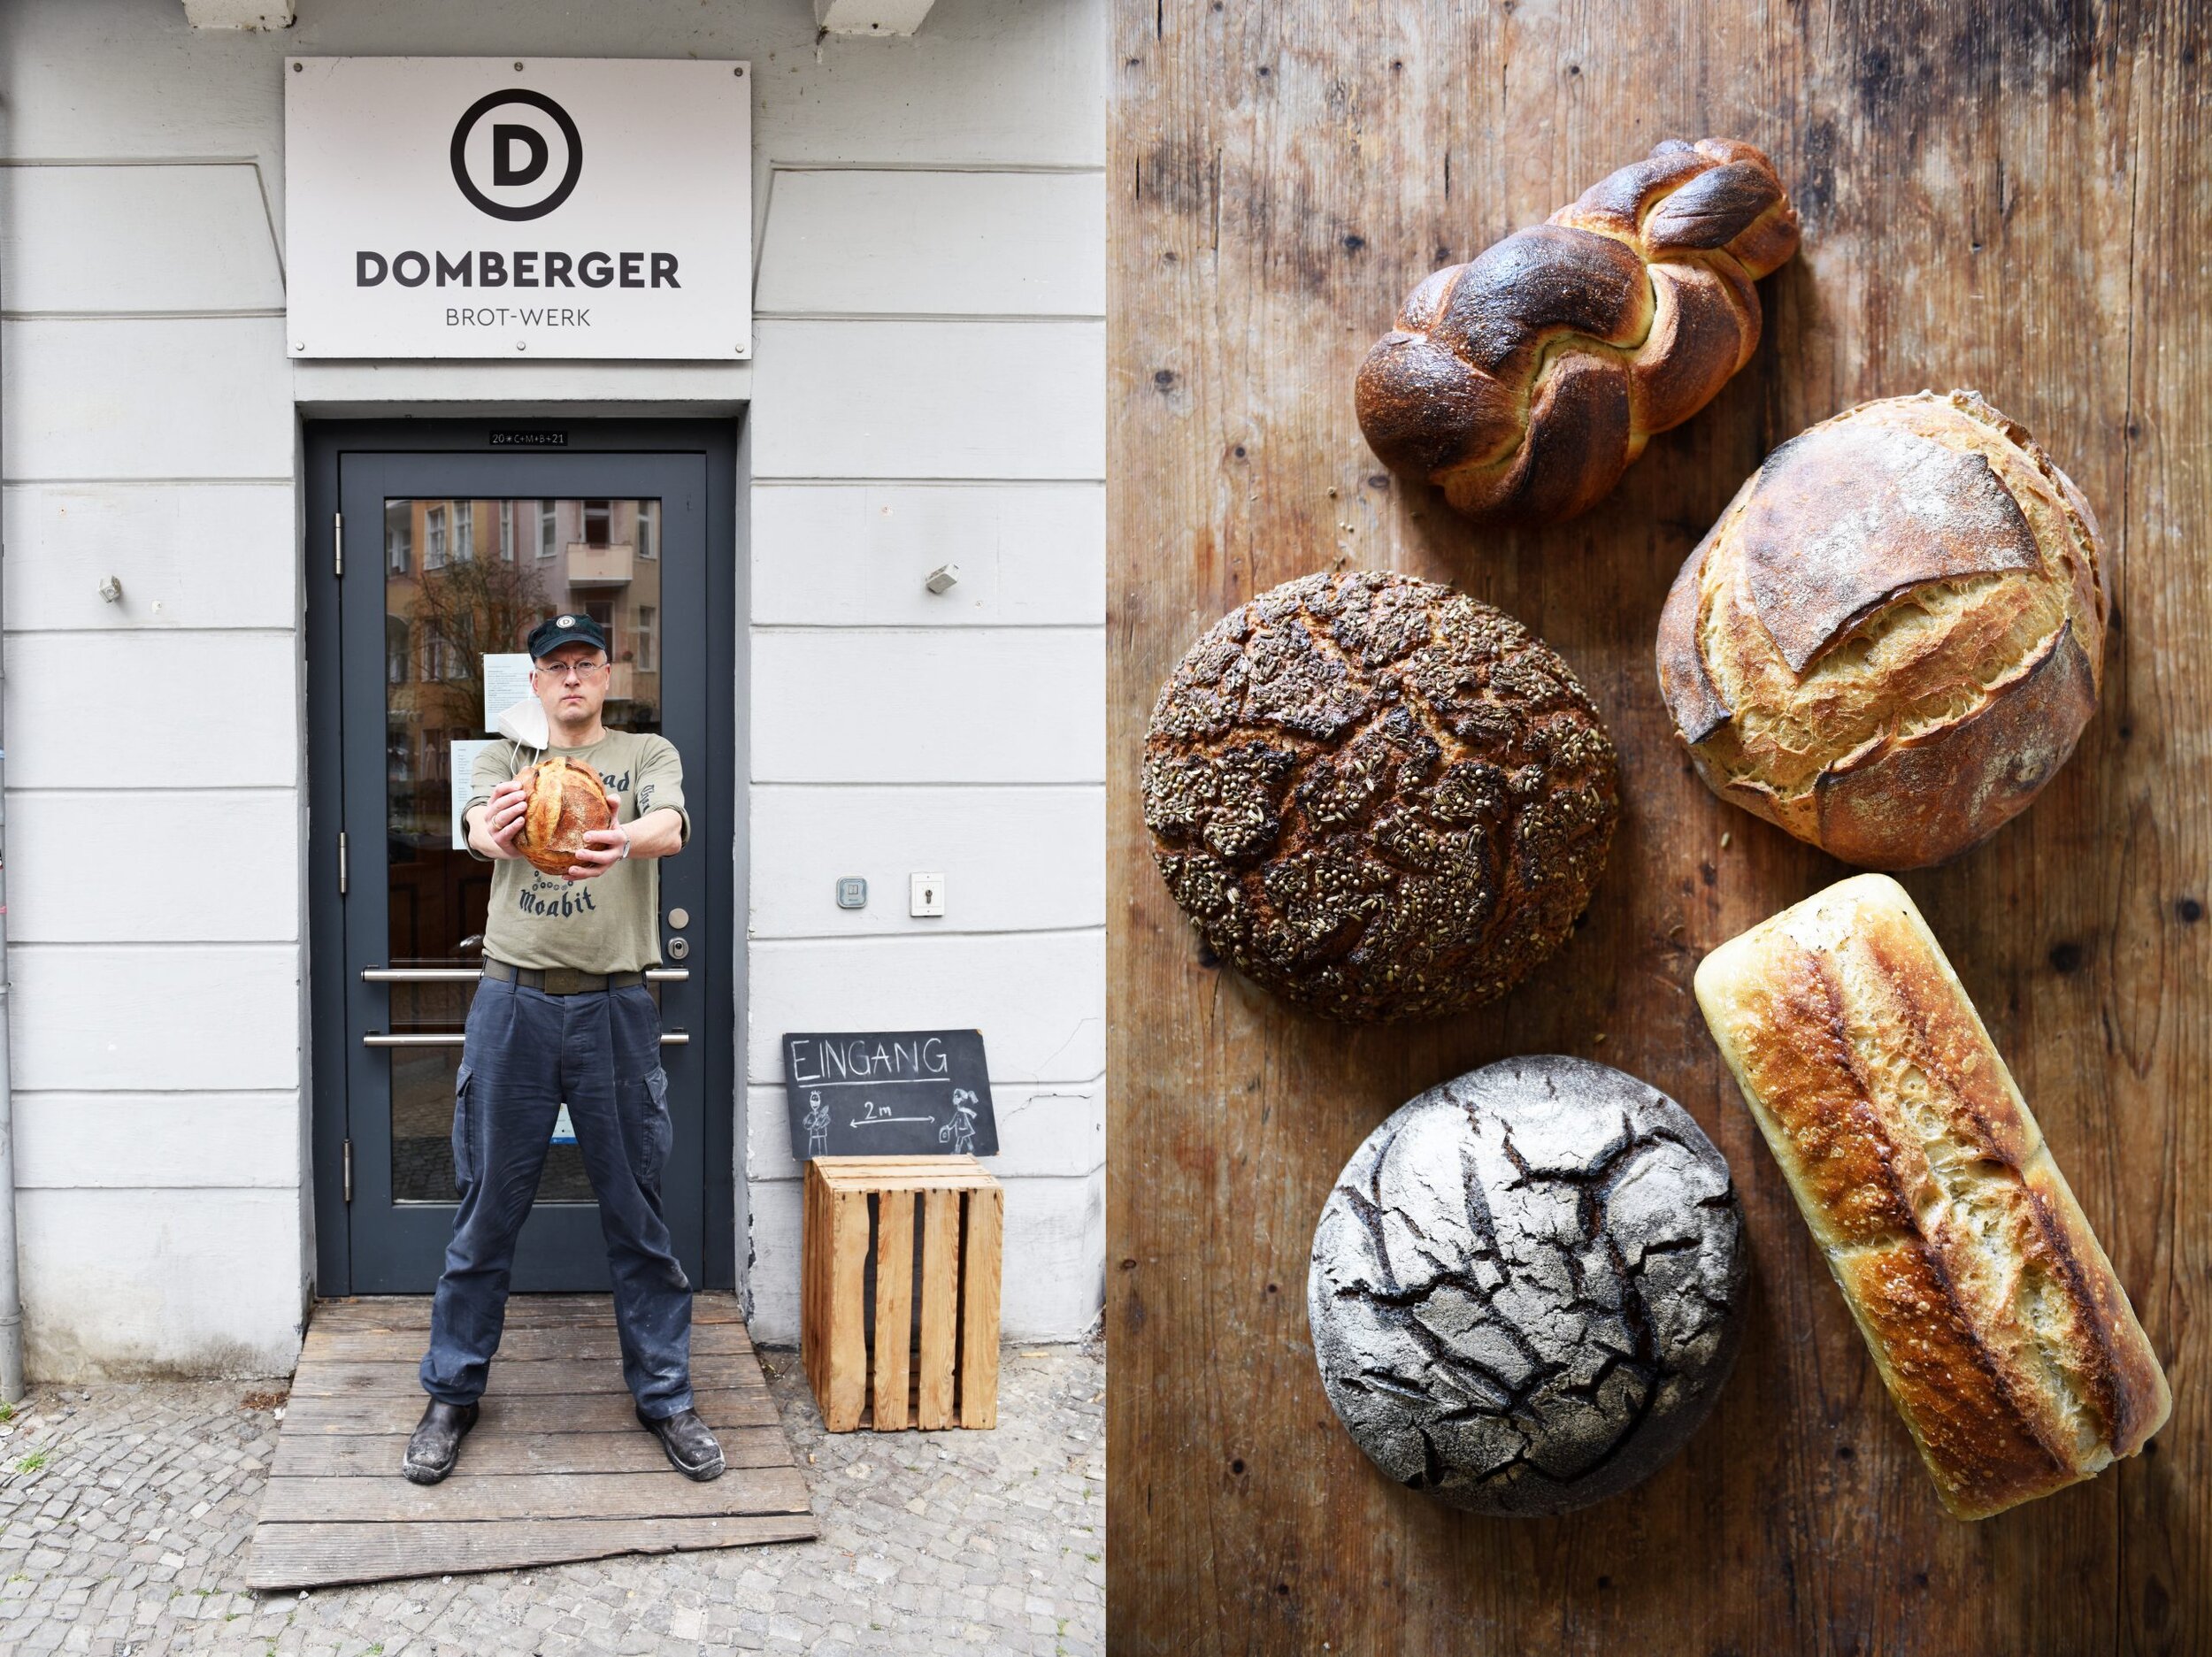
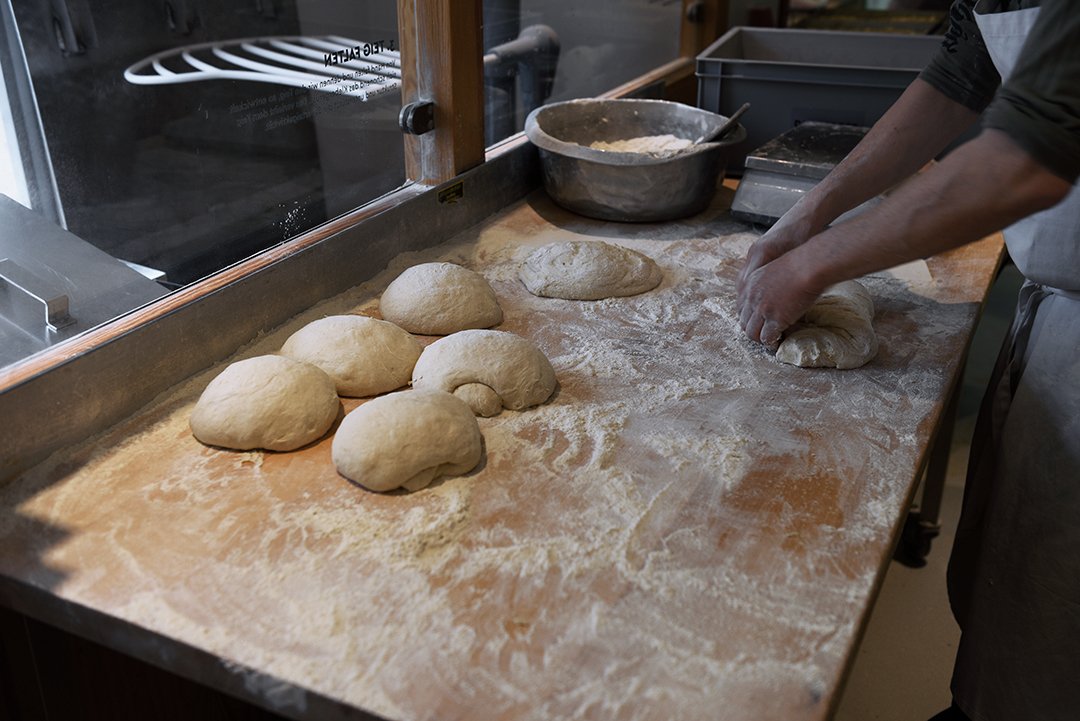
The first time I visited Florian Domberger's bakery, Domberger Brot-Werk, in Berlin's Moabit neighborhood I tried (almost) everything I saw on the wooden shelves: pretzels, croissants, fragrant loaves of crusty German rye and spice bread and traditional buns, such as Vinschgerl, Schrippen, Seelen, and Schusterjungs. All made with sourdough, all made with love. I was hooked. So I sat outside on a bench in front of the bakery in the golden late morning sunlight, all that baked deliciousness spread out in front of me, and every bite reminded me of how bread used to taste in my childhood.
Florian and his team master more than just savory traditional German baking, their sweets are also a generous gift to your palate and hips. His Butterkuchen (a yeasted sheet cake topped with lots of butter and sugar) and his Zimtschnecken (cinnamon rolls) are both the best I ever had in my life. So what is the secret behind this bakery? Florian says it's just "flour, water, salt, time - and love!", and I agree, he and his bakers truly understand the core of what their craft is about.

The craft of a baker demands a lot of fascination - and love - for the ingredients, for the flour, the process, the desire to approach perfection and improve each move every day. A baker needs the humble understanding of the importance of time, working and watching your dough slowly and attentively, you can't rush sourdough bread. And that's the tricky point where commercial bakeries lost the craft and with this loss they turned the taste of good bread into a faded memory. Commercial yeast and ready-made bread mixes replaced the elaborate simplicity of "flour, water, salt, and time" and paved the way for an industrialization that is conflicting when it comes to food that achieves its taste and quality from a slow process. An undertaking that could only fail and threaten the tradition and variety that once Germany became famous for.
Twenty years ago, driving through my home country, I could stop at almost any bakery in any town, village, and city. Those were still individual bakeries who had their family name written outside on the shop's sign and inseparably connected to their name was the responsibility, and the pride, to only deliver quality to their customers. And that's where Florian decided to go back to. He put his name on the sign. After a successful international career in shipping and logistics, after leaving his family's business and telling his father he's not going to follow in his footsteps, he learned the craft of the baker with the goal to open his own bakery. Five years ago, his wife, Vanessa, and their two daughters followed their husband and father to Berlin and together they built up one of Berlin's most acclaimed bakeries.
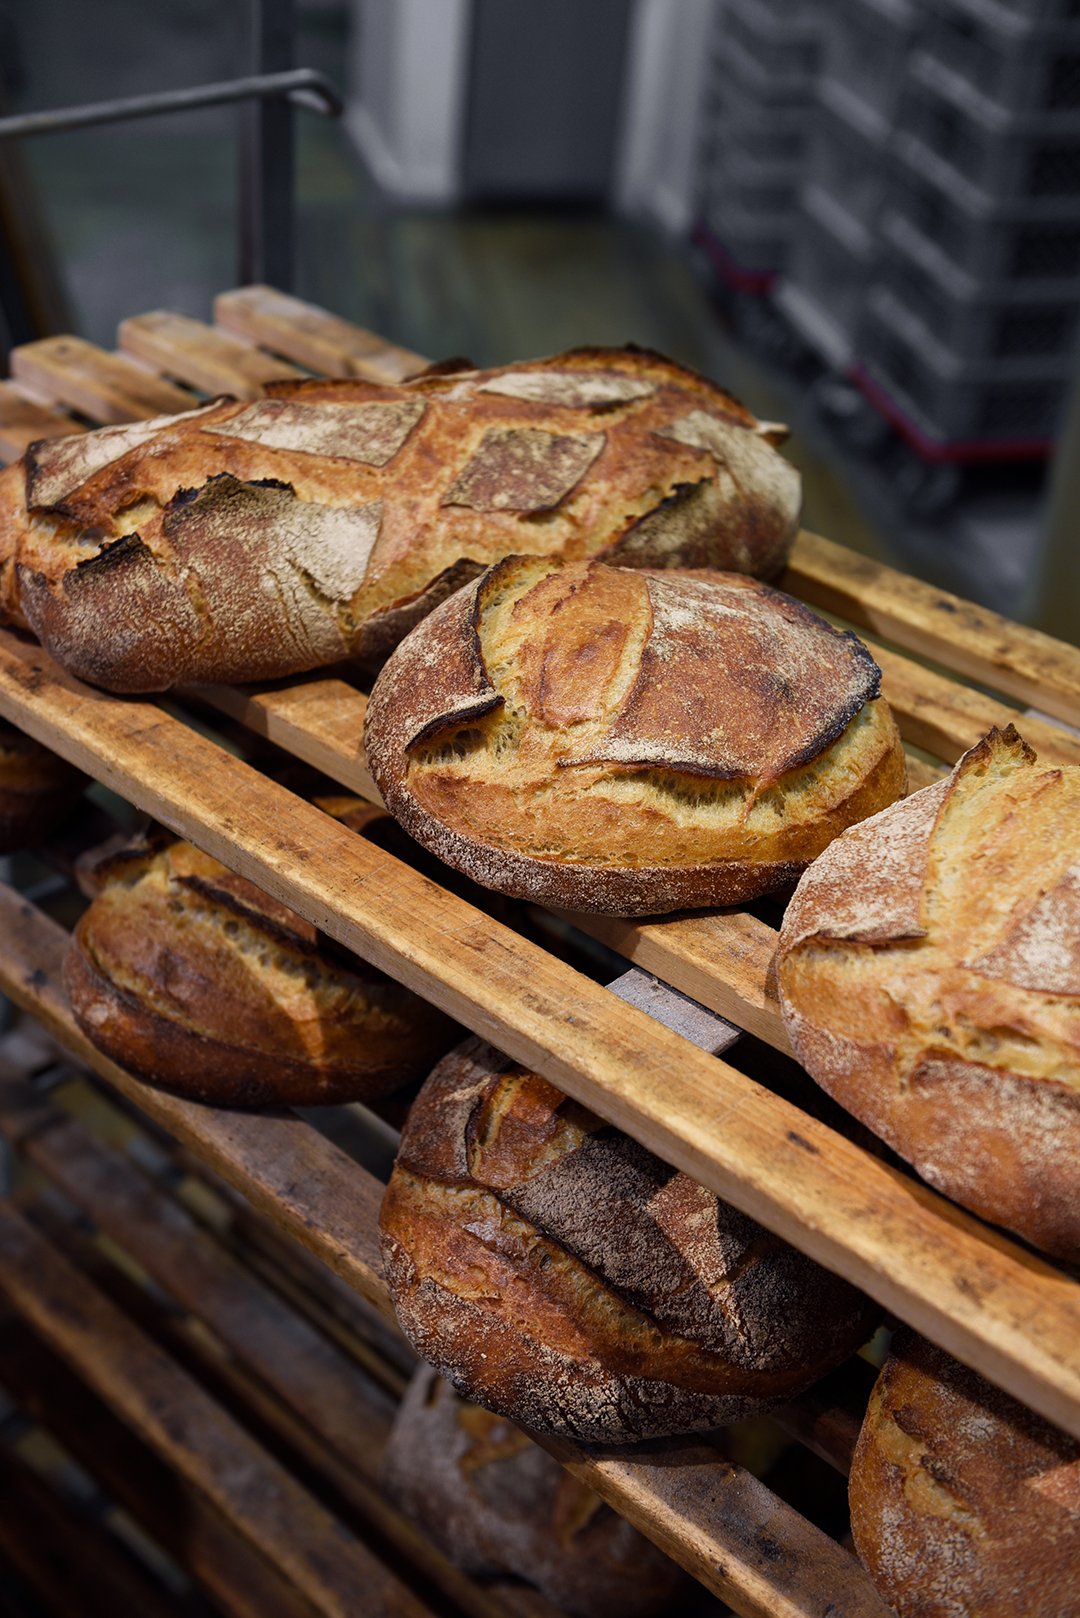
One of Florian's most popular breads - and the recipe that he shared with me (see below) - is his Beutebrot. A white sourdough bread made with wheat and a little spelt flour, with a firm crust and an open almost moist crumb (the double-picture at the bottom of this post showing the loaf cut in half is the bread that I baked in my kitchen, which worked out perfectly). If you happen to have an active sourdough starter in your kitchen you can enjoy Florian's Beutebrot in less than 24 hours and feel the sweet satisfaction of a real bread baker.
The podcast episode with Florian Domberger is in German. You can listen to the Meet in My Kitchen podcast on all common podcast platforms; there are English and German episodes. You can find all the blog posts about these podcast episodes including my guests' recipes here on the blog under Meet in Your Kitchen.
Listen to the podcast episode with Florian on:
Spotify / Apple / Deezer / Google / Amazon / Podimo
On Instagram you can follow the podcast @meetinmykitchenpodcast!
Beutebrot / Wheat and Spelt Sourdough Bread
by Florian Domberger / Brot-Werk
You will need a cast iron cocotte (Dutch oven) with a lid to bake the bread and a very sharp razor blade (bread lame / scoring knife) to score the loaves before baking - and of course, you will need an active sourdough starter.
Makes 2 loaves of sourdough bread
900g / 7 cups unbleached wheat flour (type 550)
100g / ¾ cup whole spelt flour
750ml / 3 cups plus 2 tablespoons lukewarm water
100g / 3 ½ ounces active sourdough starter *
25g / 5 teaspoons fine sea salt
* Your sourdough starter is active when you refresh it and it doubles its volume within roughly 4-5 hours. For this recipe, use the refreshed sourdough starter as soon as it has risen to its peak, before deflating. To test the activity of your starter, you can add a spoonful of it to a glass of water: it should float, it should not sink, then it's ready to be added to the dough. On my Instagram you see how I grew a sourdough starter from scratch, it's in the Highlight Story 'Sourdough', click here.
This is my bread baking schedule: On Day 1, I refresh my sourdough starter in the late morning/ around noon, I start mixing the dough at around 5 pm then, after folding and shaping the dough, I leave it in the fridge overnight and remove it from the fridge the next day at around 8:30am. On Day 2 at around 10am, I preheat the oven and bake one loaf after the other in a round cast iron cocotte (Dutch oven) with a lid.At the bakery, Florian shapes the loaves on Day 2, however I find that my schedule works easier for a home baker.
Day 1
In a medium bowl, combine the wheat flour and the spelt flour. In a large bowl, whisk together the water and sourdough starter. Add the flour mixture and, using your hands, mix for about 3 minutes until well combined; it will be a little sticky. Cover with a kitchen towel and let it rest at room temperature for about 40 minutes.
Sprinkle the salt on top of the dough and, using your fingers, push and rub the salt into the dough. Fold the dough on top of itself a few times then cover with a kitchen towel and let it rest at room temperature (about 21°C / 70°F in my kitchen) for 30 minutes.
Now the bulk fermentation starts, which will take about 3-4 hours: Every 30 minutes, wet your hands with a little water and , grabbing underneath the dough on one side, lift the dough and fold it on top of itself then turn the bowl by 90° and repeat folding the dough the same way on top of itself; turn the bowl by 90° and repeat folding the dough two more times so that the dough has been folded on top of itself from all 4 sides. Cover the bowl, let the dough rest at room temperature for 30 minutes then repeat folding the dough the same way (each time from all 4 sides) every 30 minutes. After 3-4 hours the dough will feel softer and smoother, more cohesive and less stretchy, and it will have risen by roughly 30%. This process will fasten when the room temperature is higher and take longer when the room is colder.
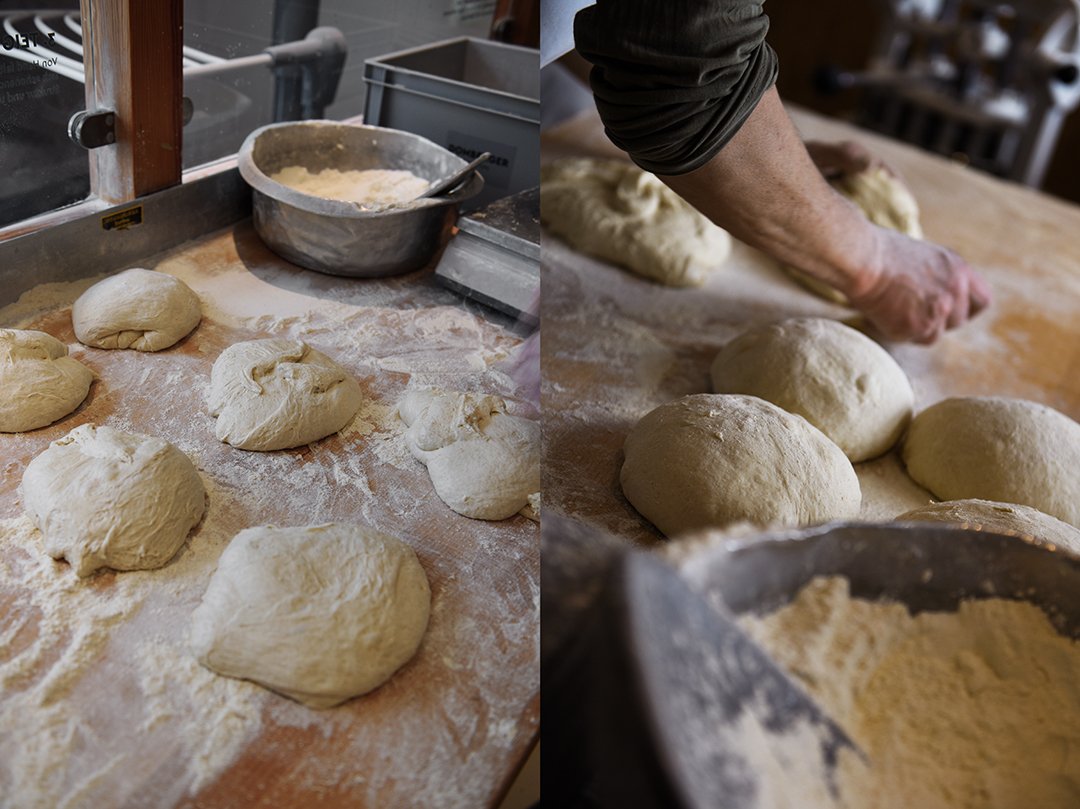
After the bulk fermentation, gently pour or scrape the dough out of the bowl and onto a work surface, dust the dough's top with a little flour then flip the dough and gently cut the dough into 2 pieces. Take one piece of dough, fold it onto itself so that the top and the bottom surface is dusted with flour. Using a bench knife or your hands, gently pull and turn the dough, giving it a round shape and building surface tension (you can find tutorials about shaping sourdough loaves online). The top should be round, smooth, and very taut. Shape the second piece of dough the same way then let both pieces rest for about 10 minutes.
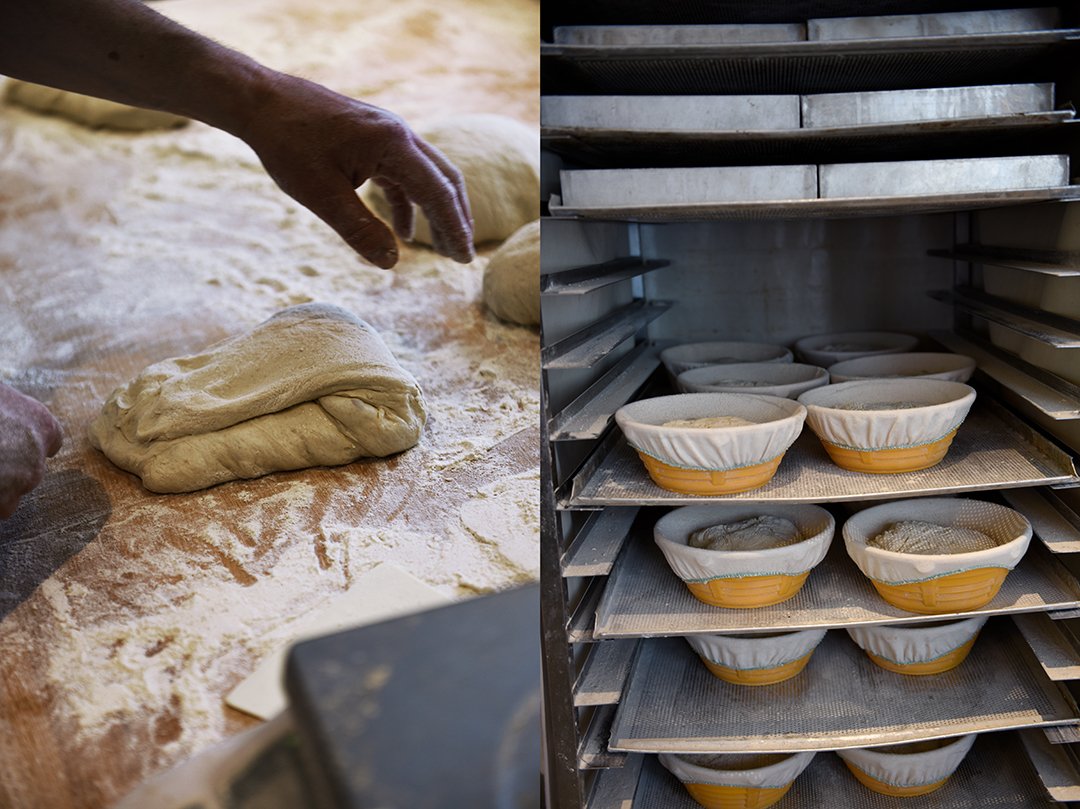
Line 2 bread baskets or bowls (about 20cm / 8" diameter) with kitchen towels and dust the towels with flour. For the final shaping, dust one piece of dough with a little flour and, using a bench knife, flip the dough. Gently stretch and pull the side of the dough that's lying closest to you a little up and fold it over the middle of the dough. Pull the right side of the dough up and fold it to the left generously over the middle of the dough then pull the left side up and fold it to the right generously over the middle of the dough. Now pull the side furthest away from you up and fold the dough onto itself towards you then lay your hands, shaped like a dome, on top of the dough and pull and rotate the dough, while the seams stay at the bottom, towards you. This builds surface tension and creates a taut, round top. Using a bench knife, lift the dough then transfer and flip it into the prepared basket; the seam should be at the top and the round surface at the bottom. Repeat the same way with the second piece of dough. Wrap both baskets with the loaves in large freezer or rubbish bags and transfer to the refrigerator. Leave the dough to rise in the fridge overnight (for about 11-12 hours).
Day 2
After 11-12 hours, remove both baskets from the fridge, leaving them in the bags at room temperature. After 2 hours, place a cocotte (Dutch oven) closed with its lid on the bottom rack of the oven and preheat the oven to the highest setting (at least 250°C / 475°F) for about 30 minutes. The cocotte should be very hot. Remove one basket from the bag. Line a large wooden board with parchment paper, place it on top of the basket, and flip the basket so that the loaf lies on the parchment paper. Quickly score the top of the loaf with the razor blade (you can find tutorials about scoring sourdough loaves and different scoring patterns online) then immediately, and very carefully (!), remove the hot cocotte from the oven, placing it onto a trivet. Be cautious and mind that the cocotte is very hot and can cause severe injuries! Immediately remove the lid from the cocotte then transfer the loaf (on the parchment paper) to the hot cocotte and quickly but carefully place the loaf (on the parchment paper) in the cocotte. Close with the lid, place the cocotte on the rack in the oven then reduce the heat to 230°C / 450°F and bake for 20 minutes. Remove the lid and bake open for another 20-25 minutes until golden brown. Transfer the bread to a cooling rack. Let the bread cool for at least 20-30 minutes before you cut it.
To bake the second loaf, raise the oven temperature to the highest setting again (at least 250°C / 475°F), place the cocotte closed with its lid in the oven, and heat for 10-15 minutes. Then repeat the steps described above but mind to reduce the heat to 230°C / 450°F when you transfer the scored second loaf into the oven (a step I often forget).
The bread tastes best in the first 3 days. It also freezes well, you just defrost the frozen loaf, sprinkle the defrosted (or partly defrosted) loaf generously with water then bake it at 200°C / 400°F for about 10-20 minutes.


Meet In Your Kitchen | Maria's Cannelloni al Ragù
This post is part of my Meet in My Kitchen podcast: How did we get to where we are in life & what does food have to do with it
“I think it’s amazing that we need to eat to survive but the way to survive is to do something that is amazing to do, that you can enjoy, that you have the privilege, the luxury, three, four times a day to do something out of necessity that you can enjoy as one of the I would say best things there is in life.” - Maria Gerace
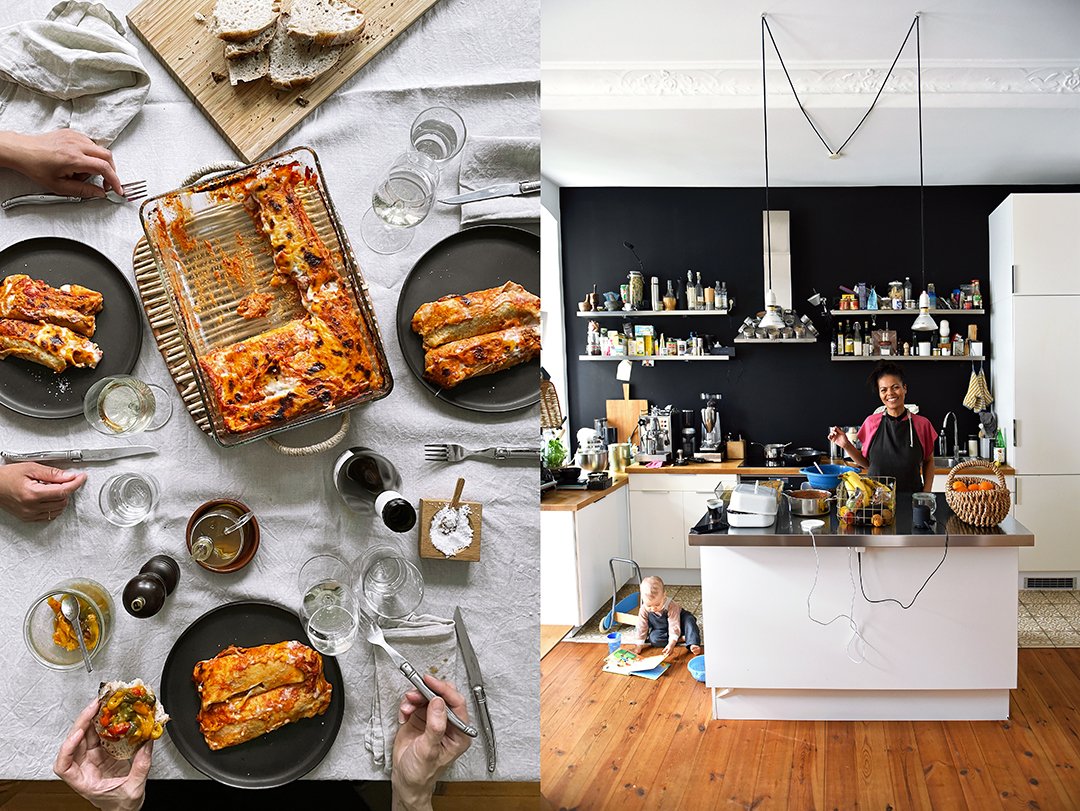
The first time I met Maria Gerace she came to a Saturday lunch at my apartment, we started at noon and parted at 4 in the morning. Mussels, crêpes, late night pasta, and many bottles of vino - that was the perfect start of a friendship that would always circle around food, wine, and long conversations. When I go to Maria's kitchen she makes cannelloni for me - not a couple but 20 (you can find the recipe below, Maria uses crespelle/ crêpes for the cannelloni instead of cannelloni pasta). In her kitchen, she's my Italian mamma who always takes care that my plate (and glass) is never empty!
Maria grew up in a small town in Calabria, close to the sea, right at the tip of Italy's boot and far away from the life she was longing for. She was raised by her grandmother who planted the seed in the young girl's soul that a good life is always connected to good food and to people to share it with.

At a young age Maria was already used to patiently peeling pounds of fava beans in the evening in front of the TV; to making passata in the garage once a year with the entire family, each member having at strict role in the procedure - a hierarchy that only slowly alters with age. Food was never just prepared for oneself, but always shared with the whole family. The famous Sunday tomato sauce enriched with polpettine, a weekly ritual, which smell and taste is so deeply woven into her memory, was a frugal feast in her granny's kitchen that no family member dared to miss. The young ones brought their boyfriends and girlfriends, the aunts and uncles sharing laughs and stories, a constant flow of people pulled to the kitchen of a woman who held everything and everybody together like a magnet.
Once a year the family would gather and go on a 'pilgrimage' to slaughter a pig at a small village close by. The blood would be collected immediately to make sanguinaccio, cooked with cocoa, sugar, and spices it was turned into a rich chocolate sauce that the kids loved. Even for the young ones it was normal that every part of an animal was used, that the whole family would always be involved in every food endeavor, and that there were recurring culinary rituals that marked the flow of the year and made it special. Traditions that everyone was longing for.
Although her curiosity and hunger for life made her leave the south of Italy to study industrial design in Milan, to travel and experience the world and widen her view, to then settle in Berlin with her husband Jan and work as an eyewear designer, Maria's voice always mellows when she talks about her granny, about Italian food, and the sea.
The podcast episode with Maria Gerace is in English. You can listen to the Meet in My Kitchen podcast on all common podcast platforms; there are English and German episodes. You can find all the blog posts about these podcast episodes including my guests' recipes here on the blog under Meet in Your Kitchen.
Listen to the podcast episode with Maria on:
Spotify / Apple / Deezer / Google / Amazon / Podimo
On Instagram you can follow the podcast @meetinmykitchenpodcast!

Cannelloni al Ragù
by Maria Gerace
There are many steps involved in the preparation of this dish, so it makes sense to cook it in larger quantities.Cannelloni freeze very well. Follow this recipe and freeze them (in the baking dish) before (!) baking the crespelle in the oven. After defrosting them you can bake them following this recipe again. You can also prepare the ragù and the tomato sauce a day ahead.The crêpes and béchamel sauce (in case you don't use store bought sauce) should be made the day you finish the preparation and then either bake or freeze the cannelloni.
Makes about 20 crespelle / Serves 7-10
For the ragù (you can prepare the ragù a day ahead)
100 ml / 1/3 cup plus 2 tablespoons dry white wine
Extra virgin olive oil
1 medium onion, peeled and finely diced
1 medium carrot, peeled and finely diced
1 stalk of celery, peeled and finely diced
1 clove garlic, peeled and finely chopped
500g / 17 2/3 ounces ground beef (or mixed beef/ pork)
1kg / 2 1/4 pounds canned whole peeled tomatoes, crushed (or canned crushed tomatoes)
Fine sea salt
Freshly ground pepper
Nutmeg, preferably freshly grated
For the crêpes
600ml / 2 1/2 cups whole milk
1 tablespoon extra virgin olive oil
3 large eggs
225g / 1 3/4 cups all-purpose flour
Nutmeg, preferably freshly grated
Fine sea salt
Unsalted butter, to cook the crêpes
For the tomato sauce (you can prepare the tomato sauce a day ahead)
Extra-virgin olive oil to taste
1 clove garlic
500g / 17 1/2 ounces tomato passata
Fine sea salt
To finish the cannelloni
1 liter / 4 1/4 cups thick béchamel sauce*
Parmesan, freshly grated
Nutmeg, preferably freshly grated
500g / 17 2/3 ounces Provola cheese, cut into cubes
* Here is my recipe for béchamel saucefrom my book '365'
1 liter / 4 1/4 cups whole milk
1 large bay leaf
Nutmeg, preferably freshly grated
Fine sea salt
Finely ground pepper
45g / 3 tablespoons unsalted butter
45g / 1/3 cup all-purpose flour
For the ragù, simmer the white wine in a medium saucepan for 5 minutes to boil off the alcohol and reduce acidity. In a large pan, heat a splash of olive oil over medium-high heat, add the onion, carrot, celery, and garlic, and sauté, stirring occasionally, for about 4 minutes. Add the ground beef and a little olive oil and cook over high heat, stirring to break up the meat, for a few minutes or until the meat is browned. Add the wine and deglaze the pan, using a spatula to scrape any bits and pieces off the bottom, then add the tomatoes. Season to taste with salt, pepper, and nutmeg and gently simmer over medium-low heat for 1-2 hours; the ragù should be thick. Place a large colander in a deep sheet pan then pour the ragù into the colander to drain any excess liquid; for the filling, the ragù needs to be very thick and not runny. Set the sauce collected in the sheet pan aside. Let the ragù cool completely.
For the crêpes, whisk together the milk, olive oil, and eggs then add the flour and a pinch of nutmeg and salt and whisk, using a stand mixer or a whisk, until smooth and well combined. Let the batter sit for about 30 minutes.
For the tomato sauce, heat a splash of olive oil in a large pan over medium heat. Add the garlic and sauté for a few minutes then add the passata, season with a pinch of salt,and cook for 10 minutes. Remove the garlic then let the sauce cool for at least 15 minutes.
For the béchamel sauce, combine the milk, bay leaf, 1/4 teaspoon of ground or freshly grated nutmeg, 1/4 teaspoon of salt, and a pinch of pepper in a medium saucepan and bring to a boil. Immediately take the pan off the heat, remove and discard the bay leaf, and set aside. To make the roux for the béchamel, melt the butter in a separate medium saucepan over medium-high heat and as soon as it’s sizzling hot, whisk in the flour. Slowly pour the hot milk mixture into the roux and whisk until smooth. Simmer on low, whisking occasionally, for about 5 minutes or until the sauce starts to thicken. Season to taste with nutmeg, salt, and pepper and set aside.
To cook the crêpes, spread out 4-6 kitchen towels on a work surface. In a 20 cm / 8“-non-stick pan or cast iron skillet heat 1/2 teaspoon of butter over medium-high heat. Pour in a ladle of the batter, tilting and turning the pan so that the batter spreads evenly and very thinly. Cook the crêpe, flipping once, for about 30-60 seconds per side or until golden. Spread the crêpe on the prepared kitchen towels and continue cooking about 19 more crêpes with the remaining batter, adding a little butter to the pan and adjusting the heat as necessary.
Preheat the oven to 180°C / 350°F.
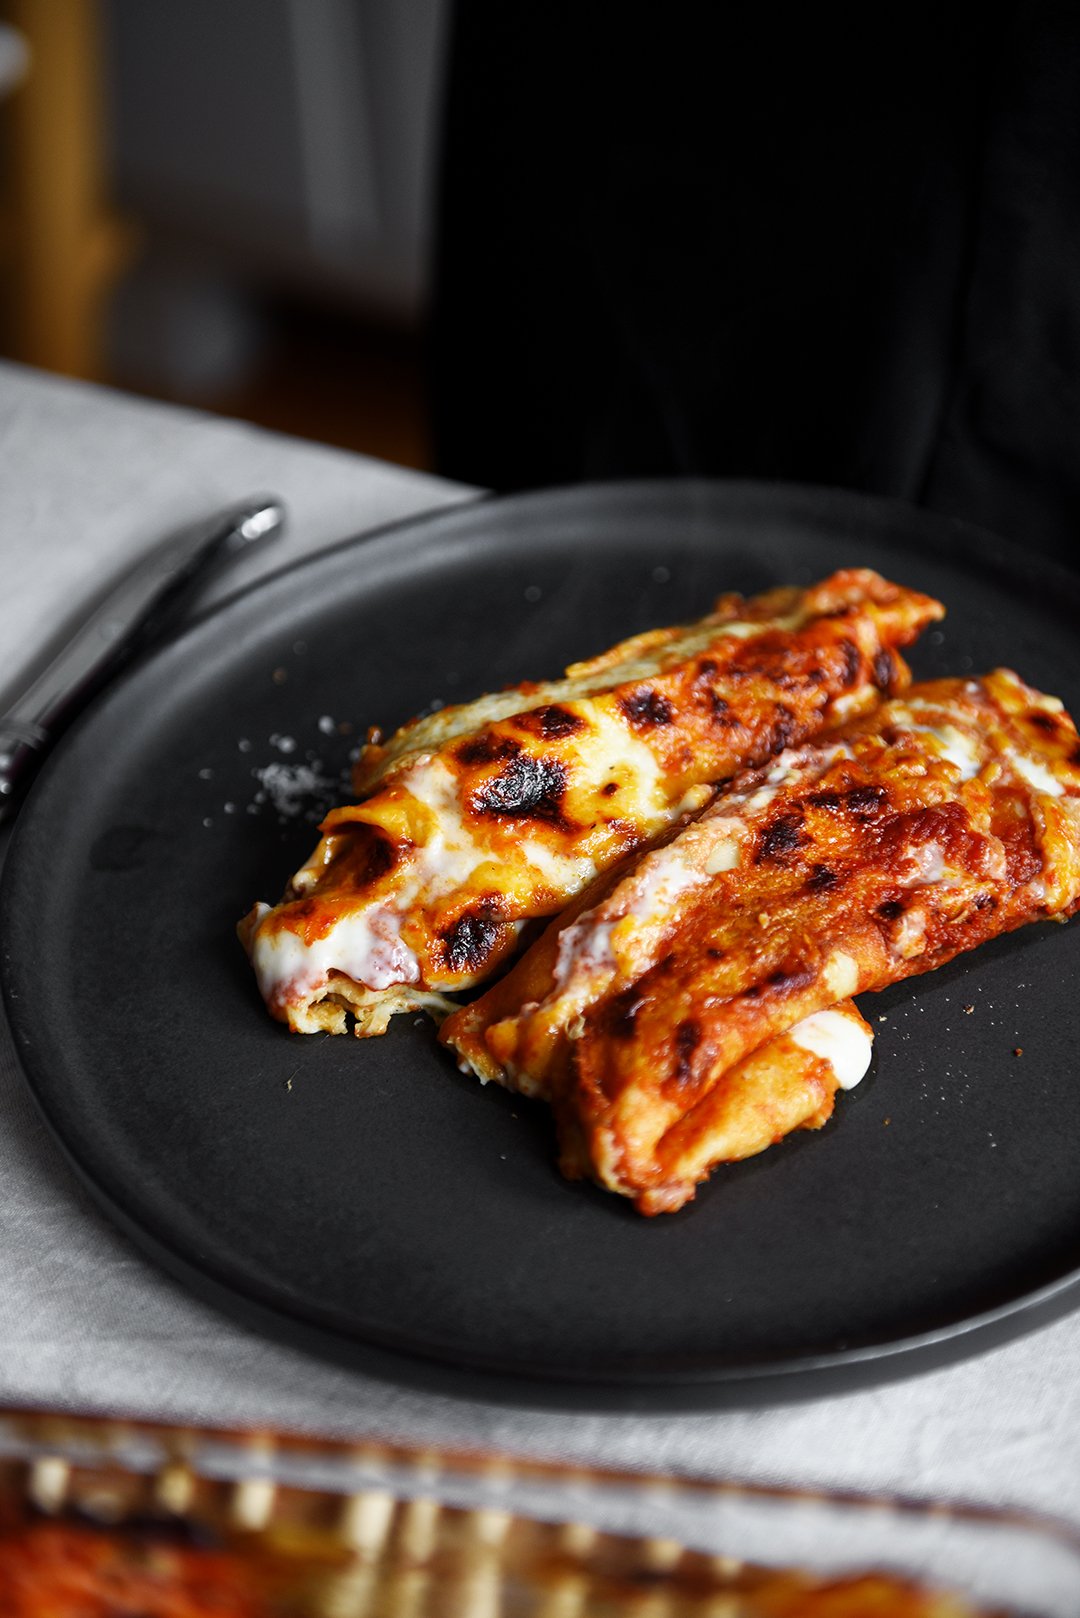
To finish the cannelloni, spread a little tomato sauce on the bottom of 2 large baking dishes, drizzle with a little béchamel sauce, and sprinkle with a little Parmesan. Season each crêpe with a little nutmeg and sprinkle with a little Parmesan. Place a generous spoonful of the ragù in the middle of each crêpe and top with Provola and a spoonful of béchamel sauce. Gently roll each crêpe into a tight wrap and arrange them tightly, side by side, in the prepared baking dishes. Cover the crêpes with the remaining tomato sauce, the sauce collected from the ragù, and the béchamel sauce, sprinkle with a little Parmesan, and bake for 30-40 minutes or until it’s bubbling and the top is golden brown. Let the crespelle sit for a few minutes before serving.


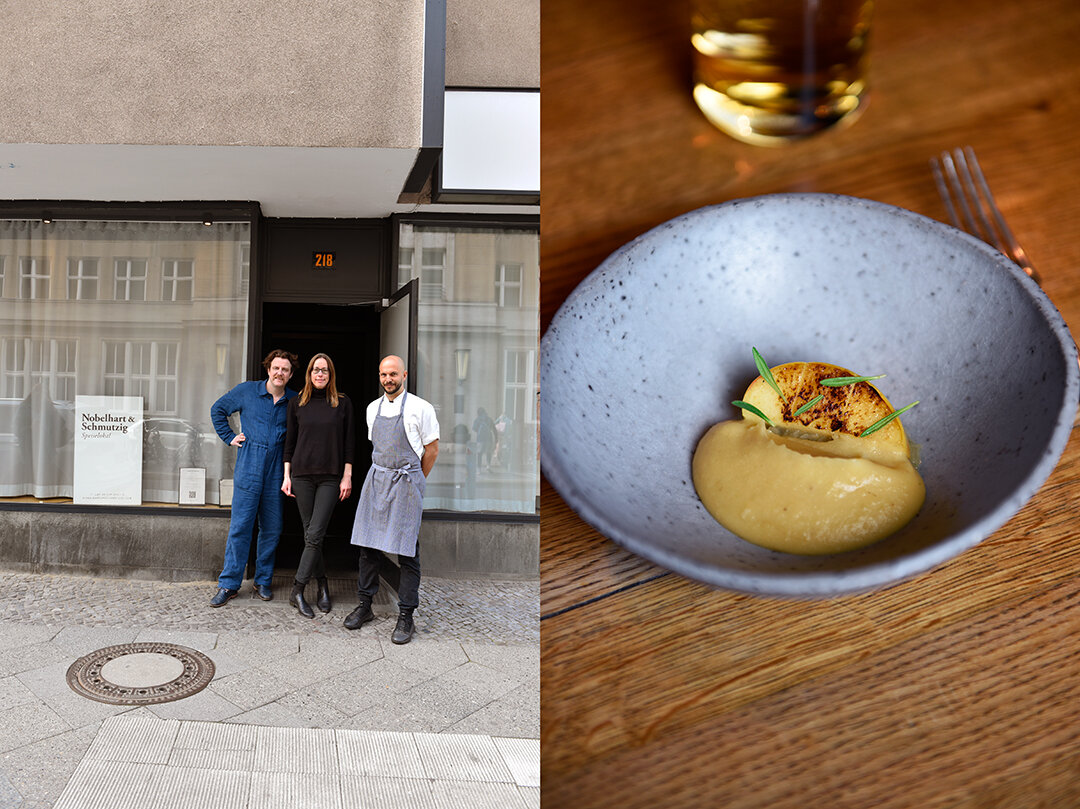
Meet In Your Kitchen | Nobelhart & Schmutzig

This post is part of my Meet in My Kitchen podcast: How did we get to where we are in life & what does food have to do with it
“Nature is much larger than our actual doings as humans because she can create so much more variety and so much more depth in taste.” - Billy Wagner / Nobelhart & Schmutzig
Nobelhart & Schmutzig seduces the hungry mind with a vibrant cosmos that is hard to resist. The restaurant is not just about food, there is a rebellious, a critical attitude behind it that likes to challenge the comfortable eater. Restaurateur and sommelier Billy Wagner and chef Micha Schäfer create dishes with verve, heart, and precision. They skillfully caress their guests' tastebuds yet a visit at their Berlin restaurant goes beyond an exciting flavor experience. Billy and Micha dare to question and shake up established structures, to reshape and experiment with all the facets that a visit to a restaurant is about.
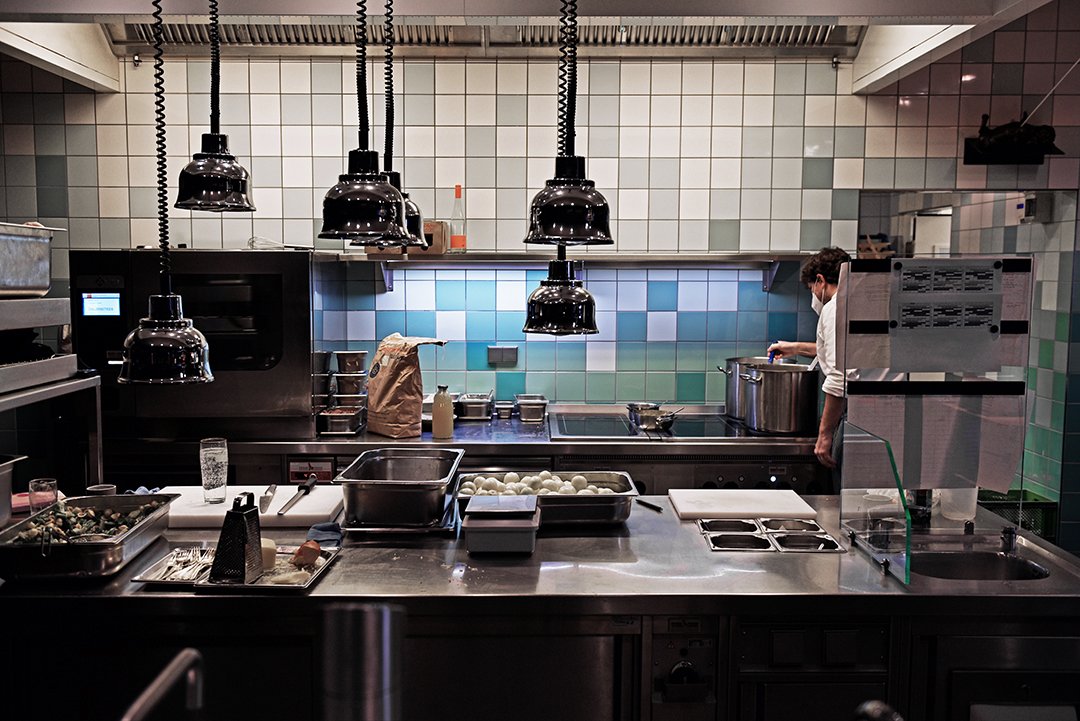
When you ring the restaurant's door bell, when you're seated at the c-shaped counter - the 'kitchen table' framing the open kitchen -, when Micha and his team cook and serve their refined compositions right in front of you, and when Billy, the conductor, takes care that you'll never forget this evening, then you're part of an almost orchestral experience that includes all your senses and excludes the outer world for a little while. There's the excitement of the unexpected but there's also the comfort of an ambience that allows you to be fully yourself. Isn't that what a visit to a restaurant should be about?
Rewarded with a Michelin Star only nine months after the opening and with 16 points by Guide Gault Millau2021, ranked at No. 57 in the World's 50 Best Restaurants list (Update October 2021: now they are No. 45), Nobelhart & Schmutzig quickly found its fame in the Berlin and in the international restaurant scene. As good as the praise may feel, the 'old couple' Billy and Micha - that's how it feels when you meet them - entered the culinary scene with more profound intentions.
Billy comes from a family of restaurateurs; named Sommelier of the Year several times, gaining experience at the German 2-Star Michelin restaurant Zur Traube amongst others, he achieved a deep understanding of what a satisfying visit to a restaurant should truly be about. Dropping out of the 2-Star Michelin restaurant Villa Merton in Frankfurt at the innocent age of 27 and taking over the responsibility for the culinary creations in Billy's endeavor right from the start in 2015, Micha also had a very clear vision of the food that inspires him as a chef.
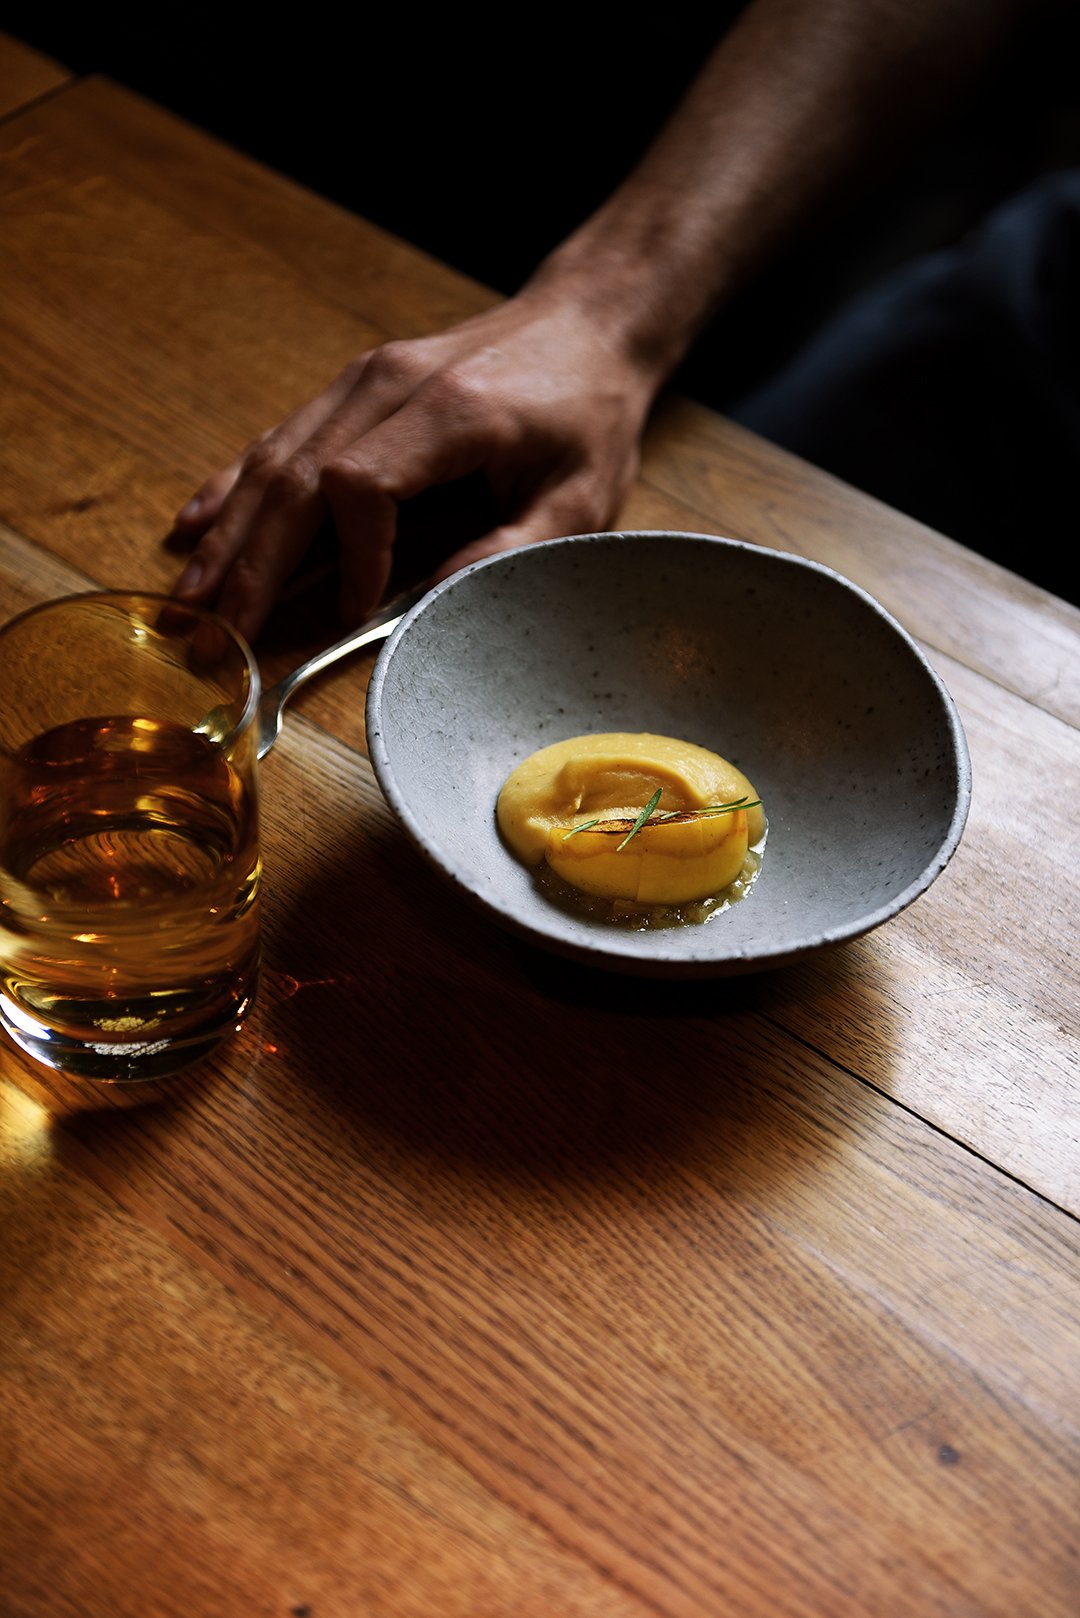
Both men envisioned a menu that pulls the single ingredient right into the spotlight, and with that also the farmers, the butchers, and bakers that are responsible for each ingredient. Focussing, reducing, leaving out the unnecessary, that's where they found their mantra and the clever and tasty answer to a changing way of eating and indulging. It's about pure taste, thriving and prospering from seasonal, regional, and responsibly handled resources. And above all, it's about having a good time and forgetting about obsolete conventions. Nobelhart & Schmutzig is the seductive synergy of two men, two opposite poles, one calm the other impulsive, which Billy modestly describes with the words: "Micha takes care that our guests enjoy the food and I take care that the guests are there." Below you can find the recipe for Micha Schäfer's Mashed Potatoes, Onions, Unripe Apples and Savory that he cooked for me at the restaurant.
The Nobelhart & Schmutzig podcast episode is in German. You can listen to the Meet in My Kitchen podcast on all common podcast platforms; there are English and German episodes. You can find all the blog posts about these podcast episodes including my guests' recipes here on the blog under Meet in Your Kitchen.
Listen to the podcast episode with Billy and Micha on:
Spotify / Apple / Deezer/ Google / Amazon / Podimo
On Instagram you can follow the podcast @meetinmykitchenpodcast!

Mashed Potatoes, Onions, Unripe Apples and Savory
by Micha Schäfer / Nobelhart & Schmutzig
"Our recipes strongly depend on the quality of the ingredients - this counts for each ingredient and that makes the difference. The more regional the ingredients that you buy yourself to prepare this recipe the bigger the possible differences to the ingredients that we held in our hands when we created this recipe and that’s great, that’s really good! This offers the possibility to experience cooking in a new way and to learn to always base a dish on the produce, that’s your starting point, just as we do at Nobelhart & Schmutzig. So be brave and adapt this recipe to your own local conditions!“ - Micha Schäfer
Serves 2
For the onions
150g / 5 1/4 ounces onions
80g / 1/3 cup unsalted butter
Fine sea salt
For the mashed potatoes
300g / 10 1/2 ounces waxy potatoes
1/2 teaspoon smoked butter (you can buy smoked butter online, in the Nobelhart & Schmutzig shop, or replace it with regular butter but then, unfortunately, you'll miss out on the smokey touch)
60g / 1/4 cup unsalted butter
90ml / 1/3 cup plus 1 tablespoon of the water used to cook the potatoes
About 1 tablespoon apple cider vinegar
Fine sea salt
For the apples
1 large or 2 small firm sour baking apples or unripe apples
unsalted butter, to cook the apples
1 medium sprig savory
For the onions, peel the onions and dice them very finely. Heat the butter in a small pot over medium heat, add the onions and a pinch of salt and cook slowly, stirring once in a while, over medium-low heat for about 30 minutes or until very soft and pale-golden; they shouldn’t be brown.
For the mashed potatoes, peel the potatoes then cut them into halves or quarters and boil them in salted water for about 20-25 minutes or until soft; mind to keep the water used to cook the potatoes when they are done and set it aside. In a medium pot, mash the potatoes until very fine; you can also use a very fine sieve. Add the smoked butter and the butter and, using a wooden spoon or a whisk, beat / whisk until combined. Gradually add 75ml / 1/3 cup of the potato cooking water, whisking constantly, adding more of the liquid until the mashed potatoes reach the desired creamy texture. Season to taste with vinegar and salt, cover with a lid, and set aside.
Core the apples (don’t peel them) then cut small apples into quarters and large apples into 8 wedges. Heat a teaspoon of butter in a small, heavy pan over high heat (the pan should be very hot). Quickly sear the apple wedges in the hot pan on both sides until golden brown; they should stay firm.
Arrange a spoonful of the onions and a spoonful of the mashed potatoes on 2 plates then arrange the apples on top of the onions. Sprinkle with savory and serve immediately.
Guten Appetit!


Meet In Your Kitchen | Berlin's Best Bagel Baker

This post is part of my Meet in My Kitchen podcast: How did we get to where we are in life & what does food have to do with it
“Food is making other people love me, it’s very manipulative. That’s how I use food!”- Laurel Kratochvila
For months, a friend who knows how much I love to talk, question, and discuss has been bugging me to start a podcast. So thanks to my friend Anne's persistence, here's my new baby: the Meet in My Kitchen podcast!
For this new series, I invite guests to my kitchen in Berlin, people whose journey in life I find inspiring, to find out how they got to where they are in life, to learn about the struggles they had to overcome, how the highs and lows shaped them - and what food has to do with it. My guests are chefs and home cooks, farmers, bakers, and artists, they are all curious adventurers who share a deep zest for food and life. I also visit each guest in her or his kitchen, or restaurant, or bakery, where they share a recipe with me, which you can find in my blog's Meet in Your Kitchen series.
You can listen to the Meet in My Kitchen podcast on all common podcast platforms, there will be English and German episodes.

Many years ago, I discovered a small book shop in my Berlin neighborhood, specializing in English literature. It was a quiet, dark space with wooden floors and vintage furniture, and a little counter filled with the loveliest loaf cakes. I came back almost every week, mainly for the sweets, and soon found out that the shop was run by an American/ Czech couple: Laurel from Boston, responsible for baking, and her husband Roman Kratochvila from Prague, taking care of the books.
They left my neighborhood too soon, creating a void that could never be filled, but they re-opened a much brighter and bigger spot just as charming. This became the famous Shakespeare and Sons / Fine Bagels on Berlin's lively Warschauer Strasse, praised and loved for Jewish baking classics - and good books. Laurel's bagels, challah knots, and rugelach are known across town and get me to hop on my bicycle regularly to enjoy her sweet and savory treats.

I'm intrigued by Laurel's passion and dedication, and her irresistible smile that wipes away all sorrows. She started as a home baker and then deepened her knowledge and education in French bakeries, but she still has this relaxed aura of 'a friend who's just baking in her kitchen.' Laurel treats her dough like a baby, she knows it well, watches and works it precisely, until it unfolds its true beauty.
For this podcast episode, Laurel shared her recipe for Brick Lane bagels with me (named after London's famous Brick Lane Beigel bakery). She calls it a mix of a New York and a Montreal bagel. Quick to prepare, a little chewy, and perfect for a luscious sandwich filled with salt beef, mustard, and gherkins, you can now satisfy your bagel cravings in your own kitchen any time.
The podcast episode with Laurel Kratochvila is in English. You can listen to the Meet in My Kitchen podcast on all common podcast platforms; there are English and German episodes. You can find all the blog posts about my podcast episodes including my guests' recipes here on the blog under Meet in Your Kitchen.
Listen to the podcast episode with Laurel on:
Spotify / Apple / Deezer/ Podimo
On Instagram you can follow the podcast @meetinmykitchenpodcast!

Laurel’s Brick Lane Bagels
Makes 12 bagels
1 kg / 7 2/3 cups bread flour or all purpose flour (type 550 in Germany, T55 in France)
50 g / 1/4 cup white sugar
1 envelope (7 g / 1/4 ounce) fast-acting yeast or 18 g / 2/3 ounce fresh yeast
10 g / 2 teaspoons fine sea salt
420 ml / 1 3/4 cups lukewarm water
1 large egg
15 ml / 1 tablespoon vegetable oil
sugar for boiling the bagels
sesame and / or poppy seeds for the topping
For the sandwich
salt beef, very thinly sliced
mustard
gherkins, sliced
Preheat the oven to 230°C / 450°F (or the highest temperature setting of your oven). Line 2 baking sheets with parchment paper.
In a large bowl, whisk together the flour, sugar, yeast, and salt then, in a medium bowl, whisk together the water, egg, and vegetable oil, and add to the flour mixture. Mix into a shaggy mass by hand or with a wooden spoon. Then knead by hand for 10 minutes or until the dough is smooth. Avoid adding more flour as you knead it. Form the dough into a ball and set into a lightly oiled bowl. Cover with plastic wrap or a damp cloth and let rise for 30 minutes in a warm environment. Meanwhile, set a large pot of water on the stove to boil.
Divide the dough into 12 pieces and roll them into tight balls, cover with plastic wrap. After ten minutes, press a hole through the middle of each ball of dough with your thumb or elbow (see pictures below). Stretch out the bagel a bit and place on a lightly floured work surface.
Add a couple spoonfuls of sugar to the boiling water. In batches (2-3 bagels at a time), boil the bagels for 30 seconds to 1 minute, flipping them once. Don’t overdo it! Using a slotted spoon or spatula, remove the bagels from the water and transfer to the prepared baking sheets. Top with seeds of your choice. Bake the bagels for about 10 minutes or until golden.
To make the sandwich, cut a bagel in half, stuff it generously with thinly sliced salt beef, drizzle with mustard, top it off with a few slices of gherkins, and close the bagel with its top.
Enjoy!


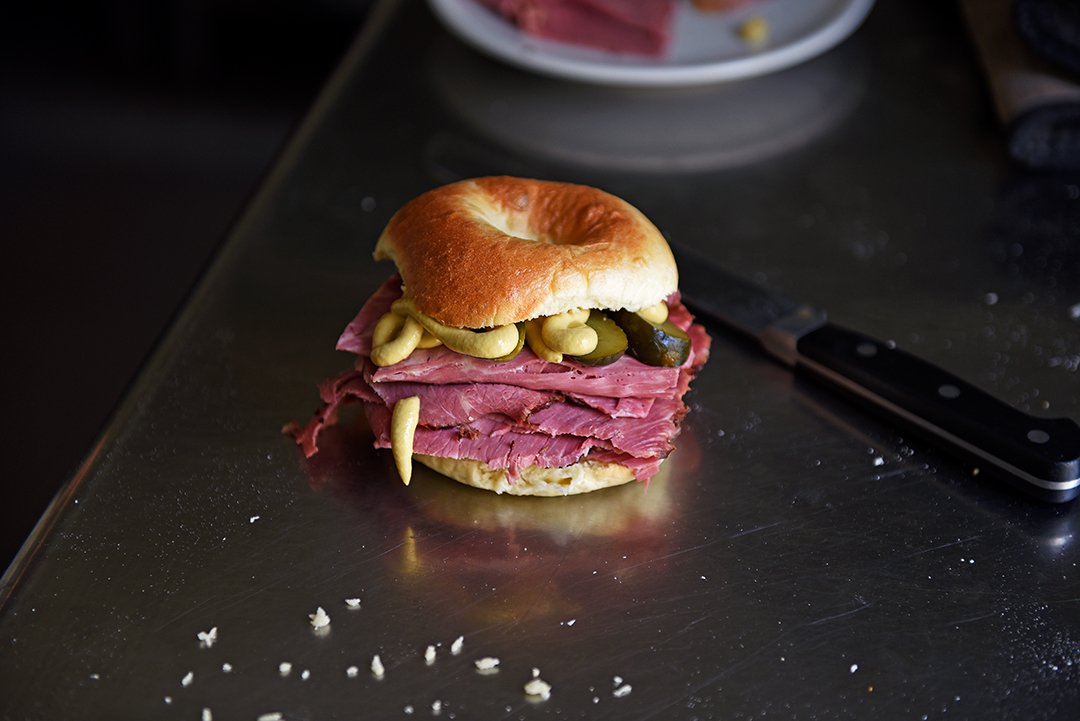
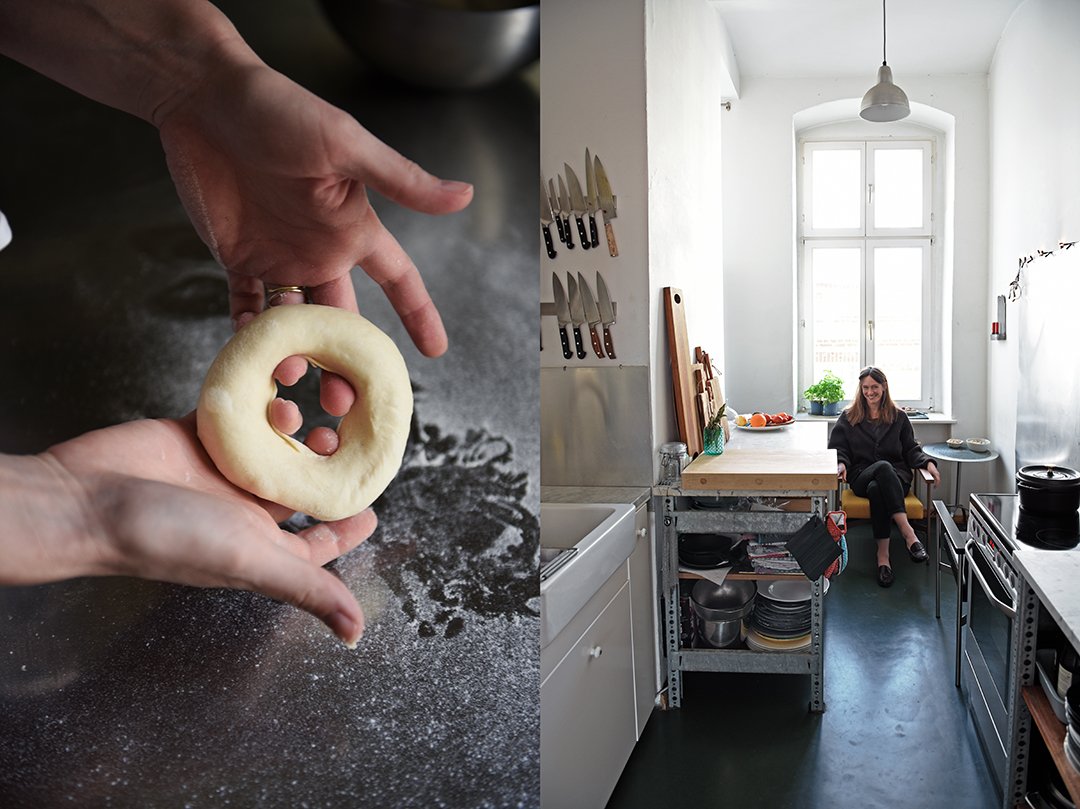
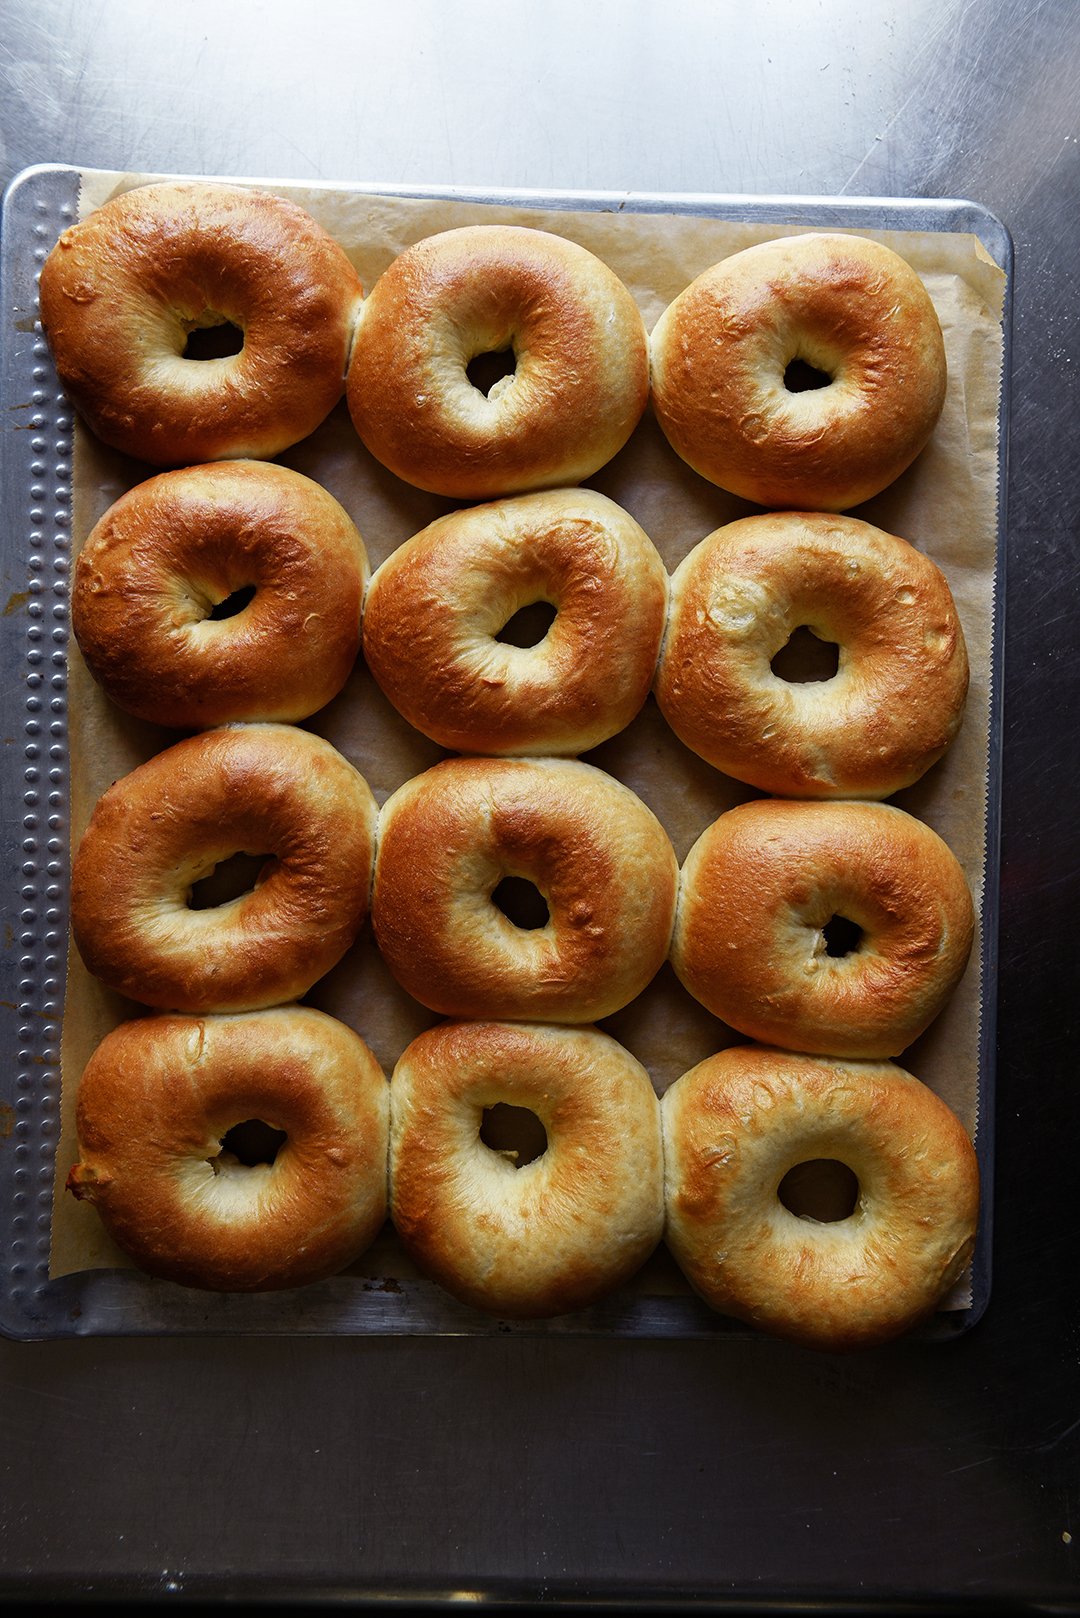


Pumpkin Seed and White Chocolate Babka
Sundays are for sugar rushes
I'll be honest, my oven has been off most of the time in the past few months. There was a humble apple pie, a few quiche variations and the obligatory cookies in December to fill the jars - and to fill my apartment with that buttery smell - but apart from that I've been a lazy baker. Yet to compensate for the lean supply of baked goods from my own kitchen - and still satisfy my voracious sweet desires - I dove into a new old passion: regular visits to my trusted Berlin bakers.
My favorite bakeries in the city offer all I would need to never ever have to turn on my oven again (not to say that would ever happen!). Flaky pastries for the mornings, experimental cookie creations from Cookies & Co for my espresso break, and for the afternoons, there's a café/ bakery I've visited for almost 16 years, SowohlAlsAuch Kaffeehaus. They have a decadent hazelnut mascarpone torte, which often crowns my Sunday coffee table. And then there's Café Boulangerie, with their chocolate covered Bundt cake it is a favorite place to go to when I meet my girls for walks in the neighborhood.
Almost any time I'm up for a longer trip across the city just to nibble on Laurel's bagels, Challah knots and rugelach from Fine Bagels, or have my traditional Pfannkuchen (filled doughnuts without a hole, called Berliner where I come from) at New Years and carnival from KaDeWe.
And for sudden cravings, around the corner from my home is a small bakery particularly talented at yeast baked goods like Puddingbrezel (vanilla custard pretzel), tender brioche buns, sticky poppy seed twists and a relatively new discovery: a glorious pumpkin seed twist. I had never before thought of using squash seeds for sweet baking. For pesto, or crunchy salad toppings, yes, but it never occurred to me that it would make sense to mix it, for example, with white chocolate chunks and use that for a babka filling. So I just did that, loved it and here's (finally!) a new recipe on the blog.
It's a wintery variation of my blueberry lemon cheese babka and my poppy seed babka and it fits particularly well to gloomy Sundays in February, when the heart needs some sweetness to fill the gap until spring. And anyway, Sundays are for sugar rushes - doesn't matter if homemade or from your favorite neighborhood bakery.

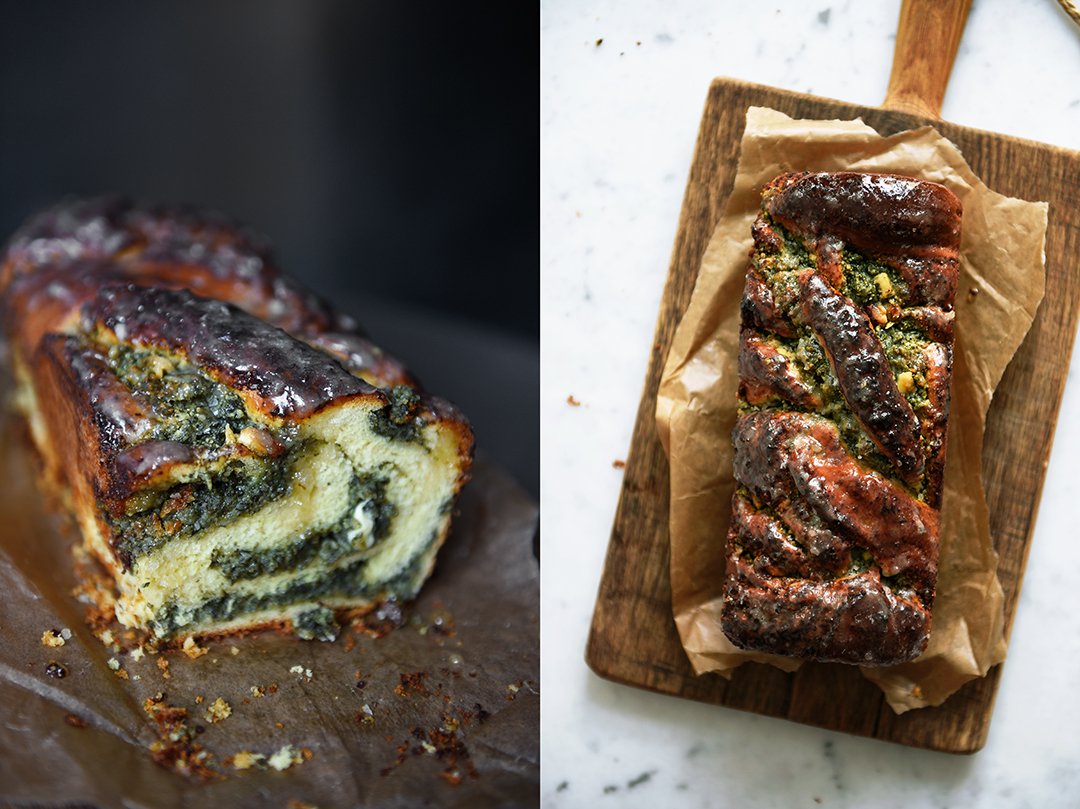
Pumpkin Seed and White Chocolate Babka
Mind that the babka has to rise twice, the first time overnight (for about 8 hours) in the fridge.
Makes 1 loaf cake.
For the dough
275g / 2 cups plus 2 tablespoons all-purpose flour
50g / 1/4 cup granulated sugar
1 1/2 teaspoons fast-acting yeast
1/4 teaspoon fine sea salt
60ml / 1/4 cup whole milk, lukewarm
1 large egg
1 large egg yolk
75g / 1/3 cup butter, at room temperature, cut into cubes
sunflower oil, to grease the bowl
For the filling
240ml / 1 cup whole milk
50g / 1/4 cup granulated sugar
1 teaspoon cinnamon
150g / 5 ounces pumpkin seeds, finely ground in a food processor
110g / 4 ounces white chocolate, roughly chopped
For the glaze
45ml / 3 tablespoons water
50g / 1/4 cup granulated sugar
Day 1 – in the evening:
For the dough, in the large bowl of a stand mixer fitted with the dough hook attachment, whisk together the flour, sugar, yeast and salt.
In a medium bowl, whisk together the milk, egg and egg yolk and add together with the butter to the flour mixture. Mix with the hook for about 8 minutes then continue kneading and punching the dough with your hands for a few minutes until you have a soft and silky ball of dough. Transfer the dough to a clean, oiled bowl, cover with plastic wrap and leave it in the fridge overnight, or for about 8-10 hours (don't be alarmed, the dough will only rise a little).
Day 2 – in the morning:
Take the dough out of the fridge and let it sit in the bowl at room temperature for about 1-2 hours (this time I even let it sit for 4 hours and the babka rose beautifully).
For the filling, in a medium saucepan, bring the milk, sugar, cinnamon and ground pumpkin seeds to a boil and cook, whisking constantly, over medium-high heat (bubbling) for 5 minutes or until the mixture is spreadable. Let the filling cool completely (I put the pot in the snow on the balcony, whisking occasionally).
Butter an 23 x 10cm / 9 x 4″ loaf pan and line the bottom with a piece of parchment paper.
Punch the dough down, take it out of the bowl and knead for 30 seconds. Roll the dough with a rolling pin into a 40 x 28cm / 16 x 11″ rectangle. Spread the pumpkin seed filling on top, leaving a 2cm / 3/4″ border then sprinkle with the white chocolate. Starting from one long side, roll the dough up into a log (8th picture, below). Use your fingers to squeeze the overlapping dough then flip the roll over so that the seam is at the bottom. Using a sharp knife, cut the roll in half lengthwise (3rd picture, top). The cut sides facing up, place both pieces next to each other then quickly lift one half over the other, repeating to form a twist (4th picture, top). Using the blade of a large knife, gently lift the babka and transfer quickly to the prepared pan. Cover with a tea towel and let it rise in a warm place (I kept the bowl on the heater) for about 60-90 minutes or until puffy.
Preheat the oven to 190°C / 375°F (conventional setting).
For the glaze, in a small saucepan, bring the water and sugar to a boil and cook for 2 minutes or until syrupy then take the pan off the heat and set aside.
Bake the babka for 35-40 minutes or until golden brown and spongy, covering the top of the babka with tin foil after 30 minutes if it gets dark. After 35 minutes, check with a skewer, it should come out almost clean. Take the babka out of the oven and immediately brush the top with the syrup. Let it cool for 10-15 minutes then remove from the pan. Enjoy the babka warm or cold.


Parmigiana di Melanzane
Think of lasagna, replace the pasta sheets with slices of fried eggplant and you have a Parmigiana di Melanzane. It took me many years to finally eat this very frugal, very simple and very delicious Italian home cooking gem and it took me even longer to finally give it a go in my own kitchen.
I have to thank the tiny Sicilian island that I mentioned earlier in May, when I wrote about Stuffed Sardines. This little rock in the Mediterranean rewards me with the best parmigiana for lunch, at a little cafe at the piazza where I sip chilled Chinotto and let my fork sink into silky layers of soft eggplant, creamy cheese and fruity tomato sauce. The island reminds me over and over again how precious good produce is, what a gift tasty vegetables are and how little I have to add as a cook when I allow the vegetables to show their humble inherent qualities.
After writing two cookbooks and sharing hundreds of recipes over the past seven years, I was worried that tiredness might keep me tethered to my minimalist cooking trip but it turns out that the opposite is true. I'm not tired of experimenting, but maybe more than ever I truly and fully appreciate when a tomato, a zucchini or a bell pepper are at their peak and simply taste good. When they taste so good that I don't even want to cook them, my tastebuds have an epiphany. It's not the complex layering in a dish, or the newly discovered combination of flavours that have rarely been combined before, but it is the purest taste of good produce melting in my mouth that makes me the happiest muncher in the world.
On this tiny Sicilian island that I love so much I pick my fruit and vegetables straight from the fields surrounding the house where we live. My early morning walks, to pick what I need for the day before the hot summer sun hits fruit, flowers and leaves, before the plants daily struggle for light, shade and water begins, have taught me more about food in the past few years than any cookbook or food show. Plants follow simple rules, they obey a rhythm. To work - as a cook - with that rhythm and not against it, creates utmost pleasure.
This year, northern Sicily and its surrounding islands didn't have enough rain. Lentils didn't grow, instead their plants dried out on the fields, lemons stayed tiny, the fruits barely having any juice, but on the other side pomodori, tomatoes, grew so abundantly that our friends who have their own fields couldn't keep up collecting and using them. So they gathered one day to make passata, blanched, pureed and strained tomatoes turned into the purest sauce, and bottled their 'red gold' for the colder months to come. If nature gives them tomatoes abundantly, they turn them into a tomato feast. Maybe next year it will be lentils, who knows, but it will definitely reflect in their cooking.

So my friend Pietro gave me a bottle of his deep red passata and although I would have loved to just drink it, I decided to let the sun-kissed concentrated tomato juices shine in a dish that I enjoy so much when I'm in Sicily: I decided to cook my first Parmigiana di Melanzane. This dish is so simple yet there are a million recipes, tricks and variations and every Italian will say that their mamma definitely makes the best. And every one of them is right because there isn't just one recipe that is the best but there is one rule that almost every Italian follows with verve and passion: the ingredients need to be of excellent quality.
You won't need many ingredients for a parmigiana but make sure to use nice, plump eggplants, good fior di latte or mozzarella and Parmesan and most importantly: invest in the best passata you can possibly find. It's also fine to make a tomato sauce from scratch, using tinned or fresh tomatoes and your favoured seasoning, but for this dish, a simple sauce made of Italian passata, garlic, a dash of olive oil, basil, salt and pepper hits the spot. You don't want a sauce that's too dominant as it's only going to play with humble fried eggplants and mainly mild cheese. It's not a sauce I would use for pasta, it's subtle and also more liquid than my usual red sauce, but it bathes the eggplant in the perfect summer-ripe fruitiness. This simple sauce with its deep taste of Mediterranean tomatoes is what makes or breaks your parmigiana.
My recipe is for 4 to 5 people, we enjoyed it over two days, hot, warm and cold, but I wished I had doubled the recipe!

Parmigiana di Melanzane
Serves 4 to 5
1.2 kg / 2 2/3 pounds eggplants, cut lengthwise into 5mm / 0.2" thick slices
Fine or flaky sea salt
3 fior di latte or mozzarella (each 125g / 4.5 ounces)
Olive oil
2 large cloves garlic, crushed
About 750ml / 3 1/4 cups Italian passata di pomodoro(if your passata isn't very tasty, use about 1l / 4 1/4 cups passata, bring it to a boil and reduce until you have the desired amount. Alternatively: Make the same amount of sauce with tinned or fresh tomatoes)
1 large handful fresh basil leaves, roughly chopped
Freshly ground black pepper
Vegetable oil, for frying
60g / 2 ounces Parmesan (preferably aged), finely grated
Spread the eggplant slices on cooling racks, generously sprinkle with salt, gently rubbing the eggplants with the salt, then flip and sprinkle the other side with salt. Let the eggplants sit for about 1 hour then rinse with cold water and pat dry with kitchen paper.
Place the fior di latte (or mozzarella) in a colander, let sit for 1 hour then cut into small cubes.
In a large pot, heat a splash of olive oil over medium heat, add the garlic and cook for about 2 minutes or until golden. Add the passata and bring to a boil. Stir in the basil and season to taste with salt and pepper (mind that the Parmesan will also add saltiness to the final dish!); immediately remove the sauce from the heat and set aside.
Preheat the oven to 200°C / 400°F and grease a roughly 20x30cm / 8x12" baking dish with a little olive oil.
In a large heavy pan, over high heat, heat enough vegetable oil to come up the side of the pan about 1.25cm / 0.5". When the oil is sizzling hot, fry the eggplant slices in batches, arranging them side by side and turning them once, for about 30-60 seconds or until golden but not dark (see picture below). Spread and drain the fried eggplant on kitchen paper and continue frying the remaining eggplant slices.
Arrange a layer of eggplant slices in the prepared baking dish, spreading them side by side, then season with a little (!) salt and pepper, sprinkle with some of the fior di latte and Parmesan and drizzle with some of the sauce. Repeat to make more layers (about 4 layers total), finishing the last layer with cheese and sauce. Bake for about 40 minutes or until bubbly then turn off the oven, tilt or open the oven door and let the parmigiana sit in the oven for 10 minutes or even for 1 hour or longer to let it soak the juices (I let mine sit in the oven for 2 hours, temperature and texture were just right when we ate it). Enjoy the parmigiana warm but not hot straight out of the oven; we even had some cold for breakfast.


Cherry Chocolate Cake
I desperately craved chocolate and cherries - sometimes it's so easy to come up with a new recipe! I used my favorite chocolate cake recipe from my 365 book - recipe no. 189 crowned by a marbled raspberry whipped cream - and topped it off with Turkish sweet cherries and German sour cherries. The cake is made with melted bittersweet chocolate, which I much prefer over cakes made with cocoa powder and water. I find the taste more complex when using proper chocolate. The egg whites are beaten stiff, which gives the cake enough oomph to rise. However, I wasn't sure if the cherries would be too heavy and drag it down so I added a little baking powder. I decreased the amount of sugar to balance the fruit's natural sweetness and was more than pleased with the result. It's a very comforting cake, hassle-free and easy to love.
As I watched the humming mixer slowly swirl the melted chocolate into the batter, I noticed a pattern. Every time July rolls around, I develop a new cherry-chocolate recipe. It's not really a surprise, the fruit's sweet juices and the depth of bittersweet chocolate is a genius combination. Yet seeing it become - unintentionally - a blog tradition struck me. There's a Cherry Chocolate Meringue Pie in the archives, recipes for Black Forest Pancakes, Cherry Chocolate Marble Bundt Cake and a Cherry Chocolate Tart. All posted in July and August. And every year I ask myself "is this combination summery enough? Is this what you really want to nibble on on a hot afternoon?." The answer is a resounding yes! and the reason is just as simple: our mind tells us exactly what we need. When we crave a certain ingredient or combination and when we notice this craving, it's usually the best thing you can possibly put into your mouth. A chocolate and cherry cake answers the pleading cravings of every chocolate and summer fruit lover and is just as perfect for breakfast and brunch as for afternoon tea or dessert after dinner.


Cherry Chocolate Cake
140g / 5 ounces bittersweet chocolate
150g / 2/3 cup unsalted butter
1/4 teaspoon ground cinnamon
1/4 teaspoon ground cardamom
4 large eggs, separated
1/8 tsp fine sea salt
150g / 3/4 cup granulated sugar
130g / 1 cup all-purpose flour (or white spelt flour type 630)
1/4 teaspoon baking powder
140g / 5 ounces pitted sweet cherries (weight without pits!)
60g / 2 ounces pitted sour cherries (weight without pits!)
Preheat the oven to 180°C / 350°F (preferably convection setting). Butter an 20 cm / 8-inch springform pan.
For the cake, melt the chocolate, butter, cinnamon, and cardamom in a small saucepan over low heat, whisking until smooth; let cool for a few minutes.
In the bowl of a stand mixer fitted with the whisk attachment, whisk the egg whites and salt for a few minutes or until stiff, transfer to a large bowl, and set aside.
In the same bowl of the stand mixer fitted with the whisk attachment, whisk the egg yolks and sugar for 2 minutes or until thick and creamy. Add the chocolate mixture and mix for 1 minute or until well combined. Combine the flour and baking powder, add to the butter-chocolate mixture, and mix until well combined then fold the egg whites into the batter (it will be a bit sticky and takes some time, be patient). Spread the batter evenly in the prepared pan and arrange the cherries on top, pushing them just a little into the batter (see picture below). Bake for about 45 minutes (slightly longer if using a conventional oven) or until golden brown and spongy. If you insert a skewer in the center of the cake, it should come out almost clean. Let the cake cool for 10 minutes then take it out of the pan.

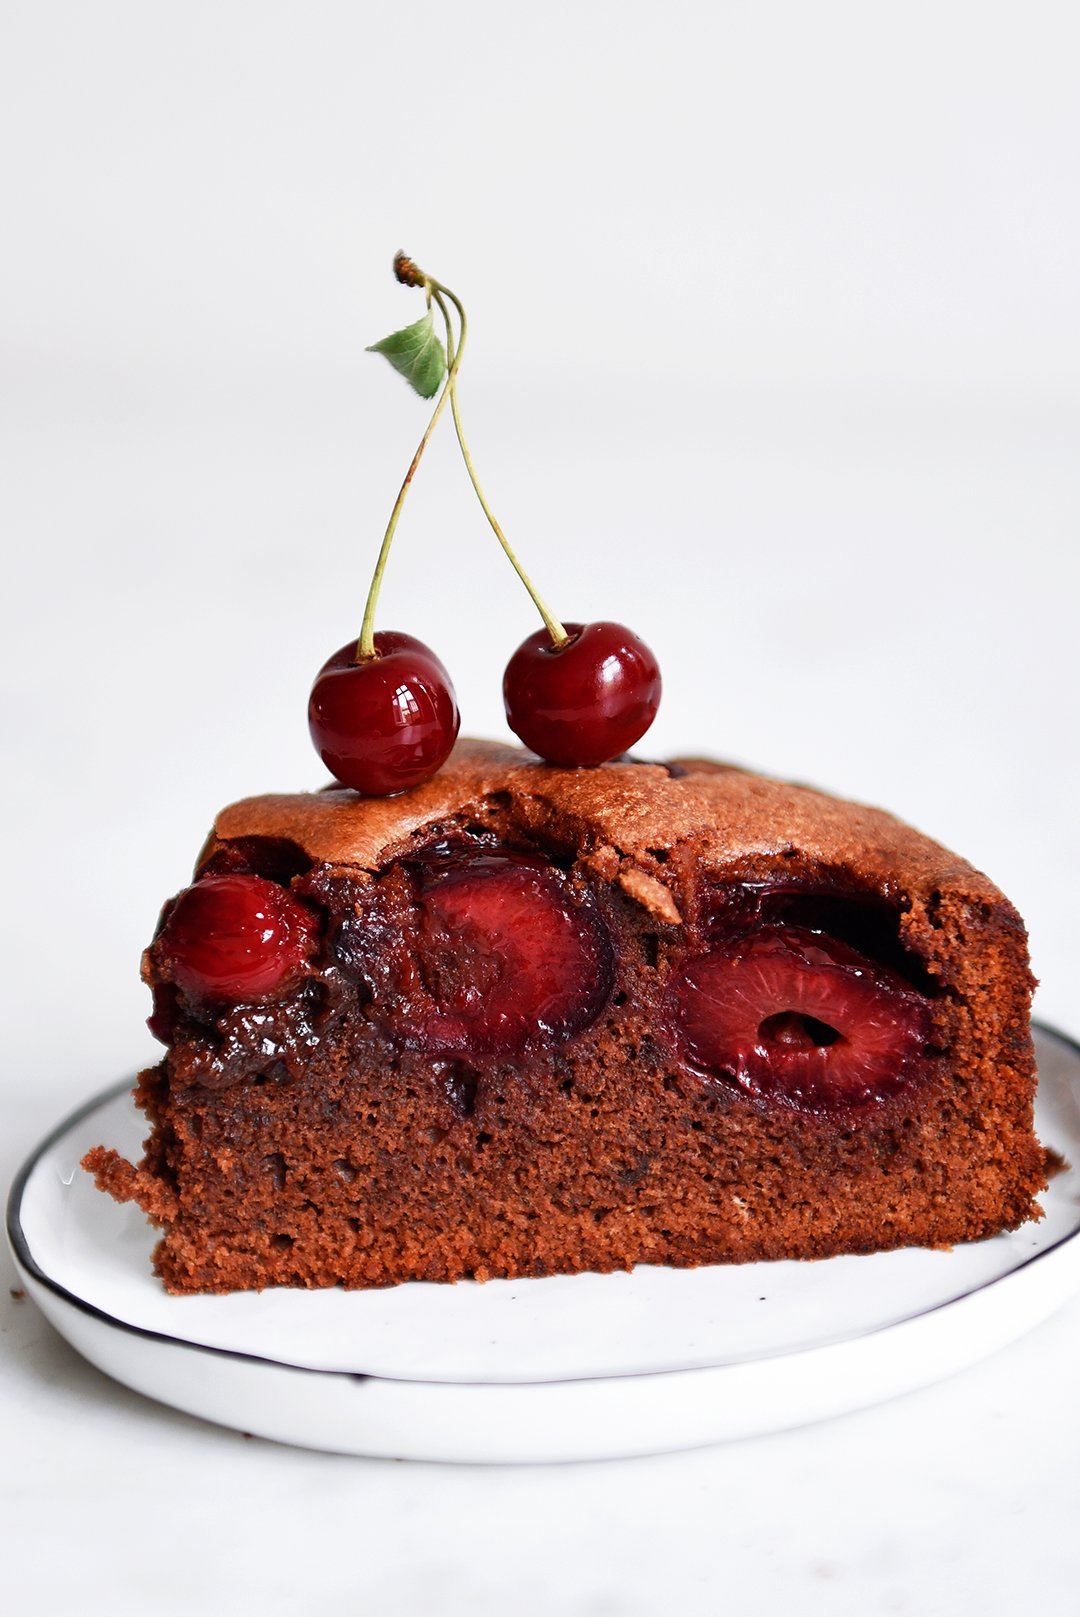
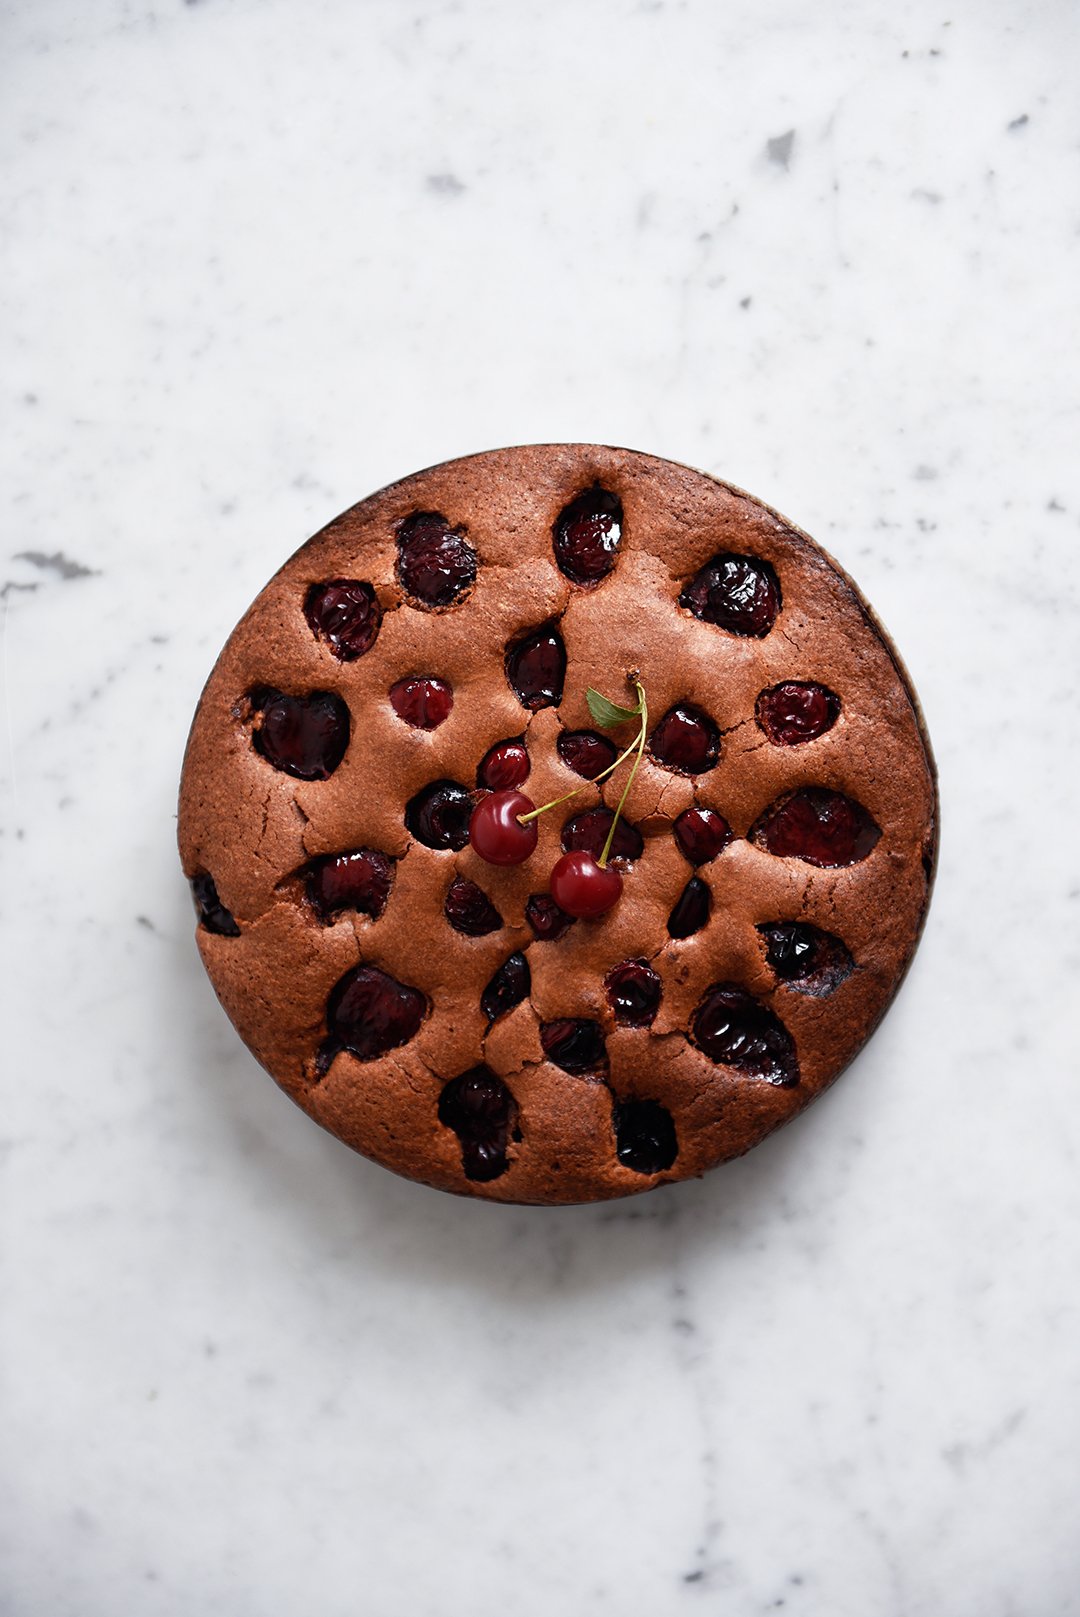
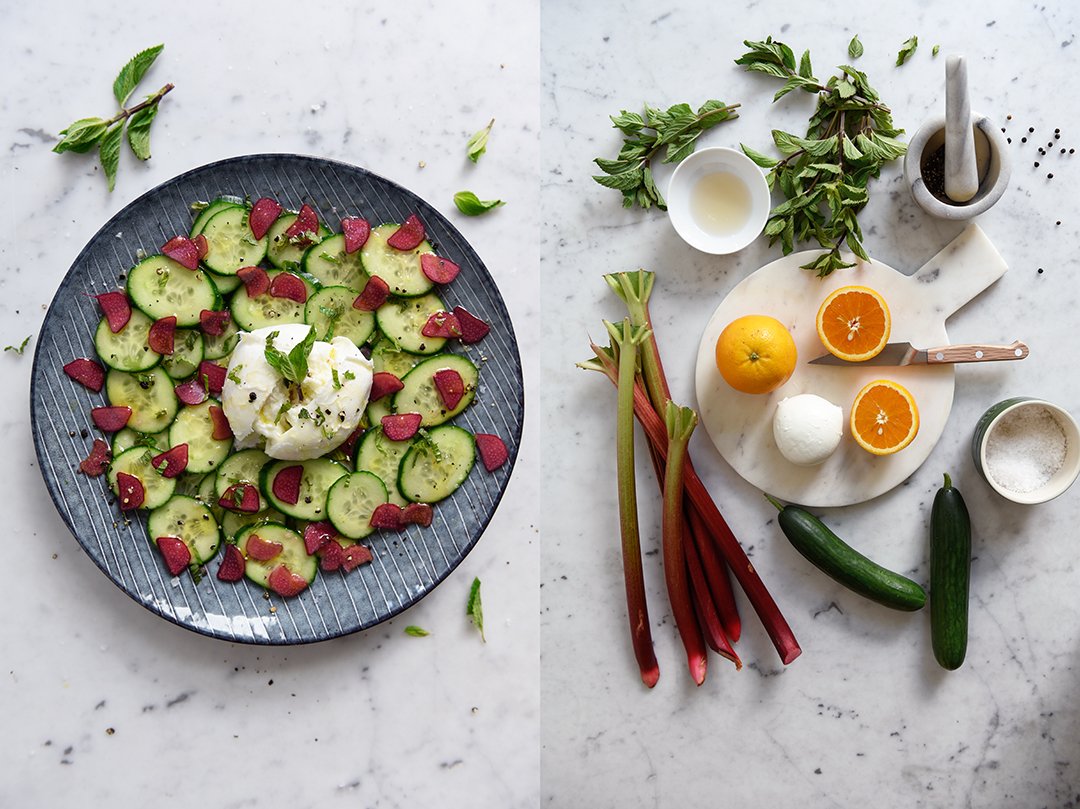
Rhubarb and Cucumber Caprese
After months of calming my mind and palate with familiar comfort dishes - creating a soothing counterpart to the uncertainties in the world - I suddenly feel a growing appetite for kitchen experiments again. Pizza, spaghetti Bolognese, German stews and roasts, and yes, baking sourdough bread, gave me comfort and safety while the world turned upside down and pulled me off my feet. But I recently started to feel curious and hungry again, searching and finding a refreshing caprese salad with pickled rhubarb, orange blossom water, cucumber, mozzarella di bufala and mint.
As I leaved through Marc Diacono's fabulous new book, Sour, which was nominated for a James Beard Award this year, I immediately stopped on page 147 as I spotted a vibrant pink Rhubarb and Radish Salad. Marc uses raw rhubarb that he cuts very thinly and marinates in rose water. That made me think. I always cook, bake or roast rhubarb and wasn't quite sure if I'd fall in love with its distinct taste and texture when raw. The British cookbook author adds blue cheese and dill and this, in combination with the rose water, wraps it up snugly. It's sour, it's bold and somehow harmonic, or in Marc's words: "The rose water sets everything off and encourages the radish and rhubarb to sit a little closer together while retaining their independence."
So I asked myself, would that also work with orange blossom water? And what about quickly pickling the rhubarb first and adding crisp cucumber and a hint of fresh mint? I find blue cheese too strong for cucumber but a creamy mozzarella di bufala or Burrata would work. All of a sudden I had a very unusual caprese salad in front of me that had all the crispness, sourness and excitement that I was hoping for. To be fair, one can only truly appreciate this unorthodox caprese variation if one loves sour and is up for having some fun with an Italian classic. I have a Winter Caprese with Blood Orange, Beet and Mozzarella di Bufala in my 365 book and when I came up with that recipe I understood that a) a good mozzarella di bufala and especially Burrata can deal with strong flavors and b) playing with a traditional recipe is a good way to keep tradition alive.

Rhubarb and Cucumber Caprese
Serves 2
1 slim rhubarb stalk (around 60g / 2 ounces), trimmed and thinly sliced with a mandoline slicer or sharp knife
60ml / 1/4 cup white balsamic vinegar
2 teaspoons granulated sugar
60ml / 1/4 cup orange blossom water (or freshly squeezed orange juice)
flaky sea salt
1 small / Persian cucumber (with skin, rinsed), thinly sliced with a mandoline slicer or sharp knife
125g / 4.5 ounces mozzarella di bufala or Burrata
2 tablespoons freshly squeezed orange juice
2-3 tablespoons olive oil
crushed or coarsely ground black peppercorns
4-6 fresh (young) mint leaves, very finely sliced
Transfer the rhubarb to a medium, heat-resistant bowl. In a small saucepan, bring the vinegar, sugar and a pinch of salt to a boil. Stir in the orange blossom water, keep it on the heat just until it starts boiling then pour over the rhubarb and let sit for about 1 hour. You will use the rhubarb and the pickling liquid for the caprese salad.
Quicker but less satisfying: In a small bowl, mix the rhubarb with 2 tablespoons of vinegar, 2 tablespoons of orange blossom water, 1 teaspoon of sugar and a pinch of salt and let sit for 10 minutes. The texture will be tougher and not as crisp compared to the properly pickled rhubarb described above.
Spread the cucumber and 1/3 of the pickled rhubarb on a large plate, adding more rhubarb once you tasted it, and arrange the mozzarella in the middle. In a small bowl, whisk together 2 tablespoons of the pickling liquid and 2 tablespoons of orange juice then drizzle over the salad. Drizzle with the olive oil, sprinkle with a little salt, pepper and mint (mind that the mint is very powerful!). Taste and add more of the pickling liquid if you prefer more of a sour note. Enjoy the salad immediately.


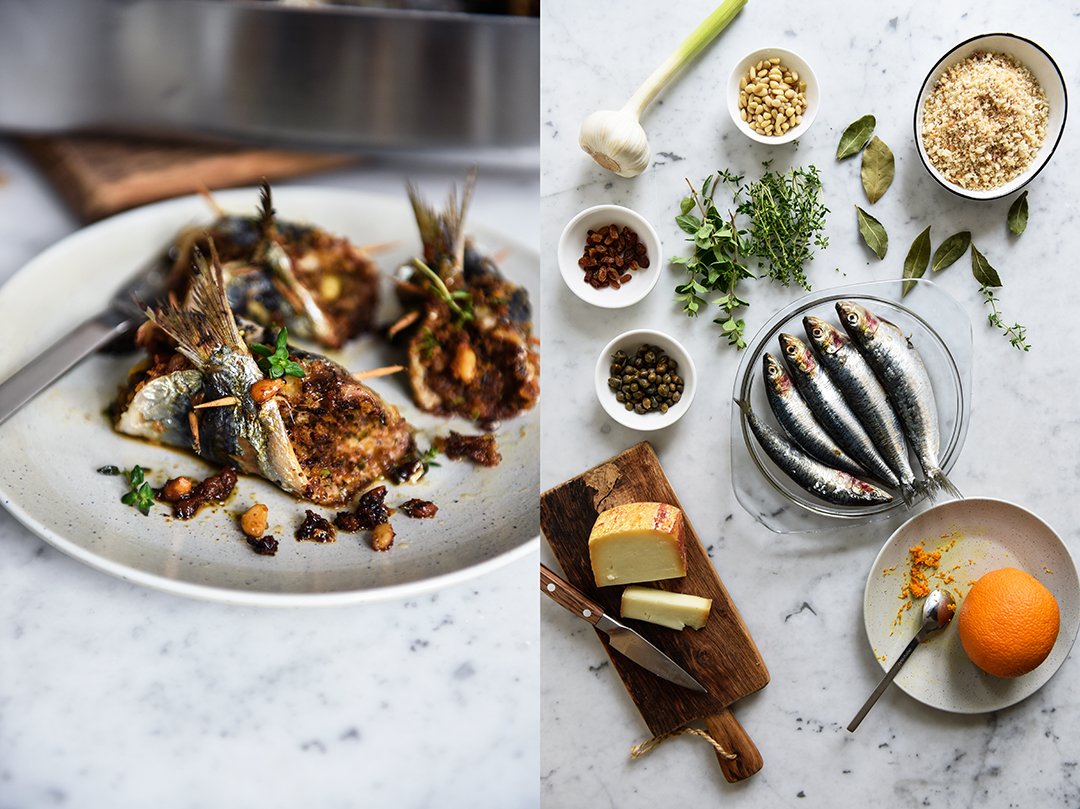
Sicily and Stuffed Sardines
A few years ago I visited a tiny Sicilian island. It was so small that I either walked, rode my bike or swam to get around. But most of the time I did nothing, just laid on the rocks at the beach or in the garden, staring into the sky, amazed by how beautiful the world is. I only used a car when I arrived to get to the little farm where I stayed, a sturdy stone building tucked in between fig trees, hibiscus and oleander; and to go back to the harbor at the end of the trip, speechless and sad to leave this little piece of heaven.
In the past couple months I've been thinking a lot about this tiny island in the Mediterranean, dreaming of a place that feels safe and makes me happy. The house was part of an organic farm and I could pick all the fruit and veg right from the fields. The juiciest tomatoes, sweet bell peppers, soft figs, zucchini, eggplant ... As soon as I fell out of bed I'd walk - still in my pyjamas - through the field to pick zucchini flowers and fry them for breakfast. The farm's olive oil and wine I basically enjoyed from tap and although there wasn't really the need to, I also visited the island's fantastic restaurants and bars almost daily. If I had to eat Sicilian food for the rest of my life I'd live a happy life.
Dinners were spectacular: the freshest grilled fish and sun showered vegetables, raw prawn carpaccio, lobster, pasta, risotto and nana's almond cake - and bay leaf schnaps for dessert. Unforgettable, there's no doubt. The little luncheons at the piazza, at a rustic bar where mamma herself cooked all morning and laid out her delicious work on the counter by noon, was the food that melted my heart. Casseroles, lasagna, tarts, focaccia and stuffed vegetables, fish and saltimbocca, framed by hearty salads made with legumes. I went there almost every day, pretending to go just for an espresso before snorkeling but always ordered more plates than could fit on the round bistro table. The table was strategically placed in the shade of a large tree, close enough to mamma's kitchen to order more food but still in the middle of the airy piazza to follow the village's late morning life. This is the Mediterranean (to me).

So at this unimposing cozy bar, I enjoyed my first Sicilian stuffed sardines. The fish filets were wrapped around a filling made of breadcrumbs, orange zest, crumbled bay leaves, pine nuts, raisins, capers, fresh oregano and thyme. The whole bold and colorful culinary orchestra that Sicily's cuisine is famous for in one single bite. Don't ask why but it took me two years to recreate this recipe in my own kitchen. Last Saturday I was in the mood for a Sicilian lunch, so I drove to the fishmonger. The recipe worked out perfectly - I only should have bought more fish. It was a little feast for two. Five stuffed sardines were just enough for a lunch nibble, for a main I'd go for ten sardines for two (recipe below).
Anyway, get your loved ones to your kitchen, cool your favorite white wine, start the oven, pull out the dusty Adriano Celentano records and pretend you're in Sicily!

Sicilian Stuffed Sardines
Serves 2 as a main or 3-4 as a starter
You can enjoy stuffed sardines warm from the oven or at room temperature
10 whole sardines, gutted and cleaned (about 800g / 1 3/4 pounds)
2 tablespoons raisins
Olive oil
85g / 3 ounces breadcrumbs
2 tablespoons pine nuts
2 tablespoons finely grated pecorino
2 cloves garlic, crushed
2 tablespoons chopped fresh thyme leaves
2 1/2 teaspoons chopped fresh oregano or marjoram leaves
2 teaspoons freshly grated orange zest
2 tablespoons freshly squeezed orange juice
6 small (or 3 large) bay leaves, finely crumbled (or ground with a mortar and pestle)
2 teaspoons capers, chopped
1/2 teaspoon fine sea salt
Ground pepper
20 wooden tooth picks
Preheat the oven to 200°C / 400°F. Grease a medium baking dish with olive oil.
Cut off and discard the heads of the sardines. To butterfly the sardines, spread and lay them cut-side (belly-side) down on a cutting board and, using your hand, push the back down gently (see 2nd picture from the top, right). Flip the sardines, gently pull out the backbone and cut the bone at the tail but don't remove the tail; discard the backbone. Spread the sardines skin-side down on the cutting board.
In a small bowl, soak the raisins in hot water for about 5 minutes then drain.
In a medium, heavy pan, heat a splash of olive oil over medium-high heat and roast the breadcrumbs, stirring, for about 2 minutes or until golden and crispy. Push the breadcrumbs to the sides, add the pine nuts and roast, stirring, for 1 minute. Transfer the breadcrumbs and pine nuts to a medium bowl and add the raisins, pecorino, garlic, thyme, oregano, orange zest, orange juice, bay leaves, capers, 2 tablespoons of olive oil and the salt and season to taste with pepper. Mix well with your hands, rubbing the mixture between your fingers.
Season the sardines with a little salt and pepper. Divide the filling among the sardines, pushing the filling down gently with the back side of a tablespoon. Gently roll up the sardines towards the tail and fix the roll with 2 tooth picks (see pictures below). Arrange the sardines, side by side and tail up, in the prepared baking dish, drizzle with a little olive oil, sprinkle with the remaining filling in case any is left, then season with a little salt and pepper and bake for 20 minutes. Let the sardines cool for a few minutes and enjoy warm or wait a little longer and serve at room temperature. Enjoy with good bread (drizzled with good olive oil), a simple green salad and a glass of white wine.

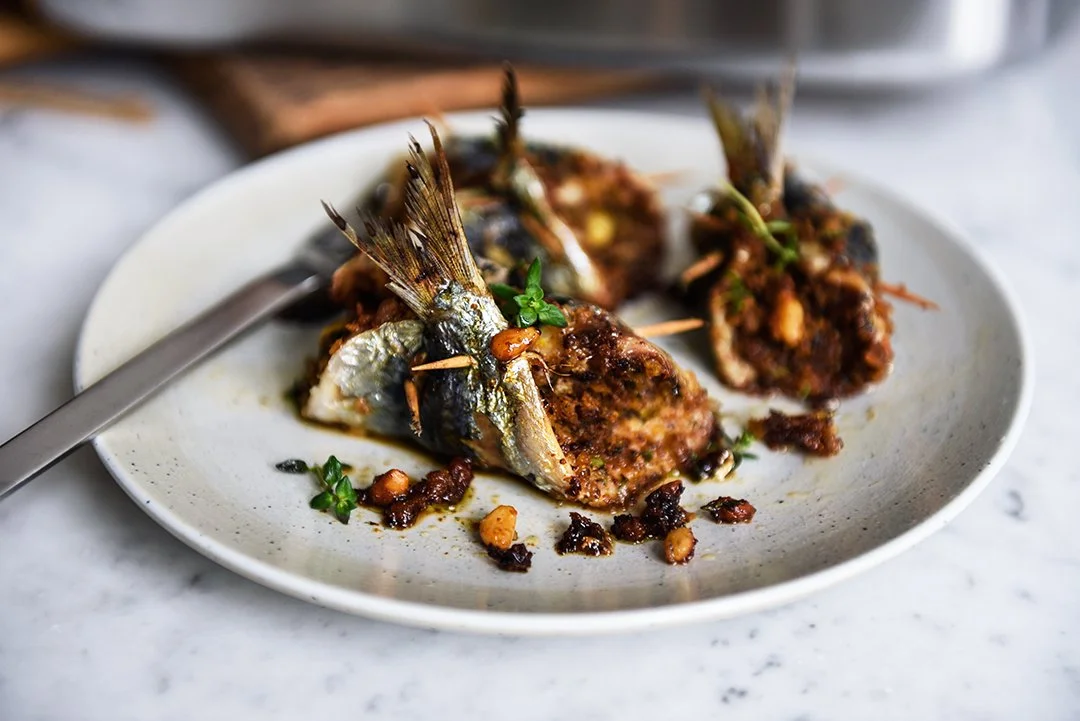


What shall we do? What shall we cook? What shall we buy?

In the last few days, as things became more and more worrying due to the worldwide pandemic situation, I thought a lot about my granny, my Oma Lisa. I thought about her life during war times and poverty, and I thought about her way of cooking that was fundamentally shaped during those times. The ingredients cheap and accessible, recipes made to feed and nourish a large family of six children without too much fuss. Lisa had to keep things running, cooking wasn’t a question of lifestyle, it was a necessity. But still, she managed to turn it into something so joyful and special that she instilled this feeling into all of her six children who then passed it on to her grandchildren - and I’m one of them.
It was a very rational way of cooking. Potatoes were a staple, they store well, are healthy, and versatile. Whenever I visited her she used them abundantly, for latkes (Reibekuchen), or with a dollop of quark with chives, or she mashed and served them with sauce, or fried with bacon and onions. In her times, vegetables were used according to the seasons, cabbage and legumes during the winter months, cucumber salad as soon as spring opened its wings. She was a food loving mother and grandmother who naturally followed the calendar in her kitchen, and we, her hungry children and grandchildren, followed her to the kitchen in awe and excitement.
Last week I was stuck in Malta, all flights to Germany were cancelled. There weren’t many other countries that still kept their borders open to flights in and out of Germany. I left via Budapest, scared for hours that my connection flight to Berlin would get cancelled and that I’d be stuck in Hungary for weeks. It worked out, yet that day was a changing point. It was the day I understood that the world had changed.

The biggest difference between my granny’s and my own kitchen is the large pantry she had in the cellar of her house. Cool and dark, it was home to endless shelves filled with jars of pickled and preserved fruits and vegetables, of jams and baked treats. Lisa lived on a farm before she moved to that house. Nature taught her well when she was a young woman. Humbly, wisely, and gratefully, all her life she used what nature gave her to eat. Nothing went to waste, everything had to be used. Lisa had a plump cherry tree in her garden. An old swing dangling from a thick branch was my happy place where I’d sit and dream while she was cooking. The harvest from that tree was always abundant and she made use of every single fruit. And she gave to others what she didn’t need for her family, or she swapped.
This memory came back as I found myself in my Berlin kitchen after Malta. I immediately started to think of my shopping and cooking plan for the weeks and months to come. And I reconnected with friends and family to see what they need. Staying calm and sensible, I tried at least. So what do I need to stock up on? I don’t have a large pantry. What dishes am I going to cook or what dishes should I cook? What should I buy and how much? I tried to channel my inner Oma Lisa and assimilate her skill to humbly adapt to whatever life puts in front of you. The women of her generation just got things done when they needed to be done, so why shouldn’t we do the same now? Although times have changed - our way of cooking has changed since her days - my decisions should be just as responsible and deliberate as hers. And beyond my personal worries in this situation, now more than ever is not the time to only think about myself but also about the people around me. In our little community we are staying in close touch and letting each other know if anyone needs something. We share and swap food and stories, like Lisa with her cherries. We talk about our fears, we laugh and cry together (on the phone), but we know that we’re not alone in this and that feels really good.
The list below reflects the way I cook, what I store in my pantry shelves, fridge, and freezer, it’s personal (that’s why you won’t find quinoa on this list). I hope it gives some help and inspiration but you should adapt it to your preferences. You can find many recipes that I will be using myself in both my cookbooks (365 and Eat In My Kitchen) and in the blog’s archive and I’m sure that the internet, all the great cookbooks that are out there, and especially the culinary chats with family and friends offer enough inspiration to cook and bake for years. At the end of this post are two recipes from 365 that indulge in the joy of pasta (recipe no. 59 and no. 102 from the book): one is based on pantry staples - Spaghetti with Sun-Dried Tomato and Pistachio Pesto - and the other is a seasonal celebration of ramp pesto and green asparagus crowned by a creamy burrata.
But let’s start with our SHOPPING:
I generally go shopping once a week. Especially now, I’m trying to minimize contact with others. In the first days after my shopping, I use the fresh vegetables, meat, and fish that don’t last long. Wilting greens and leftover bones are used for cooking broth, which I freeze in small portions. Pantry staples help out when the vegetable drawer is empty.
My cooking will gravitate around carbs in the weeks and months to come, adding fresh ingredients as they will be available. Roots, legumes (dried and canned, also for protein), and grains/ pasta will be my daily playing field.
-Essentials-
Pantry and window sill staples:
Olive oil, dark and white Balsamic vinegar, tahini, mustard
Sea salt (mine is from the Cinis in Gozo)
Spices (black peppercorns, bay leaves, fennel seeds, coriander seeds, nutmeg, juniper and allspice berries, cumin, cinnamon, cardamom, dried oregano and marjoram)
Nuts (pistachios, cashews, and pine seeds for snacks and pesto) and dried fruits (dates, prunes, and apricots are a great addition to minced meat)
All-purpose flour (I use white spelt flour/ Type 630), sugar, fast-acting yeast, baking powder, baking soda, oats (for baking and breakfast: cooked with water, tahini, a pinch of salt, and whatever fruit is at hand), plus fine durum wheat pasta flour and chickpea flour for special cooking projects
Additional note for baking with yeast (March 28th): I started a little kitchen experiment, I decided to grow my own sourdough starter. It's impossible to get yeast in Berlin at the moment, so why not use and cultivate the wild yeast that's naturally in the air and flour? Yesterday was Day 1 and you can follow the daily progress in my Instagram Highlight Stories called 'Sourdough'. I will update and share new stories every day.
Green and black olives, capers, sun-dried tomatoes, preserved artichoke hearts, anchovies, canned sardines (for sandwiches and pizza) and canned tuna (for mixed salads with hardboiled eggs)
Onions and garlic
Fresh herbs (basil, thyme, rosemary, sage, mint)
Citrus fruit (lemon and orange for zest and juice)
Roots/ winter squash:
Potatoes, sweet potatoes, beets, parsnip, and squash (Hokkaido and butternut squash are still available and store well)
You can roast roots/ squash in the oven or boil and mash with olive oil (or milk and butter) and add fresh herbs, spices, lemon zest, chopped olives. I boil a bunch of beets every week to add to salads or simply dice roughly and enjoy with olive oil and sea salt. Roots and squash make a minestrone a little richer (squash is often used in the Maltese minestra, roughly mashed for a thicker texture).
Legumes:
Dried and canned beans (butter beans, cannellini, cranberry/ borlotti, and kidney beans) and chickpeas; dried lentils that don't require soaking (French green Puy lentils, yellow, red, and black beluga lentils)
Dried legumes can be cooked in unsalted water with fresh herbs like thyme and rosemary (dried beans/ chickpeas need to first soak overnight) then add a splash of olive oil; or add them to soups/ stews; leftover green and beluga lentils can be turned into patties (drained then adding flour, egg, and seasoning)
Canned legumes can be used uncooked for salads and hummus, added to minestrone or other soups/ stews, or cooked briefly in a splash of olive and refined with spices. Then you can either serve them directly or mash with olive oil, something I became particularly fond of in the last couple months.
Fresh green beans, fava beans, and peas can be blanched in salted water and served immediately or frozen (I always have a large bag of frozen peas and fava beans in my freezer).
Grains and dried pasta:
Spaghetti, short pasta, lasagna sheets, polenta, whole grains (buckwheat, spelt, farro, couscous, bulgur), and rice
For pasta there are no limits, yet a bowl of simple spaghetti just with butter, Parmesan, and black pepper (Cacio e Pepe) can be heaven on earth. Leftover pasta can be used for Froga tat-Tarja (Maltese pasta omelette). Short pasta (rice size) can be cooked like a risotto (see Maltese Kusksu with Poached Eggs and Goat Cheese).
When I cook polenta, I like to cook more than I need and serve it soft and smooth on the first day as a side for vegetables or braised meat. Then on the second day, you can spread it in a baking dish (finger thick) and bake for a few minutes then cut into squares and serve with sage butter; or turn it into polenta lasagna: layer the baked polenta slices with Bolognese sauce (or any other red sauce) and Parmesan and bake in the oven.
Buckwheat, farro, and spelt may sound a bit uninspiring but taste surprisingly good when they are boiled in salted water and then served with a knob of butter and some salt stirred in (added fresh herbs or spices won’t harm it either)
Cheese (that stores well):
Parmesan, pecorino, feta (plus mozzarella, raclette and blue cheese if available and needed)
-Fresh produce and products-
Fresh vegetables and fruit:
I buy fresh produce once a week according to what I need and what’s available and use it raw or cooked for salads, raw as a snack with pesto or sautéed in olive oil, to mix with legumes and pasta/grains, or for soups. I always cook more soup from the start and freeze any leftovers. Wilting vegetables are used for broth then frozen for soups and risotto. Red and white/ green cabbage stays fresh in the fridge for weeks and shredded they are a crunchy addition to salads.
Eggs, yoghurt, milk, butter:
I buy them fresh once a week according to what I need. I barely use butter, olive oil is my go to fat (it also stores much easier), however you can also freeze butter, which is helpful for spontaneous baking.
Meat and fish:
We usually eat meat or fish once a week. It will be one of the first things for us to skip if necessary, especially fresh fish.
If the meat is braised (beef or lamb shanks/ oxtail/ rough cuts for braising), I cook more from the start and freeze the leftovers, which are great for pasta and potatoes. Any leftover bones are turned into broth. I’m a huge fan of minced beef, be it meatloaf or small patties/ burgers, which taste great both cold and warm (there’s a leek and mountain cheese meatloaf in Eat In My Kitchen and a meatloaf with spices and dates in 365). One of my favorite minced meat dishes since my childhood days is Labskaus (also in 365), a stew made of potatoes, beets, minced beef, and pickled gherkins. It's a traditional dish that sailors used to eat on their travels during the times of the great ships (they made it with corned beef). In Northern Germany, some even add pickled herring. It sounds strange but I love it and it freezes well.
Coarse sausages (such as salsiccia) also freeze well (uncooked) and when you peel and cut them into small portions you can shape them into little polpette and turn them into the quickest meatballs.
Tomato sauce (canned tomatoes) with bacon and fennel seed is an easy substitute for classic Bolognese sauce (for spaghetti and lasagna, you can also add fresh fennel).

COOKING AND BAKING
Cooking is like building a house, it’s assembling blocks and you choose which blocks you want to use to make it your own. There are many ways to build this house, yet at the moment keep in mind that it’s important to strengthen your body and boost your immune system. We often underestimate the very simple, frugal dishes and now’s the time to rediscover them. A couple months ago I found a cauliflower recipe in Anna Del Conte’s Gastronomy of Italy. I’m generally not too fond of cauliflower but I love Anna’s honest Italian cooking so I gave it a go: She sautées onions and garlic, adds tomato pasta and broth (which makes a fantastic sauce) and cooks the cauliflower for around 20 minutes. At the end she adds parsley, I added basil. This recipe also works with broccoli, potatoes, and green beans, capers or anchovies would also fit.
Try to establish special traditions that keep feeding your curiosity in the kitchen, sparking excitement and inspiration, even in tougher times. Every Sunday, we bake pizza from scratch - the reason I always have flour and yeast in stock. The toppings vary, the pleasure is real. You can also introduce a special sandwich day for your family and declare a sandwich challenge/ competition (check out the blog's Sandwich Wednesday). Is there a cooking or baking technique you’ve been wanting to learn for years, like sourdough? Now go for it! Apart from sweet baking you can also opt for savory treats like quiche, which is just as rewarding and the vegetable filling easily adapts to the seasons (fennel, green beans, peas, squash, tomato, leek). And if you feel close to a breakdown, just bake cookies. Nothing is more satisfying than filling the cookie jars to the rim with your own creations.
-Regular kitchen projects-
Homemade pesto and hummus:
Pesto is a thing of genius, and so is hummus. Both last for days, freeze well, and turn all kinds of raw and roasted vegetables, cooked grains, poultry, fish, and sandwiches into a burst of flavor. I like to stretch the terms 'pesto’ and 'hummus’ in my kitchen and use it for every vegetable, legume, and herb that my food processor can turn into something dollop-able.
Inspiration for pesto: basil, ramps (the season just started), arugula, parsley-black olive, dried tomato-pistachio, tapenade (French black olive dip), cilantro-pistachio, blanched peas or fava beans, mixed leftover herbs, walnut-parsley
Inspiration for hummus: chickpeas, beet-chickpeas, white or fava beans, lentils (I’ve also seen carrot hummus but never tried it myself)
Preserved lemons:
If you can find small lemons, now’s the time for this rewarding kitchen project. I use them for sandwiches, pizza, sautéed vegetables, and pasta. For the recipe click here, it's also in Eat In My Kitchen).
Yeast dough:
Making pizza and focaccia (click here), or your own pretzel buns (click here / the recipe is also in the Eat In My Kitchen book), is better than any therapy and can be breakfast, lunch, or dinner for a couple days.
General links to recipes on the blog
You can also use the Search function at the top of the blog's Recipe page for inspiration (click here): search for any ingredient and it will show the related posts and recipes that I wrote about in the last few years.
General pasta and grain recipes (click here)
General salad recipes (click here)
General vegetarian recipes (click here)
General soup recipes (click here)
General meat recipes (click here)
General fish and seafood recipes (click here)
General cake and dessert recipes (click here)
General sandwich recipes (click here)
Quiche, pizza, and focaccia recipes (click here)
Restaurants all over the world are struggling to survive at the moment. A lot of them offer take-out, which allows them to keep operating. Please support them if you can.
Cooking and baking goes beyond necessity, it nourishes our body but the effect it has on our mind and soul is just as essential. It calms us down and puts things in perspective when life feels utterly overwhelming.
Writing these words is a very strange experience. I find myself in a world that I wouldn't have imagined just a few weeks ago. A world I don’t really know how to deal with, not yet. When I’m absorbed in cooking or writing these days, not thinking about the current situation, it feels like visiting my old life, but I feel physically shocked when reality comes back to mind without warning. It feels like waking up from a dream. The only thing that helps is knowing that we’re all in this together. We are not alone. Despite my fear, there’s a beautiful, strong feeling of togetherness, unconditional help, and solidarity. I guess that’s the same feeling that helped my Oma Lisa to get through.
Stay safe, stay home as much as possible, stay away from others but stay positive and hungry for life.
Sending a big virtual hug,
Meike xxx

Spaghetti with Asparagus, Burrata and Ramp Pesto (from 365)
Serves 2
For the pesto*
2 ounces (60 g) ramp or ramson leaves
1 ounce (30 g) Parmesan, finely grated
1/4 cup (60 ml) olive oil
1/4 tsp fine sea salt
For the pasta
1 pound (450 g) trimmed green asparagus
6 ounces (170 g) dried spaghetti
Olive oil
7 ounces (200 g) burrata (or mozzarella di bufala), torn in half
Fine sea salt
Coarsely ground pepper
For the pesto, purée the ramp leaves, Parmesan, olive oil, and salt in a food processor or blender until smooth.
For the pasta, bring a large pot of salted water to a boil and blanch the asparagus for about 3 minutes or until al dente. Using a slotted ladle or spoon, transfer the asparagus to a colander, reserving the cooking water in the pot, then drain and quickly rinse with cold water. Cut each stalk into quarters lengthwise.
Put the pot used to cook the asparagus back on the heat, adding more water if necessary, and bring to a boil. Cook the spaghetti, according to the package instructions, until al dente. Drain the spaghetti and return it to the pot. Add a splash of olive oil and toss to coat. Divide the spaghetti and asparagus among the plates. Add the burrata and drizzle with the pesto. Season to taste with salt and pepper and serve immediately.
* You can double the recipe and use the leftover pesto for sandwiches, potatoes, and salads.
____________________________
Spaghetti with Sun-Dried Tomato and Pistachio Pesto (from 365)
Serves 2
For the pesto*
2 ounces (60 g) sun-dried tomatoes, preserved in salt
2 ounces (60 g) salted pistachios, plus 1 to 2 tbsp chopped pistachios for the topping
1/4 cup (60 ml) olive oil
1 large clove garlic, crushed
For the pasta
7 ounces (200 g) dried spaghetti
Olive oil
Coarsely ground pepper
For the pesto, bring a small pot of water to a boil and cook the sun-dried tomatoes for 3 to 4 minutes or until soft. Remove the tomatoes with a slotted ladle or spoon and transfer to a plate; reserve the cooking water. Drain and rinse the sun-dried tomatoes under cold water, dry with paper towels, and transfer to a food processor or blender. Add 4 tablespoons of the cooking water, 2 ounces (60 g) of pistachios, the olive oil, and garlic and purée until smooth. If the pesto is too dry, add a little more of the cooking water.
For the pasta, bring a large pot of salted water to a boil and cook the spaghetti, according to the package instructions, until al dente. Drain the spaghetti, divide among plates, and drizzle with a little olive oil. Sprinkle with the pesto, chopped pistachios, and a little pepper and serve warm.
* You can use leftover pesto as a spread on bread.
Enjoy!


Clean-Out-The-Fridge Soups
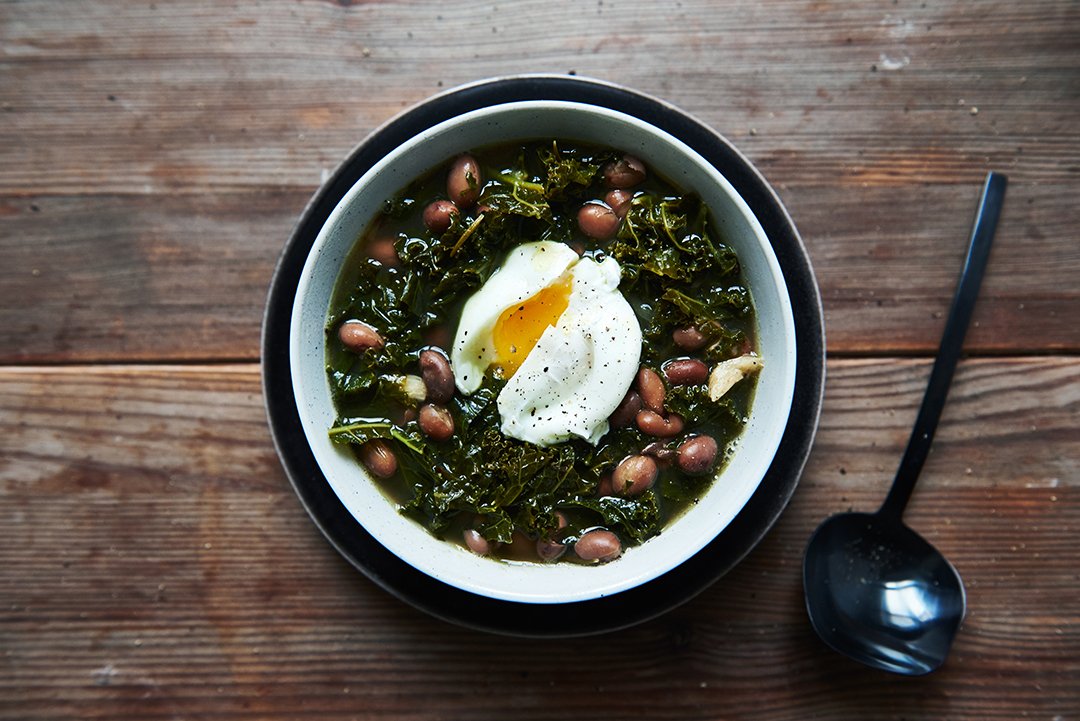
Food52 asked me about my approach to soups. Not just any soups, but big-flavor, clean-out-the-fridge soups to cure the winter blues. I love them now, but that wasn't always the case. We're like friends that had to learn to love each other. So I shared our bumpy love story, my basic soup formula, and three soup recipes from my new book, 365, on food52.com. Converted and convinced that a soup can be one of the best things to find on your dining table after a long day of work, I also decided to share my article on these pages here (and you can find two of the recipes from 365 below):
I have a new habit, recently, I often have soup for lunch, which is actually my breakfast as I only have green tea with lemon in the morning. My relationship with liquid foods wasn’t always so harmonic. Soups and stews are very popular in Germany, thick lentil, pea, or potato soup enriched with smoked sausage (Knackwurst or Knacker) is a German winter classic. As a child, I ate it, but I wasn’t particularly fond of it. There was something missing, or maybe I just wasn’t ready yet. Then the eighties came, the Nouvelle Cuisine reached home kitchens and all of a sudden soups where always puréed and as bright as candy: yellow squash, purple beet, squeaking green pea pod. Shallow bowls filled with colorful compositions, smooth and shiny, conquered the menus but unfortunately not my palate. Despite their vibrancy, they didn’t excite me. This is essential to me, and my taste buds - I want, I need food to excite me. So I took a break of many, many years until I found the kind of soup that I like.
Fast-forward to today and it has become a constant in my weekly culinary routine. My basic soup formula is very simple:
1. Canned legumes and dried lentils that don’t need to soak overnight. I always have a vast collection of cans filled with butter beans, cannellini, borlotti (cranberry) and kidney beans on my pantry shelves, and bags of black beluga lentils, dark green French Puy lentils, and yellow and red lentils. Legumes make a soup rich and wholesome, they add heartiness and a nutty touch. It's what turns a light soup into a proper meal.
2. Cleaning out the vegetable drawer. This drawer is a treasure box that needs to be emptied once in a while. Leafy vegetables, kale, chard, and spinach that start to wilt, sturdy roots like potatoes, parsnip, and beets that lie forgotten, the whole range of winter and summer squash, fresh beans, peas, and tomatoes. Every season has its produce that’s just waiting to crown a soup.
3. Using homemade or quality store-bought broth. My mother taught me to always cook my own broth, with leftover vegetables, chicken, duck, and beef bones, with fresh herbs and whole spices like allspice, peppercorns, and juniper berries. And a bay leaf, always a bay leaf. I then freeze it in 4-cup portions to have my tasty broth right at hand whenever I need it. I never use instant broth as I find it adds an artificial flavor. Broth is the base of a soup, it adds its taste to all the other ingredients and therefore deserves utmost attention.
Soups can easily follow the seasons and the cook’s mood. I want to throw them together spontaneously, quickly, without too much planning or overthinking. A quick look in the pantry and fridge and my mind starts playing. A soup is a simple, a frugal dish, but that doesn’t mean it can’t be exciting. Playing with flavors is a boundless game, playing with textures is at least as rewarding.And varying toppings allows the cook to serve a soup repeatedly without anyone noticing. Crunchy bacon cubes or dukkah, a dollop of velvety mascarpone or ricotta, a fried or poached egg, or a crumbled hardboiled egg, fried herbs like sage or rosemary, or roasted fruit like grapes, apple, pear, or apricot.
In my new book, 365: A Year of Everyday Cooking & Baking, I share a recipe for each day of the year, following the seasons and also the rhythm of the week, from Monday to Sunday, from quick and simple weekday dishes to luscious - and more time-consuming - roasts, stews, and cakes on the weekend. Soups are a constant treat in this rhythm, especially during the colder part of the year. There’s a cozy kale and borlotti bean soup for example, cooked in a flavorful duck broth (recipe from 365 below and on food52.com) - a clear vegetable broth works just as well - and it's the perfect cure for winter blues. It’s crowned with a poached egg and when you cut through the yolk and let it run into the broth, it adds a creaminess that’s even better than cream; as an added bonus: it only takes twenty minutes for dinner to be ready.
A golden squash, parsnip, and sweet potato soup - basically the tasty finds of a fridge clean out - could be kept chunky but with a nod to the good old Nouvelle Cuisine, I purée it and also go for a more extravagant topping that makes this recipe fit for a Christmas table. Red grapes roasted with woody rosemary until soft and shriveled, and a dollop of whipped orange mascarpone turn this dish into a festive stunner (recipe from 365 onfood52.com). However, crunchy bacon bites would make it even heartier and also quite appealing.
One of my favorite soups is the minestrone because there are no rules and limitations. Every vegetable, every combination that the cook finds fitting, works. For my green minestrone, I use green beans, peas (which I always have in my freezer), and zucchini, but that’s not set in stone, and add tiny meatballs refined with lime and arugula. It gives it a fresh citrusy note, similar to lemongrass. This is the speediest of all weekday soups. Once the meatballs are mixed and shaped, the entire soup and meat only need to cook for about 5 minutes (recipe below).
So what changed my mind, what made me fall in love with soups after so many years of skepticism? First, the taste, I had to find combinations that excite me, but then there’s something else. Sitting in front of a bowl of steaming soup is one of the coziest things I can think of. It makes me feel good while I eat it and this feeling stays. A soup is a friend of my mind and my body.
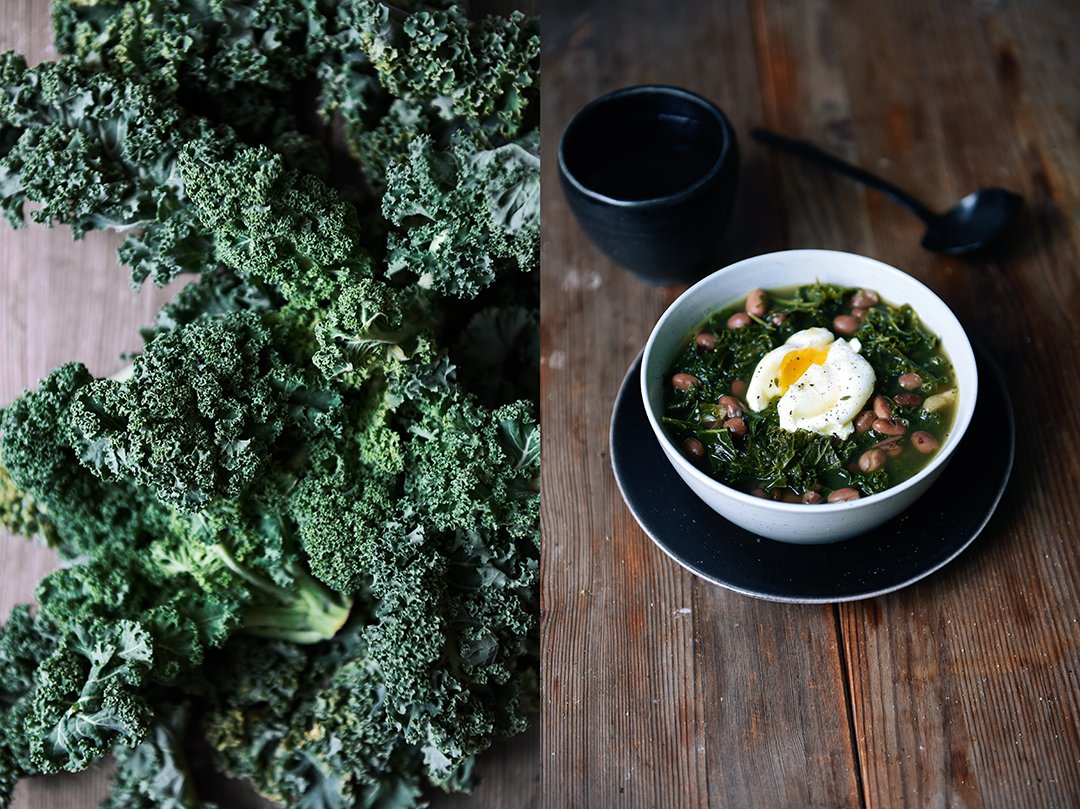
Kale and Borlotti Bean Soup with Poached Eggs
from ‘365 – A Year of Everyday Cooking & Baking’ (Prestel, 2019)
Serves 4
For the soup
Olive oil
1 medium onion, cut into quarters
2 large cloves garlic, cut in half
7 ounces (200 g) trimmed kale leaves, cut into strips
5¼ cups (1.25 liters) homemade or quality store-bought duck, chicken, or vegetable broth, hot
1 small bunch fresh thyme
1 medium sprig fresh rosemary
1 large bay leaf
Fine sea salt
Finely ground pepper
1¼ cups (250 g) drained and rinsed canned borlotti (cranberry) or pinto beans
For the topping
4 to 8 large eggs
Coarsely ground pepper
For the soup, in a large pot, heat a splash of olive oil over mediumheat and sauté the onion and garlic, stirring, for a few minutes or untilgolden and soft. Add the kale, stir, and cook for 1 minute then add the hotbroth, thyme, rosemary, and bay leaf. Season to taste with salt and finelyground pepper, reduce the heat, and simmer for 20 minutes or until the kale istender. Remove and discard the herbs then add the borlotti beans and cook for 1minute. Season to taste with salt and finely ground pepper and keep warm.
For the topping, bring a small saucepan of salted water to a low simmer.Crack 1 egg into a small bowl. Hold a large spoon just over the surface of thewater and gently pour the egg onto the spoon. Lower the spoon into the waterand hold until the egg white starts to turn white then use a tablespoon togently scoop the egg off the large spoon. Poach the egg for 3 minutes. Using aslotted ladle or spoon, transfer the egg to a plate. Poach the remaining eggsthe same way, adjusting the heat as needed to maintain a low simmer. It’s bestto poach 1 egg at a time, but you can cook 2 at once.
Divide the soup among bowls, place 1 to 2 eggs in the middle of each bowl, and sprinkle with a little coarsely ground pepper. Cut the tops of the eggs with a sharp knife and serve immediately.
Green Minestrone With Lime-Arugula Meatballs
from ‘365 – A Year of Everyday Cooking & Baking’ (Prestel, 2019)
Serves 2-4
14 ounces (400g) ground beef
2 large cloves garlic, crushed, plus 1 large clove garlic, cut in half
2 ounces ounces (60g) arugula leaves, finely chopped
1 teaspoon (heaping) freshly grated lime zest
Fine sea salt
Finely ground pepper
Extra-virgin olive oil
3/4 pound (340g) trimmed mixed green vegetables (such as green beans, frozen peas, zucchini, Brussels sprouts, broccoli, or kale, cut into bite-size pieces if necessary)
4 1/4 cups (1 liter) homemade or quality store-bought vegetable broth, hot
1 tablespoon freshly squeezed lime juice
1 bay leaf
1 spring onion (green part only), thinly sliced
Combine the ground beef, crushed garlic, arugula, lime zest, 1 teaspoon of salt, and a generous amount of pepper in a large bowl and mix with your hands until well combined. Form the mixture into 38 roughly 1-inch (2.5 cm) meatballs.
Heat a splash of olive oil in a large pot over medium heat. Add the garlic and sauté for 1 minute. Add a little more oil and the vegetables and sauté, stirring, for 1 minute. Add the hot vegetable broth, lime juice, and bay leaf, season to taste with salt and pepper, and bring to a boil. Add the meatballs then reduce the heat, cover, and simmer gently for 4 to 6 minutes or until the meatballs are just cooked through and the vegetables are tender. Season to taste with salt, pepper, and additional lime juice.
Divide the soup among deep bowls, sprinkle with the spring onion, and serve immediately.
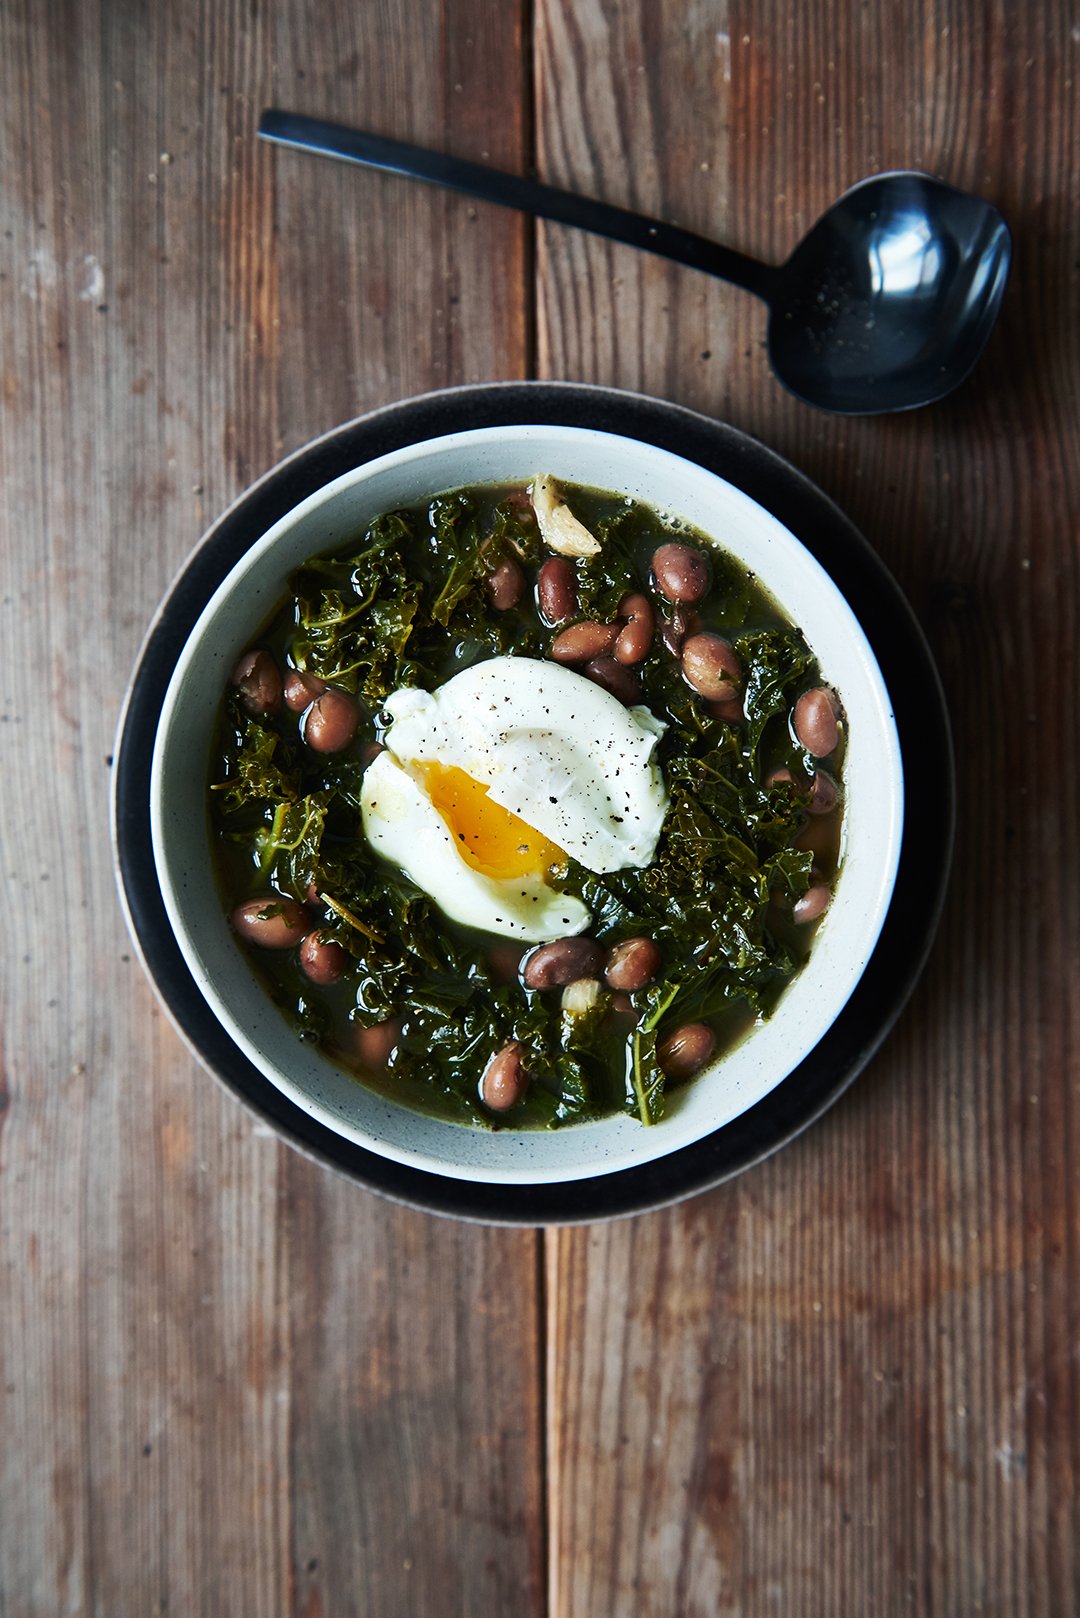

London, Helen Goh & 365's Roasted Squash Salad
The clouds hung low over London - as usual - yet as soon as our plane plopped through the thick layer of foggy mist, millions of sparkling lights danced underneath us and made me giggle like a child. There's a picturesque, an almost innocent cuteness about this city that reminds me of a fairy tale. Colorful doors in sturdy brick houses, smoking chimneys and neatly cut boxwoods. If I had painted my dream city as a child, it would have been London.
So I was back, just for a few days, with a new cookbook in my bag and the unsettled excitement of a nervous author. London was the third stop on my 365 book tour and I asked a very special woman if she'd join me to talk about my new book on the big day, a woman whose work I have admired for years and whose creations I enjoy every time I'm in town: Helen Goh, co-author of Sweet, also responsible for some of the best sweet creations piled up at the Ottolenghi temples' temptingly luscious displays. When Helen said "Yes," I felt like a groupie who got handed a backstage pass. The first thing she said when we met before the guests arrived was "lets have a glass of wine and sit down." She saw that I was nervous. I looked into her eyes and immediately felt calm. And contrary to my usual habit of not having a single drop before a talk, I had a glass of Meridiana Wine Estate's dark red Melqart. It neither harmed nor increased my chattiness but it reminded me of the fact that all this is fun. To meet people all over the world and talk about food is one of the greatest gifts that my cookbooks - and this blog - have given me. (You can watch some snippets from our conversation here on my Instagram Stories.)
We had a fantastic evening, chatting, discussing, and laughing, enjoying more of Meridiana's wines and food from the book; bruschetta, quiche, and brownies, and the Roasted Squash, Shallot, and Radicchio Salad with Stilton - recipe no. 289 in 365 - a beautifully vibrant recipe that I share with you below. This salad is a spectacular, and easy to prepare starter during the festive season, but also a wonderfully light lunch or dinner when December's feasting becomes a little too excessive.
When I wrote about my Berlin book launch, I mentioned that this tour is only possible because I have amazing friends at my side. People who I've been working with for years and who've been solid rocks in their support for my adventures. The night I arrived in London, I jumped into a taxi that took me straight to my favorite hotel in town. We celebrated the launch of 365 at the magical Corinthia London, and to come back to the fairy tale, I was also lucky to sleep there and this definitely made me feel like a princess. Laying in the coziest cloudy bed, framed by more puffy pillows than one really needs (but it feels so good), and room service delivering the best fish and chips at midnight. I don't think life could possibly get any better than this. But then breakfast comes, and the spa, and then lunch, and dinner - and the fairy tale continues. It's a grown up princess dream come true. Thank you.

Roasted Squash, Shallot, and Radicchio Salad with Stilton
from ‘365 – A Year of Everyday Cooking & Baking’ (Prestel, 2019)
Serves 2 to 4
For the salad
¾ pound (340 g) seeded squash, preferably peeled butternut or Hokkaido with skin, cut into 1-inch (2.5cm) wedges
8 shallots, unpeeled, cut in half lengthwise
1/3 cup (75 ml) olive oil
Flaky sea salt
Finely ground pepper
5 ounces (140 g)radicchio, soft leaves only, torn into pieces
1 large, firm pear, cored and cut into thin wedges
2 ounces (60 g)Stilton, crumbled
1 tbsp fresh thyme leaves
For the dressing
3 tbsp olive oil
1 tbsp balsamic vinegar
1 tbsp white balsamicvinegar
1 tsp honey
Fine sea salt
Finely ground pepper
Preheat the oven to 400°F (200°C).
For the salad, spread the squash on one side of a large baking dish andthe shallots on the other side. Drizzle with the olive oil and toss tocombine, keeping the squash and shallots separate. Season generously with flakysea salt and pepper and roast for 15 minutes. Flip the squash and shallots overand continue roasting for 10 to 15 or until golden and tender. Transfer thesquash to a plate. Let the shallots cool for a few minutes then peel and addto the squash.
For the dressing, whisk together the olive oil, both vinegars, and thehoney and season to taste with fine sea salt and pepper.
Divide the radicchio, pear, squash, and shallots among plates, arrangingthem in overlapping layers. Sprinkle with the Stilton and thyme, drizzle withthe dressing, and serve immediately.


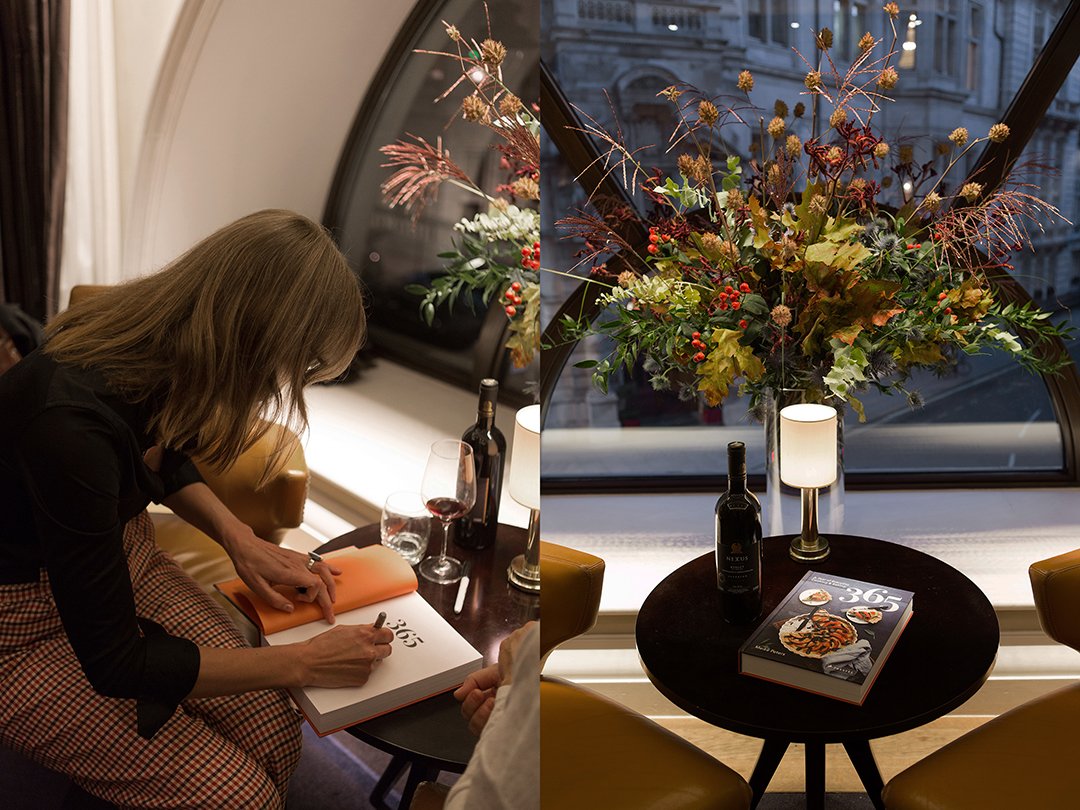


Grilled Raclette with Rosemary Kumquats, Coriander Apple & Star Anise Pear
The light dimmed, tall candles casting flickering shadows on the ceiling, the room filled with the dry heat from the crackling fireplace and the smell of burnt wood and cheese lying in the air like a heavy cloud. When it's time for Raclette at my mother's house in the countryside, it's a celebration of everything that I connect with coziness. Surrounded by family and friends, everybody gathers around the sizzling Raclette grill to watch the magic happen: aromatic cheese melting and dripping, golden bubbles bursting and splashing as they touch the glowing grill, and the rind turning into smokey charred bites.
When you eat Raclette at a snow covered hut in the mountains, you would most likely enjoy it the classic way, with boiled potatoes, raw spring onions, pickled vegetables like gherkins (cornichons) and pearl onions, and lots of crushed or coarsely ground black peppercorns. The cheese needs added acidity, which can come from the pickles but it can also come from fruit.
So here's the fruity way to enjoy the fragrant melted cheese on a crusty baguette: I skip the pickles and go for Raclette with rosemary kumquats, coriander apple, and star anise pear. Kumquats cooked with honey and fresh rosemary turn the tiny citrus fruits into soft and caramelized bites. Pear wedges seared in star anise butter taste like Christmas and apple wedges softened in coriander butter are sweet, aromatic, and slightly sour. That's the colorful trio to complete my rustic Raclette table but you could also add roasted grapes or plums, or juicy persimmons. Whatever fruit you would normally eat with cheese will fit; it can only become better with a little heat, either in the pan on the hob or under the grill. The heat softens the fruit's texture and makes the flavor even more concentrated. I would keep the side dish simple, you can serve the grilled Raclette with a quick green salad.
My mother always uses a very old Swiss made grill that's rather large. It can hold half a wheel of Raclette, melting the surface where the cheese is cut in half, and then you scrape the melted layer right off the wheel onto your plate. It's a lot of fun, but it's heavy, you need a lot of people to eat up half a wheel of cheese, and you can only feed the hungry crowd in batches - around two people every time you scrape the top layer off, then the half-wheel needs to go under the grill again. This is not necessarily a bad thing seeing as we're talking about a meal that's rather rich and filling. A break once in a while doesn't harm the hungry cheese lover, but if I want to throw a cozy Raclette party just for two (or maybe a couple friends), I go for my more practical tabletop grill with single Raclette dishes instead. Then I opt for sliced cheese and grab Le Rustique's Raclette l'Originale. It's aromatic yet not overpowering and melts like butter. When I use sliced cheese I remove the rind, and if you're after that smokey burnt touch you can just leave the Raclette on a little longer until the charred bubbles burst under the grill.
Thanks to Le Rustique for sponsoring this post and reminding me of the coziest celebration of cheese: watching - and eating - bubbling and crackling Raclette.


Grilled Raclette with Rosemary Kumquats, Coriander Apple and Star Anise Pear
You'll need a Raclette grill for this recipe.
Serves 3 to 4
For the fruit
2 tablespoons honey
2 tablespoons fresh rosemary needles (whole needles, not chopped)
12 fresh organic kumquats (or canned kumquats, drained), cut in half lengthwise and seeds removed
4 tablespoons freshly squeezed orange juice
Unsalted butter, to cook the pear and apple
3 star anise
1 large, firm pear, cored and cut into thin wedges
2 teaspoons coriander seeds, crushed with a mortar and pestle
1 large baking apple, cored and cut into thin wedges
For serving
About 500-600g (18-21 ounces) sliced Raclette cheese (for a tabletop grill with single Raclette dishes), rind removed
1-2 crunchy baguettes, sliced
Crushed or coarsely ground black peppercorns
Optional
2 large handfuls mixed small leaf lettuce (young spinach and chard, mâche or corn lettuce)
Olive oil
Balsamic vinegar
Fine sea salt
Finely ground pepper
For the kumquats, in a small, heavy pan, heat the honey over high heat until bubbling. Add the rosemary, kumquats, and orange juice and cook, turning once, for 3-4 minutes or until golden brown and soft - mind that the kumquats don't burn. Set the pan aside and keep warm.
For the pear, in a medium, heavy pan, heat 2 tablespoons of butter and the star anise over medium-high heat until sizzling. Add the pear wedges and sauté, turning once, for about 3-4 minutes or until golden brown and tender. Set the pan aside and keep warm.
For the apple, in a medium, heavy pan, heat 2 tablespoons of butter and the coriander seeds over medium-high heat until sizzling. Add the apple wedges and sauté, turning once, for about 3-4 minutes or until golden brown and tender. Set the pan aside and keep warm.
Melt the cheese, one slice at a time, under the Raclette grill until bubbly then scrape onto a slice of baguette, top with kumquats, apple wedges, or pear wedges and season with crushed black pepper.
You can serve the grilled Raclette with a simple green salad on the side: Divide the mixed lettuce leaves among the plates, drizzle with a little olive oil and balsamic vinegar, and season to taste with salt and pepper.
Enjoy!


Berlin & 365's Autumn Quiche with Squash, Taleggio & Sage
My editor at Prestel in New York asked me one day where I'd like to launch my new book. Berlin, I said, and Malta, of course, and London, and NYC, and the West coast this time, LA and San Francisco. It's nice to dream and imagine all these places on both sides of the Atlantic, to think of all the people I'd meet and who'd celebrate 365 together with me. I'm good at dreaming but I'm bad at not following a dream. It makes me restless, once my mind is set on something it doesn't want to stop until it gets there. Sometimes my dreams don't work out, sometimes they do - even though everybody around me has given up hope. And sometimes they happen to be even better than I hoped they'd be.
There are many ways to launch a book, but I wanted a feast - in six cities. There are many reasons why a dream works out, luck (always), persistence (tiring for everyone around), thoughtful planning (I studied architecture, I'm good at that), and help and support from others (and I got a lot of that). In the next couple months I'll share some impressions of the six 365 book launch events here on the blog, I'll write about the places and what I love so much about them, and about the people who made all this possible. And to give you a little taste of this book tour, I'll always share one of the recipes that we enjoyed at the events. So I'll start with Berlin, my home, the place where my adventurous journey began, and with the recipe for the Squash and Taleggio Quiche with Crispy Sage (you can find it in the book, recipe no. 287, and below). This quiche became the cover of 365 and quickly gained fans and fame all around the globe.

On the morning of September 23rd I started to feel nervous, it was the publication day of the German 365 and the day on which I'd step out of my comfort zone and talk about the book that I'd been working on for so many days and nights. It feels good when a book is out, you can't change anything anymore and at one point you even stop dreaming about gram-to-cup conversions but it's also the time when people start seeing what you've created, when it's not just you and the book anymore. It's scary.
So I kept myself busy during the day (the best strategy to calm my antsy mind), I went to the hair dresser (thank you Jay for dealing with my anxious self) and then drove straight to the Hotel de Rome, a former bank turned into the hotel of your dreams where 365 would soon see the most marvelous of celebrations. Türkan Arikan, the hotel's Director of Communications and the best event partner an author could ask for, had reserved the stunning roof terrace for our launch - my favourite spot for a summery sundowner - but Berlin's weather was set on drizzle, wind, and grey, no blue skies and golden sunset. We took over Hotel de Rome's imposing Opera Court with our 100 guests instead, nibbled on hearty tastings from 365 prepared by the diligent kitchen crew, and on the bittersweet recipe no. 70 from 365, Tangerine Jam Chocolate Brownies baked by Fine Bagels' fabulous Laurel Kratochvila. A fair feast needs wine and we happily filled our glasses with the wonderful reds, whites, and rosé from Meridiana Wine Estate in Malta (thank you Karl Chetcuti for making Maltese wine that fills my heart and every room on the book tour with so much joy). Florian Domberger baked and shared Berlin's best bread with us, his crunchy, spongy Beutebrot. And I had a very honest, intimate talk about the book with my friend Cynthia Barcomi. This woman manages to fit more into one life than anyone else and her laugh is so charming and infectious that you totally forget that you're nervous and that you're talking about something that existed, not too long ago, only in your head before it became a book. Could I ask for more? No, it was a feast.
Thank YOU so much for all the love and support that you've already shown for 365! If you have a few minutes and you're in the mood, it would be great if you could write a review for the book on Amazon (here are the links for the US, UK, Germany).
You can see all the pictures of the Berlin book launch event here on Facebook. And if you cook or bake recipes from the book and share pictures on Instagram, you can add #365TheCookbook so that they show up in the book's collection. If you feel like diving into the love that this book received so far, you can read about it here.


Squash and Taleggio Quiche with Crispy Sage
from '365 - A Year of Everyday Cooking & Baking' (Prestel, 2019)
Serves 4 to 8
For the filling
1 1/3 pounds (600 g) seeded squash, preferably peeled butternut or Hokkaido with skin, cut into 1-inch (2.5 cm) wedges
1 tbsp olive oil
Flaky sea salt
Finely ground pepper
3 large eggs
3/4 cup (175 g) sour cream (or crème fraîche)
1/2 cup (120 ml) heavy cream
1 tsp fine sea salt
Nutmeg, preferably freshly grated
5 ounces (140 g) mild, sweet cheese that melts well, such as Taleggio, fontina, or Robiola, diced
3 tbsp (45 g) unsalted butter
50 large fresh sage leaves
For the pastry
2 cups (260 g) all-purpose flour
1 tsp fine sea salt
1/2 cup plus 1 tbsp (130 g) unsalted butter, cold
1 large egg
Preheat the oven to 400°F (200°C).
For the filling, spread the squash in a large baking dish, drizzle withthe olive oil, and toss to combine. Season to taste with flaky sea salt andpepper and roast for 15 minutes then flip the squash and continue roasting for10 to 15 minutes or until golden and tender; set aside.
For the pastry, combine the flour and fine sea salt in the bowl of astand mixer fitted with the dough hook attachment. Add the butter and use aknife to cut it into the flour until there are just small pieces left. Quicklyrub the butter into the flour with your fingers until combined. Add the egg andmix with the hook until crumbly. Form the dough into a thick disc, wrap it inplastic wrap, and freeze for 10 minutes.
On a work surface, place the dough between 2 sheets of plastic wrap anduse a rolling pin to roll out into a disc, large enough to line the bottom andsides of a 12-inch (30 cm) quiche dish. Fit the dough into the quiche dish,pushing it into the dish, especially along the edges. Let the dough hang overthe rim a little or trim with a knife. Use a fork to prick the dough all over.Bake for 15 minutes or until golden. If the dough bubbles up, push it down witha fork. Take the quiche dish out of the oven and reduce the heat to 350°F (180°C).
In a medium bowl, whisk together the eggs, sour cream, heavy cream, andfine sea salt and season to taste with pepper and a generous amount of nutmeg.
Arrange the squash in a circle on top of the pre-baked pastry andsprinkle with the cheese. Pour the egg mixture over the squash and bake for 45to 55 minutes or until golden brown and firm. Take the quiche out of the ovenand let it sit at least 10 minutes.
In a large saucepan, heat the butter over medium-high heat, add thesage, and cook, stirring gently, for 20 to 30 seconds or until golden, green,and crispy—mind that the leaves don’t burn. Spread the sage on top of thequiche, sprinkle with a little pepper, and serve warm or cold.